Difference between revisions of "PVD The Girly Bike"
(→Repairing the Seat Tube Issue) |
(→The Paint) |
||
| (10 intermediate revisions by the same user not shown) | |||
| Line 1: | Line 1: | ||
| − | This is a special bike for my wife. A mountain bike. She is very light and rides very light. Making a light bike is one thing, getting it to flex just right is quite another. | + | This is a special bike for my wife. A mountain bike. She is very light and rides very light. Making a light bike is one thing, getting it to flex just right is quite another. Something the light rider rarely gets. |
It's going to be capable of single speed or gears. She's probably not going to ride the bike much, 'cause she likes her suspension bike so much, but this will give us maximum flexibility with just a little more weight for this goofball bike. | It's going to be capable of single speed or gears. She's probably not going to ride the bike much, 'cause she likes her suspension bike so much, but this will give us maximum flexibility with just a little more weight for this goofball bike. | ||
| Line 16: | Line 16: | ||
*Bottom Bracket: Paragon 1.5" | *Bottom Bracket: Paragon 1.5" | ||
| − | *Drop Outs: Paragon Sliders | + | *Drop Outs: Paragon Light Sliders |
*Hydo Stops: Pacenti SS Stamped [http://www.bikelugs.com/productimages/STAINLESS%20HYDRO%20GUIDE.JPG Bikelugs.com] | *Hydo Stops: Pacenti SS Stamped [http://www.bikelugs.com/productimages/STAINLESS%20HYDRO%20GUIDE.JPG Bikelugs.com] | ||
| Line 27: | Line 27: | ||
*Custom bending of OX Platinum stays is a great success. It took a lot of failure and some improvements on my bending set-up. Things look great in the end.\ | *Custom bending of OX Platinum stays is a great success. It took a lot of failure and some improvements on my bending set-up. Things look great in the end.\ | ||
*Because I had an issue with seat tube reaming, I made a seat tube sleeve that reduced the post size to 26.0mm, a lot nicer for the lighter rider. Kinda cool looking too. | *Because I had an issue with seat tube reaming, I made a seat tube sleeve that reduced the post size to 26.0mm, a lot nicer for the lighter rider. Kinda cool looking too. | ||
| + | |||
| + | *The delicate little seat stays are to die for. They are just sooo cute. | ||
====The Bad==== | ====The Bad==== | ||
| Line 44: | Line 46: | ||
===The Paint=== | ===The Paint=== | ||
| − | It's going to be a cheap powder coat | + | It's going to be a cheap powder coat. $110. |
I have used Poly Engineering of Richmond, CA but may use [http://www.olympicpowdercoating.com Olympic Powdercoating] for this one. Poly Engineering did an OK job, but it could have been better and their stock color choices could be better as well. I will have to ship the bike, but they have an excellent reputations and a but load of colors to choose from. | I have used Poly Engineering of Richmond, CA but may use [http://www.olympicpowdercoating.com Olympic Powdercoating] for this one. Poly Engineering did an OK job, but it could have been better and their stock color choices could be better as well. I will have to ship the bike, but they have an excellent reputations and a but load of colors to choose from. | ||
| + | |||
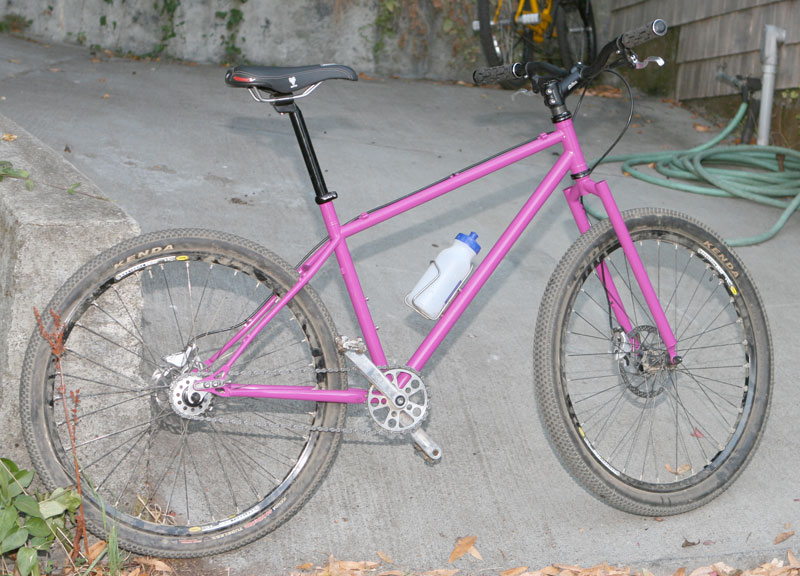
| + | The color was RAL4006 Traffic Purple. It ended up with an orange peel texture. Not what I had expected, but it is consistent and looks neat. | ||
===The Complete=== | ===The Complete=== | ||
| + | |||
| + | Test ridden before braze-ons. | ||
| + | |||
[[Image:Girly-bike-rolling.jpg]]<br> | [[Image:Girly-bike-rolling.jpg]]<br> | ||
| + | |||
| + | It doesn't stop at the frame. Note the girly 5" rear rotor! The 26.0 seat post is a nice touch as well. And a 1.95" Smallblock on the back just to be mean. | ||
| + | |||
| + | [[Image:Girly-bike-rolling3.jpg]] | ||
| + | |||
| + | 34x20 Gearing seemed fine for her single speeding. She may go to 34x21 as we sort it out. In time, she will have a full range of gears on the bike, but for now it's very cheap to just reuse some single speed parts. | ||
| + | <br> | ||
| + | [[Image:Girly-bike-complete.jpg]] | ||
===The Ride=== | ===The Ride=== | ||
| Line 61: | Line 76: | ||
BUT... | BUT... | ||
| − | When my wife and I took the bike out on a small test ride, no apparent problems showed up with here on it. I rode behind here up a brutal fire road climb and the frame looked straight and solid. She said the bike felt comfortable and in control. Thus, the goal was acheived, a bike built for a specific rider. | + | When my wife and I took the bike out on a small test ride, no apparent problems showed up with here on it. I rode behind here up a brutal fire road climb and the frame looked straight and solid. She said the bike felt comfortable and in control. No more thrust initiated steer than a standard bike. Thus, the goal was acheived, a bike built for a specific rider. |
| + | |||
| + | Is it light? 21.75 lbs before paint, but it feels super light. | ||
She really hates the rigid fork. That will collect dust in time. Smart girl. | She really hates the rigid fork. That will collect dust in time. Smart girl. | ||
Latest revision as of 16:03, 10 August 2007
This is a special bike for my wife. A mountain bike. She is very light and rides very light. Making a light bike is one thing, getting it to flex just right is quite another. Something the light rider rarely gets.
It's going to be capable of single speed or gears. She's probably not going to ride the bike much, 'cause she likes her suspension bike so much, but this will give us maximum flexibility with just a little more weight for this goofball bike.
Contents
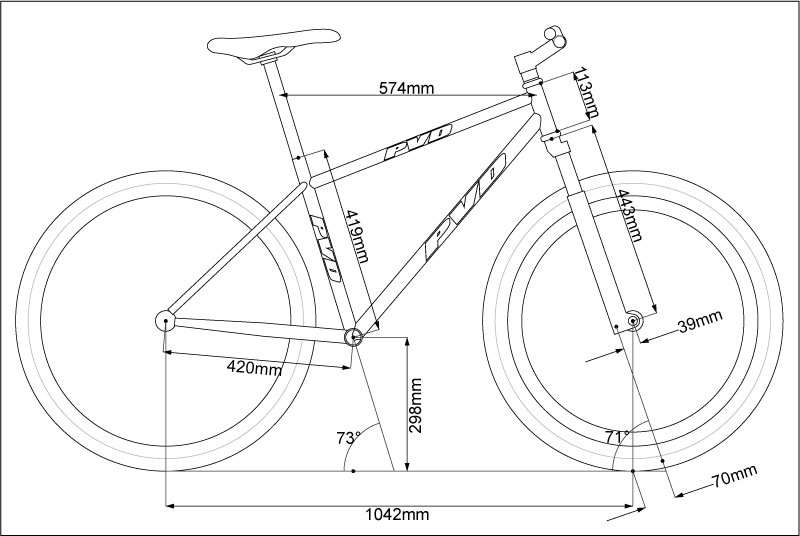
The Print
The Tubes
- Top Tube: True Temper OX Platinum #01, 25.4 OD, 620mm, .7/.4/.7
- Down Tube: True Temper OX Platinum #06, 31.8 OD, 680mm, .7/.4/.7
- Seat Tube: True Temper OX Platinum #05, 28.6 OD, 580mm, .7/.4/.7
- Seat Stays: True Temper OX Platinum #SS1
- Chain Stays: True Temper OX Platinum #CS3
- Head tube: Custom machined tube
- Bottom Bracket: Paragon 1.5"
- Drop Outs: Paragon Light Sliders
- Hydo Stops: Pacenti SS Stamped Bikelugs.com
Successes and Problems
The Good
- The machined head tube looks awsome. It appears that it did not ovalize much at all in the welding process. I am very happy with that part of the project.
- The front triangle looks really neat with the 1" top tube and 1.25" down tube. The head tube/top tube joint is especially cool looking.
- Custom bending of OX Platinum stays is a great success. It took a lot of failure and some improvements on my bending set-up. Things look great in the end.\
- Because I had an issue with seat tube reaming, I made a seat tube sleeve that reduced the post size to 26.0mm, a lot nicer for the lighter rider. Kinda cool looking too.
- The delicate little seat stays are to die for. They are just sooo cute.
The Bad
- OX Platinum is REALLY, REALLY, REALY hard after welding. I wasn't able to ream the seat tube. I destroyed a brand new reamer trying. I had to cut it down and weld in a sleeve. Lesson learned. Keep OX Platinum to DTs, TTs, and SSs.
- My welding still looks like shit. It may be the OX platinum causing issues, but most probably more due to the extremely thin wall tubes. I do need much more practice.
- Using the OX Platinum #05 cut down as a seat tube was a really bad idea in more than one way. Welding the super crazy thin (0.4mm) tube at the bottom bracket with complex curves was hell. I made it work, but it ain't pretty.
- I should have bent the chainstays a bit more. Tire clearence is limited to a 2.1" tire.
Repairing the Seat Tube Issue
Please. Look away. This sucks. I know. Hopefully this bike will be replaced in a few months, so this has to only last so long.
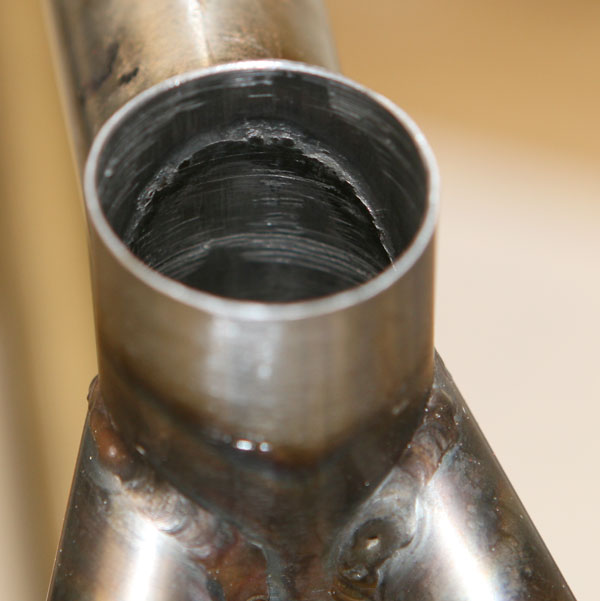
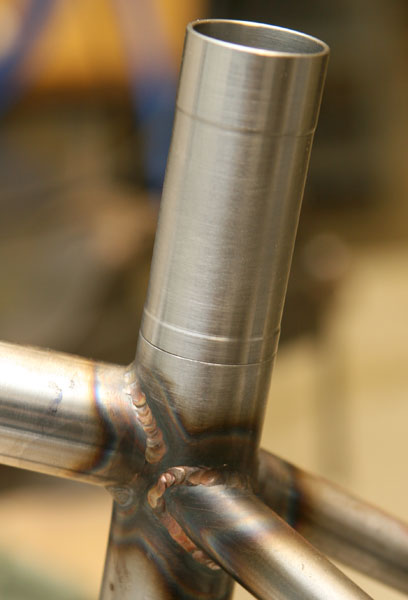
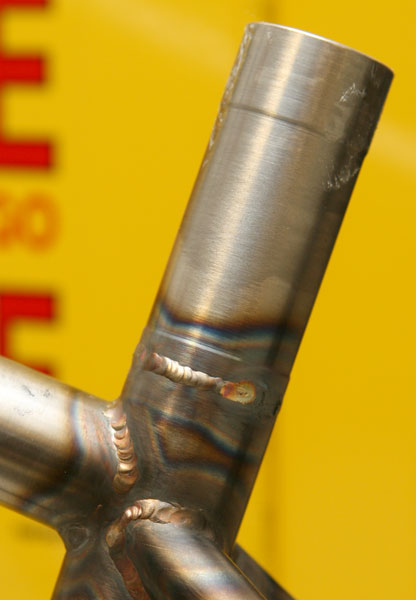
I'm really sadened by this fix. It's lame. It's not quite straight. I will try to never have this happen again.
The Paint
It's going to be a cheap powder coat. $110.
I have used Poly Engineering of Richmond, CA but may use Olympic Powdercoating for this one. Poly Engineering did an OK job, but it could have been better and their stock color choices could be better as well. I will have to ship the bike, but they have an excellent reputations and a but load of colors to choose from.
The color was RAL4006 Traffic Purple. It ended up with an orange peel texture. Not what I had expected, but it is consistent and looks neat.
The Complete
Test ridden before braze-ons.
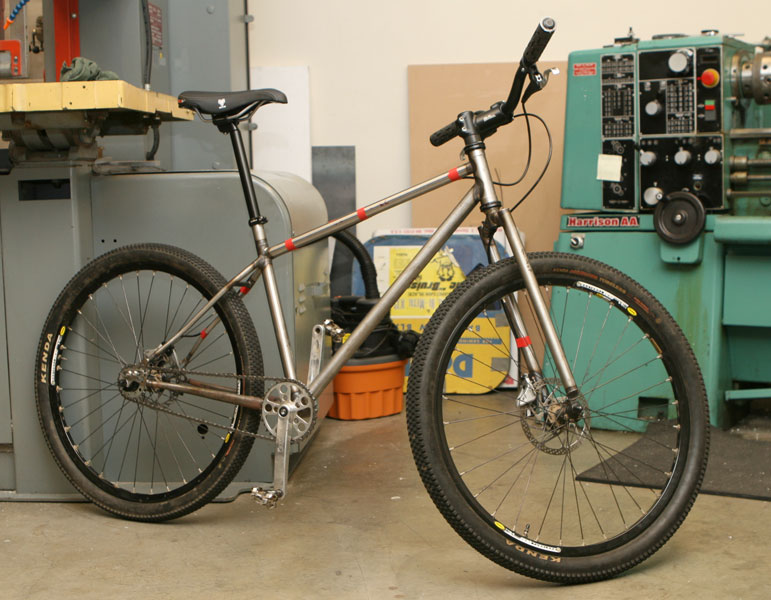
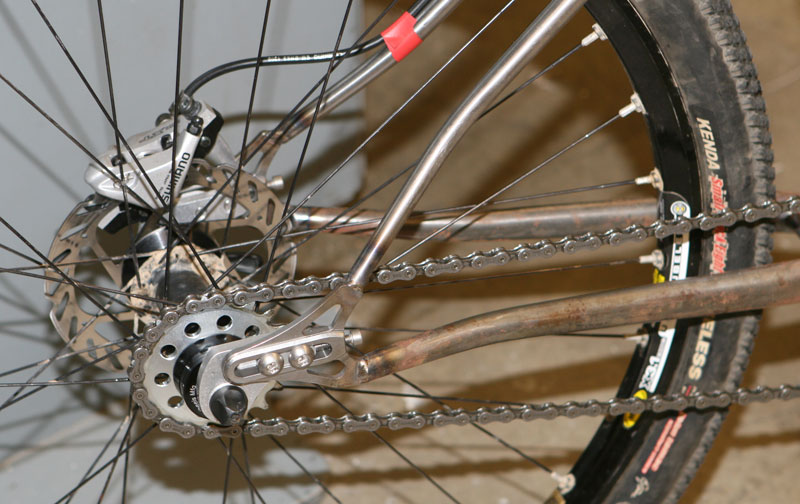
It doesn't stop at the frame. Note the girly 5" rear rotor! The 26.0 seat post is a nice touch as well. And a 1.95" Smallblock on the back just to be mean.
34x20 Gearing seemed fine for her single speeding. She may go to 34x21 as we sort it out. In time, she will have a full range of gears on the bike, but for now it's very cheap to just reuse some single speed parts.
The Ride
Wow! This is a really different experience.
When I set my wife's full suspension bike up for her, I cannot test ride it. I weigh quite a lot more than she does and I flatten the bike in the parking lot, let alone railing trail. With the suspension nearly bottomed, it is hard to diagnose any problems.
This bike is similar to that in a different way. I tried to test ride this bike around the block. The bottom bracket was swinging from side to side and the wheelbase grew quite a bit as I loaded the bike up and down. I felt scared! It was just wrong.
BUT...
When my wife and I took the bike out on a small test ride, no apparent problems showed up with here on it. I rode behind here up a brutal fire road climb and the frame looked straight and solid. She said the bike felt comfortable and in control. No more thrust initiated steer than a standard bike. Thus, the goal was acheived, a bike built for a specific rider.
Is it light? 21.75 lbs before paint, but it feels super light.
She really hates the rigid fork. That will collect dust in time. Smart girl.
