I’ve been riding mountain bikes for over 20 years. In that time I’ve had to walk out of the woods, run from weather, try to start a fire to avoid freezing, ride a bare rim for 20 miles, and do a host of other crazy fixes on the trail. Things will go wrong. Things always go wrong. You need to be prepared and it really doesn’t take much. The penalty can be a lot more than getting a good story.
I’m not saying to be one of those weirdos that carries a 32mm. spanner, a chainwhip, and a medical “just in case”. That’s just silly. My goal here is to give you an idea of what you can easily have with you when out on the trail that solves a host of common issues. They key here is that the kit is light and compact. No more or less than what is really important.
The #1 thing you need to do before every ride is ensure that your bike is in proper working order and in good shape. Look at cables, brake pads, tire sidewalls and casing, stiff/bent chain links, or anything else that is not in near perfect working order. Cables should all have cable ends intact. Cable housing should be uncompromised. Nothing should be loose or falling off. Saddle packs should be secured solid.
You want to be carrying what you will need if the common ‘on trail’ problem strikes. If your freehub needed replacement before the ride, the side of the trail is no place to address that.
If you notice, the only medical stuff I’ve included is Advil. I don’t believe in bringing medical stuff on the trail. If someone is seriously hurt, you will need 911 contact, a tourniquet, and knowledge of CPR. Otherwise, it’s best to evacuate as fast as possible. General bleeding should be allowed to bleed as it cleans the wound. Bandaging wounds on the trail is just silly, if it’s truly serious, cut a jersey. If it’s so late in the day that you are going to need a space blanket, then you deserve to die as you should have prepared far better.
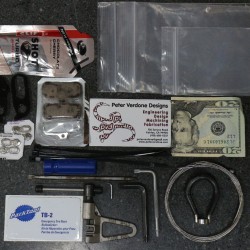
Here’s a sample of what’s in my backpack and some stuff done around a ride. This stuff really doesn’t add up to much bulk or weight but covers you in the variety of situations that do come up (from my experience). Take a minute and look at your kit.
At home:
* A quality paper map or two – Understand where you are going to ride. More importantly, after riding a group of trails or area, take the time to review the map after the ride to learn the name of the trails you rode or chose not too and how they fit together with the topography and landmarks. This will speed the process of putting together solo rides or better planned rides. It will also help to know escape routes if you need to evac from rangers. Maps are all different from each other where I live. Some are fantastic and some really suck. Some have trails shown that others don’t but leave off trails others show. Do some shopping.
* Program important emergency phone numbers into your cell phone. Local rangers and sheriff department numbers! Northstar, Whistler Blackomb, and other lift serve areas have special numbers for bike patrol that will get to you faster than anyone else. This does come up and you will need these numbers at some point if not for you but probably for someone else.
* Program the phone numbers of the Shuttle or tour company you are using. If you get really lost, they may be the only ones willing to drive out to nowhere after dusk to get you. They may even give you ride options if you can tell them where you are.
* Know what kind of safety gear is required where you are going. Riding without a helmet and gloves is just stupid. Liftserve usually requires a full face helmet. In France, you must have spine protection in addition to knee and elbow at liftserve areas. Knowing in advance that full body armor is a wise (and sane) choice at Northstar and can be the difference between a fun day of progression and a hospital visit.
* Don’t plan on bringing anything but a downhill bike to a real DH venue like Northstar or Whistler unless you are making an informed, expert (are you a pro?) decision. No matter what your imagination is telling you, you will have more fun and save money on a rented or borrowed DH bike if you don’t already own one. That fancy 6″ travel bike you ride on average trail will be completely ruined on the rocks of Northstar. It will also completely suck to ride and everyone will know that you are the noob. I see this done constantly.. Don’t make this mistake.
* Don’t plan on bringing a freeride bike to an epic adventure ride. Don’t bring an XC race bike or, worse, a fucking cyclocross bike on an honest trail ride. Ask around about the right choice and borrow something if you need to. Do this a few days in advance so you can make adjustments and service the bike to your needs. Share a little folks.
Always:
* Water – Enough for the full ride or to get to where you can refill. Note the temperature and your fitness as well as altitude. These factors effect the amount of water you will need.
* Proper clothing – How will weather change? Windbreakers and headbands don’t take up much space. In Southwest Colorado, you can start a sunny ride in 80 degree weather at the base and at the pass the temperature can drop 40 degrees in 10 minutes if a storm blows by. Know how weather works where you are.
* Sunscreen – I don’t like this stuff but most do. Especially important at elevation and desert rides.
* Real food/fruits – Chem foods suck. Sugar is good. Gorp is good.
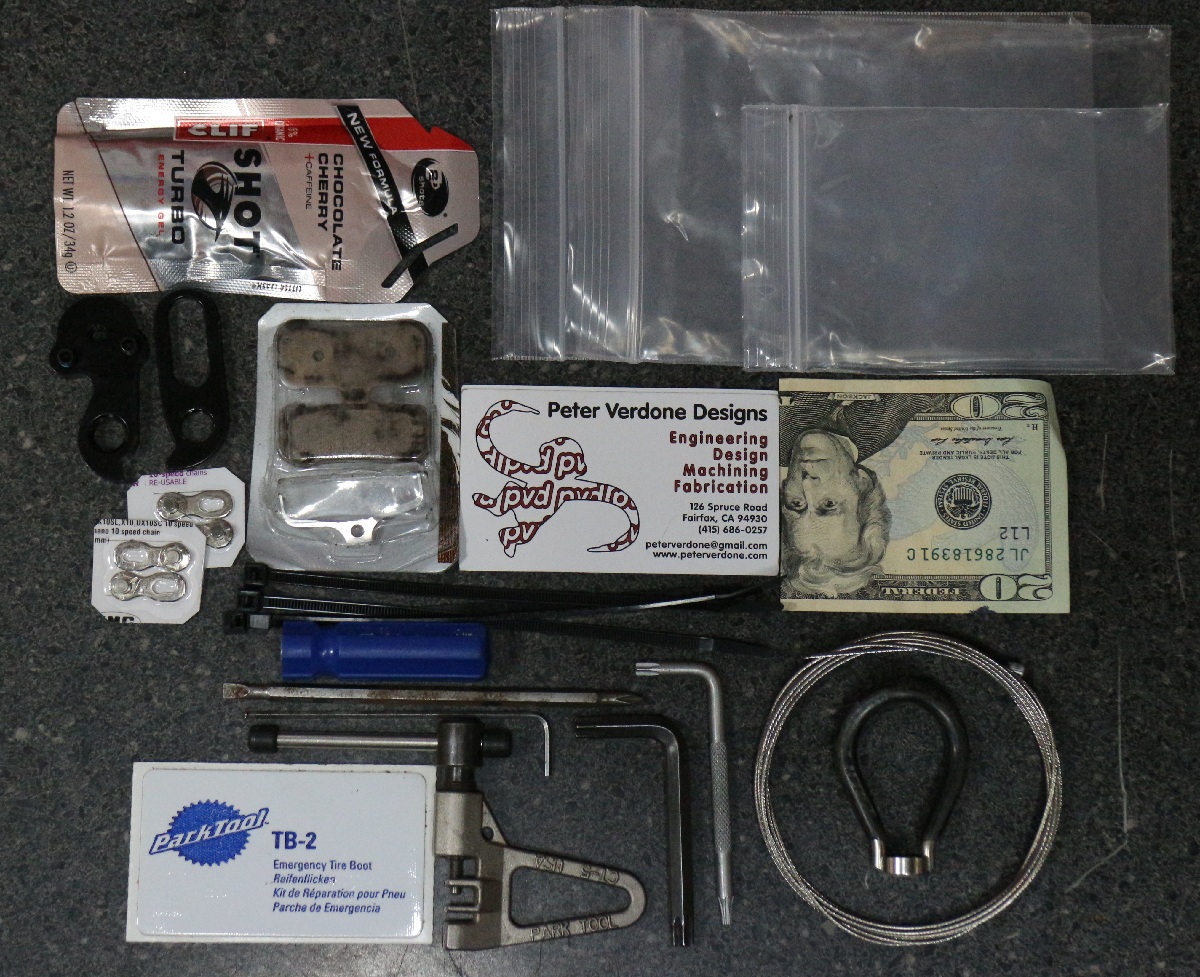
* Cliff Shots/gels – Chem foods are better than bonking. Save these in a small Ziploc as they can burst. Keep them with the tools as you really shouldn’t be using them regularly.
* Cash – It’s nice to be prepared for beer and food post ride. Just leave some cash in your bag regularly. 20-40 dollars can make dreams come true at the right time.
* Cell Phone – For emergency calls and quick photos on the trail. Program emergency numbers in advance.
Keep these handy: (you need these often)
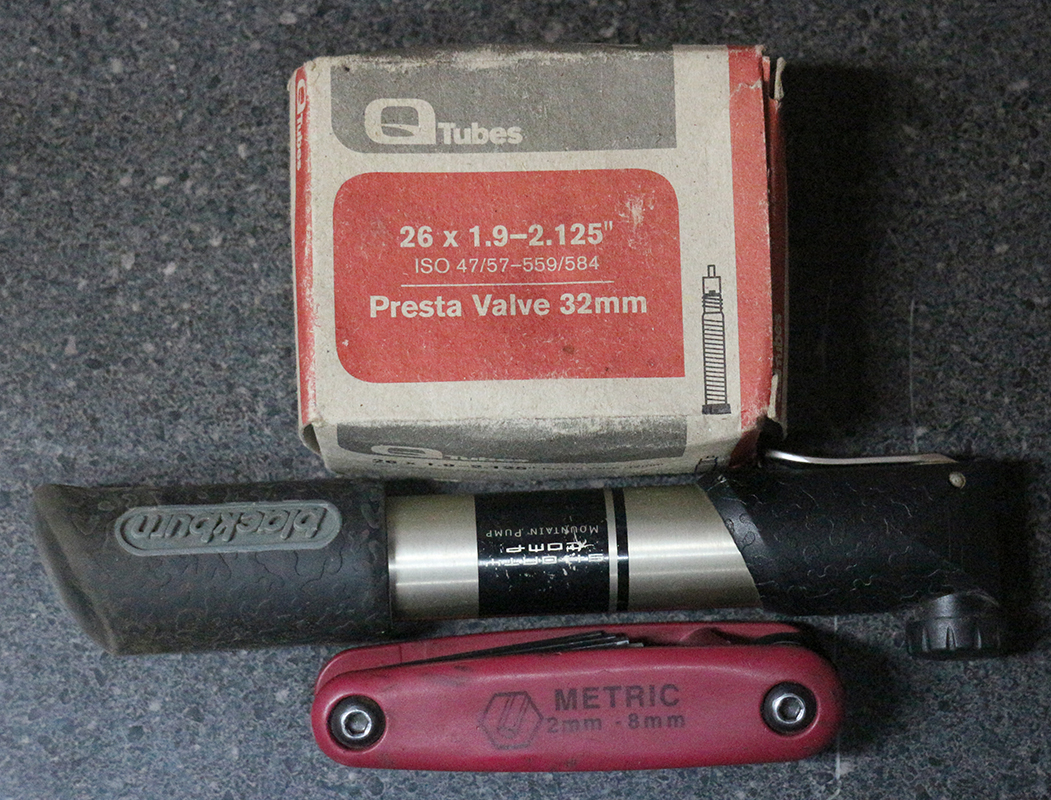
* Bondus GorillaGrip HF7M. 2-8mm hex set. – This set covers most situations. Note the 8mm needed for some fancy pedals, cranks, and axles.
* Blackburn Mammoth pump – The standard for pumps. Stay away from junk pumps, and there are many. CO2 is cute, but does nothing for you when it’s empty.
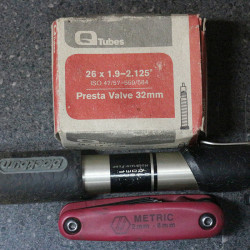
* Inner tube – Standard issue. Fancy light tubes leave you walking. Bring two if you know you are going to play rough. When tubeless tires shit the bed as they always do, you need a tube.
Packed tight just for emergencies: (don’t open ’till xmas)
* $20 bill – Get’s you home, food, beer, sex. A ten, five, and five ones is even more flexible for vending machines and buying a tube on the trail.
* Minoura tire levers – The only tire levers to buy. They work when others fail. Simply, the best. Also very light.
* Small zip ties – God’s little fingers.
* Part CT-5 Mini Chain Brute Chain Tool – Chains are better these days than in the past, but failures still happen.
* * 2-3 quick links for 10, 11, aand 12spd chain. – Ever notice that quick links fail? Every fucking time.
* Small modular Phillips/flat screwdriver – The basics. Very handy, especially on Shimano derailures.
* Park SW-0c Spoke wrench, black (2.23mm) – Makes wheels round and straight again.
* 2mm allen L-wrench – For SRAM brake lever adjustment. Multi sets don’t reach.
* Shimano TL-FC16 – Plastic HollowTech II bolt wrench. Funny how many of these get loose.
* T40, T25, T10 torx – For SRAM perches and Shimano chainring bolts. T15 for new Thomson stems.
* Problem Solvers Universal Derailleur Hanger – Works on whatever bike needs one. Drill out to 10mm for TA. Wheels Mfg. makes a similar product.
* OEM derailure hanger for your bike (not shown) – Best to have for you, but the universals will save others.
* Brake pads – A must if you ride Downieville or enduro. Especially if you run odd brakes. A simple trail fix or a ruined ride.
* Shimano SS Derailure cable – They take up almost no weight or space, but saves a lot of struggle. I’ve saved so many people with this.
* Cliff shot – Refuse to bonk. Bonking ruins tomorrow too.
* Business cards – You never know who you will meet…
* Park Tool GP-2 Super Patch (not shown) – Ride out on air, not aluminum!
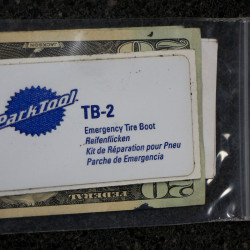
* Park Tool TB-2 Emergency Tire Boot – Torn sidewalls will happen. Especially if you ride lava (McKenzie!)
* Copy of Drivers Licence (optional) – If you may encounter the law man, you may need to identify yourself to save your bike from impound. I don’t carry ID.
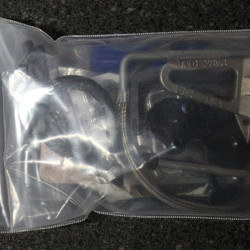
* Rugged zip lock bags – Keep all this together tight. Double bag for durability. Reuse creatively.
* 2x rotor bolts (not shown) – These peskey buggers do loosen up if installed by a hack. Always use Loctite.
* A small valve core tool. Valve cores can loosen when not torqued well. This will save your ride.
* 2x chainring bolts (not shown) – They can break or loosen and fall out. Always use Loctite.
* 1x cleat bolt (not shown) – Just in case. Always use Loctite.
* A couple of steerer spacers. These are needed on the trail sometimes and can really save headsets.
* Duct tape (not shown) – A couple of feet wrapped around the pump. Quite handy.
* A few Advil (not shown)
* Some toilet paper.
* A spare car key – This can really make your day.
Special Occations:
* -30x60mm stem – When doing flow or pump track, you can make the day so nice by just doing a trailside stem swap
* 0x50mm stem – When doing a DH run mixed into another ride. Pedal out on a long stem and switch stems to kill the drops.
* Super short seatpost – For flow, pump, or DH runs, a little more involved but some droppers still don’t get low enough. Plan ahead. Uncut ridged posts rarely drop much. Trim those in advance for more trail options.
* Knee pads – keep them in your bag and break them out at the top of the hill. Not needed for most rides, but rad for the good ones. Make sure to test them in advance of a ride to make sure they fit and you can pedal in them.
* Pruning sheers – For photo shoots and sessions. Sometimes there are a few peskey things getting right in the way. These help get a tidy cut. Red Rooster RR-FL2 are nice.
* Tape measure – It’s nice to be able to measure gaps and drops when you are out hucking. The Starrett TS510-50ME is the perfect tool for this.
Winter:
- Small folding saw – Trailwork gets done on rides. Do your part. Winter has a way of dropping bombs.
- Helmet cover – These are totally dorky…unless your in a downpour. They really do make a difference and they take up little room.
Dogs:
* A small plastic cup – About 1.25″ tall and 3.5″ diameter to offer drinks with. This keeps water use efficient.
* A small leash – In case you see the ranger.
Crazy note :
While putting the images together for this post, a problem occurred in a very odd way. Images that contained the $20 USD bill wouldn’t open. It turns out that the US and other countries have imposed restrictions on imaging software that prevents copying currency and counterfeiting. The programs see the bill and stop you from opening the image. Workarounds have to be used and require some creative thinking. Give it a try and you will see what I’m talking about. Who would have guessed?! Read more: http://www.rulesforuse.org/pub/index.php