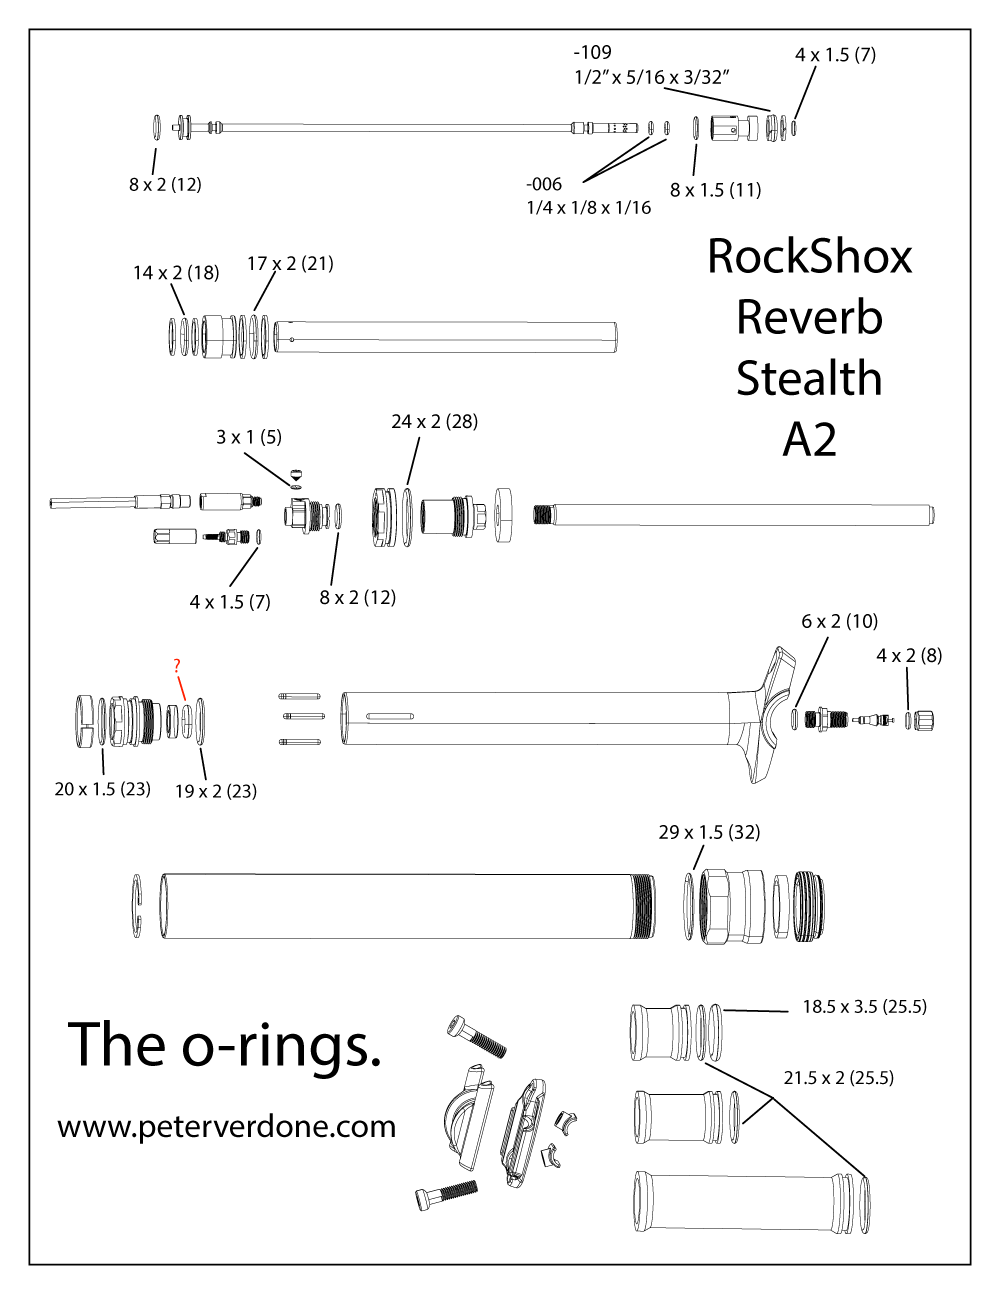
In the past weeks, I’ve rebuilt 3 reverbs. A Reverb A1 for a friend and two Reverb Stealth A2s of my own. I’d done a few others in the past, especially when they first came out and there were all kinds of issues and a learning curve for most. Traditionally, 90% of all Reverb issues are produced by the ‘mechanics’ failure to properly bleed the control system.
This time around, I put a lot of work into understanding the system of both the Reverb and the Reverb Stealth. It’s amazing how easy these things are to work on when you know what every single part does to serve the system. I don’t even need to refer to any manual or instructions. Easy. I measured and wrote down all of the o-rings I could easily get to.
There are a few parts that really do wear. The collar bushing on the pressure tube cap is a big one. That’s needed often and really should be available as a separate part although it is included in #11.6815.031.000 Basic Service Kit . A new pair of foam rings are nice from time to time (included in the basic service kit or separately). Other than that, the problems mainly come down to 0-rings. I like to be prepared for the future and for things to go wrong at the last minute the night before a race so I want to have basic parts on hand that will save me from failing before an event even starts.
McMaster-Carr is a great source for o-rings and a lot more.
At the very least, I would keep these o-rings on hand for emergencies:
- -109, 1/2 x 5/16 x 3/32
- -006, 1/4 x 1/8 x 1/16
- 4 x 1.5 (17)
- 8 x 2 (12)
- 17 x 2 (21)
- 14 x 2 (18)
- 19 x 2 (23)
Make sure to have 00.6815.066.020 Post Bleed Tool – Reverb (for non-stealth), 00.6815.066.040 IFP Height Tool – Reverb
For fluid, I’ve used Redline ExtraLight 2.5wt Suspension Fluid in the system with great success.

