When I was a kid, one toy ruled them all, Lego. Then in the late 70s and very early 80s, when I was in the prime age for using these, we didn’t have a lot of money in the family and Lego were very expensive. Still, Lego is a toy that provide a huge dollar per hour value. A new set added to the mix was a compounding of all of it. This kind of toy is really an investment in many ways.
For young kids that are interested in making things there are few other toys that provide the same potential. We learn how to hold things together and how to think in space. Back then, there were only a few special parts in addition to the basic blocks. Now, there are ‘millions’ of special part shapes, mechanical parts, robot kits, and stages. It’s pretty wild. So much can be done.
These days, Lego seem to be very cheap and even neglected. In fact, years ago I began trash picking Lego and buying them for pennies at yard sales. Pass a free pile on the street, grab a bunch of Lego. Years go by and I now have a few large bins full of bricks. It’s a real stockpile.
Full circle to the topic at hand.
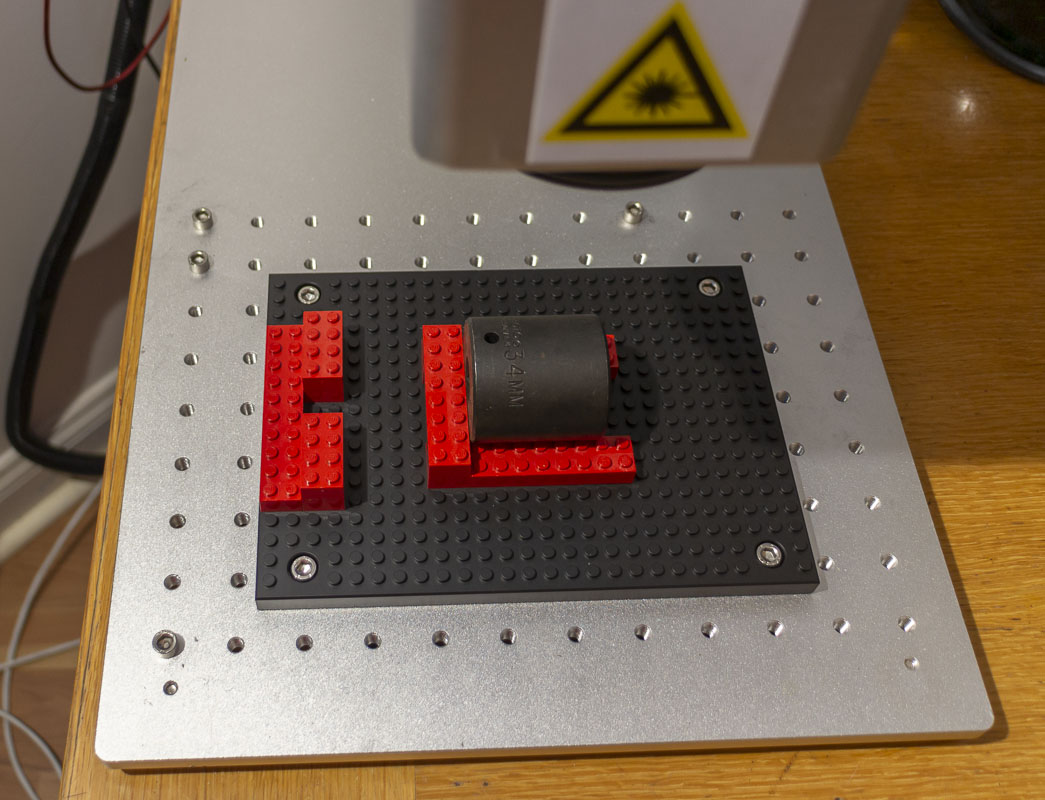
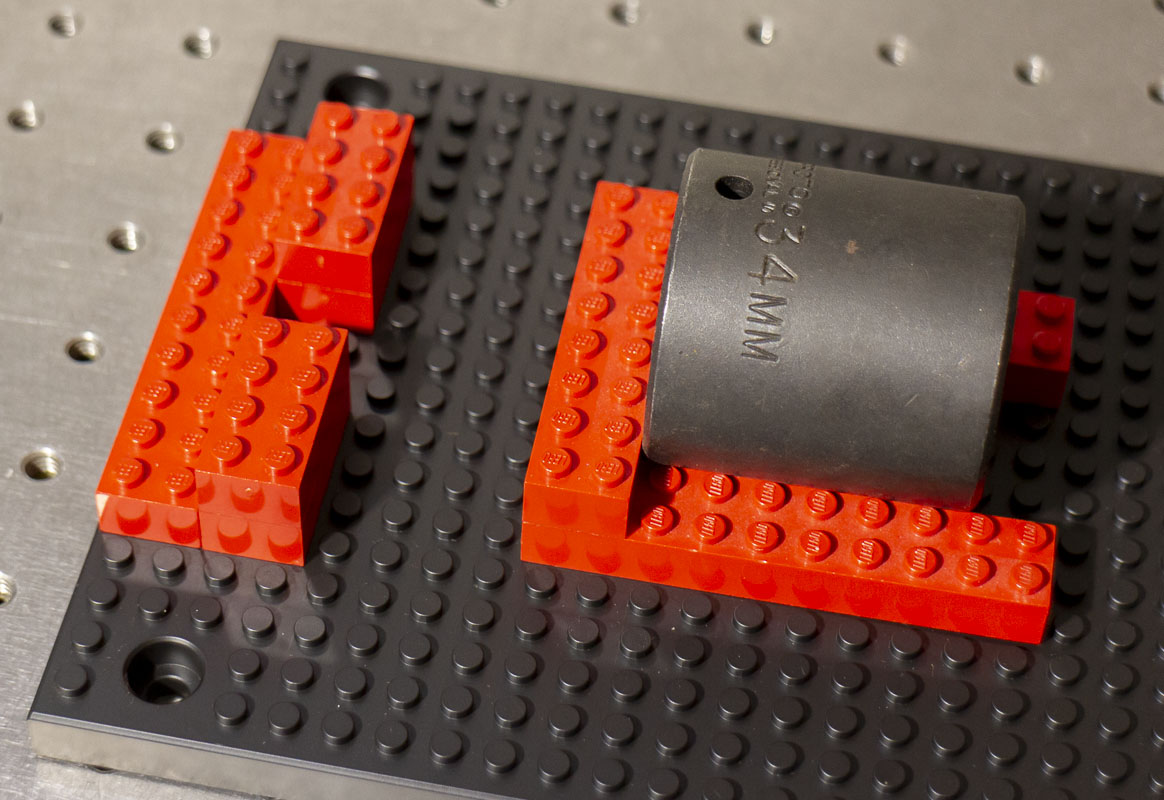
When working with the fiber laser, we need to find ways of repeatedly setting up a part for marking. This needs to be quick and easy. Also cheap. Unlike setups in the machine shop, a working setup doesn’t have to take any cutting load or have any real rigidity. Many people have found that Lego bricks are a great solution for this. It’s a creative and wonderful solution.
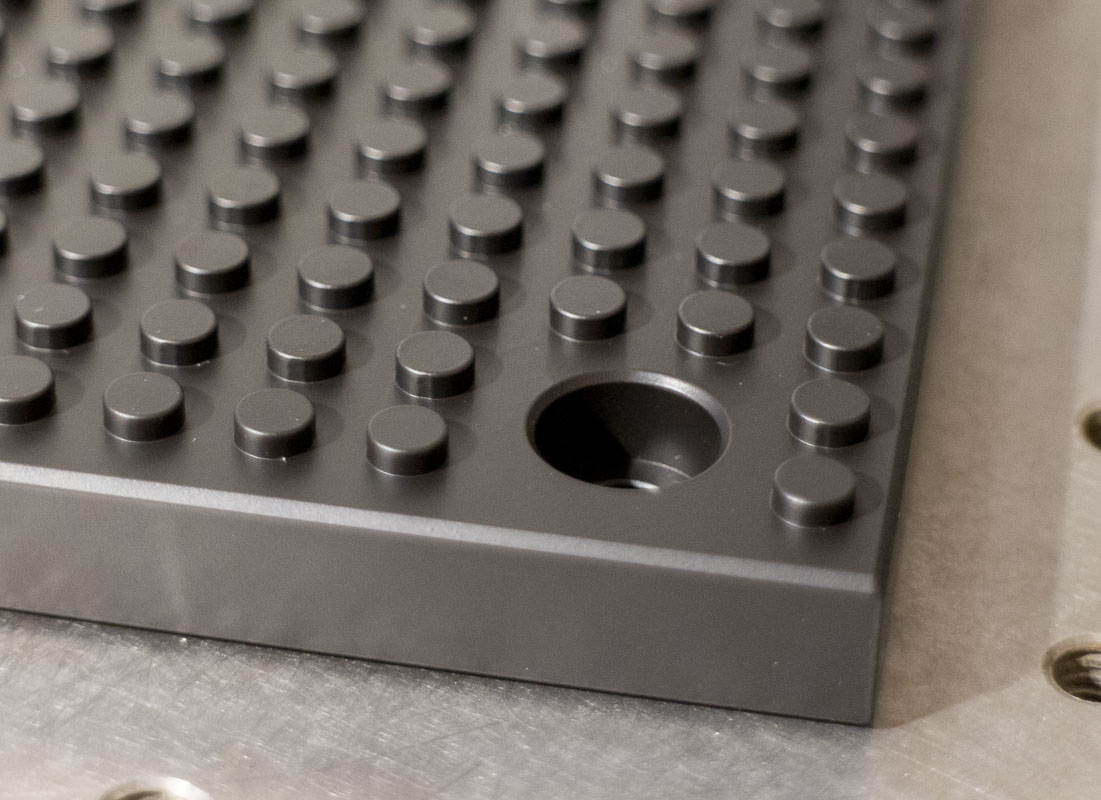
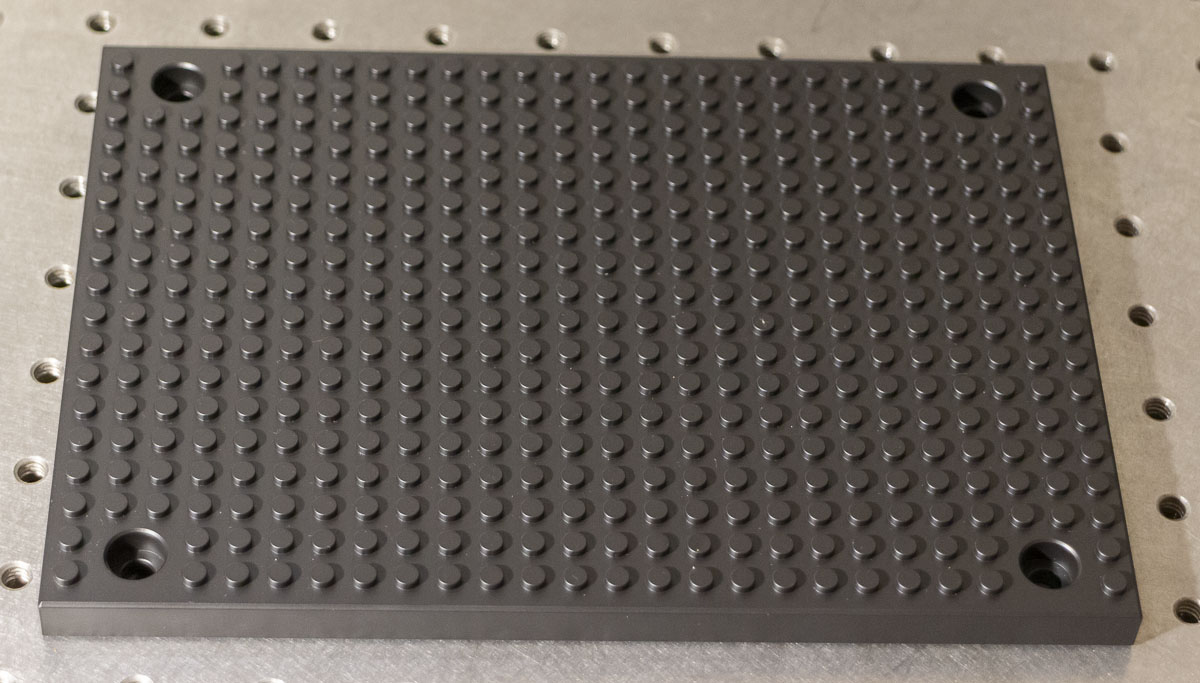
The other day a guy, Randy Lint, posted to a board that he had produced a Lego base made from aluminum and cerakoted. The photos looked good. The price was OK. I was interested. Lint Arms Lego Compatible Fixture Plate (3191207).
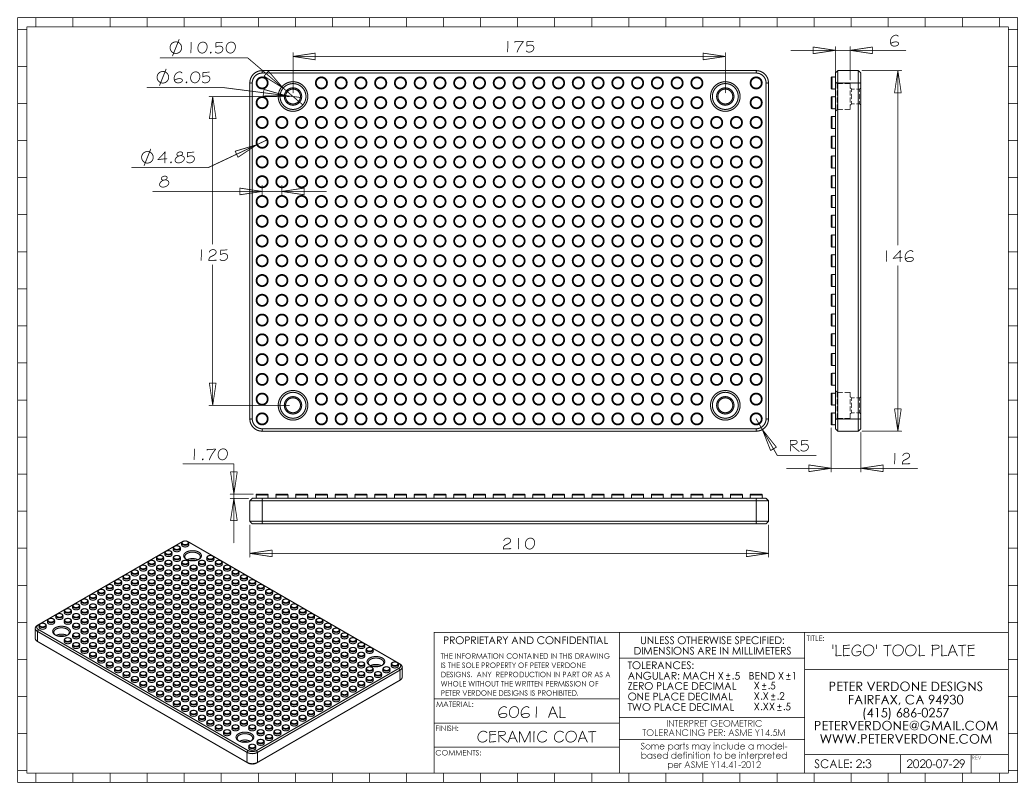
Initially, the product page failed to list the material and I messaged Randy to confirm that it was made from 6061 aluminum. We began a dialog. It was made from 6061. I asked about the strange fractional imperial dimensioning (now changed to decimal, 6.9063″ x 4.9375″, WTAF?) that he was specified. He gave me very odd responses. It was clear that Randy had no real engineering or professional shop experience. I felt that he didn’t even know about the metric system. Regardless of the doubts that I now had, I decided to continue with the order for the sheer novelty of owning such a plate.
Less than a week later, the plate showed up. It looks gorgeous. It functions fine but the errors in design are obvious when we go to bolt it up. It also lacks customary radii in the corners of a plate like this that reducing marring. I was going to draw up Randy’s version to share but I couldn’t bring myself to reproduce the measures he used. Instead I drew it as it should have been made. This is how it should have been produced as:
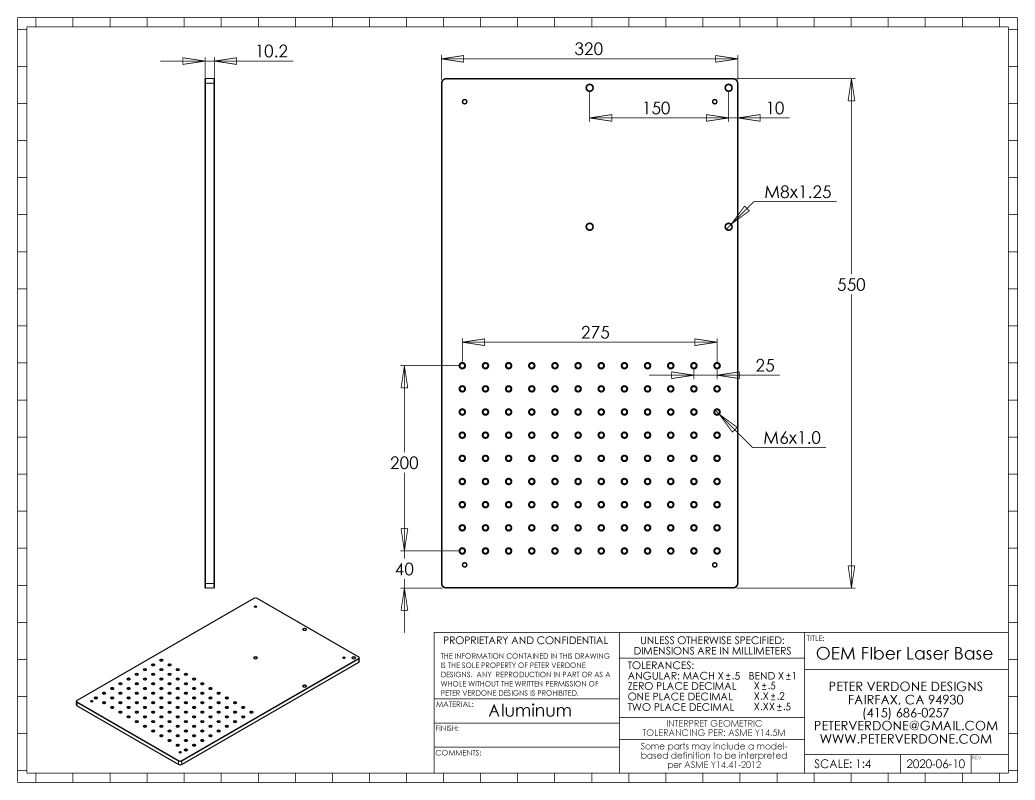
 Since setting up my fiber laser, I’ve been acquiring setups for holding parts and aligning them precisely for marking. It’s a lot easier than machining setups but it is a challenge from another level. Easy flexibility and re-configuration is the challenge.
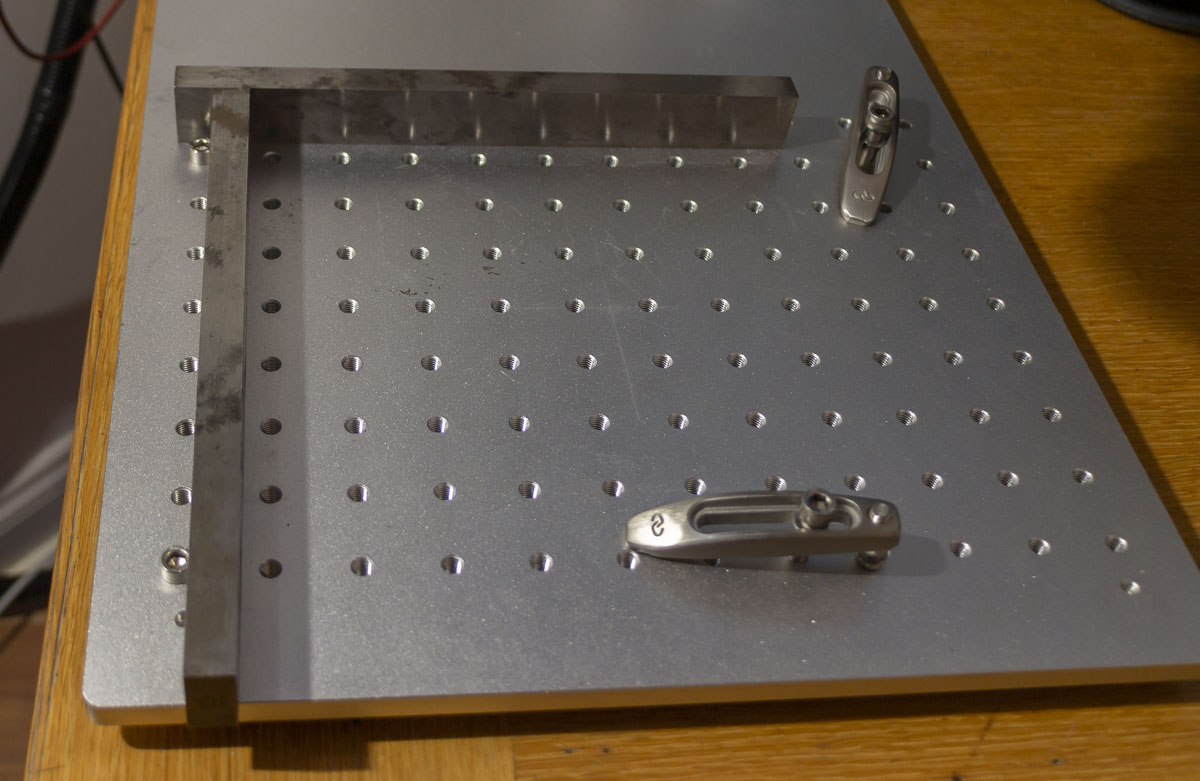
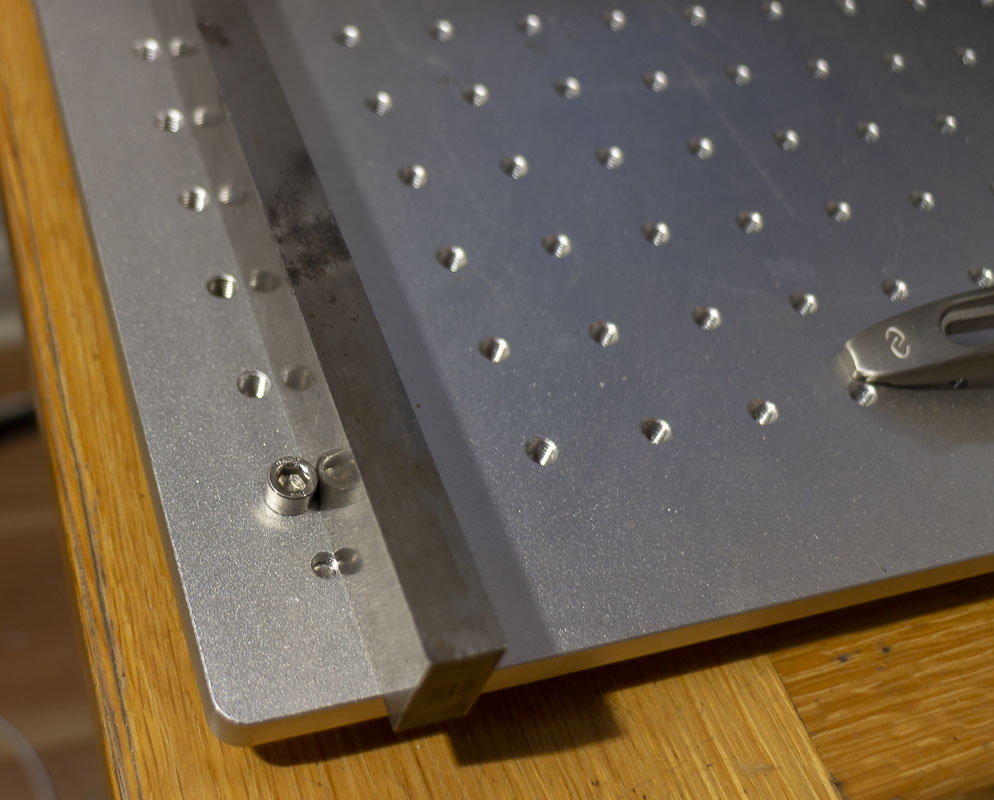
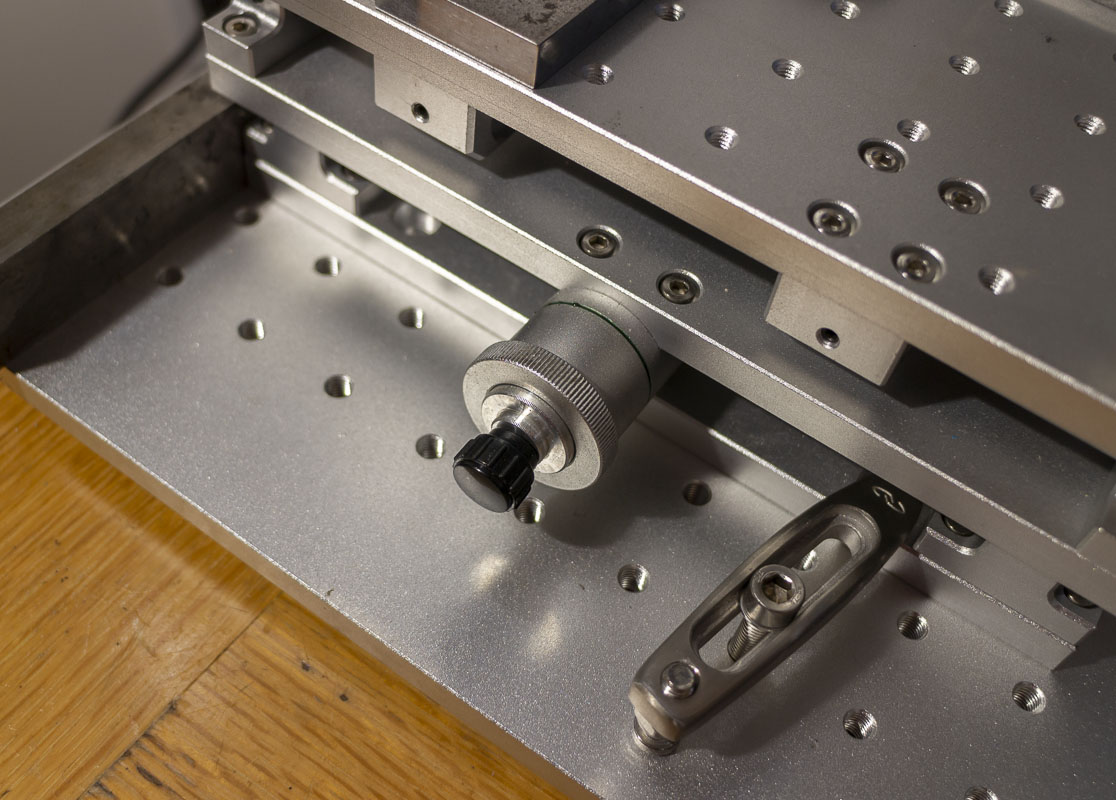
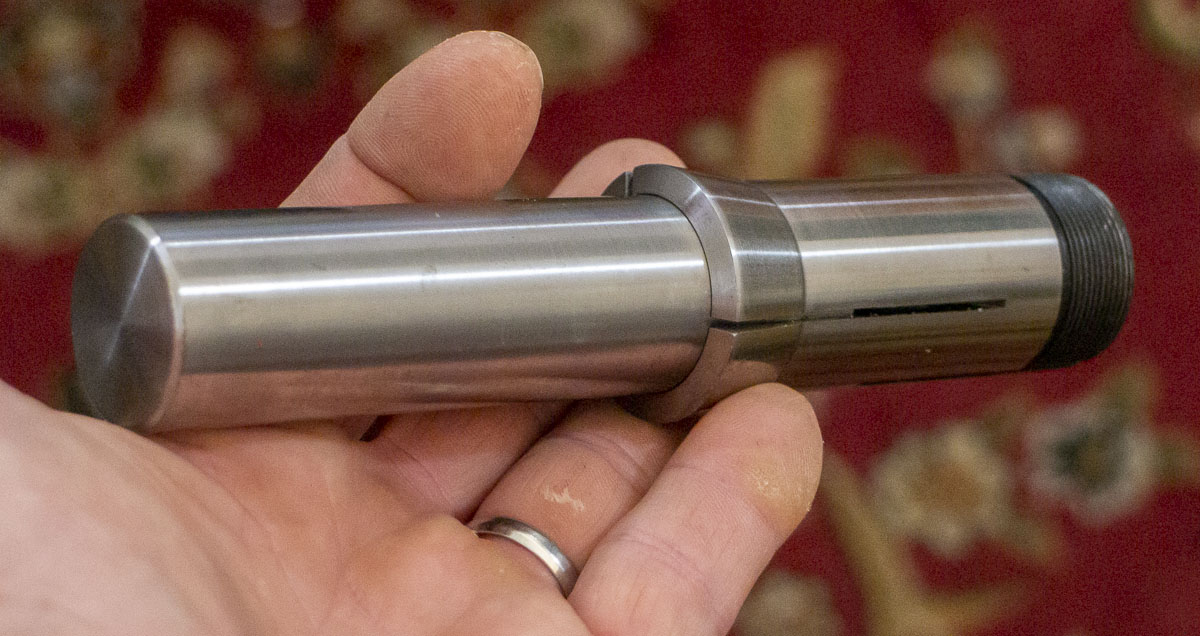
At the heart of my method is the use of machined socket head cap screws. I have a few sets of these that I machined on a collet lathe. M5 and M6 screws with the heads turned to 8.0mm and 9.0mm respectively. By using these as pins and some long parallels, I can define axii on the metric breadboards we have in the fiber world. Once this is set up, the galvo head is mechanically adjusted to be aligned with the board.
Large shifts in the position of these parallels is quick and easy by just changing the location of the machined screws.
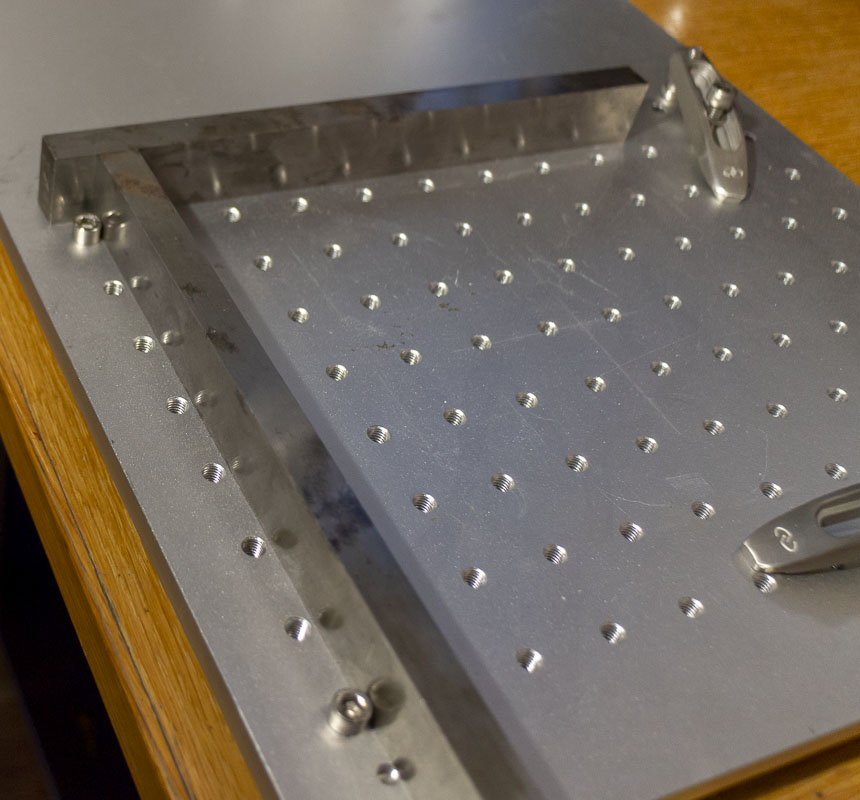
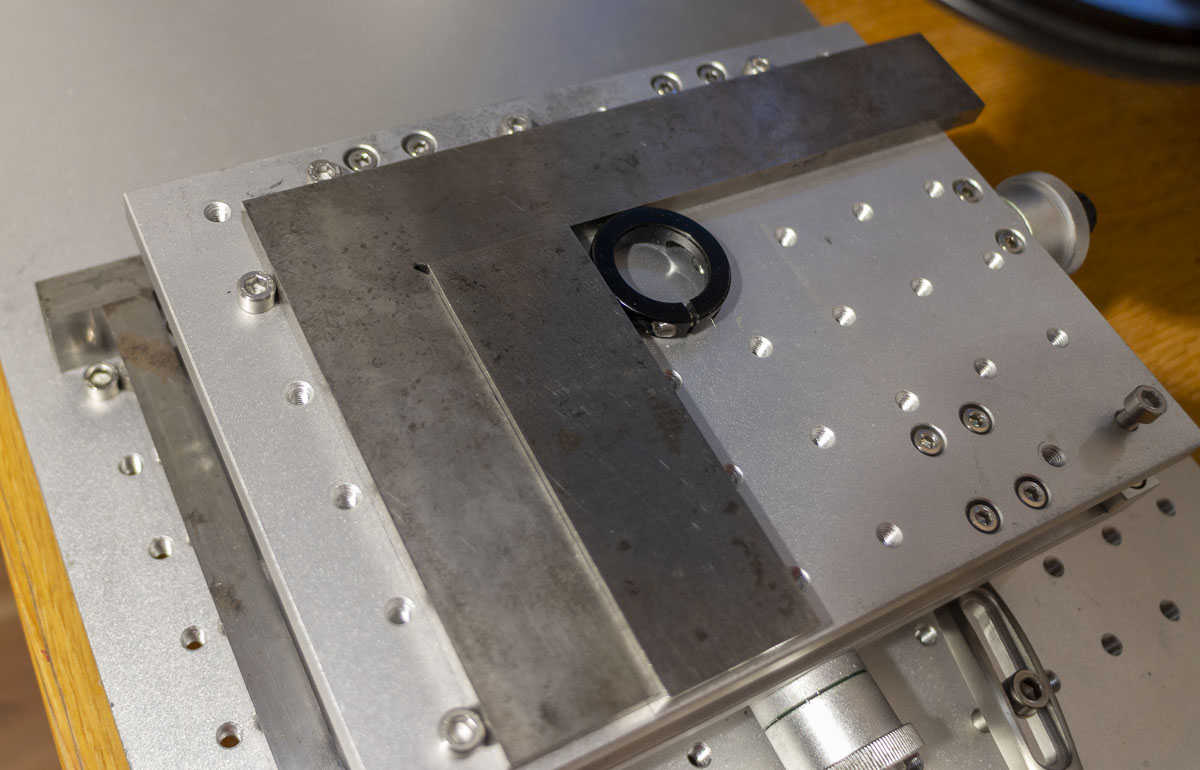
To make precise adjustments from this raster easier, I have a cheap $149 X70/Y50 travel table with a 210mm x 150mm top (75mm stack). This can bolt to the M6 threading of the laser base but the top is M5. Given the scale, I mostly use a machinist square to located with the M5 screws on the top of the table.
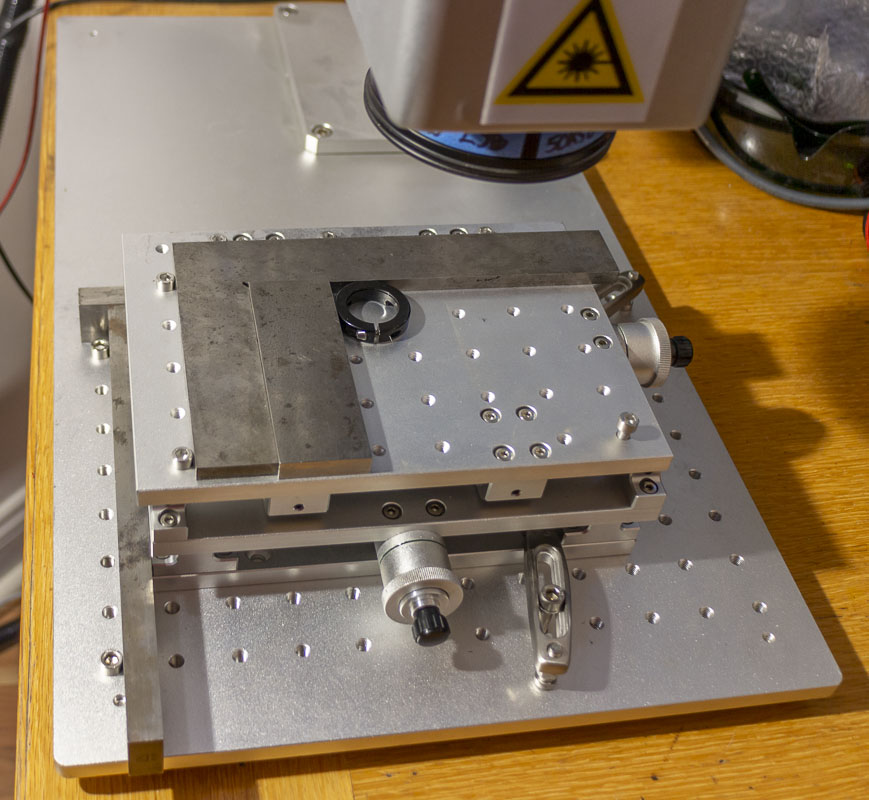
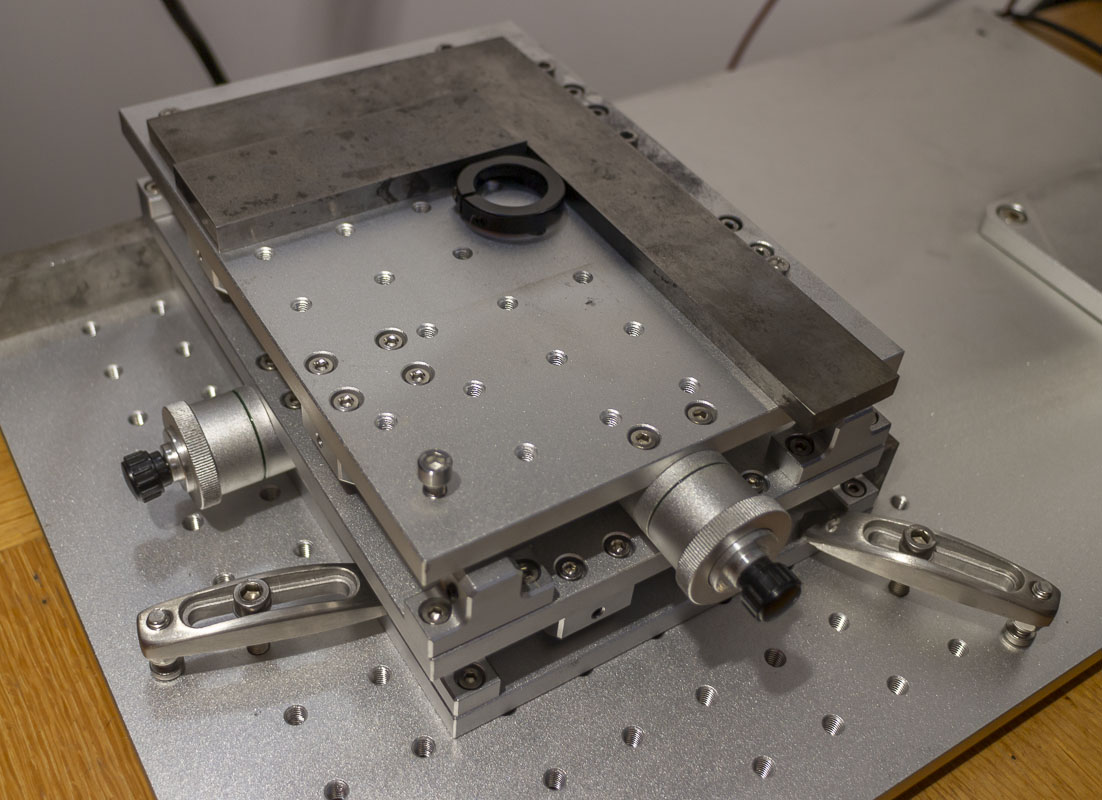
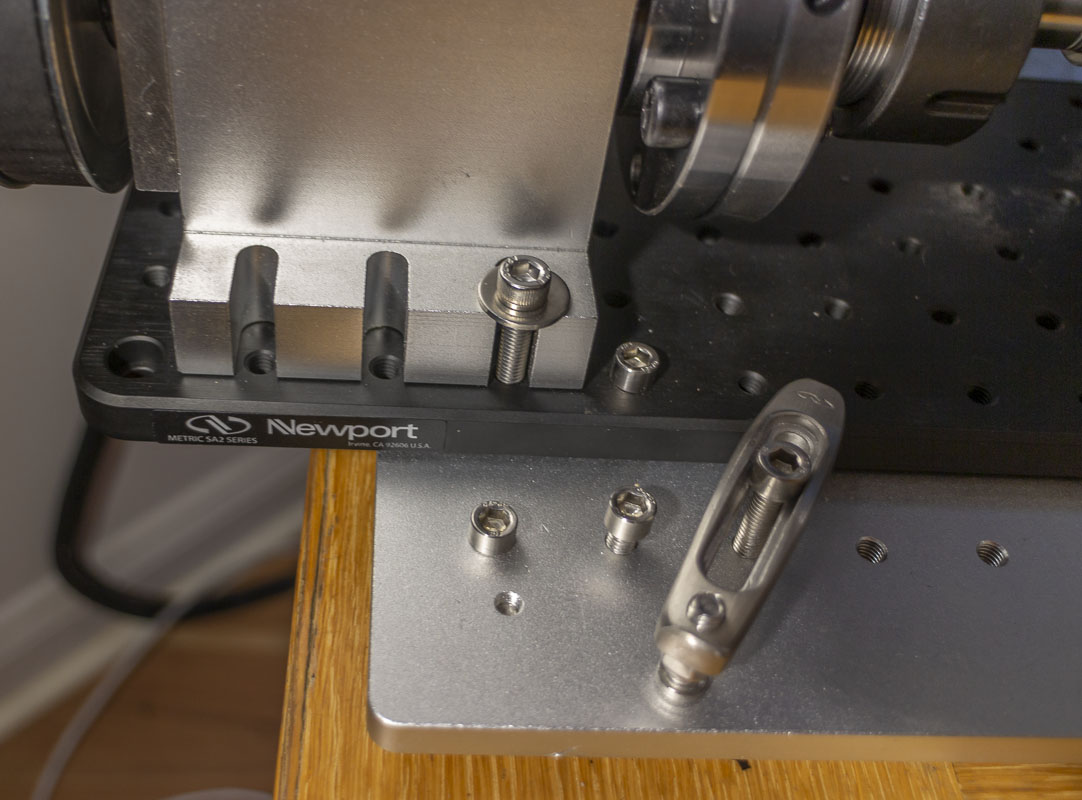
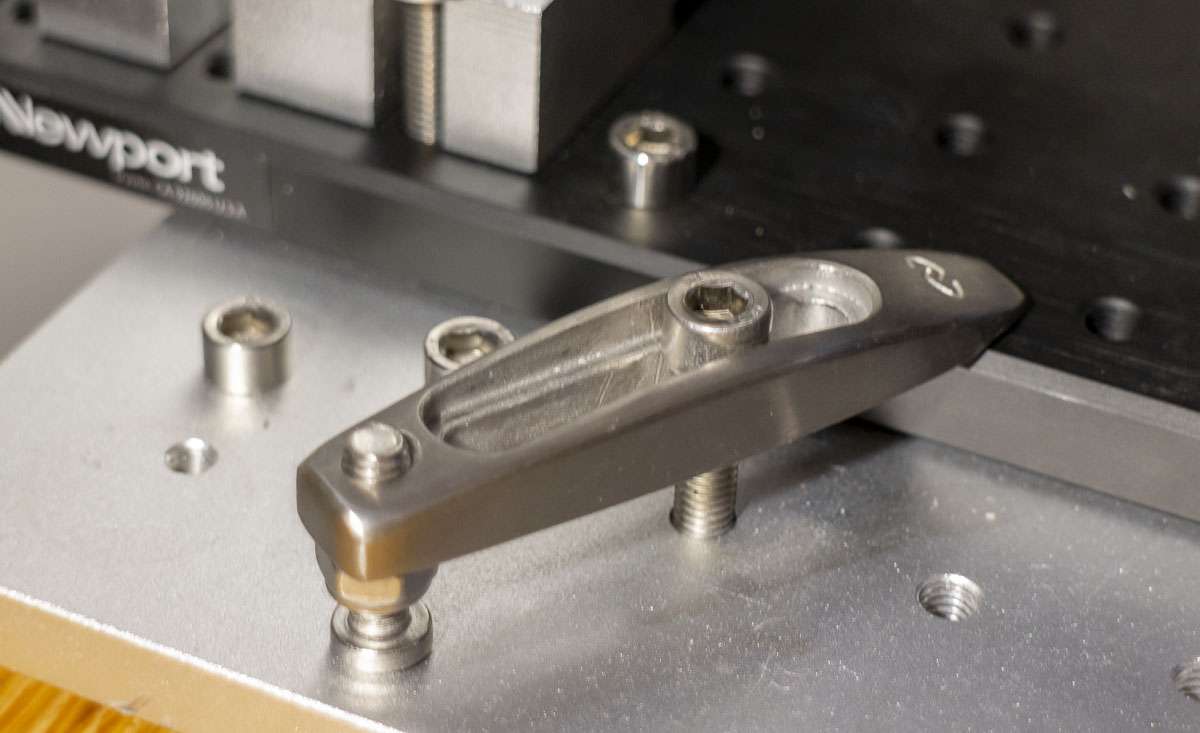
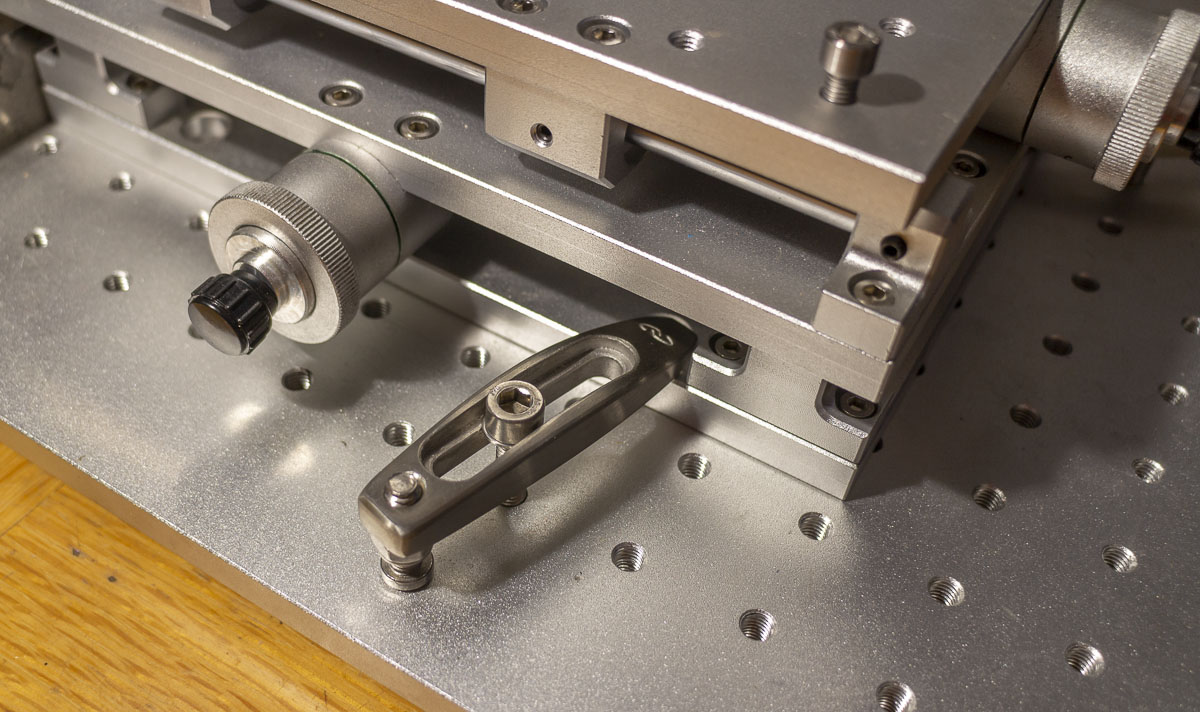
Because the mounting of plates to the laser base most often doesn’t land in a proper bolting location, I have a pair of Newport M-BC-6 Base Clamps to hold them securely in place. This is super easy and quick. While there is no load on the parts during marking, having tooling shift or get bumped is a real risk that should be eliminated.
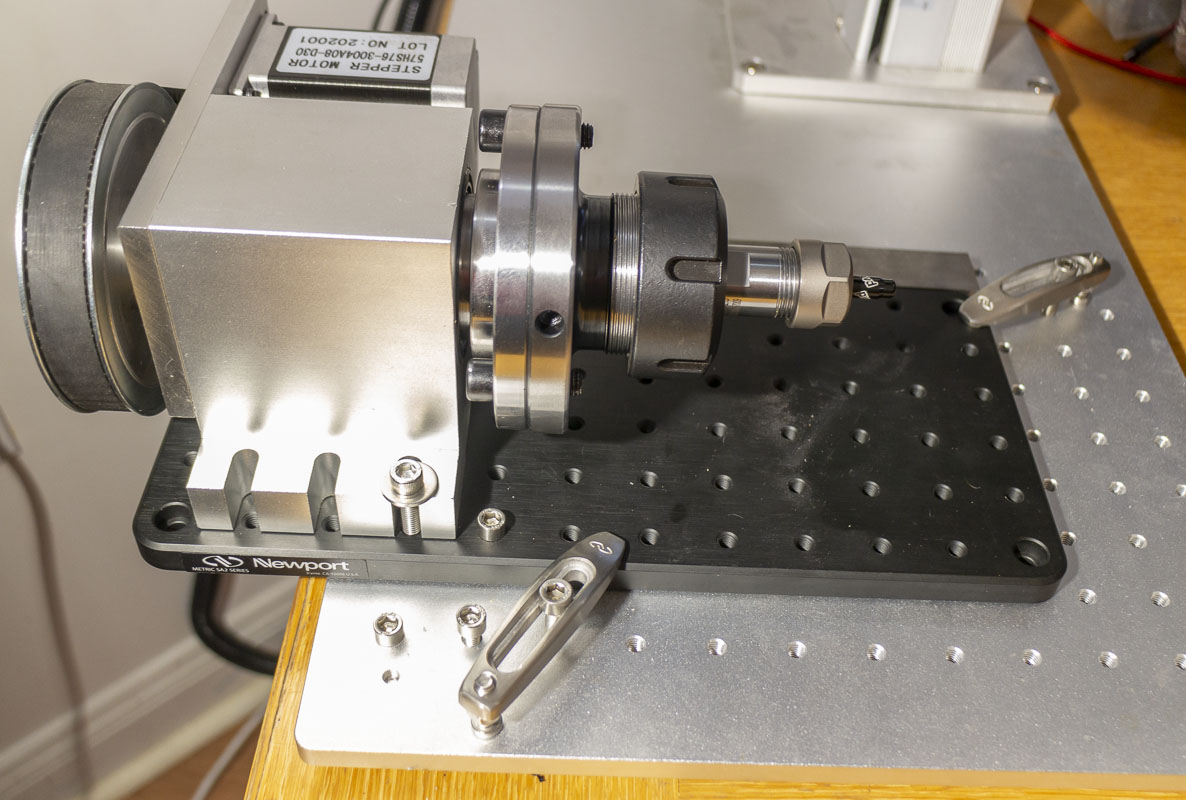
Setting up a larger rotary is a PITA for the standard size fiber bases. I set out to solve that. By going to a modular setup makes everything is easier. I purchased a Newport M-SA2-06X12 breadboard to mount the rotary to. The rotary is aligned to the plate with a similar screw/parallel system although the parallel gets removed in use to clear the back plate screws that rotate. I set the galvo to be on center when the rotary module is set on the base with a specific screw/parallel set. Because I have the Newport Base Clamps, I can slide the rotary to whatever Y location is needed for marking.
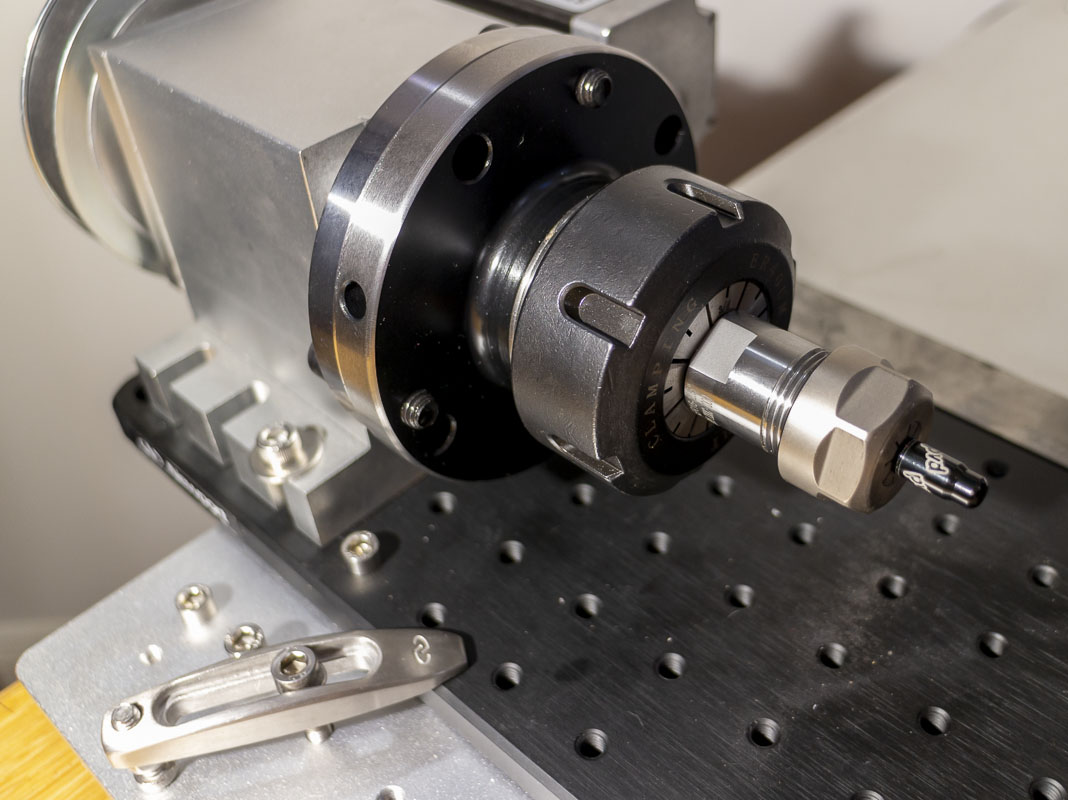
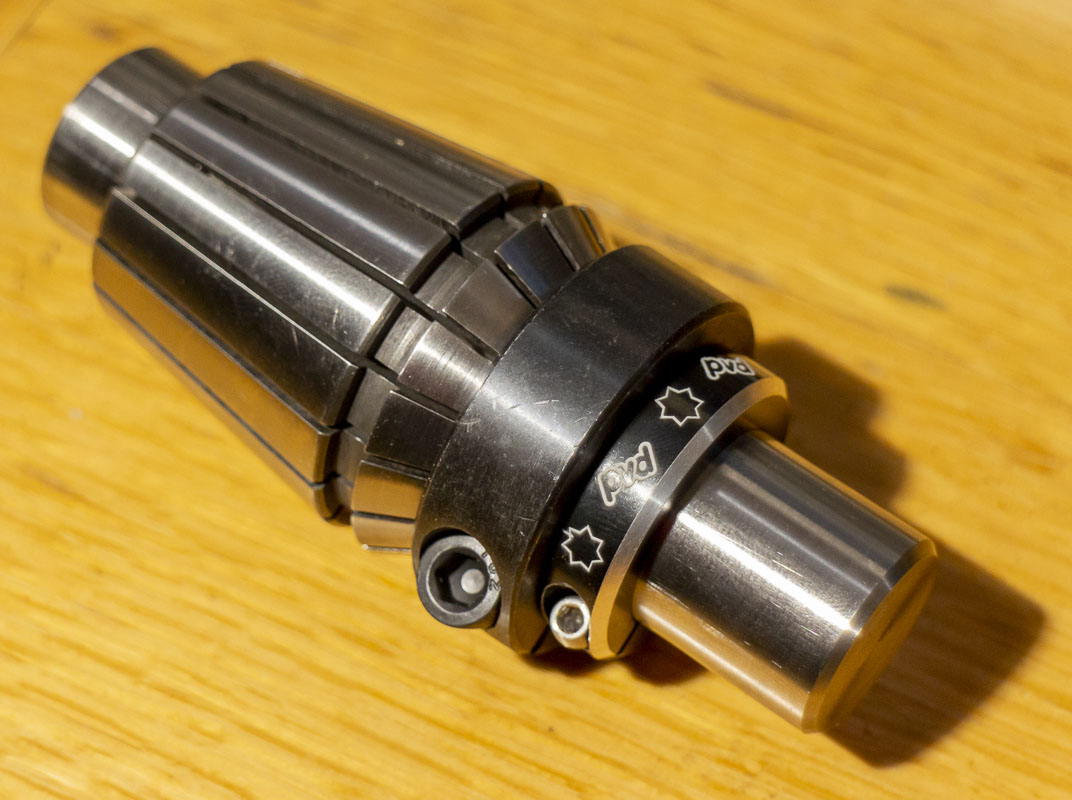
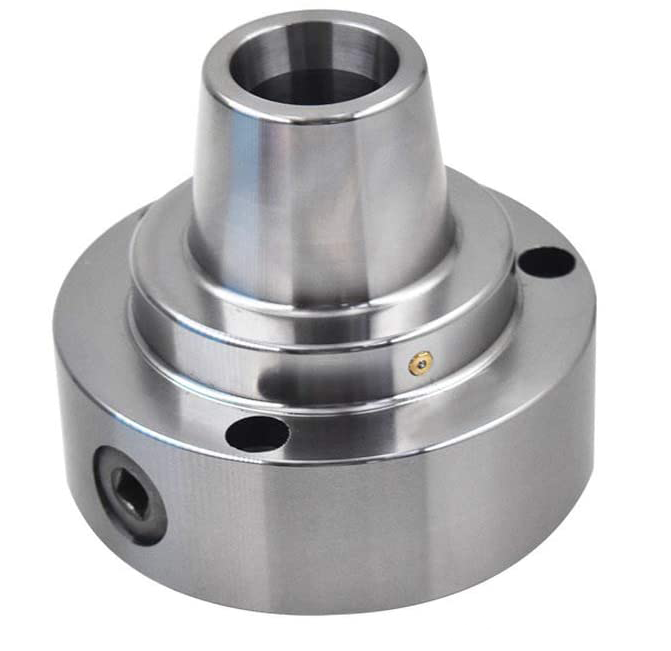
As seen in the photo above, I have obtained a ER40 chuck to use in addition to the 4″ scroll chuck that came with the rotary. I already had a cheap set of ER40 collets so this was a no brainer and gives me precise holding of diameters up to 1 1/8″. ER collets have a lot of use in the laser world. MariTool has a lot of odd sizes.
Additionally, I have an ER16 holder for much smaller diameters. This connects with the ER40 chuck via a 3/4″ collet. Low quality ER16 collets are very inexpensive and easy to obtain.
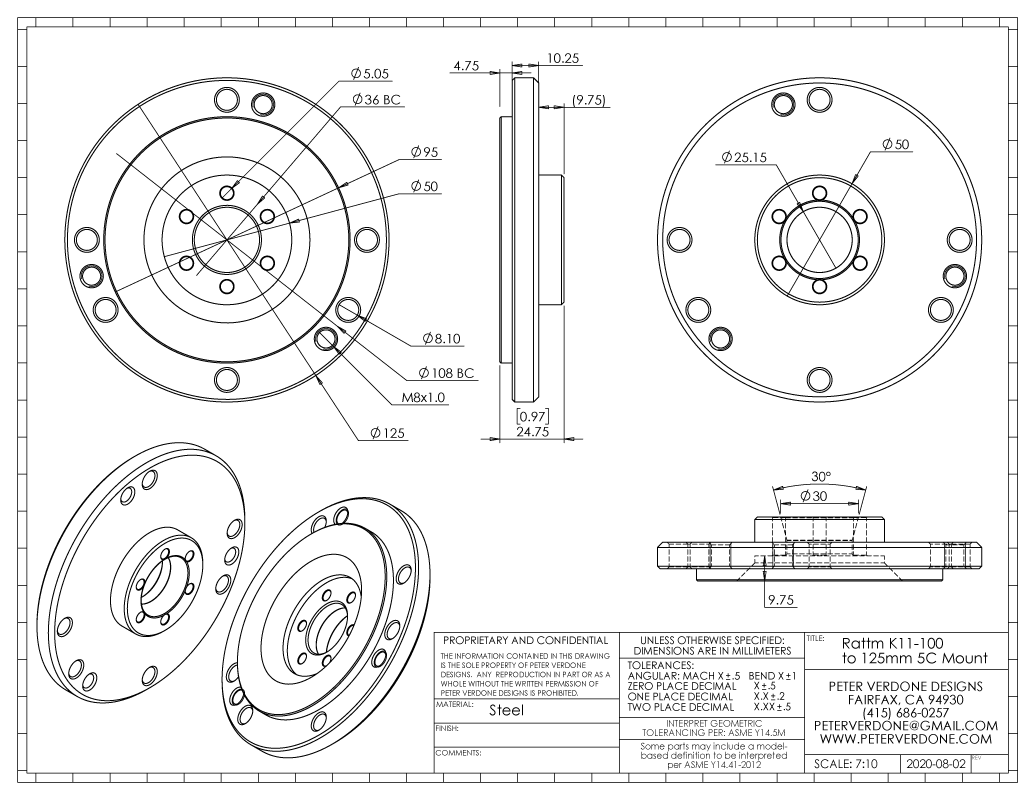
One last part that I haven’t arranged is a 5C collet chuck. This is useful because tools I use on the lathe can then be used at the marking laser. The issue is that I need to make a custom back plate or adapter to mount the 5″ diameter chuck. COVID-19 restrictions are making machine shop time an issue for me and slowing this down.
An adapter is simple enough just need the shop time to get it done.
Here’s a fun little note:
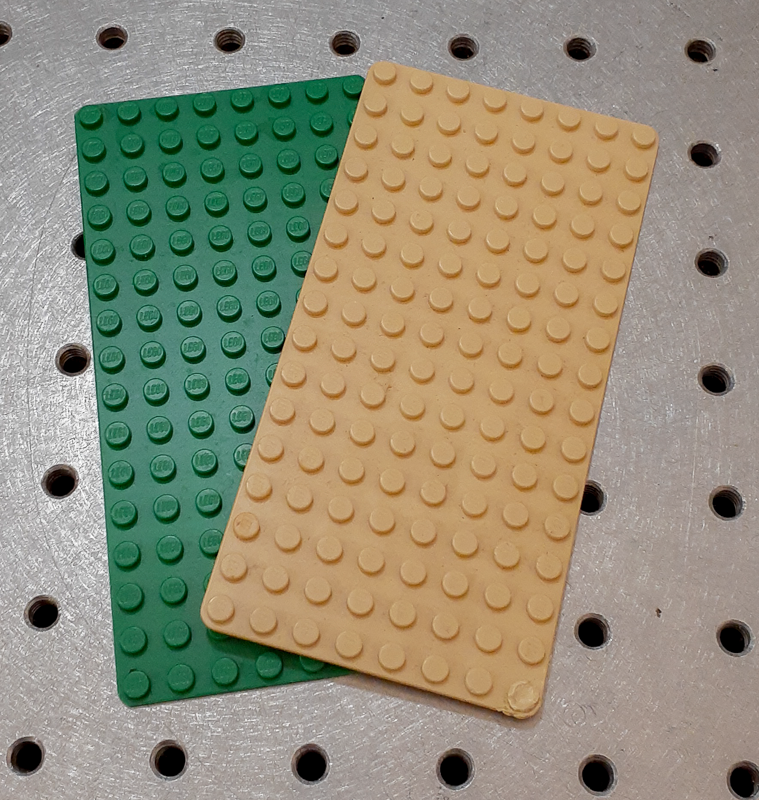
While measuring some Lego parts in my bin to produce the drawing, I was holding two identical parts (#3865), but one was tan and the other green. I needed to look closely to model the detail and I found something, one of the parts was a counterfeit! Yes. Looking close at the details was a give away. Lego parts are extremely high quality. The counterfeit parts are not. In the photo below, the green part is not a real Lego.