In my workshop at the university, I’m constantly instructing students and others that designing at the mill is a fools job. It’s not where we do this work. We should be arriving at the machine with a fully sorted design with all of the issues worked out. This is obvious stuff that somehow doesn’t occur to most. This is how quality work gets done.
There are times, however, that magic happens. We do everything right. We worked it out and we are busy cutting good parts. Somehow, with actual shaping of real material in front of us we see things. We understand differently.
This is like what I describe in emphisising the skill and dedication of producing 2D prints of 3D parts. That process may not seem important to modern designers but it’s a step that helps one see things differnetly. It can find mistakes or show different understandings. It’s important.
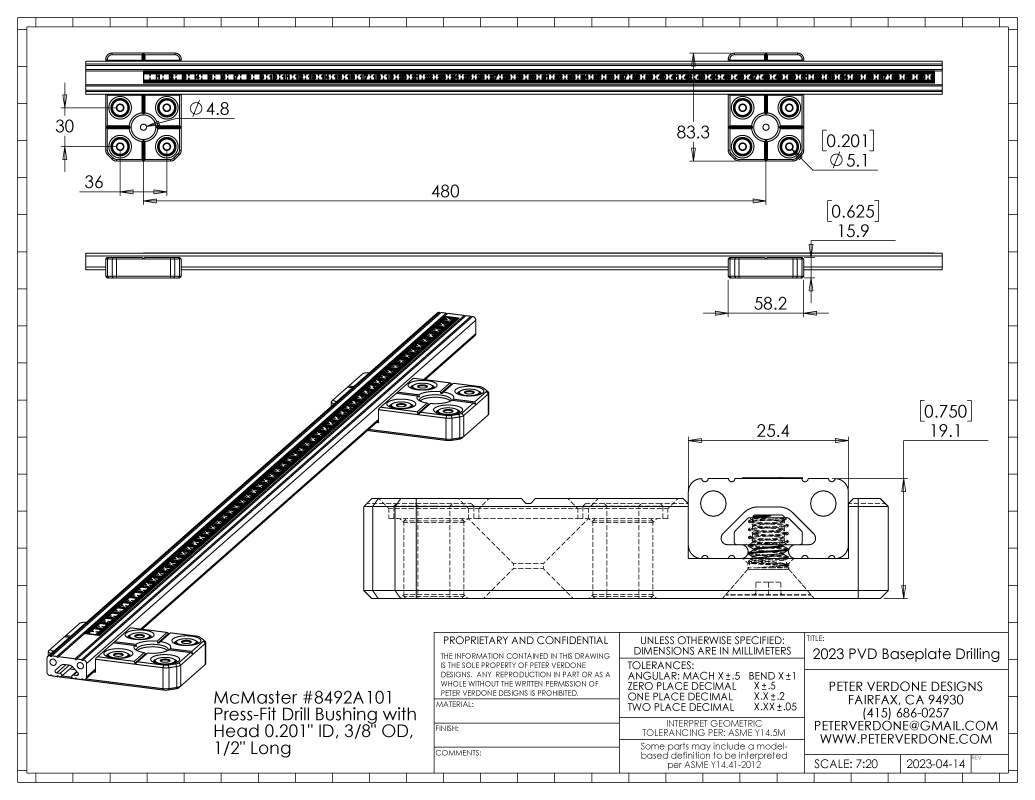
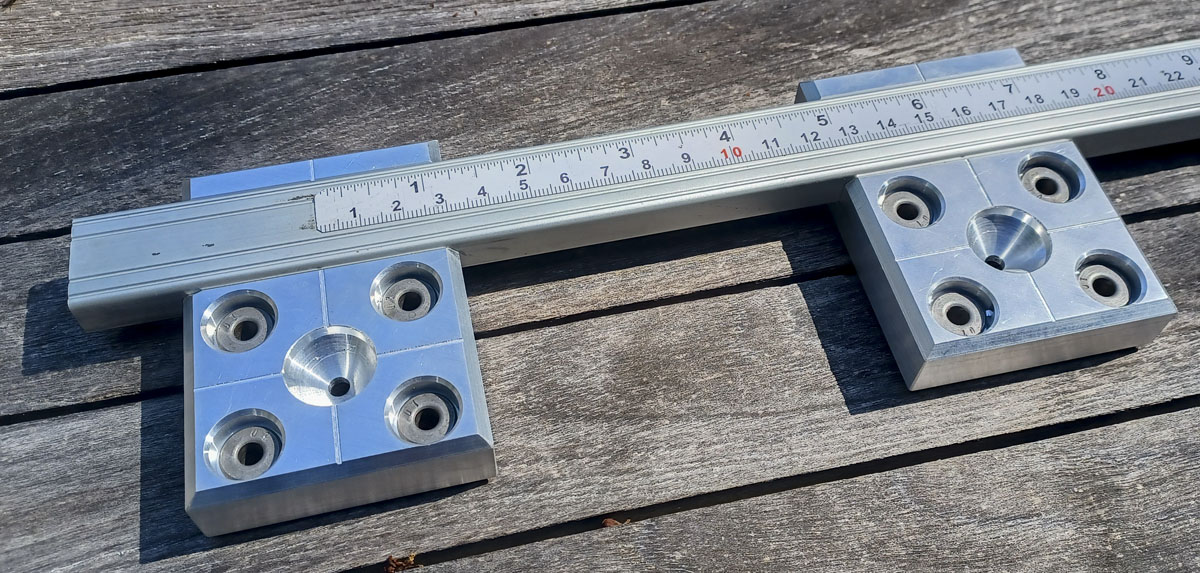
I’m doing the dirty work of making the truck drilling jig parts for the new G5 trucks that are currently being printed. These are the succsors of the the PVD g4 trucks that I’ve been testing. I’m moving to a newer and even smaller bolt pattern that will need to be drilled in the deck to mount the new trucks. 30mm x 36mm. It’s micro-madness. My fingers are crossed for this one..
Well, I’m at the mill. I’m about to cut the new features in the parts that I had designed for witnessing actual location marks on the deck. It was then that I suddenly saw everthing differently and not what I had understood earler. This happens. Even if we had spend hours on a design, it’s instantly obvious that it needs to be different during the moment of cutting.
What do I do? I ride the lightning. I start hacking. Sometimes it’s so important that I need to stop everything and run back into the CAD models to understand further. These were pretty low stakes parts so I just went for it.
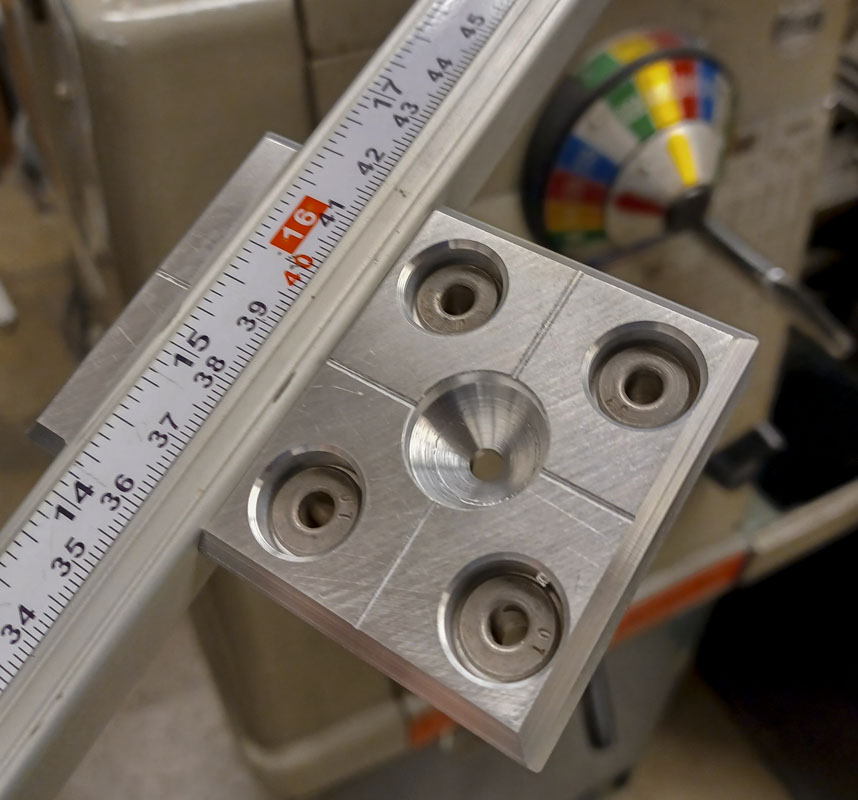
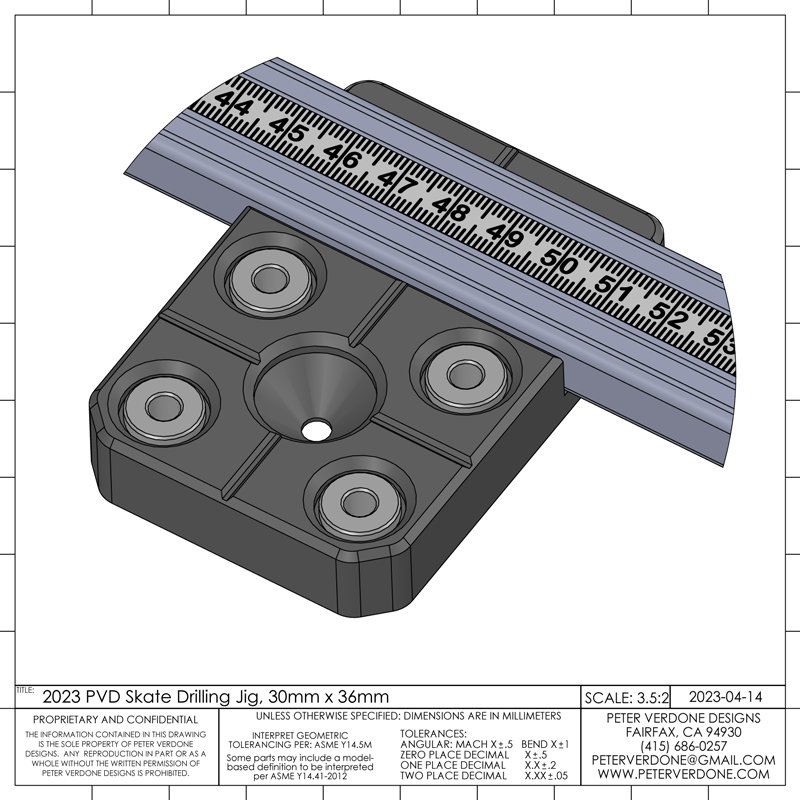
The issue is that witnessing the deck is an optics problem. As such, it needs to be designed that way. I cut a deep tapered hole in the center of the pattern and a smaller tapered hole to match on the other side. This gives me an orifice to sight when a mark is close by and when I’m approximately centered above it. It’s simple and pretty cool.
I did a bit more work to my model (after the fact) to preserve the intent of this modification, show it clearly, and record it for future reference. This tool has evolved over the past 5 years from when I first designed it through the various drillings that I’ve been deveopoing for the new trucks.