In a way, one of the nice things about additive manufacturing is the long wait to get the parts. We don’t really like that wait but it’s a fact and hard to change. It takes between 20 and 30 days to get my parts from the printer from when I send off the models. Since there is little to do otherwise, it forces me to be productive in the time between when I’ve ‘pushed print’ on a design and when I can get to productive fabrication. In short, we make the best of it.
I take that time to clean up my cad models, produce nice prints, and refine and build out my tooling. It’s good time that let’s me focus on solidifying where I am before the rush of production hits.
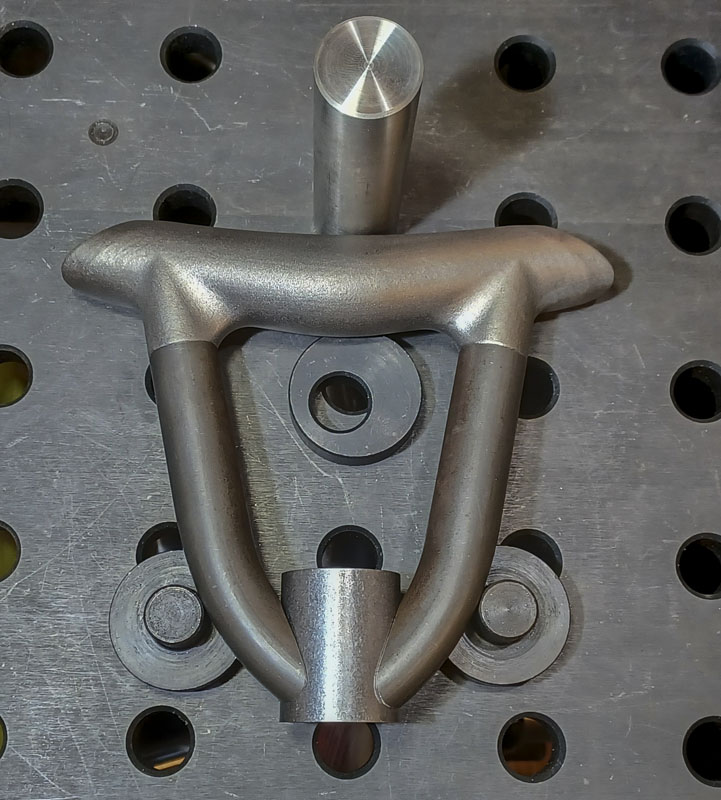
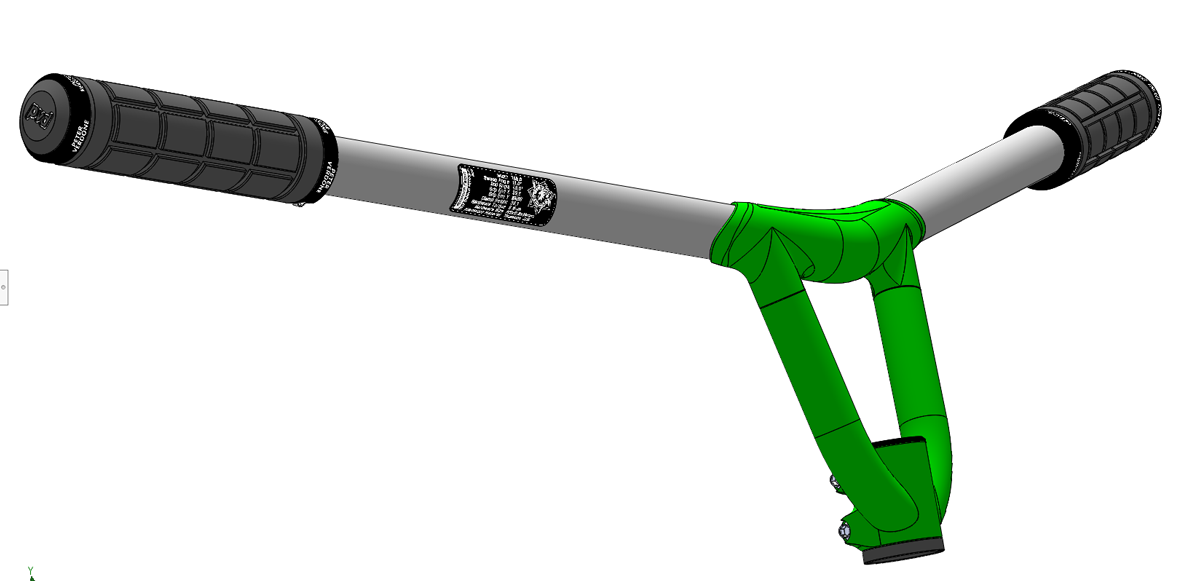
This next bike is a big one. There are quite a few parts spanning the frame, the fork, and the handlebars. Just getting all of these to a final state and at a point where I felt good about moving forward is a huge undertaking. It took everything from me to get it done. The feeling of sending the files out gave me some peace that I hadn’t felt in a while.
So, I get to sorting out what I can so that I’m as ready as I can for when the prints arrive. I set the frame fixture and cut tubes. I make the head tube assembly. I then get to the handlebars. That’s when I realize that I don’t have a good way to cut the strut tubes or hold the assembly for welding. I had changed the design enough so that I lost datums that I had previously relied on.
There were some refinements that would be needed on my handlebar tooling that would let me hold the new design for welding. A new thread raster on the plates and a few 7/8″ tube blocks produced to a new spec. This was the easy stuff.
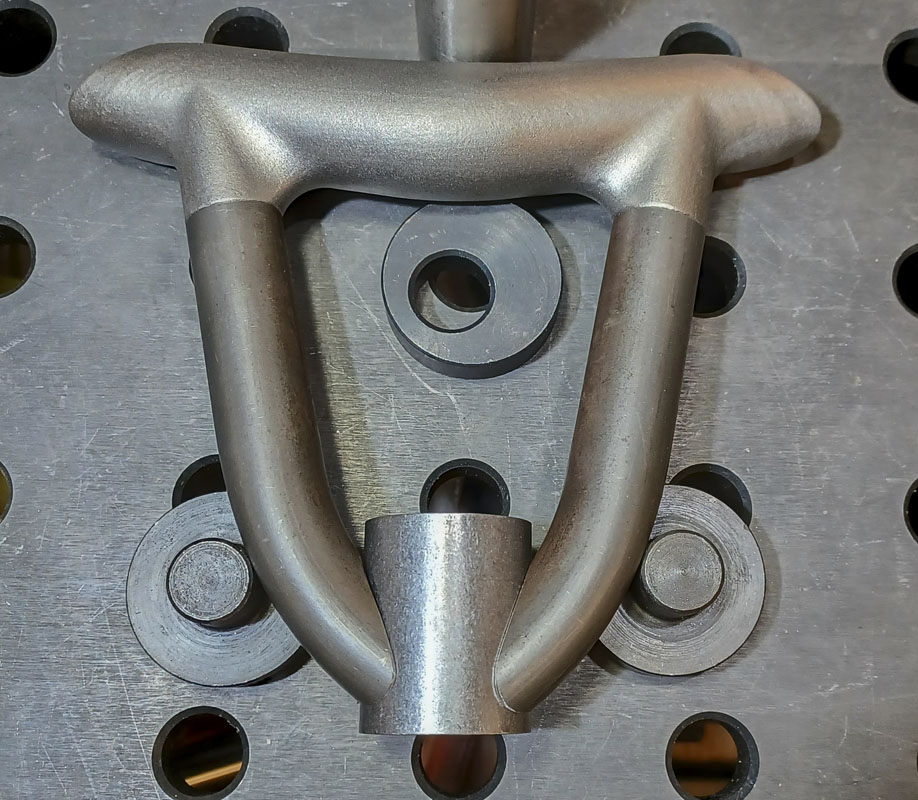
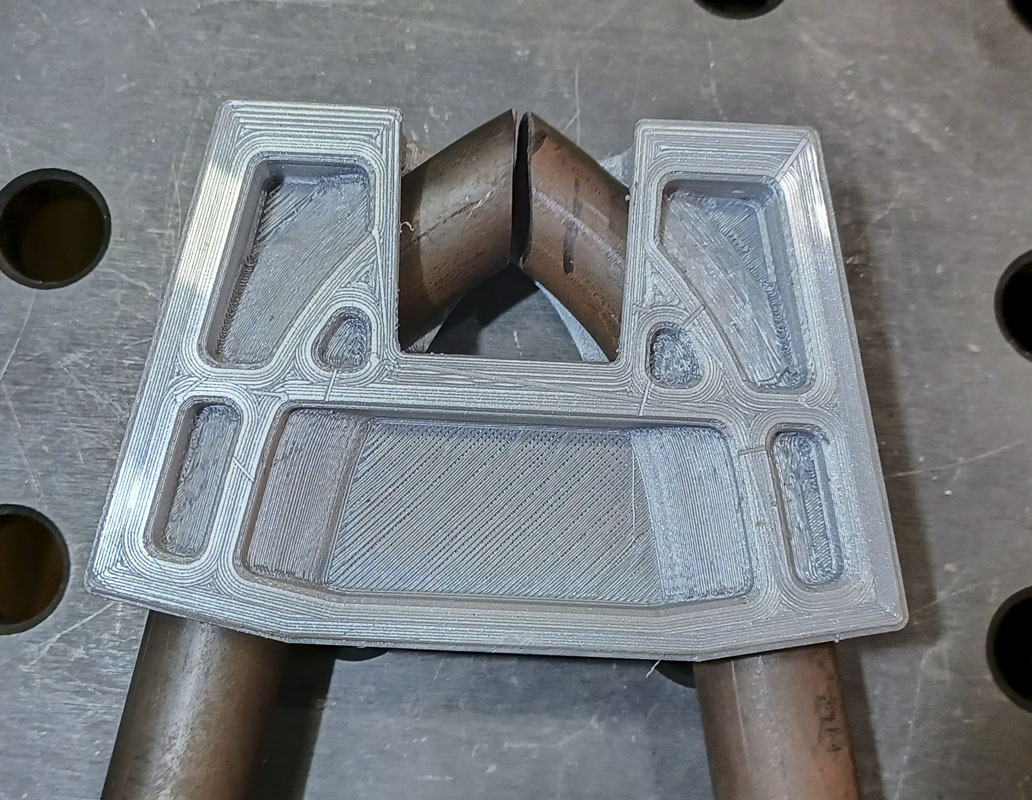
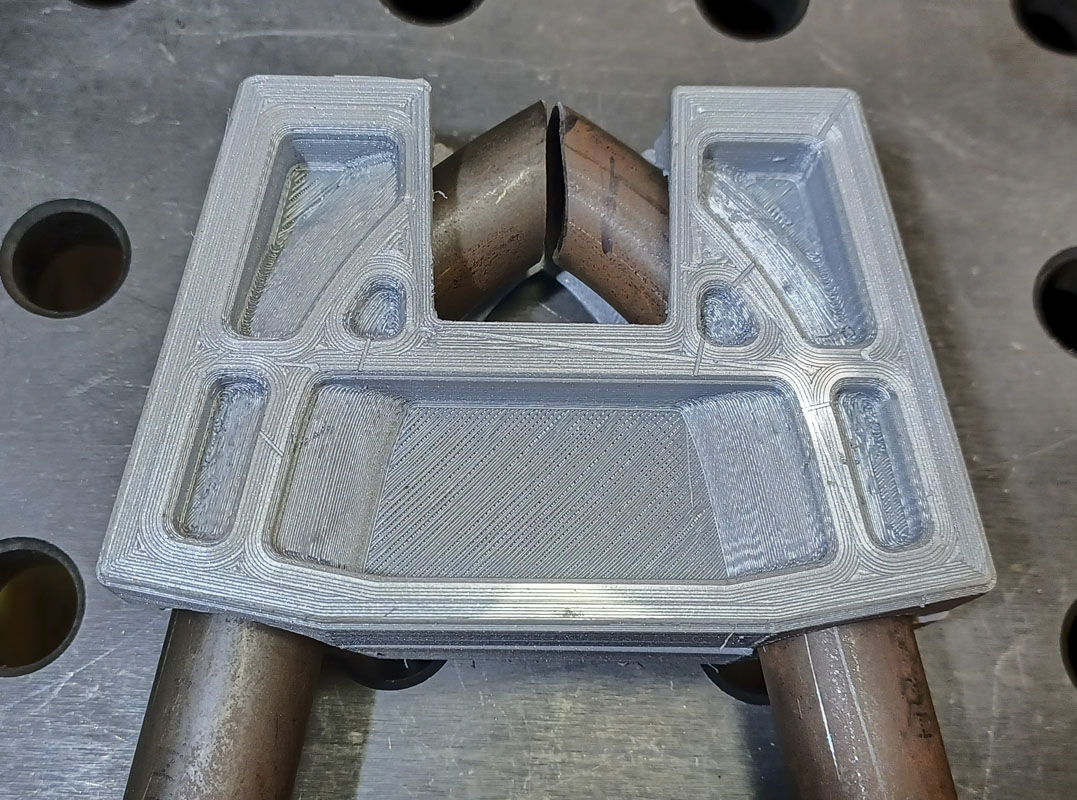
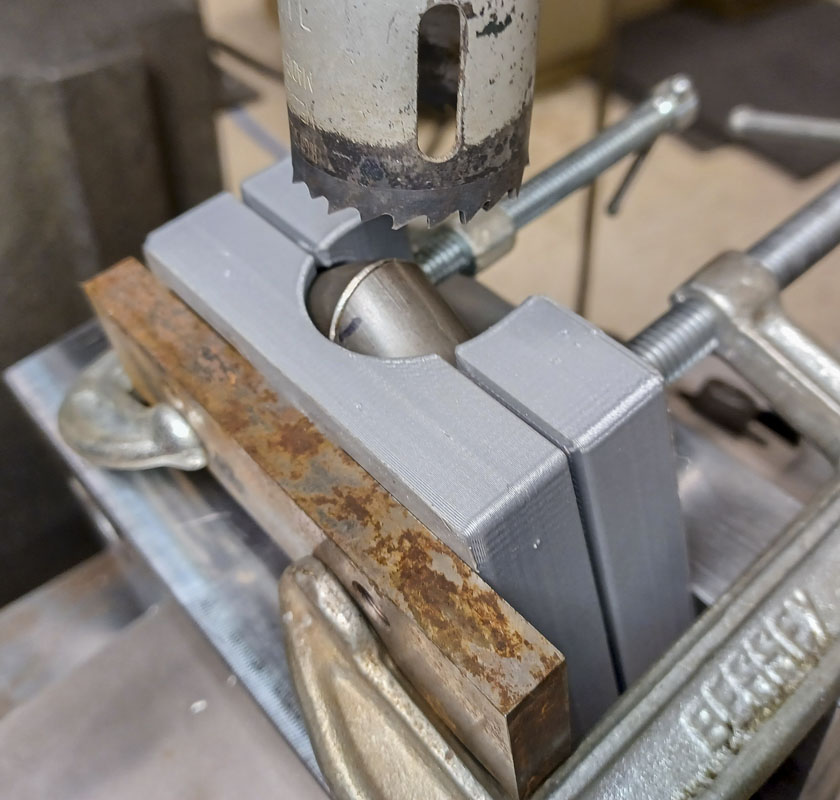
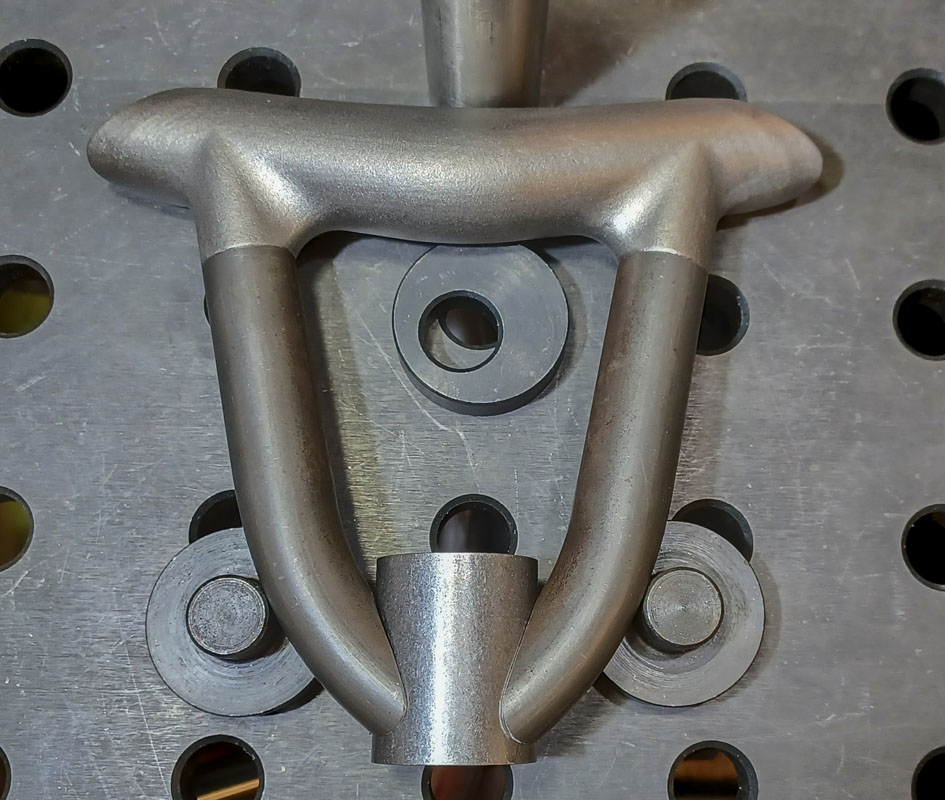
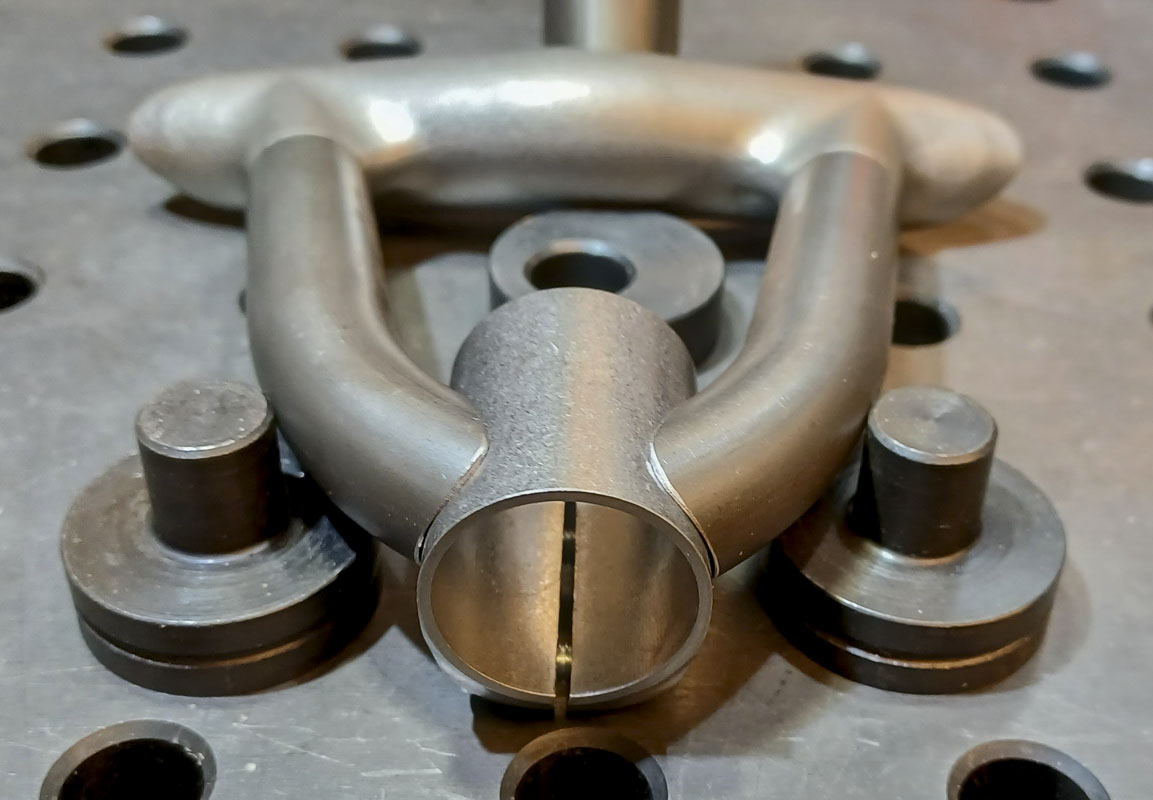
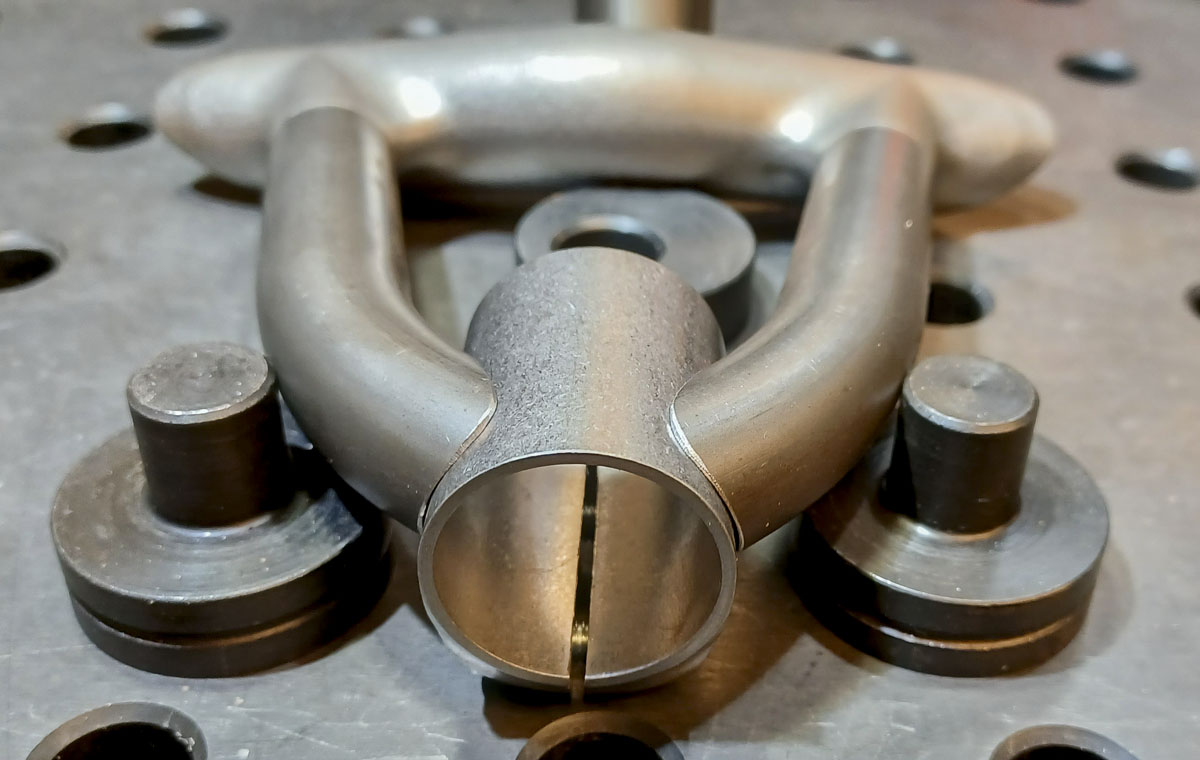
The harder problem was holding the struts when they get mitered for the steerer clamp. This is a cut that needs to be very precise even as the strut is extending into space with little support and at two angles and a clocking. Adding to this, the two struts aren’t identical. They are mirrors. That’s a difficult task.
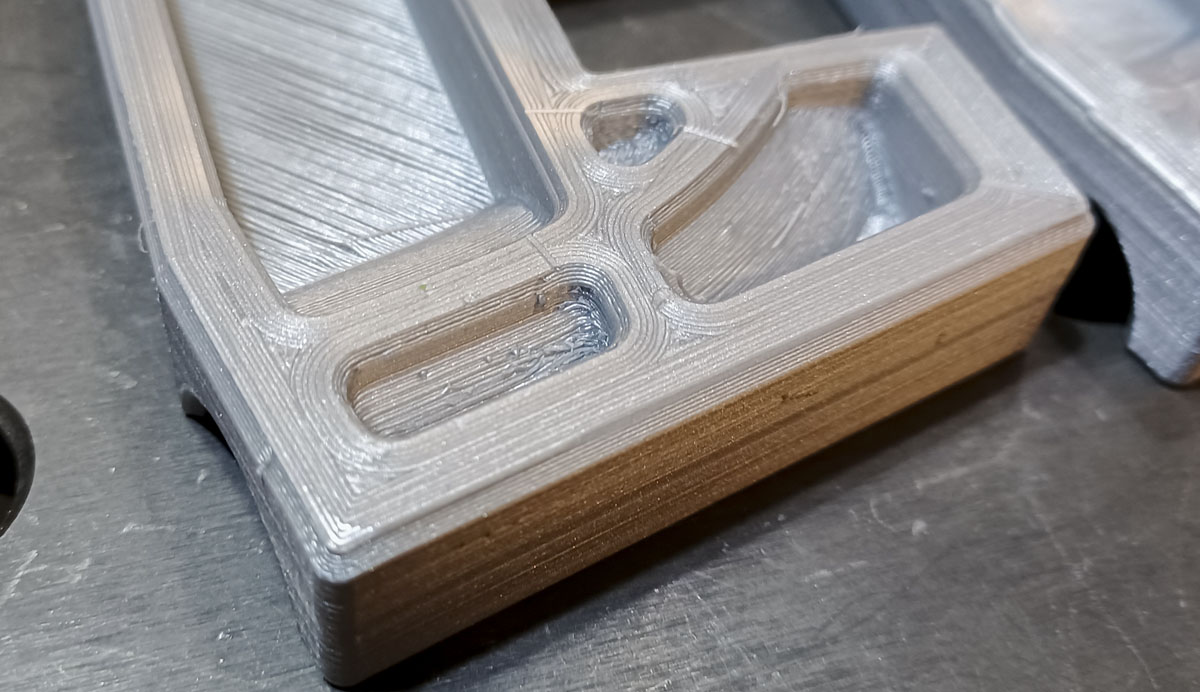
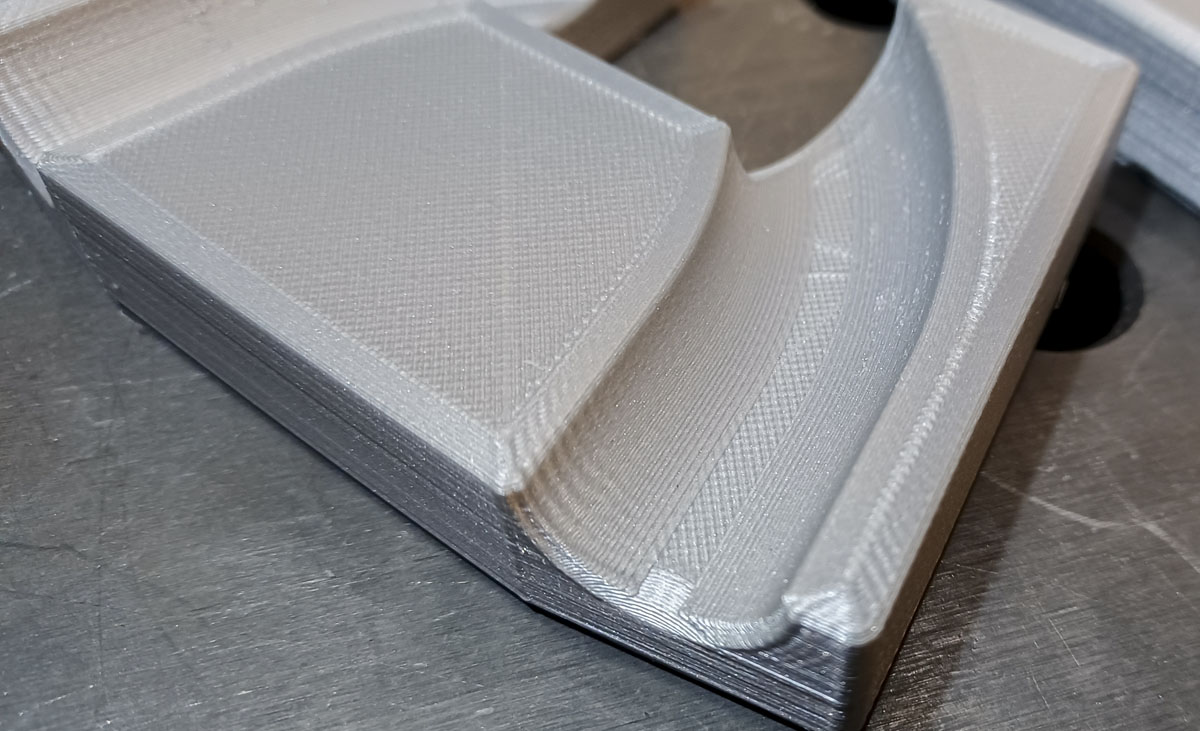
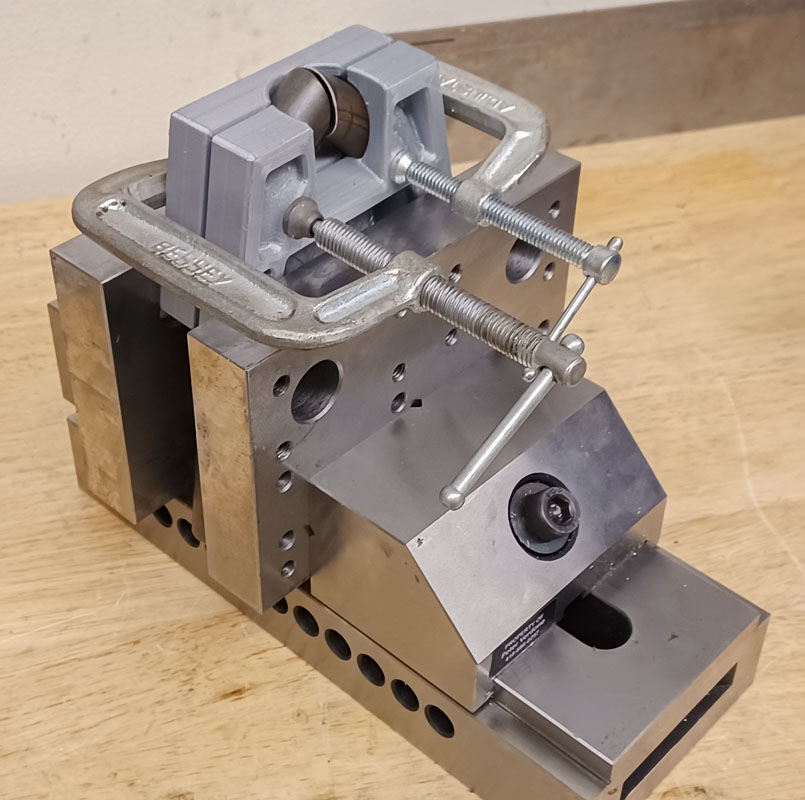
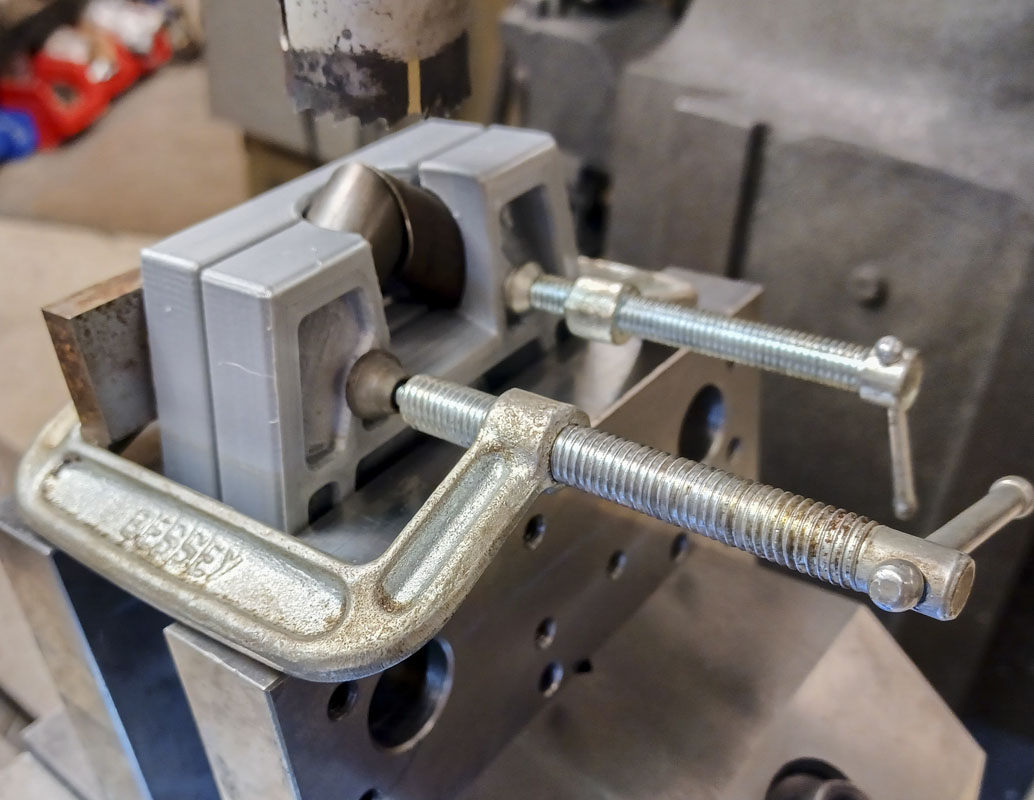
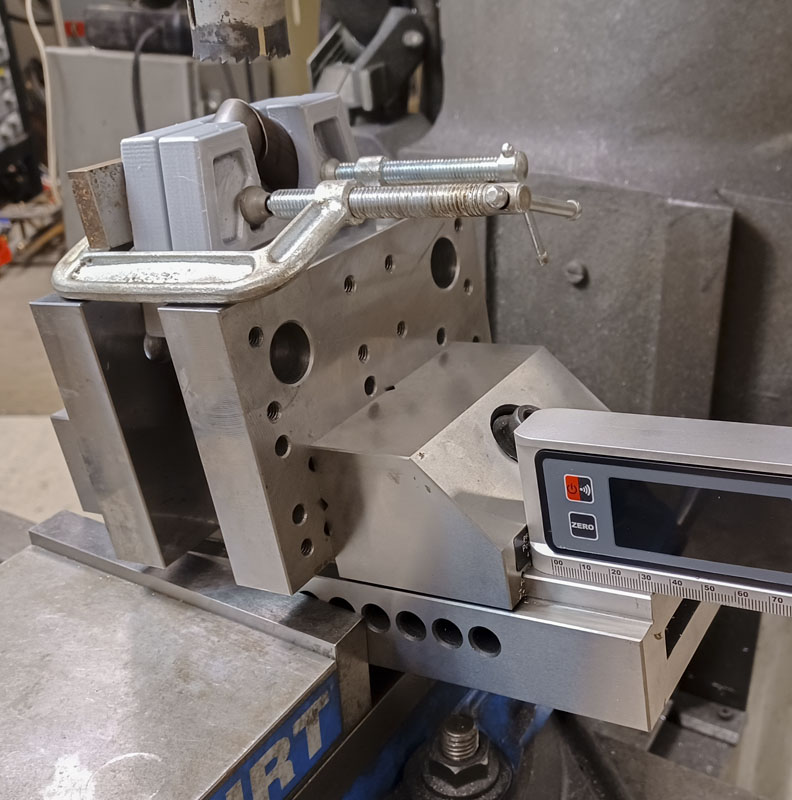
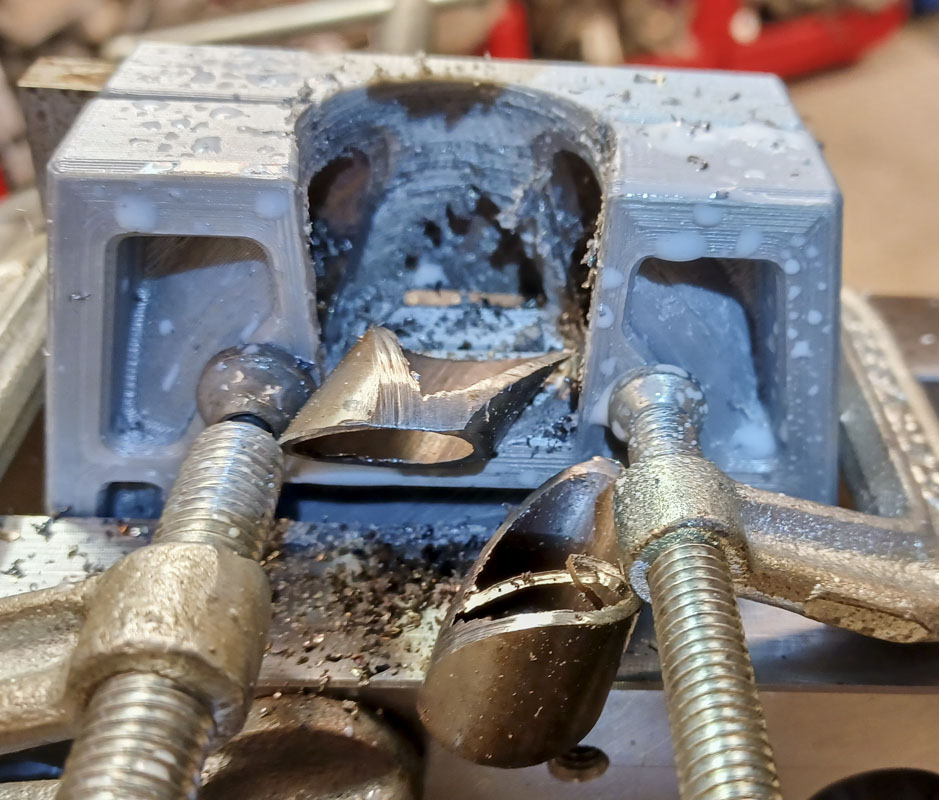
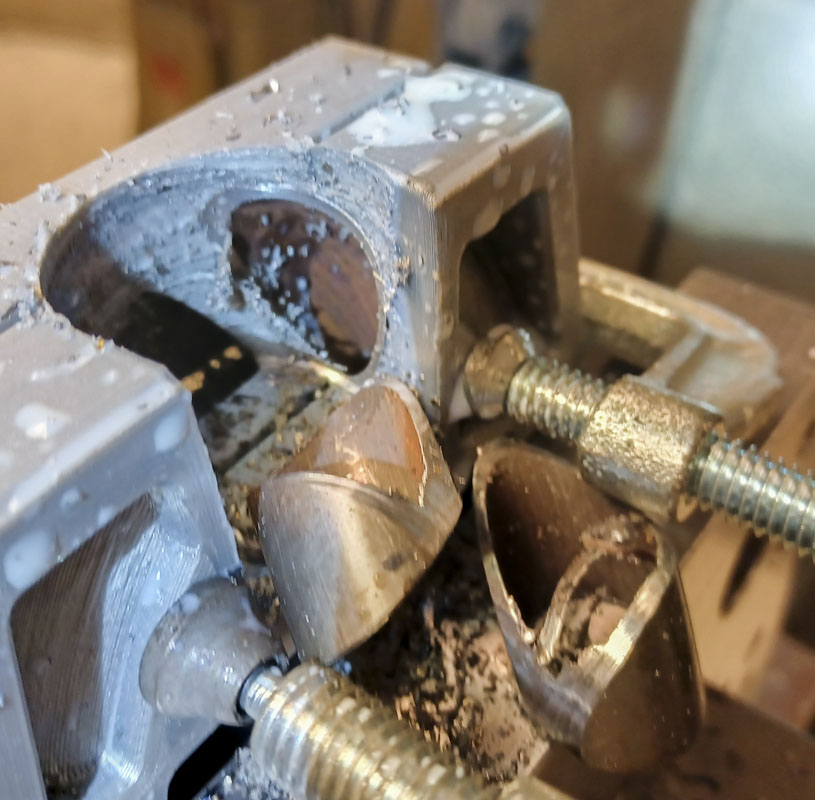
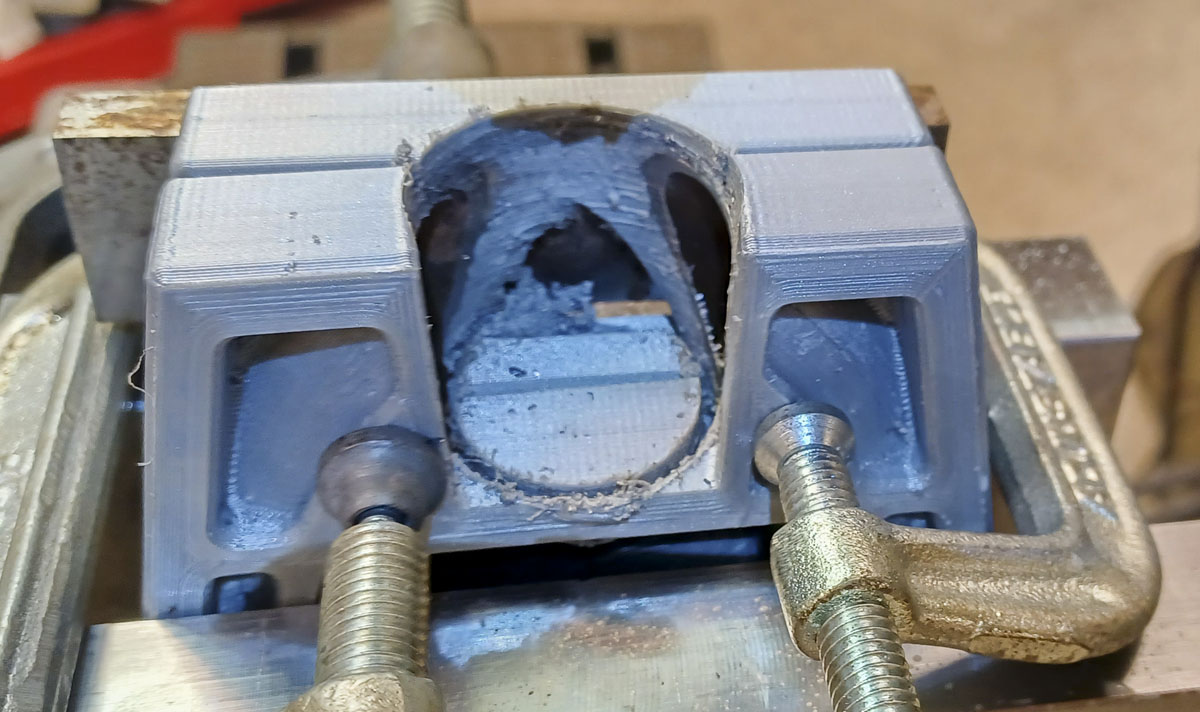
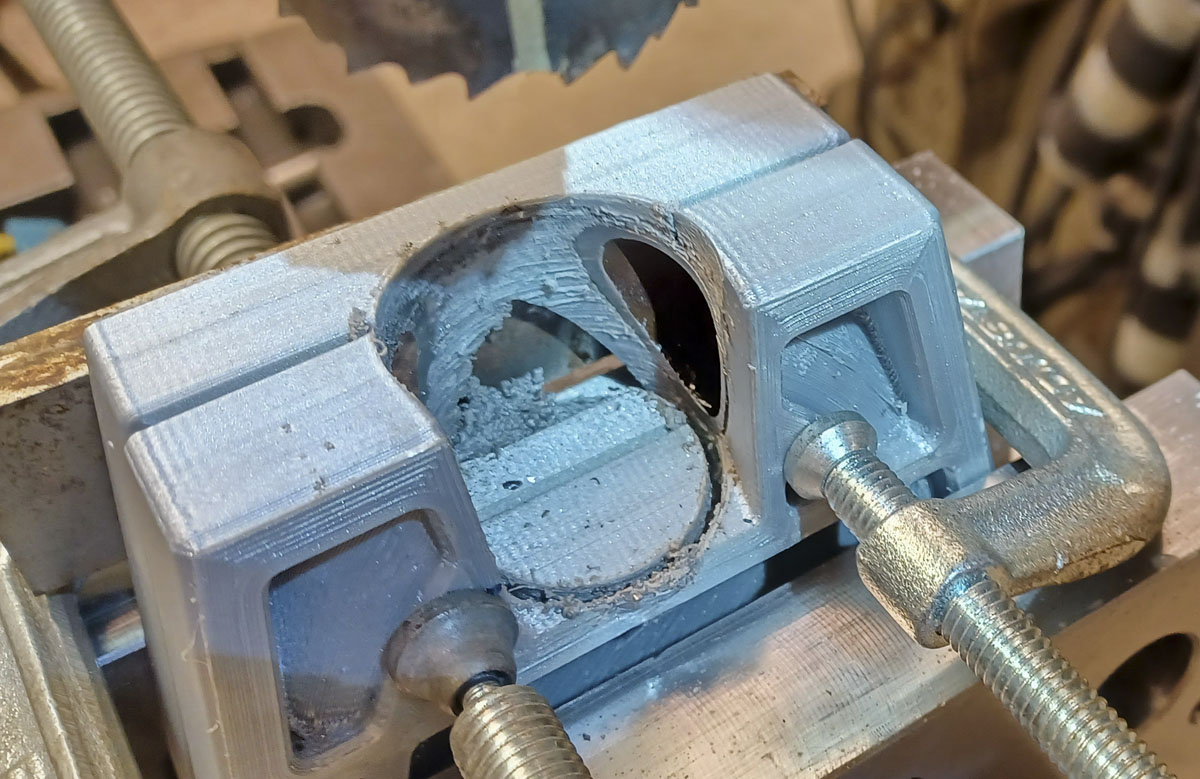
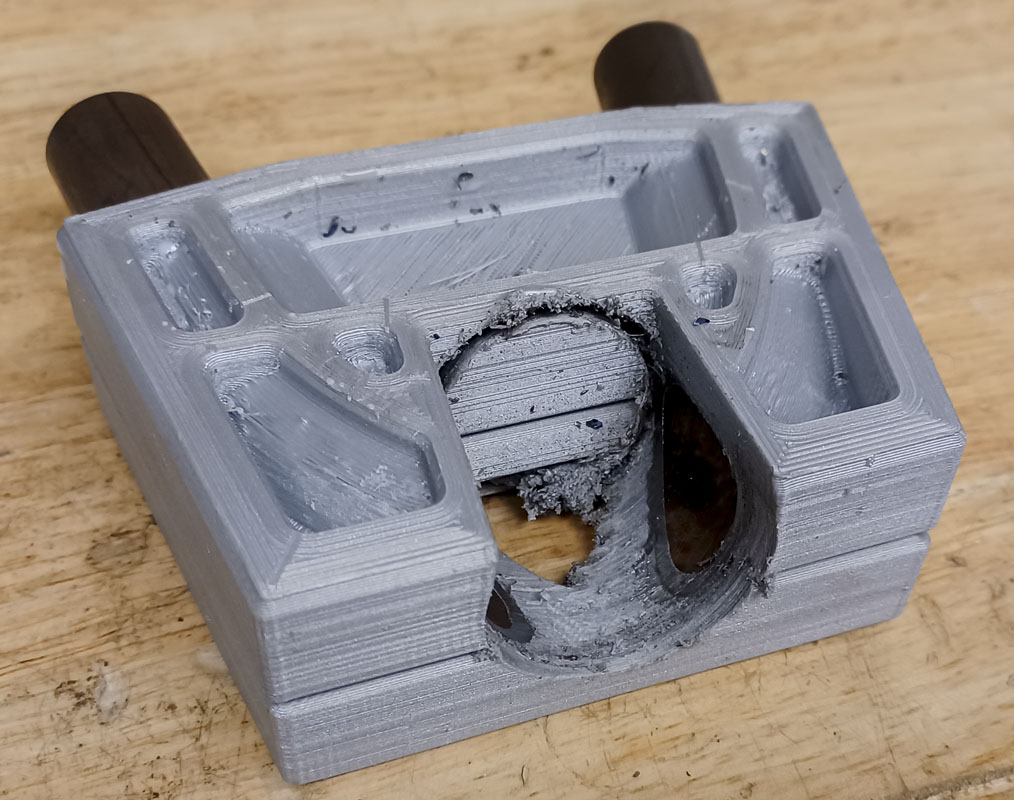
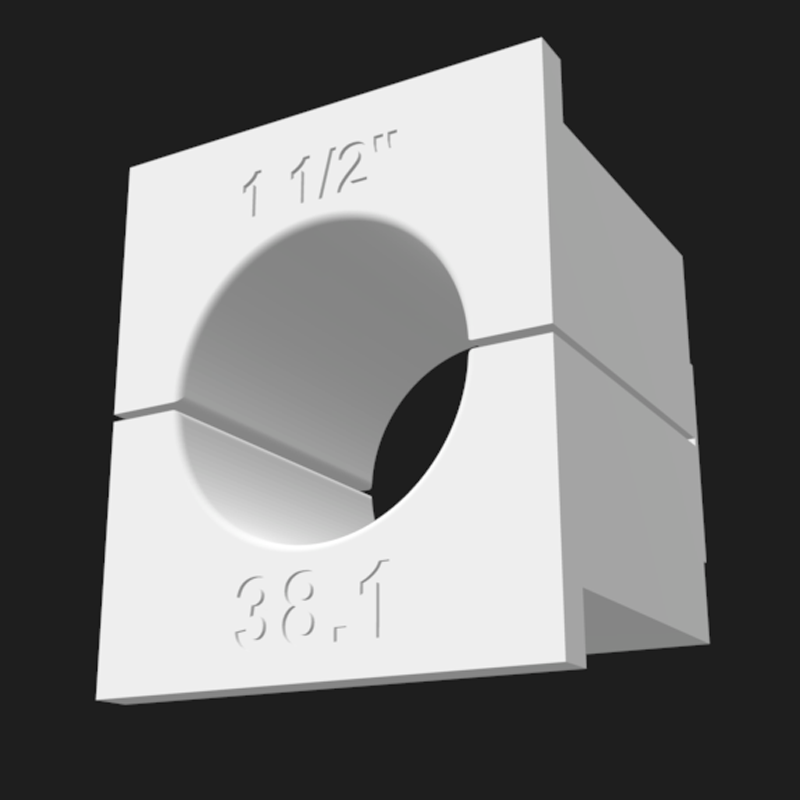
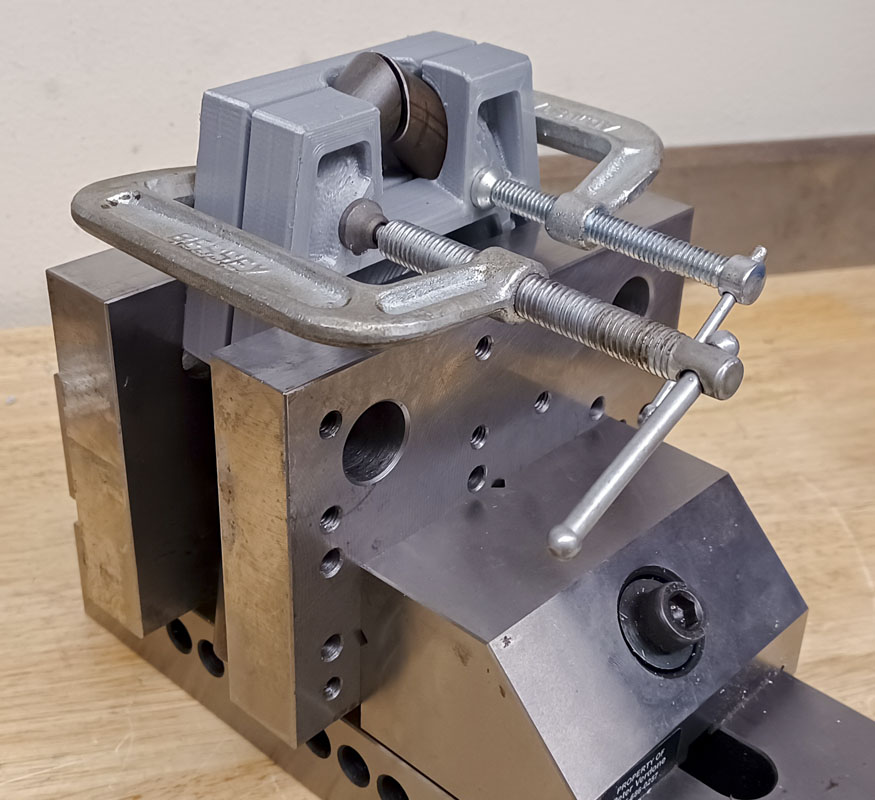
I decided that I’d take the easy way out off this to get this project over and work on a better solution over time. To make the job far easier now, I’d hold the tubes in a one-off plastic tube block so that with some quick positioning, clamping, and one angle, I’d be able to do the cut.

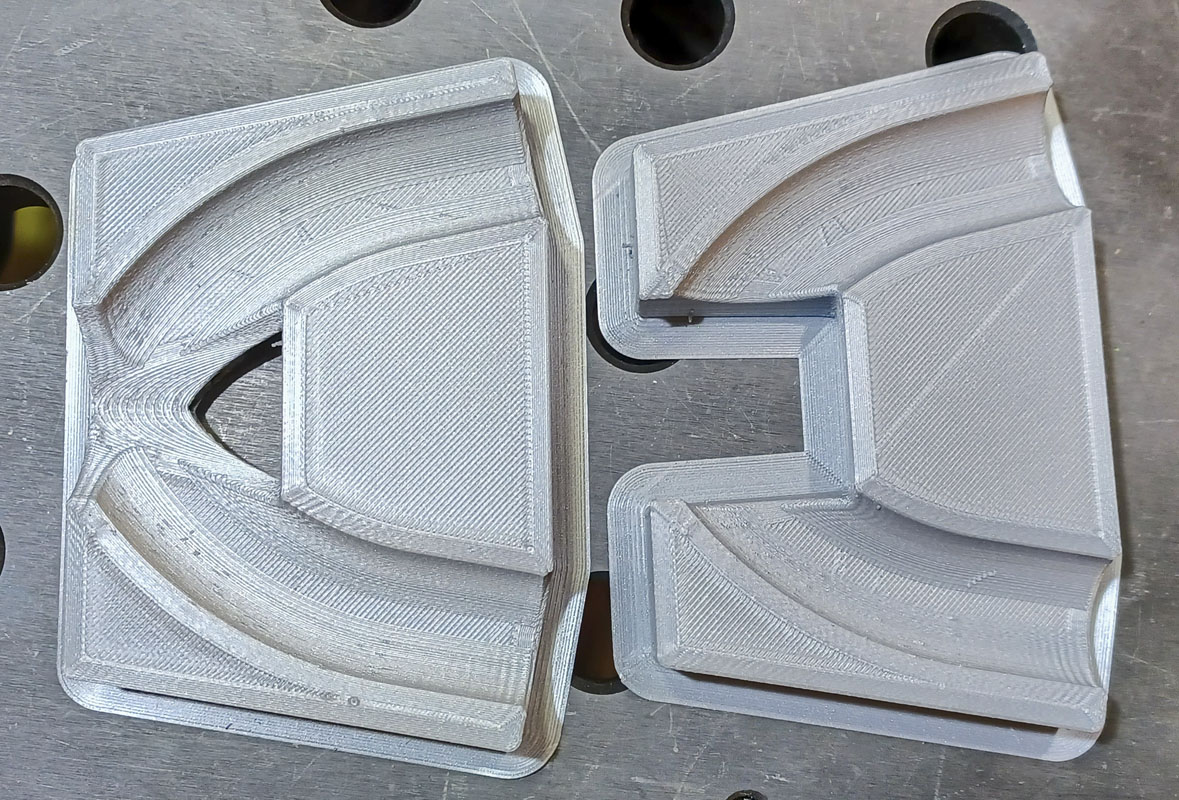
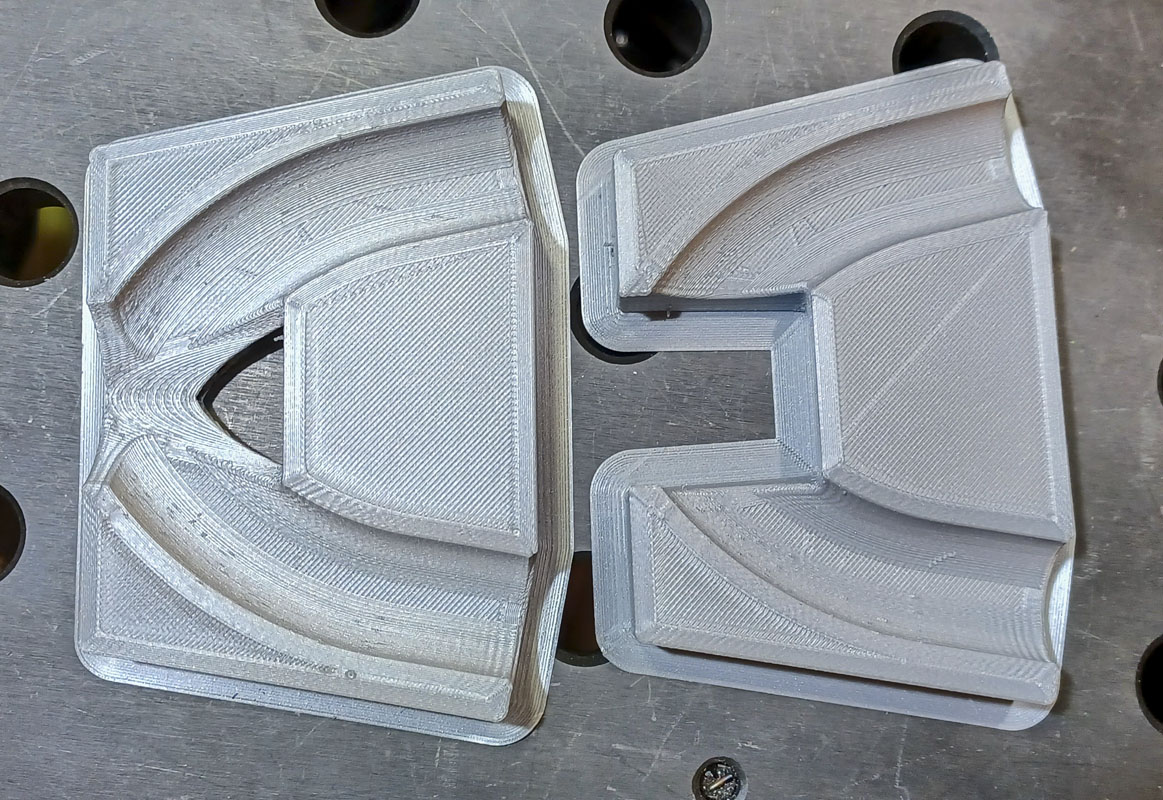
The reason for this post is in how I shaped this tube block.
I’ve seen plenty of folk print blocks to help them make bikes. This isn’t new and it’s a great solution for folks just trying to make something happen with what they have available. I’ve ben spoiled in that I typically have nice metal tools.
More, combining a printed block with a fixture design similar to my PVD WOPR fixture can make the construction of an entire bike a lot easer with a good deal of precision. Leveraging the table raster with printed holders is probably the key to the lowest cost, ‘more’ precise systems.
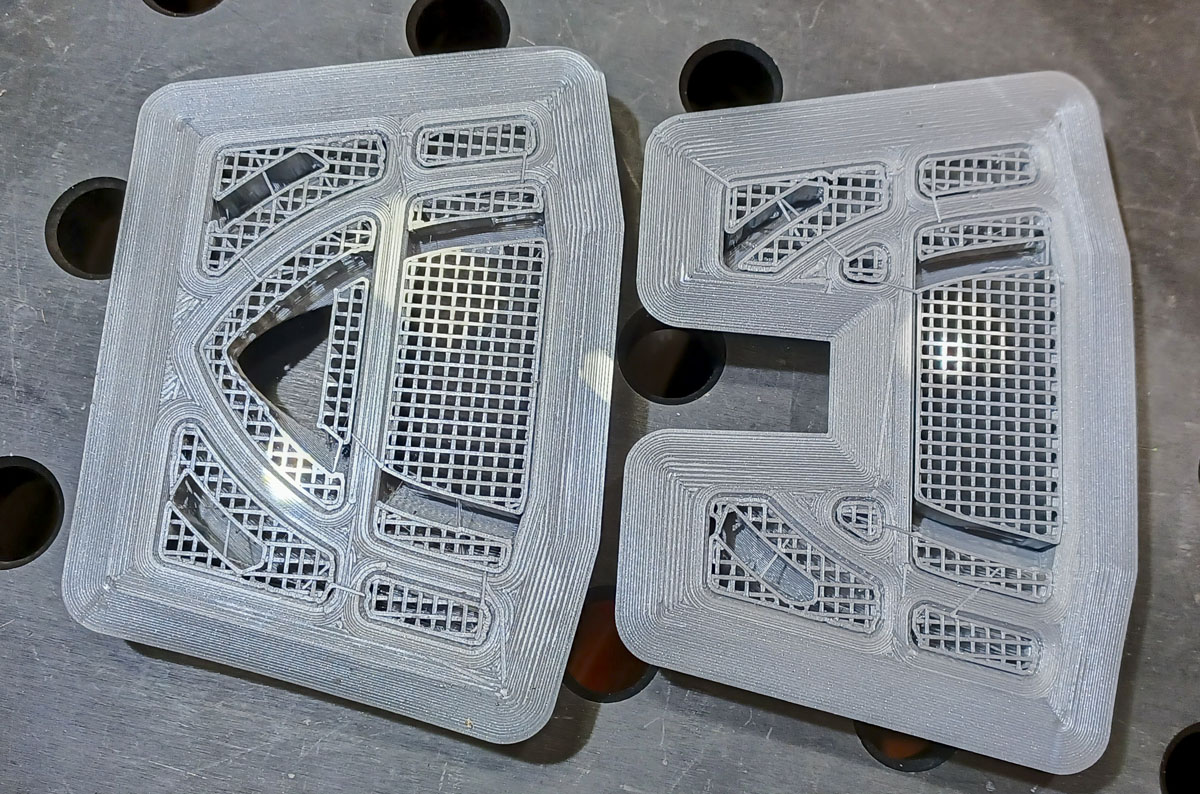
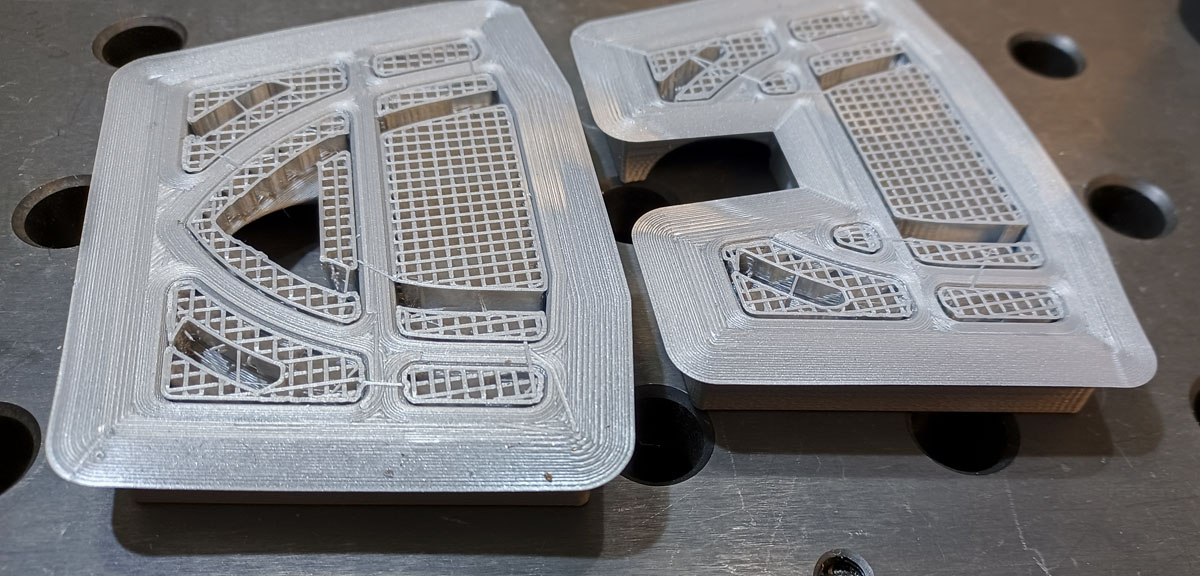
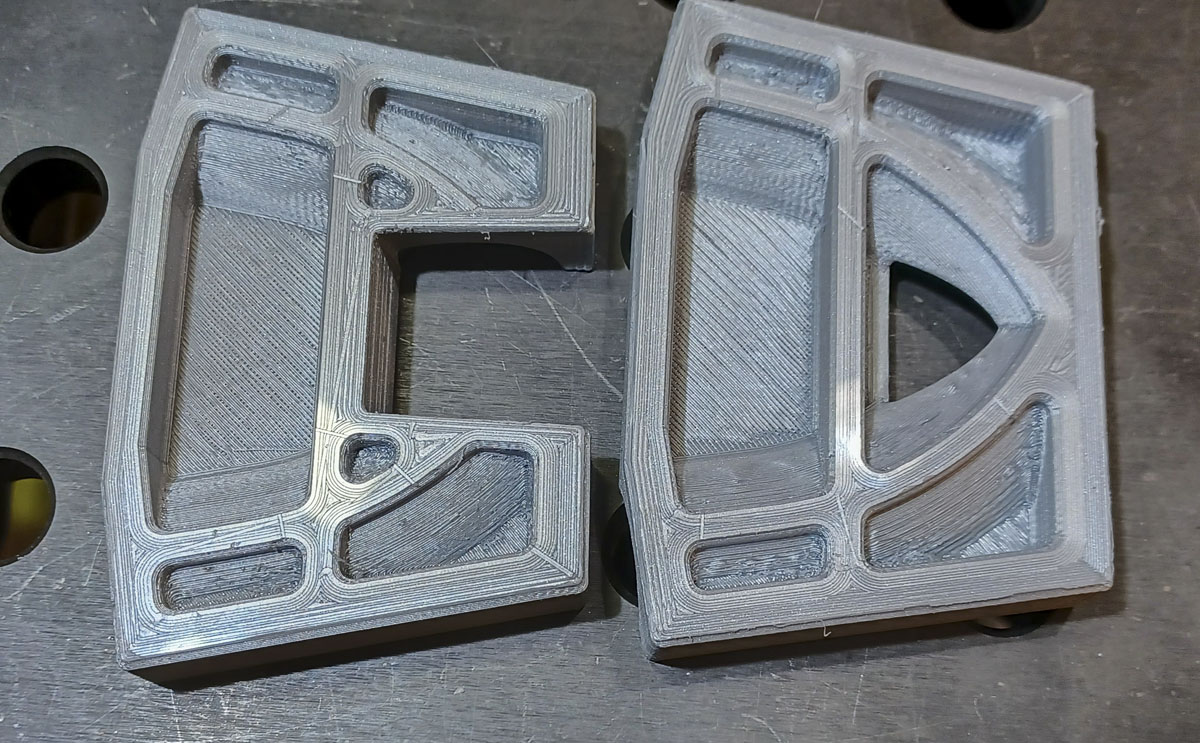
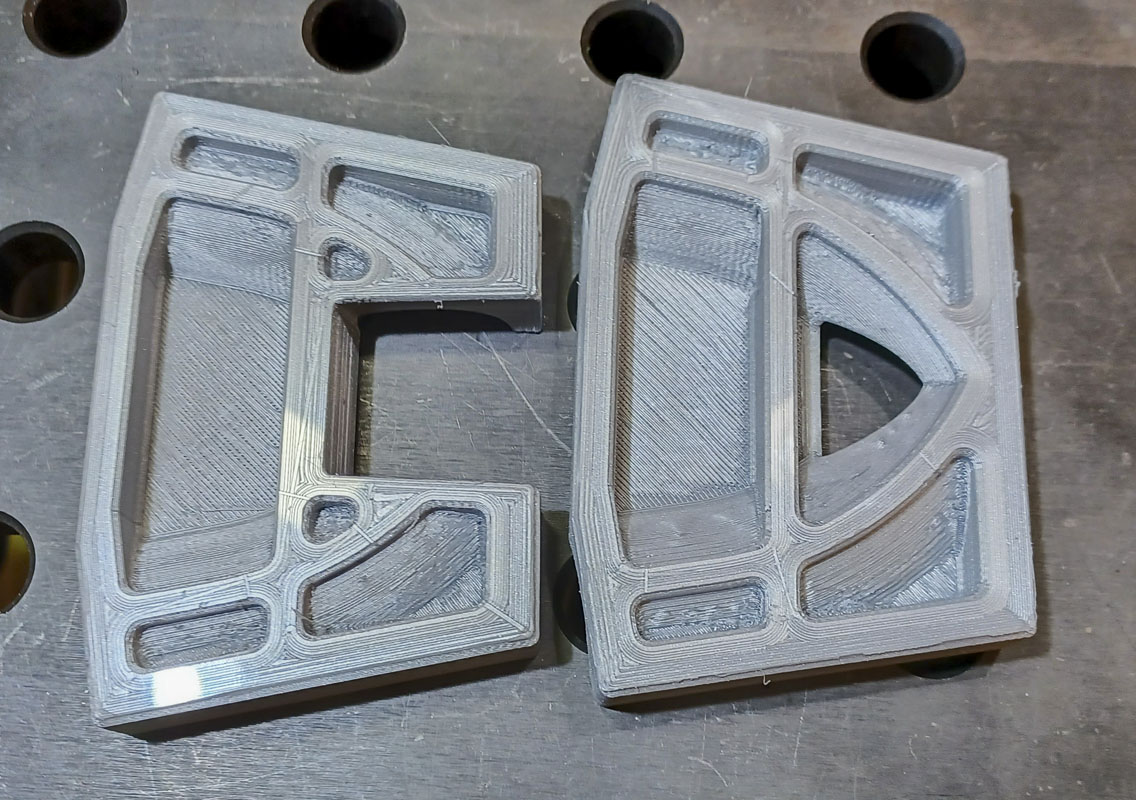
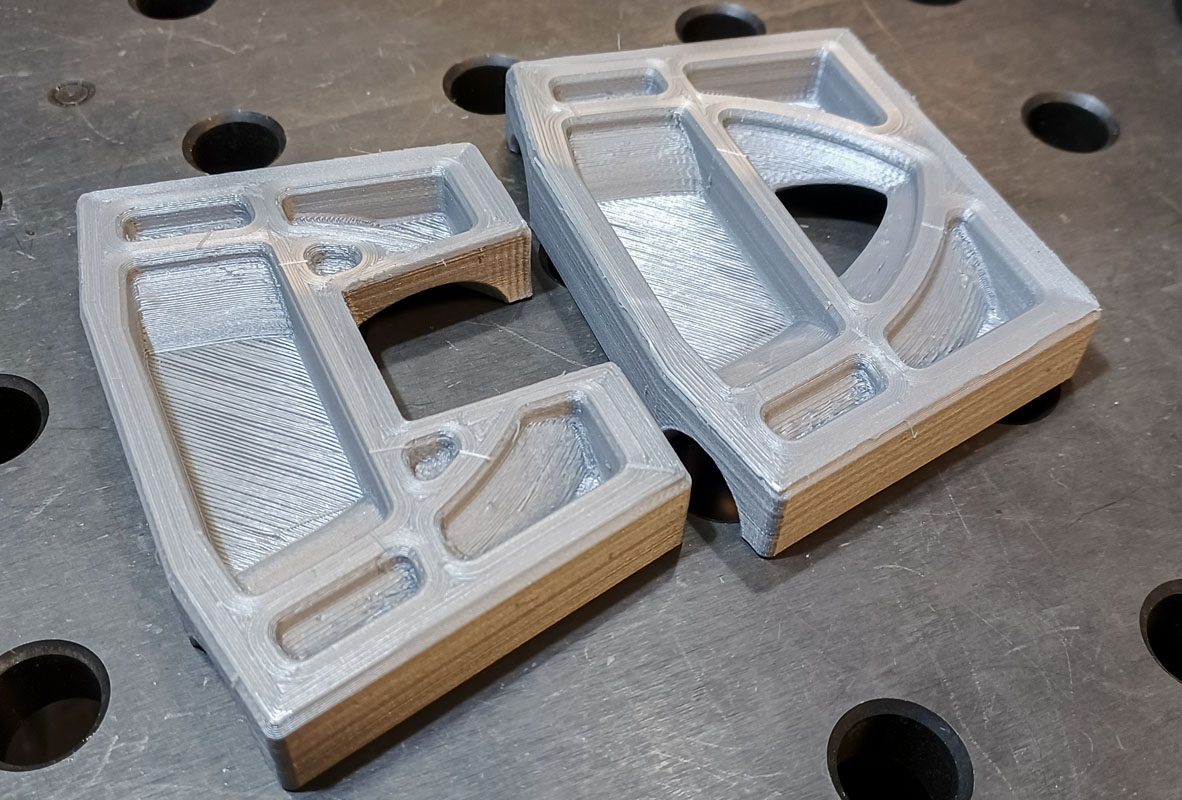
The problem that I’ve seen with many of the prints that others are doing is that they don’t truly take advantage of what printing is good at or avoids what it is bad at. The blocks are often, just copies of those that have been seen made from subtractive aluminum. That’s not good thinking. There are better designs for these that exploit what printing is good at.
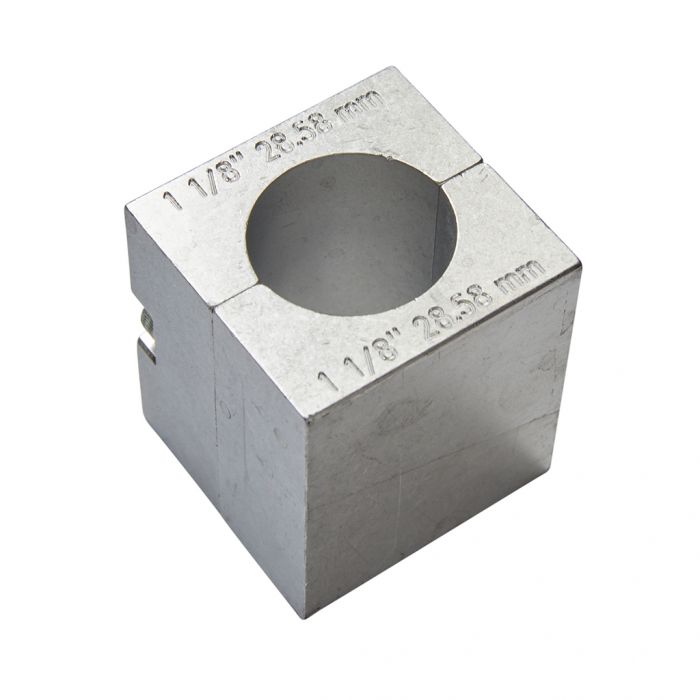
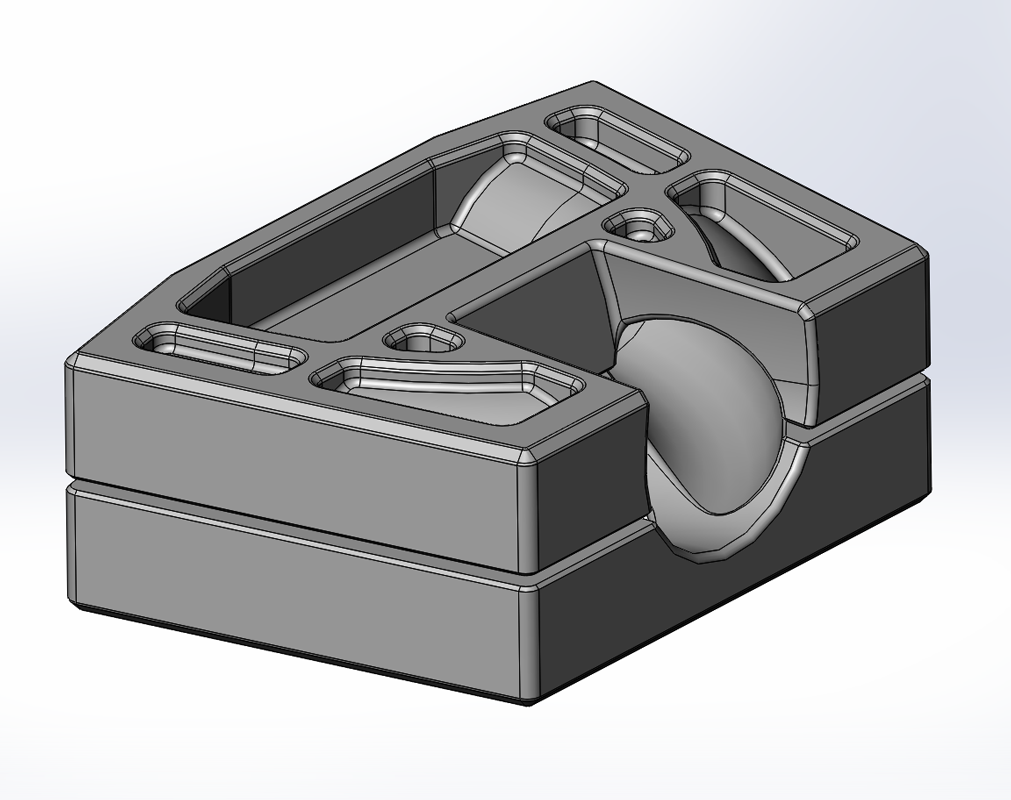
With the blocks that I made, you can see that I’ve tried to improve support in critical areas and reduce material in other areas. I wanted to speed up the print time and make the tool stronger. I also made some of the geometries good for measuring the part as it’s placement can be complex. This block could be used during the welding of a sub-assembly. I’m getting a lot of value here. I didn’t want to replicate an aluminum block.
This added a little time in the modeling but not much. I feel that this is a worthy investment for future block designs so I can just make slight modifications to this model should I need to make another.
On other projects like my skate trucks, I’ve planed well ahead and had special blocks done in the metal printing run. This makes for an awesome tool that is far stronger than any plastic part could be. Those, however, utilize far different geometries due to the material used.

This was my first plastic printed tube block and there is plenty of improvements to be made. I should have added:
- T-nut and screw holes for clamping together.
- A male/female pin mate for the two haves would have been nice also.
- Dowel pin holes.
- Refinements of the shape and material use.
- Planning better for more rigidity for the part is needed more than any other detail.
- Design with intention to bolt to a generally available flat steel or aluminum back plate.
Still, I got this done quickly and it’s going to make a difference for now. Even though I had focused on that, it wasn’t as much as I’d like. There are good and easy ways to do this, they just need to be added to the plan.
We will see how this evolves. Tools become things unto themselves and create new methods and practices.