
9/20/2006
I was coming down bofax (from Bolinas Ridge toward the Alpine Dam) on my ride home from work Wednesday night. It was a hard decending right hand turn, but one of the higher speed ones, not the koo-koo one's peppered about the run. I think that I was suprised by an oncoming car mid turn. I must have leaned the bike over a little to far suddenly while on the gas, 'cause the people in the car I hit said my rear wheel swung around at them. I really have no idea how or what went wrong, but obviously, I lost control somehow and set a brutal physics experiment into motion. In describing what I know happend and the results, the current theory is that I high sided and that is why my body was clear of the real carnage.
I hit the ground so hard, had the wind knocked out of me for about 3 minutes. I thought that I had broken all my ribs (spine side) on my right side and crushed my shoulder. My head slammed the road amazingly hard. I break (literally) about two bicycle helmets each year while mountain bike riding, so I'm pretty used to what kind of impulse a crash will put to the head and I cannot belive that I didn't get a concussion through this helmet. Mad props go out to Shoei Helmets. This is the second time one of their fine helmets has saved my life. Giro still leads at around 15-20 saves. Pro-tec is down at 1. My Arai has not been properly tested.
The people in the car that the bike hit were fine. They were in good spirits, other than the fact that I had ruined their trip to the top of Tam and they were pretty freaked out about just getting slammed into by a motorcycle projectile. My insurance will cover the damages to their car. They even gave me a ride home and suffered through all my bad jokes about the situation and the fact that I was more interested in getting pictures taken than how broken my body or bike may be. Gotta get pictures, right?
After a few days, it lookes like I escaped with a lightly separated shoulder, lightly skinned knees, and a general all-over body bruise. Considering the situation, I feel like the luckiest guy alive. In the end, I'm going to be fine.
Initial Damage Assesment:
My bike is shot. assuming the frame is still good, it will need new forks, plastic and lights. Plus a new intake tract. My bean counters are working on that now. If the Ebay gods shine on me, this will put me out about $1500. Time will tell.
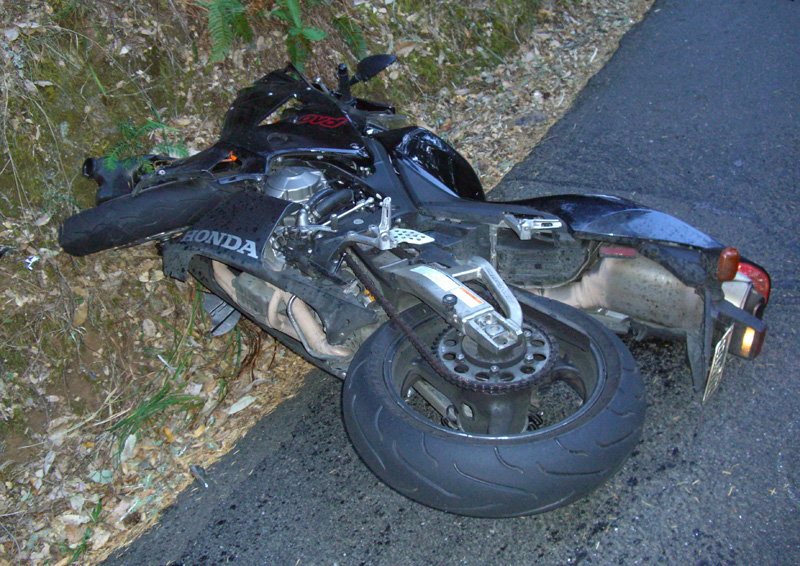
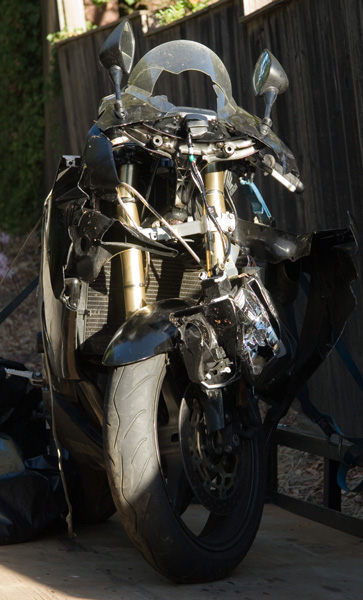
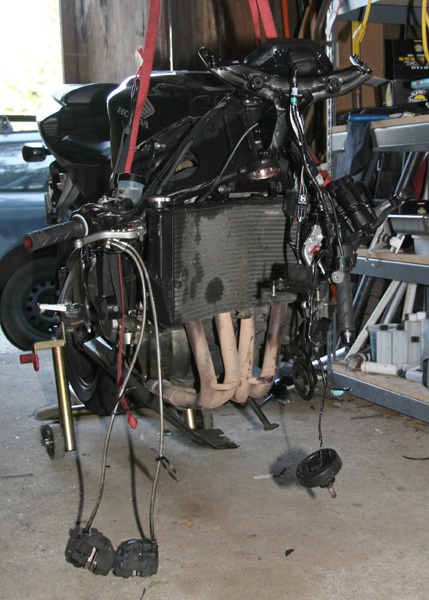
The bike as it layed imediately following the crash.
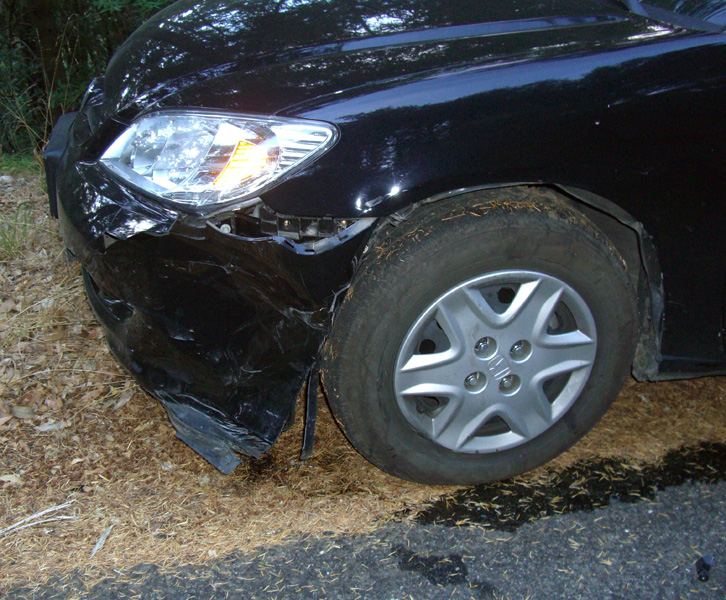
A little damage to the front left quarter of the car I hit. The wheel looked a little out of allignment.
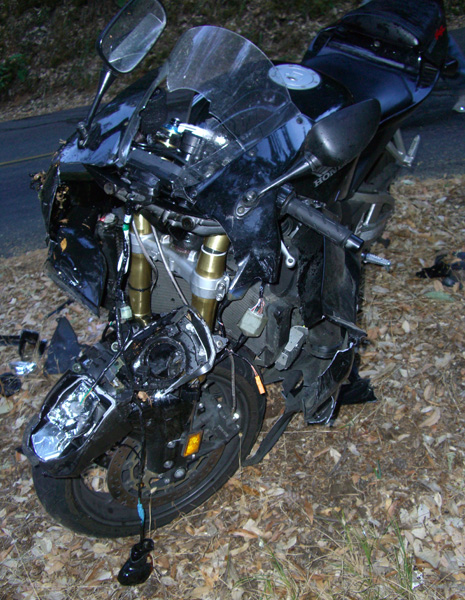
Note the broken forks. Fork oil was all over the bike and the road. All the other fluids seemed intact. This is the bike after we moved it to the side of the road. It looked like a bomb when off. Bits of plastic were everywhere.
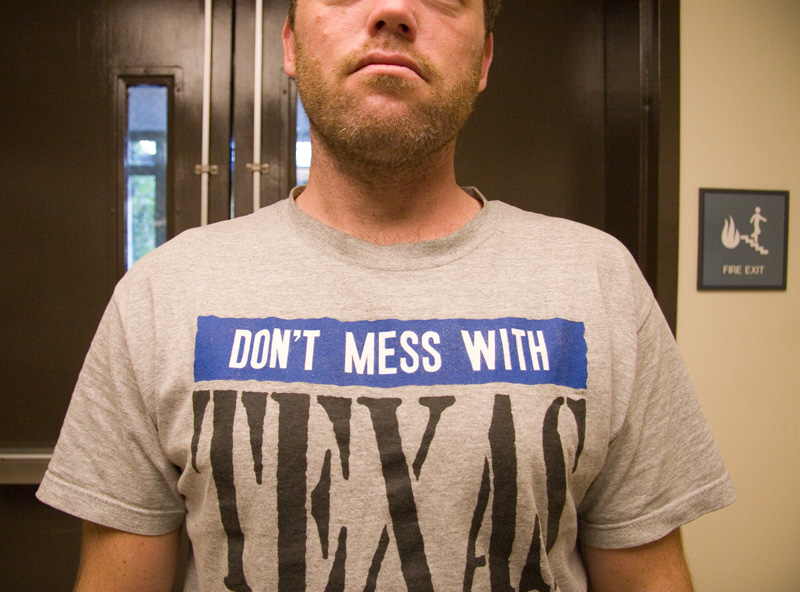
Separtation of my right shoulder. Note it's lack of definition. After about a week, it starts feeling a lot better.
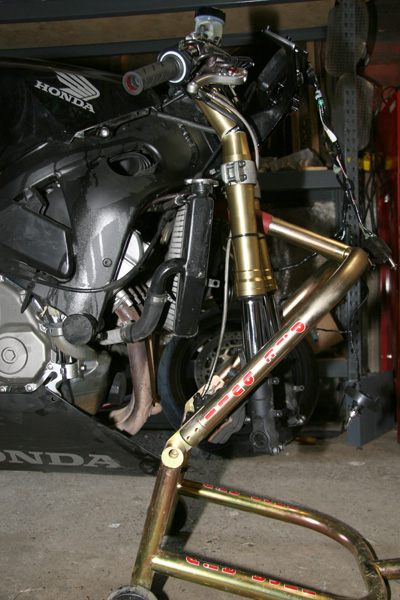
The bike on the trailer the next morning. The front wheel has a tiny ding in it. It will be straghtned easy enough.
A filthy mess.
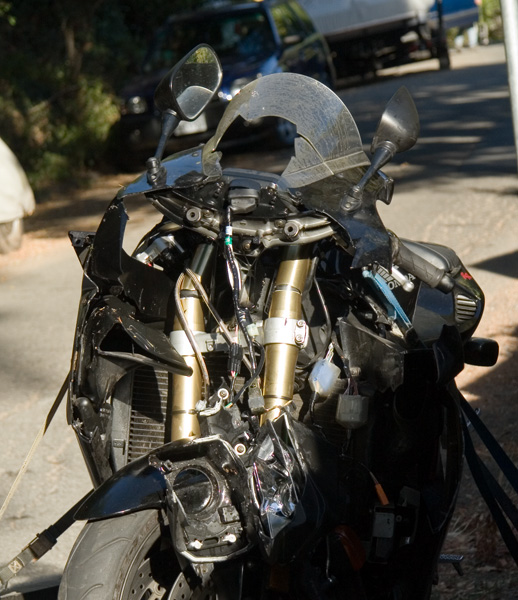
All fucked up. You can see the head bearings peeking out of the head. This is what is so weird, the forks are broken BETWEEN the trees! Have you ever seen that?
I may have the frame alignment checked in a while. GP Frame and Wheel is close bye in Napa, but until I get the front end together, the bike is a little hard to move. Also, I need to get the bike commuteable, so the full alignment may have to wait until a more convienient time.
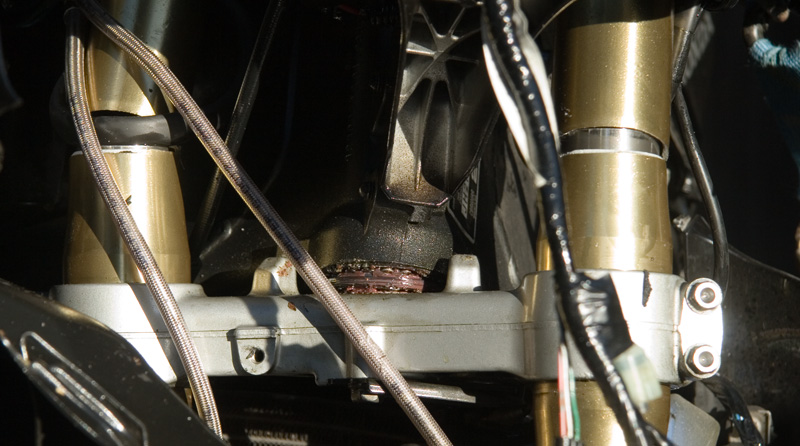
The Steering Head
In my discussion with GP Frame and Wheel, they say that the honda frames tend to elongate at the top head bearing and crush the bearing races into the lands when running stock head bearings. Good thing I was runing upgraded head bearings. I checked the head tube. The top head bearing race does not fit tight any longer. The hole is ROUND, but not a true press fit, more of a slip fit. I will reinstall the bearing using some retaining compound. The bearing lands apear to be in fine shape. Lucky again. Everyone agrees that modern aluminum frames will loose alignment in any crash. Some of this is tolerable, some is not. A ride test will tell how critical it is to get the frame realigned. I will do this in a few weeks.
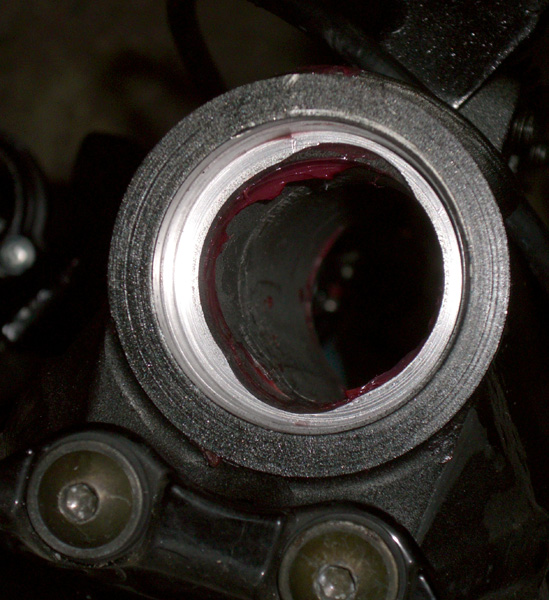
Things look good at the top of the head. The hole is slightly larger, but useable and round. Retaining compound will work just fine.
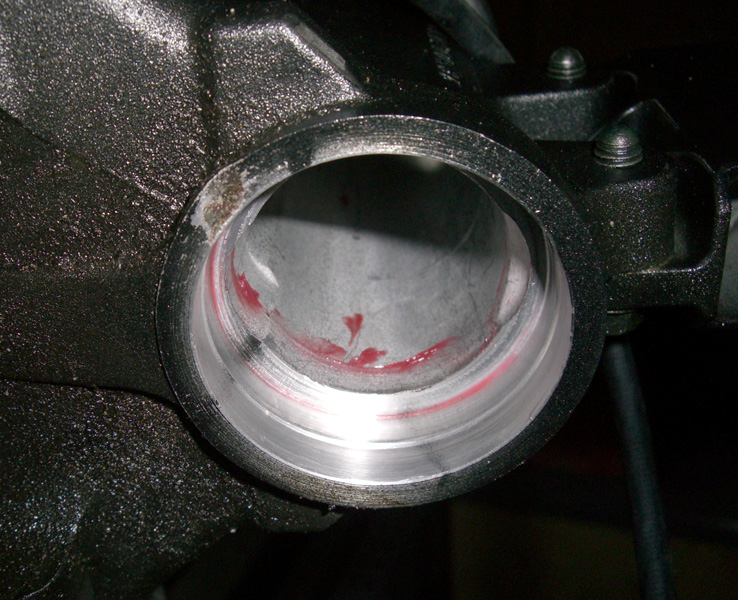
The bottom of the head appears to be in perfect condition. Cool!

Hit so hard the races of my fancy tapered rollerbearing headset were pitted.
| Bearing No. | Boundary Dimensions |
Basic load ratings |
Mass |
|||||||
Dynamic |
Static |
|||||||||
d |
D |
T |
B |
C |
R |
r |
Cr |
Cor |
w |
|
mm |
min |
min |
KN |
KN |
kg |
|||||
| 32005X | 25.0 |
47.0 |
15.0 |
15.0 |
11.5 |
0.6 |
0.6 |
28.8 |
34.1 |
0.112 |
| 32005XR | 25.0 |
47.0 |
15.0 |
15.0 |
11.5 |
3.7 |
0.6 |
28.0 |
34.1 |
0.116 |
| 32005XR/26 | 26.0 |
47.0 |
15.0 |
15.0 |
11.5 |
3.7 |
0.6 |
28.0 |
34.1 |
0.116 |
| 32005XRZ | 25.0 |
47.0 |
15.0 |
15.0 |
11.5 |
3.2 |
1.0 |
28.0 |
34.1 |
0.116 |
| XAA32005 XYAA32005X |
25.0 |
47.0 |
15.0 |
15.0 |
11.5 |
3.3 |
1.0 |
28.0 |
34.1 |
0.111 |
| 32006X | 30.0 |
55.0 |
17.0 |
17.0 |
13.0 |
1.0 |
1.0 |
38.0 |
46.4 |
0.170 |
The bearings used in the kit are shown above in bold. They were sourced from KML Bearing. It is very important that the 32005XR/26 not be confused with the other 32005 bearings. It is the only one with a 26mm ID. The 3.7mm radius is not the biggest concern for the aplication for which this bearing is being used, but beggers cannot be choosers and this is a very rare bearing. The All Balls part numbers for these two bearings is 99-3519 and 99-3520.
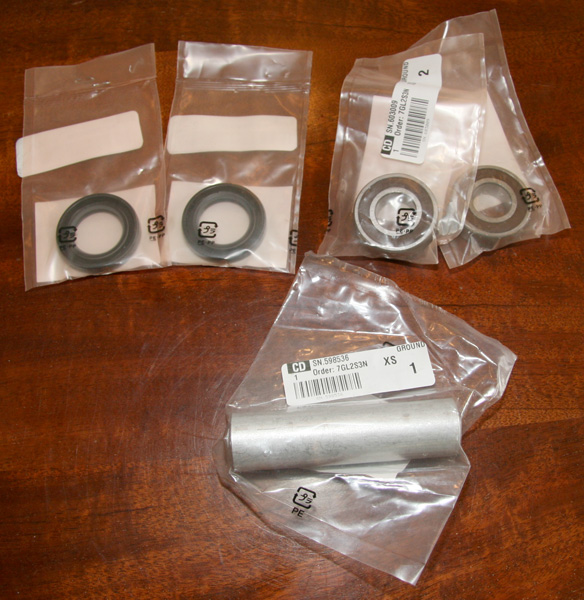
The two seals that came with the kit are sourced from Clark Seal, LTD. The two seals are marked as CSL CY-32006 JR and CSL CY32005X. The part numbers from All Balls are 33-1003 and 33-1001 respectively.
It is very important to install the seal onto the bearing before installation. This is especially important for the lower bearing as you will no longer have access to it once installed. The lips of the seal are a tricky bit.
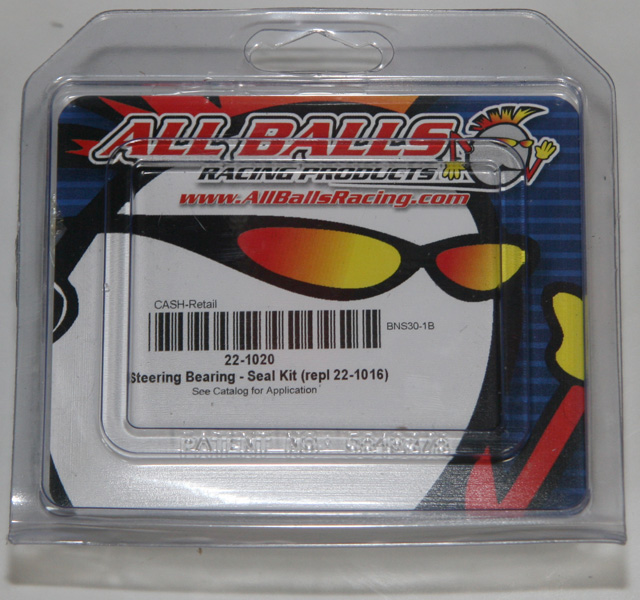
The new upgrade kit.
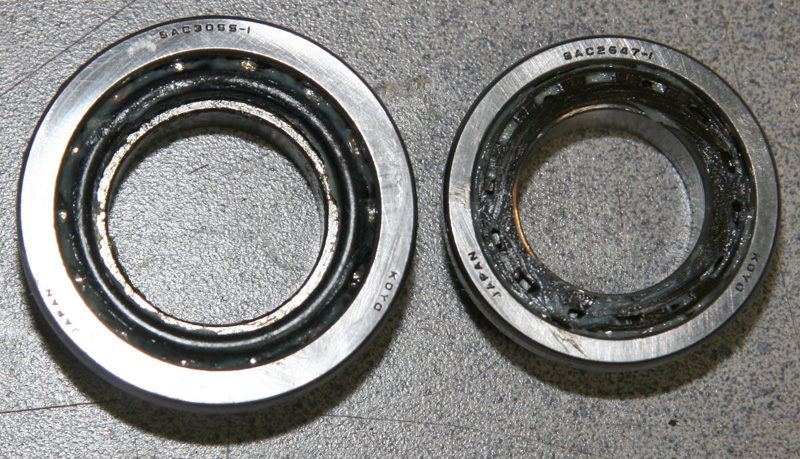
Stock bearings. Koyo Seiko #SAC3055-1 & SAC2647-1
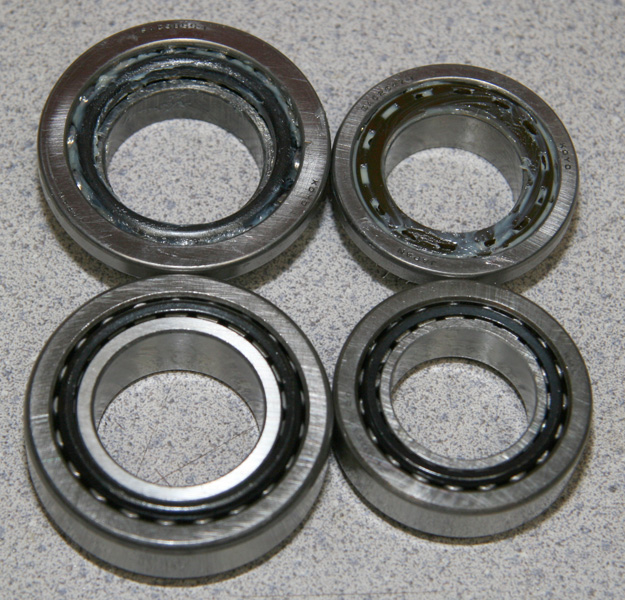
Upgrade bottom, stock top. Outside dimentions were exact matches.
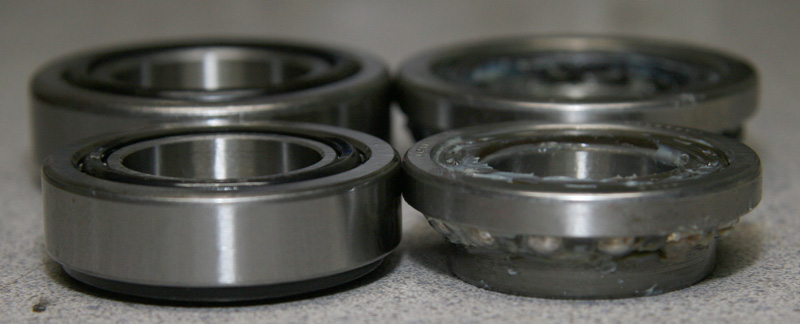
Upgrade left, stock right. Outside dimentions were exact matches. Note how much more surface area to meet the head bore on the upgrade bearings. Having the upgrade bearings in my bike during the crash is probably what saved my frame, or at the very least, saved me a lot of money reparing damaged bores.
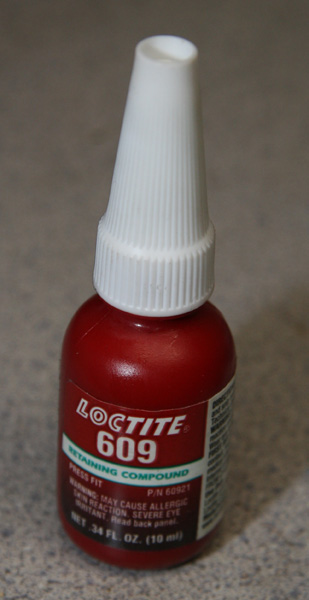
Loctite retaining compound was used to install the top cup. The top race changed to a slip fit from the crash. The retaining compound will hold the race as solid as a press fit.
My first choice would have been Loctite 641, but it was not available as readily as 609. So I ended up using 609. It should be fine. I will see if the race developes play or if it is too difficult to remove when the time comes.
Below are the retaining compound options available from loctite:

OEM head bearings nuts are torqued to 35 ft/lbs. In discussions with the guys at All Balls Racing, they say that the upgrade roller bearings can be torqued up to 5 ft/lbs more than stock. I had had the upgrade bearings installed to 35 ft/lbs before the crash. I set the nut this time to 40 ft/lbs to see the difference.
The Fork and Trees:
The heart of the damage. This will go in my trophy case.
The sliders may be fine. I will check them at work. Nice spares.
The bike stripped of all the busted shit. This was a sad sight. I'm glad the bike is back up again.
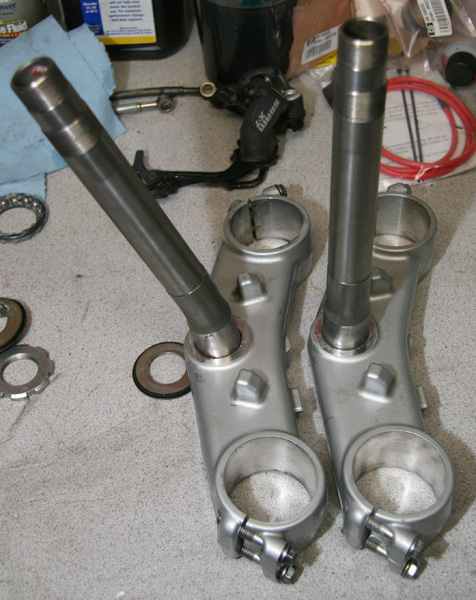
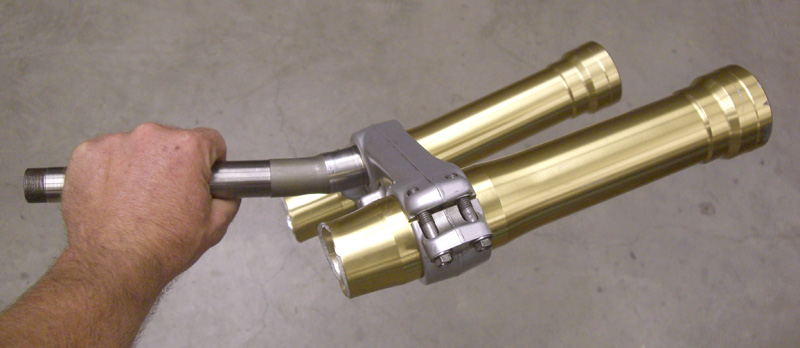
The bent tree next to a straight tree. Ouch!
Once I had the head bearings and the new lower tree replaced, I could assess the top tree. The left side was fine.

The right side had been bent. Top tree is junk.
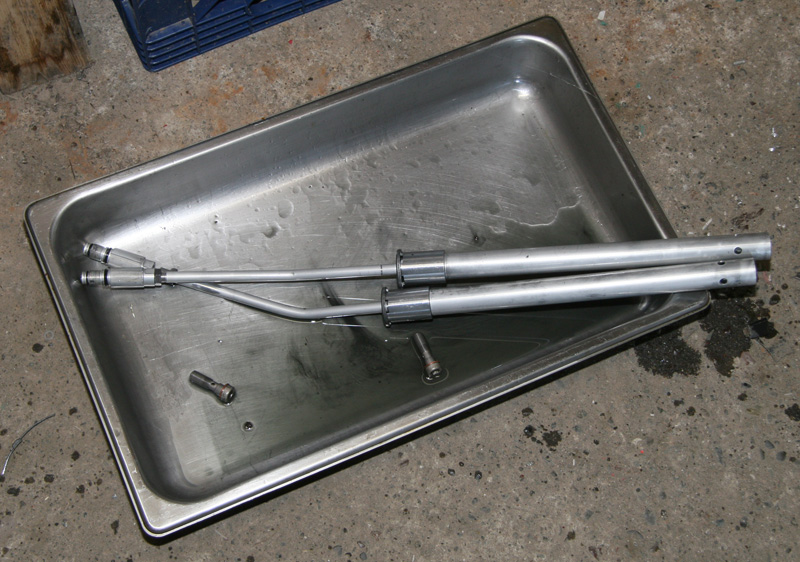
The rebound rods and shafts are wasted. The rest of the cartridge will be saved for spares.
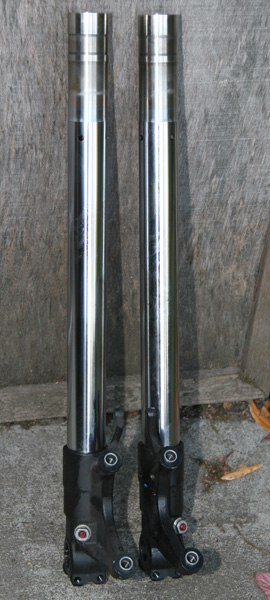
I made very sure to save my ohlins 0.97 kg/mm springs and ohlins compression and rebound valve kit for the replacement forks. They will work just fine.
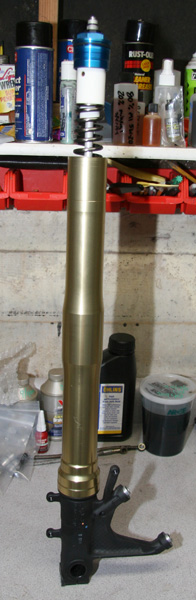
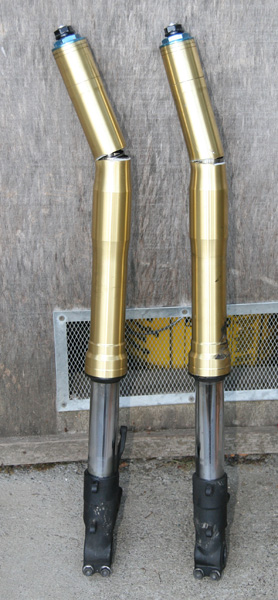
Virgin fork set from ebay. These forks were in excellent shape, basically perfect.
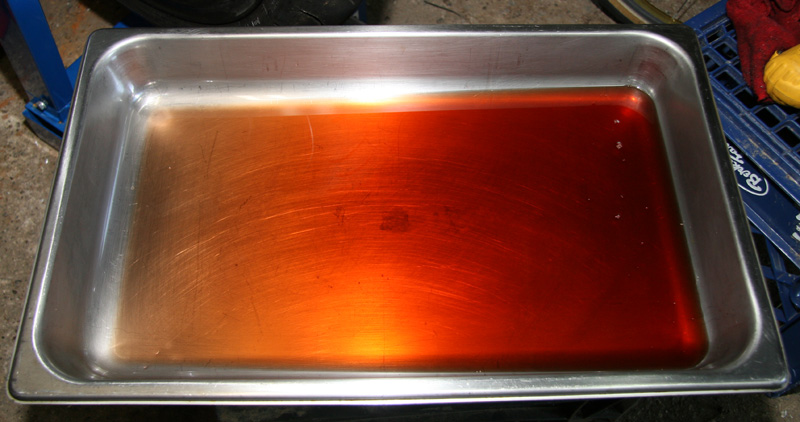
Absolutely clean fork oil. These forks had never seen any hard use or time. This is what you want when you get a set of used forks. Dirty non-OEM oil would be cause for much further investigation.
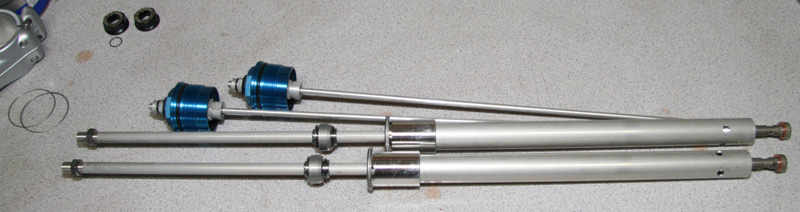
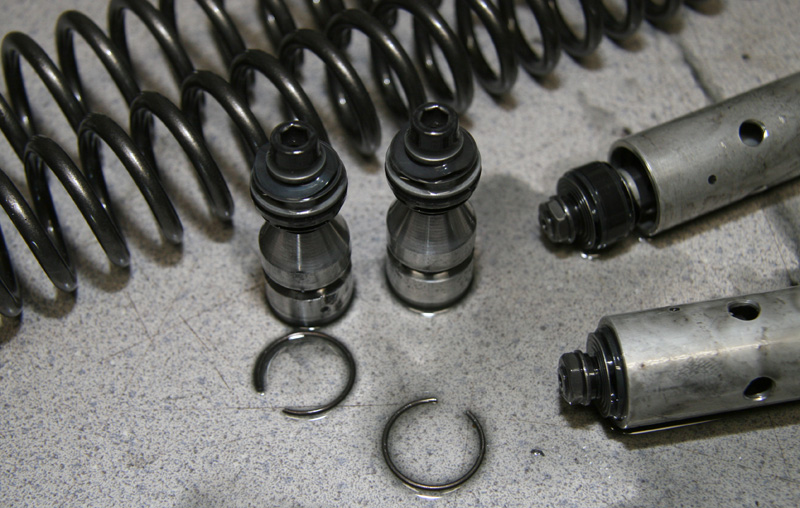
The cartridges about to have the oil lock removed and the compression and rebound valving replaced with the Ohlins stuff.
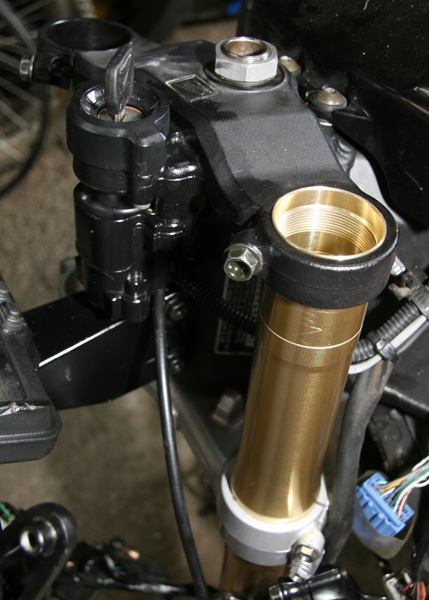
Internal fork setup:
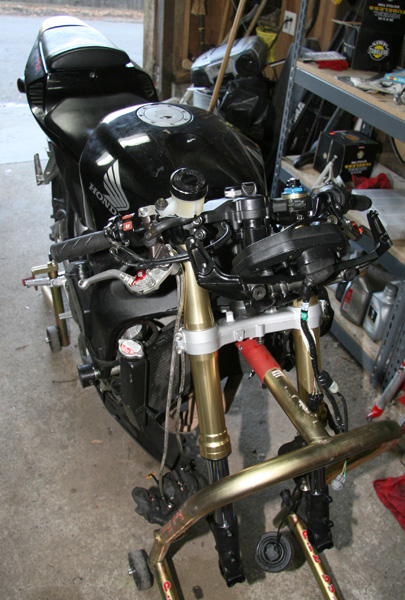
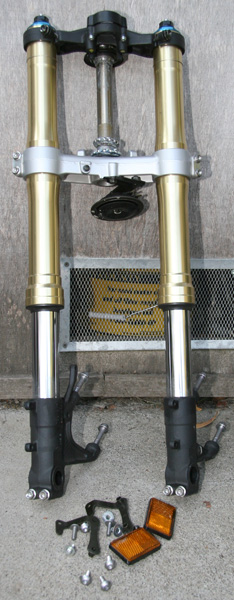
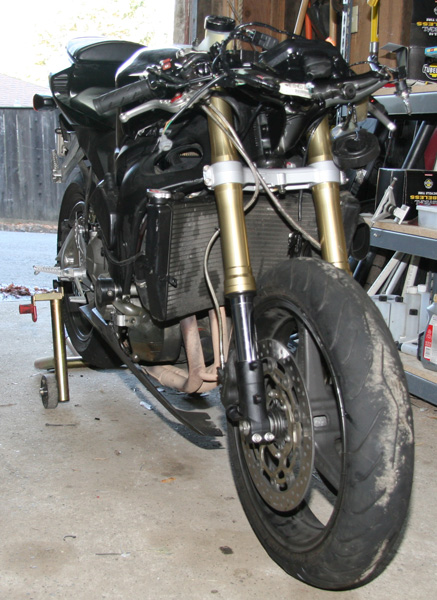
Fork back on the bike.
The Wheel:
The wheel bearings were found to be in poor shape. I figured that the impact had caused the problems. I decided to replace the bearings, spacer, and seal.
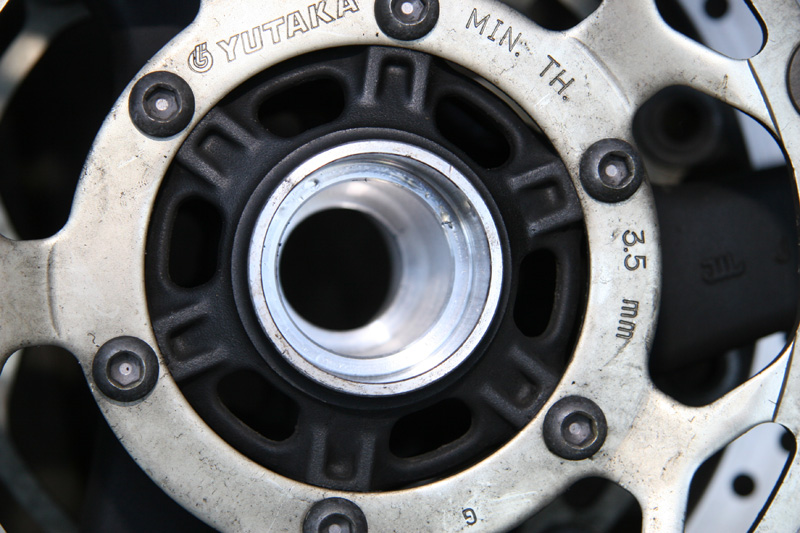
Wheel guts removed.
New OEM parts.
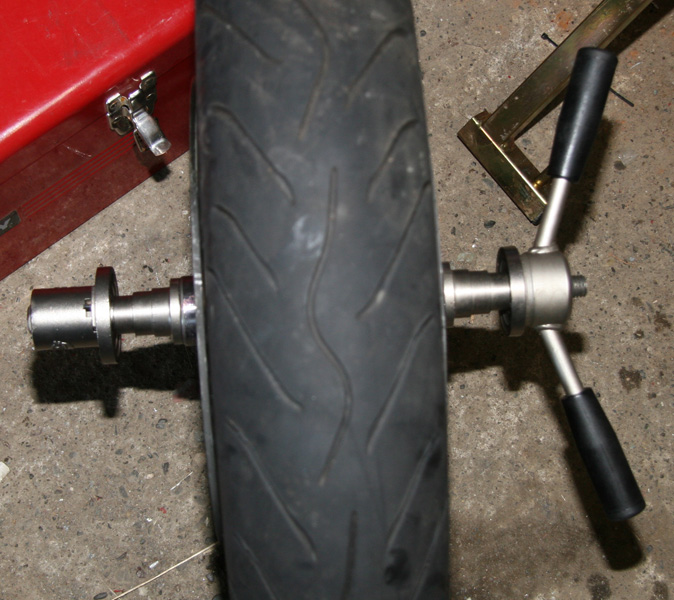
A Park headet press works perfectly to install wheel bearings. In the future, I will make some special disks to make this setup more user friendly, but it worked as-is. Installing the bearings this way required very little pressure since everything was held in perfect alignment.
The exhaust:

The left header took most of the load after the fork broke. The wheel was slammed against it bending it slightly. As long as the seal works at the head, it will work just fine. The one issue is that if I ever remove the exaust, it will not go back on. So I will have to locate a header then.
Foot Controls:
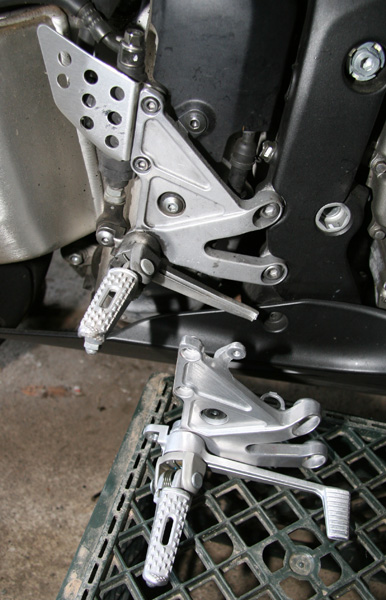
A bent bracket and broken brake lever required replacement. This was easy. Always lube your foot control pivots since OEM lube is poor and is lost in time.
Bodywork and Lights
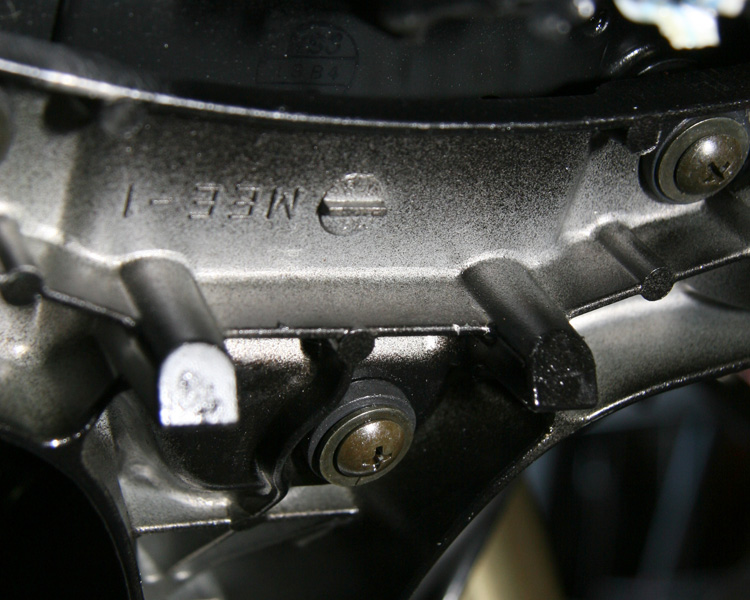
It is very rare that Honda actually makes things easy for the tuner and for race prep. Here on the front hanger is a couple of bosses obviously intended for mounting the bank angle sensor when set up on a race bike. Just drill and tap some holes and you are good to go. I will be running headlights, so I will keep the bank angle sensor in the stock location. I just figured that I would point this out.
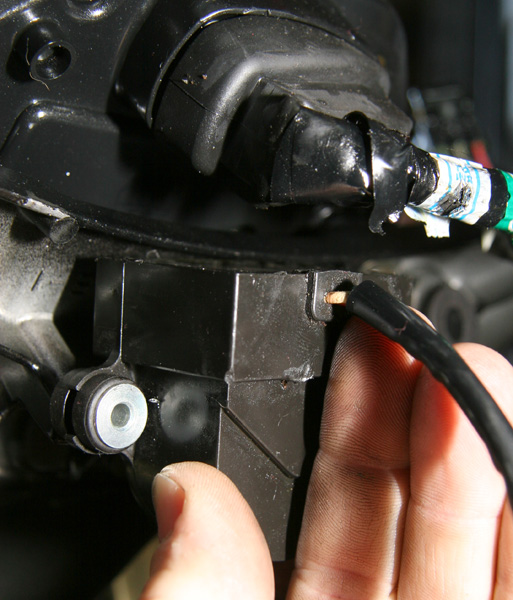
The bank angle sensor held in place as it would be if installed on a race bike.
I got scammed on ebay with regard to the headlight assembly. The part looked fine, but one of the mounting tabs is broken. For $128.10, I should have a perfect part. I have to repair it useing some Devcon Plastic Welder. JB Weld didn't seem to adhear to the parts.
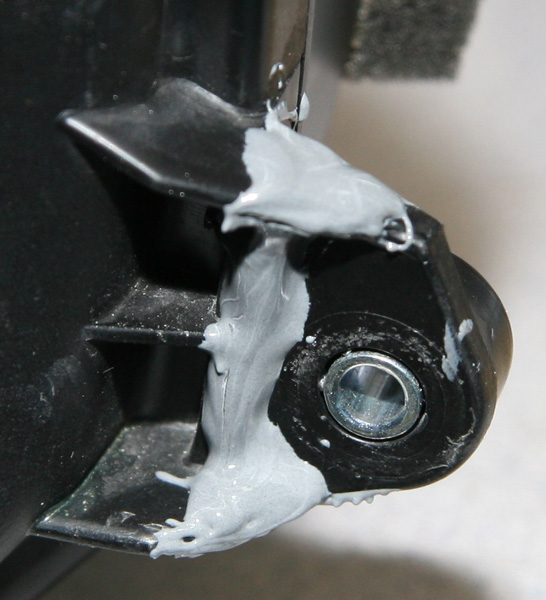
Failed attempt to JB Weld the parts.
The shopping list:
Running total so far: $1,348.94
I already have:
This site has not been
updated since Fall 2006.
Since then, all new projects
have been place on my wiki
site.
If you like what you see on
this site, Make sure to go
to the wiki for even better
projects.