I’ve been picking away at making my CTX700 the bike it can be. Here are some of the updates on that.
Gearing:
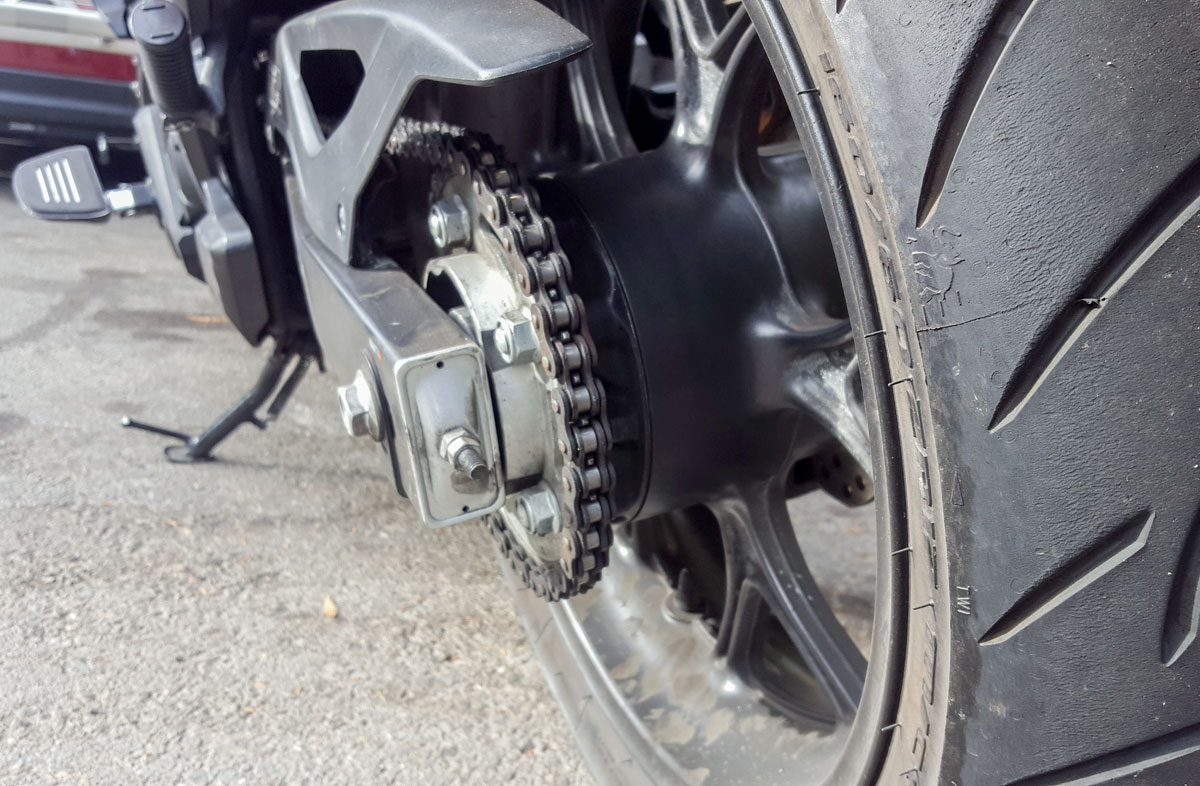
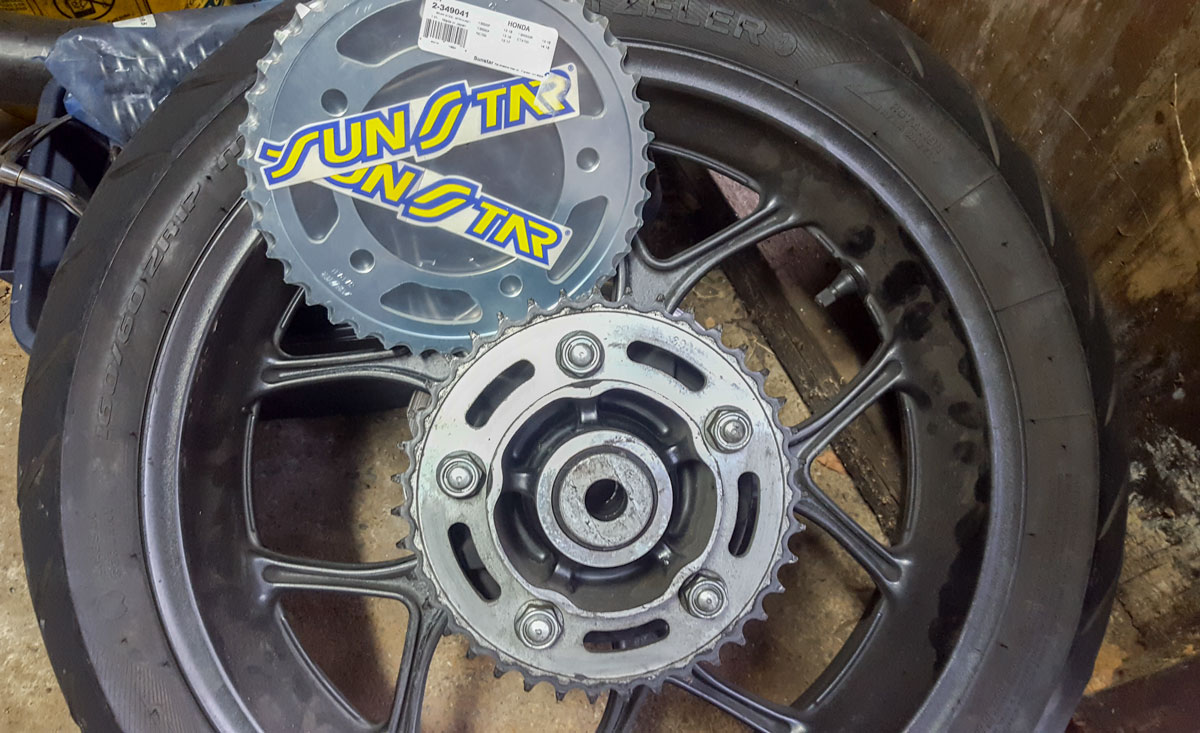
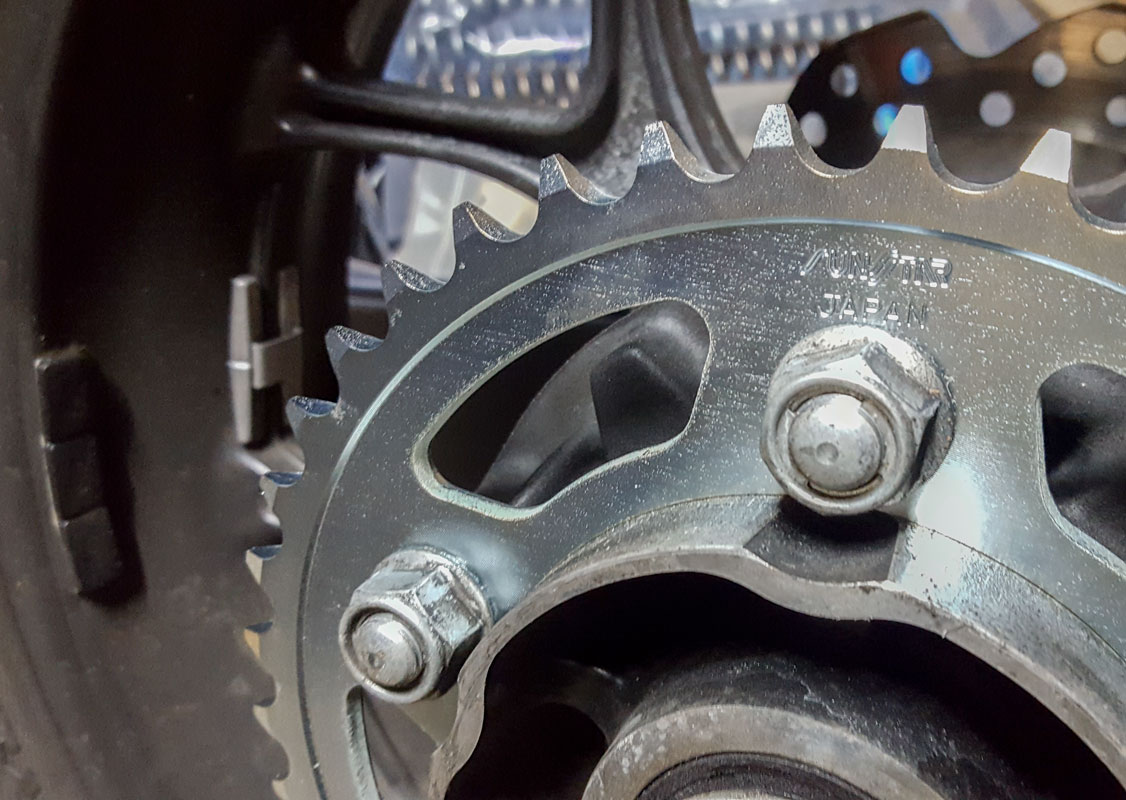
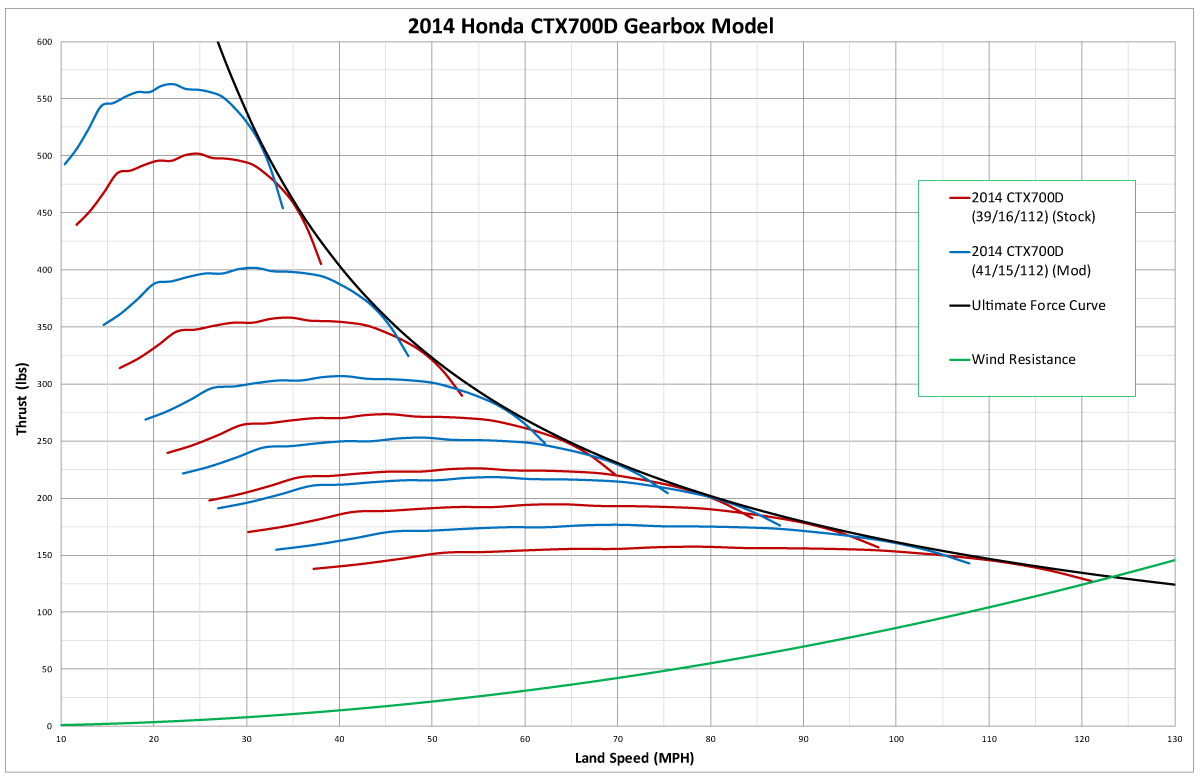
I have been riding the 15/41 gearing on the bike for quite a while now. It’s great. The bike now gets up and gets down to business on the Northern California back roads. I don’t know why anyone who isn’t doing real long range touring wouldn’t make this change.
There is a strange problem in the automatic transmission that this gearing brought out. After 4,000 rpm, the bike doesn’t want to change gear. Both automatically and manually. Since the gearing brought the revs up everywhere, this ends up being an issue on highway at times. I have to do some planning and distracting to not get caught in the wrong gear. I don’t know why this would have been added to the programming of the transmission but it is 100% a problem. Not a deal killer, I love the system. It’s just a real hassle and distraction.
Speedometer error as measured by Garmin Edge 510, approximately 13% high @50 mph. Given that the gearing was changed 12.1%, the built in error is about 1.4%.
Fork Springs:
I’ve been wanting to dig into this part of the tune for some time. I finally got around to it.
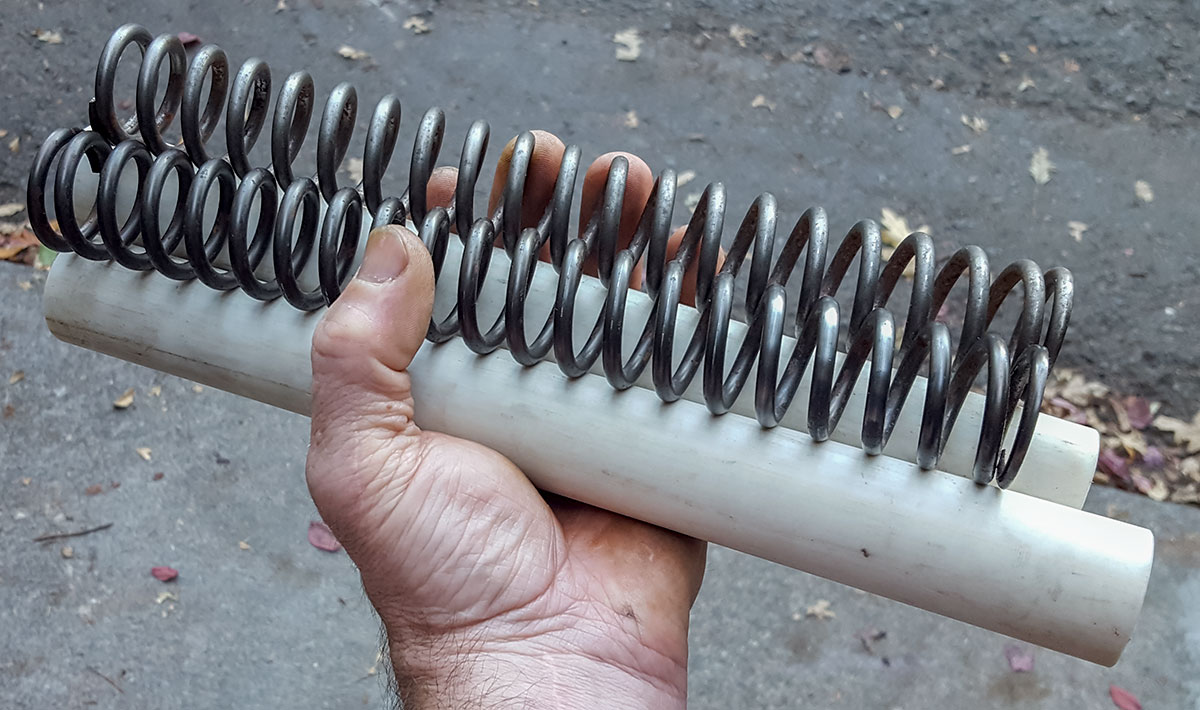
I had originally just added preload to the stock springs without looking too deep into the setup. A 225mm spacer in place of 200mm. That was about 49.5mm of initial preload. I was pretty busy at the time and that’s what I had the bandwidth for. After riding the bike for more time, the soft springs were really looking to be a big problem for the bike with radical pitching and bottoming going on when I pushed things hard. There was simply no composure in the front end. Adding some to the rear end really made this more glaring.
Now, I pulled out the springs and rated them. Basically, they are 6.0 N/mm springs and 358mm long, 35mm diameter. I found that I had a pair of pairs of Ohlins 35mm x 260mm 9.0 N/mm and 9.5 N/mm springs in my stash that would fit in the CTX forks. Given that equilibrium support is about 220 lbs for the spring pair, I chose the 0.90 N/mm pair and 22.5mm of preload (296mm spacer).
The bike now rides a million times better. I’m going to get around to re-measuring sag and such when I find the time but I have made huge progress here. The bike tracks better, floats over bumps (on the front end at least), and pitches far less. This modification should have been done first thing.


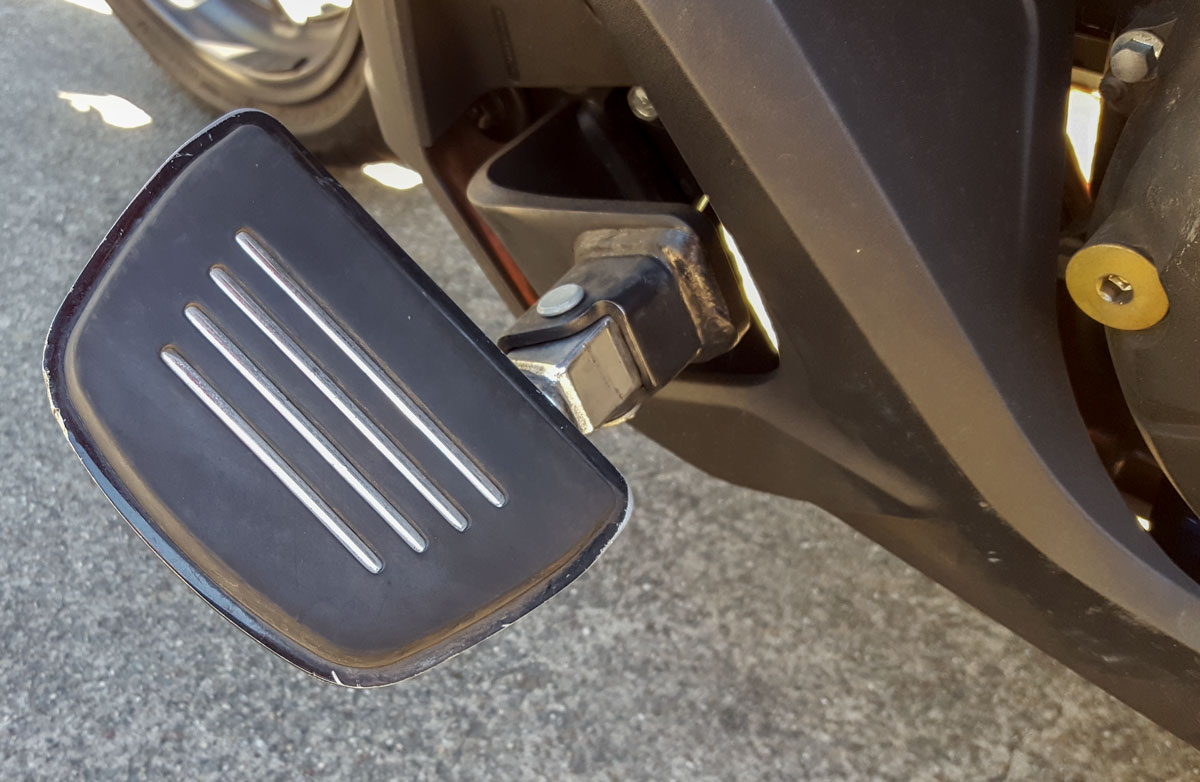
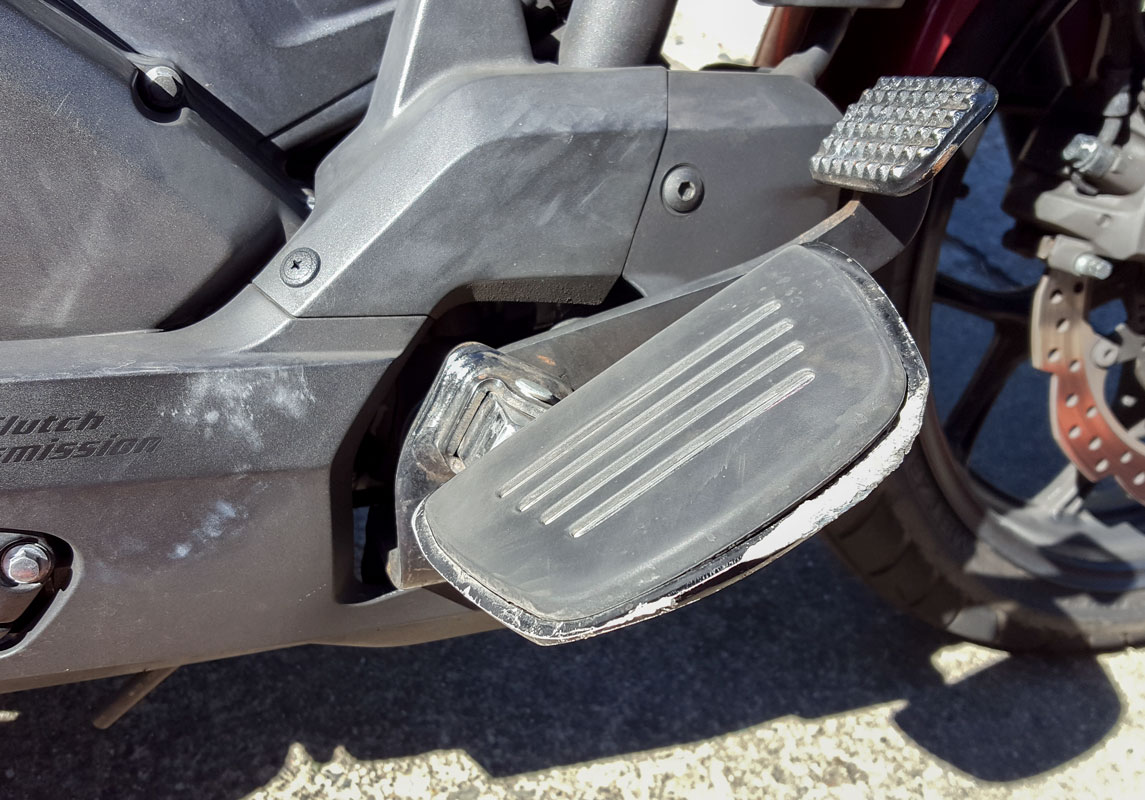
Floorboards:
I was looking on Ebay for some foot pegs parts to hack to make a more forward position on my bike. Not only did I find those parts fairly cheap from a crashed bike, but they had a pair of Kuryakyn Premium Mini Boards with Comfort Drop Mounts attached. This was a nice plus as I was interested in trying floorboards with this bike. It turns out, it’s an amazing upgrade to the bike. It makes everything far more comfortable and puts me in a better position to use the rear brake. The whole setup still needs to move another inch forward, but these were a great move in the right direction.
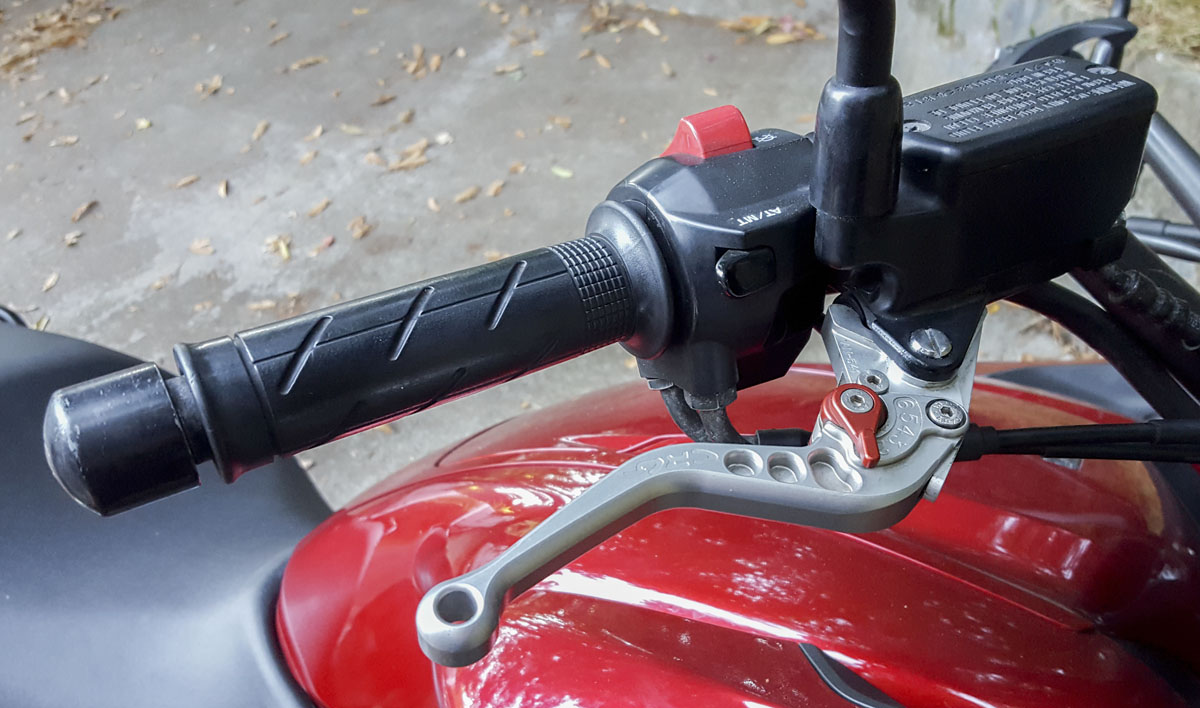
Brake lever:
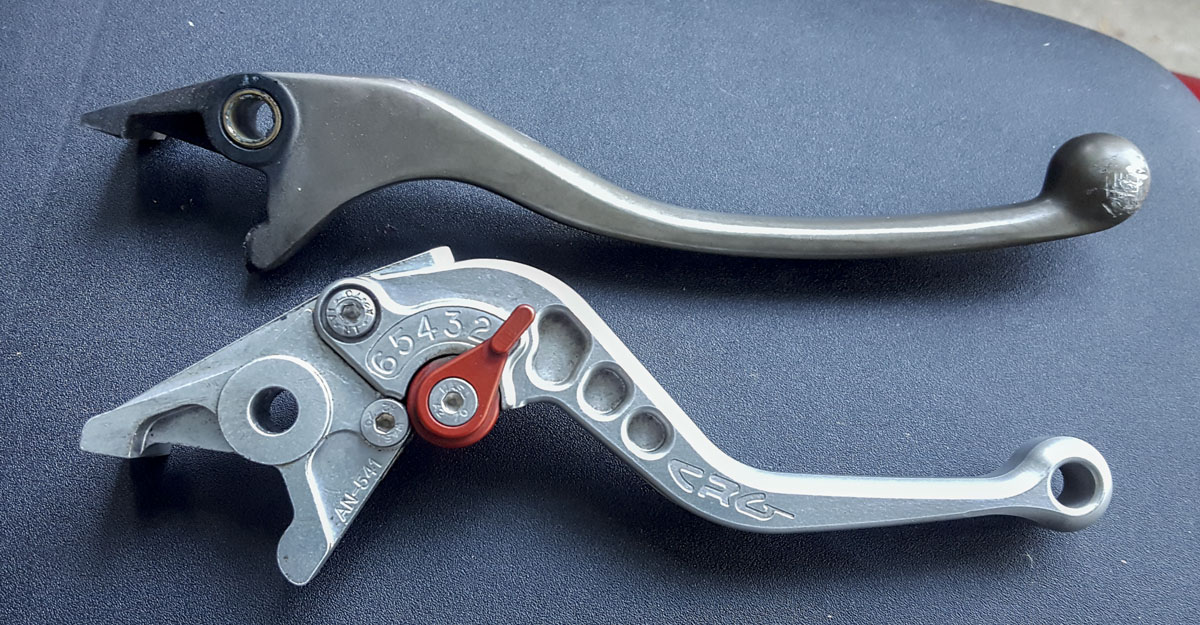
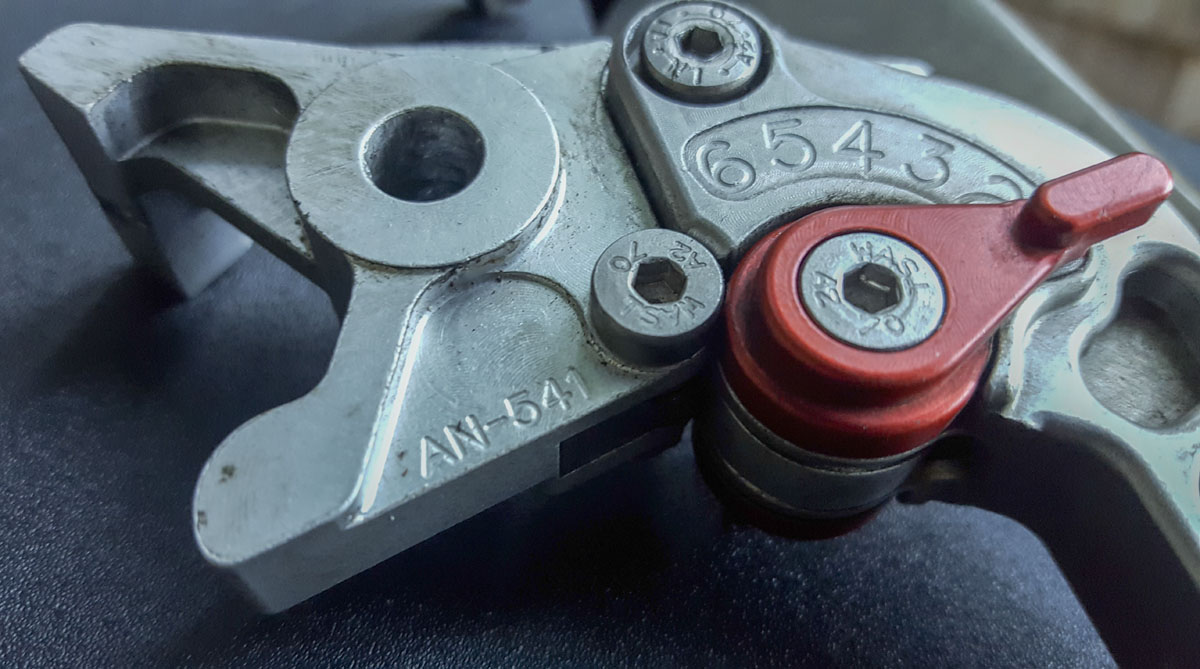
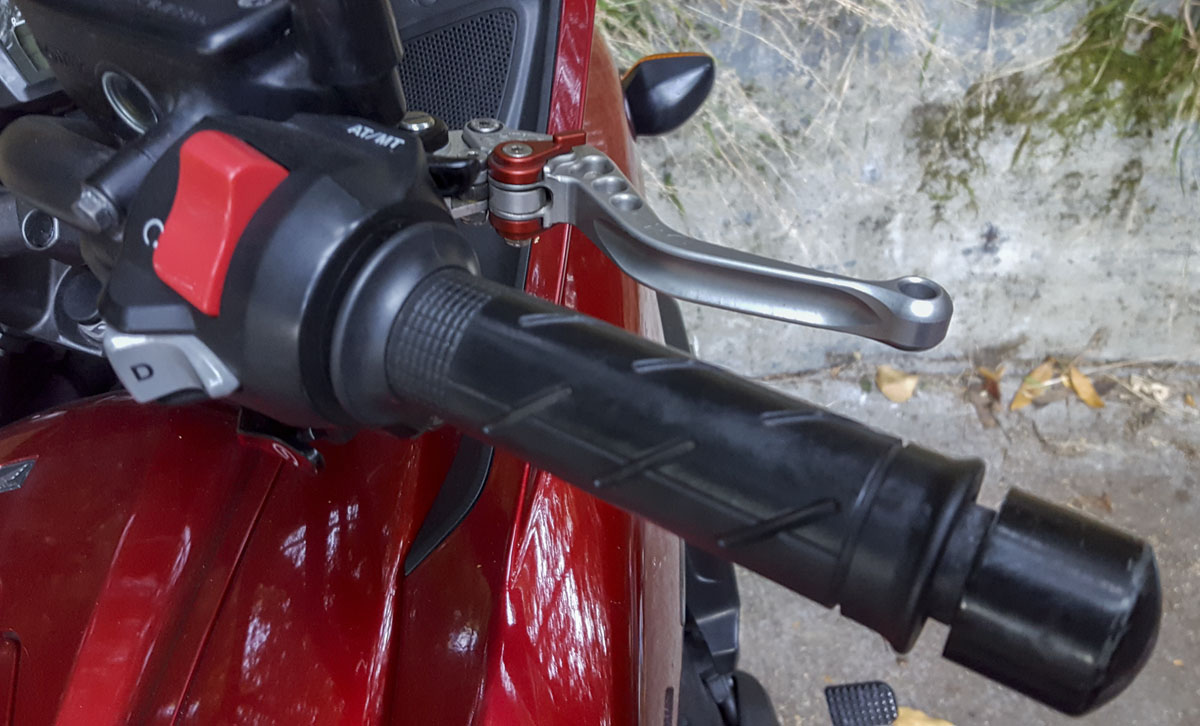
It turns out that an old CRG Roll-a-click shorty brake lever from a 2001 CBR600 F4i fits perfectly on the CTX. This is with the AN-541 link. It’s got a great feel and position. Another part from the bin that’s hopping up this bike!
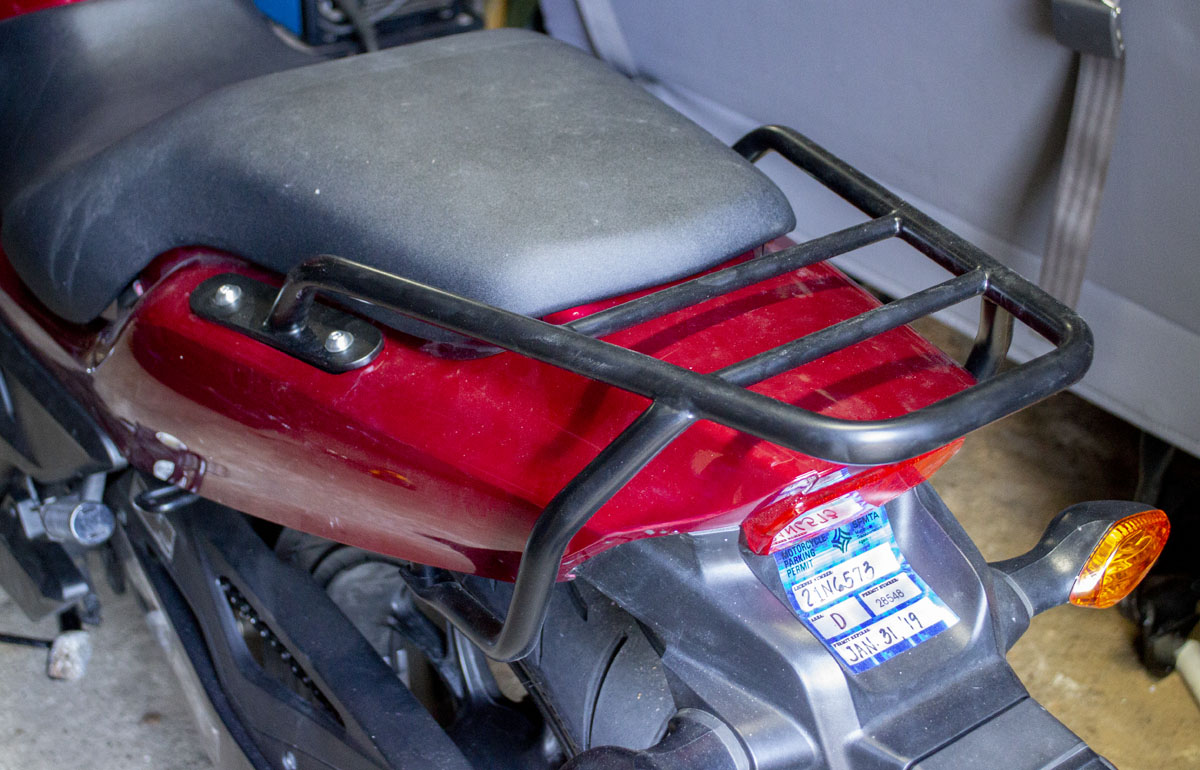
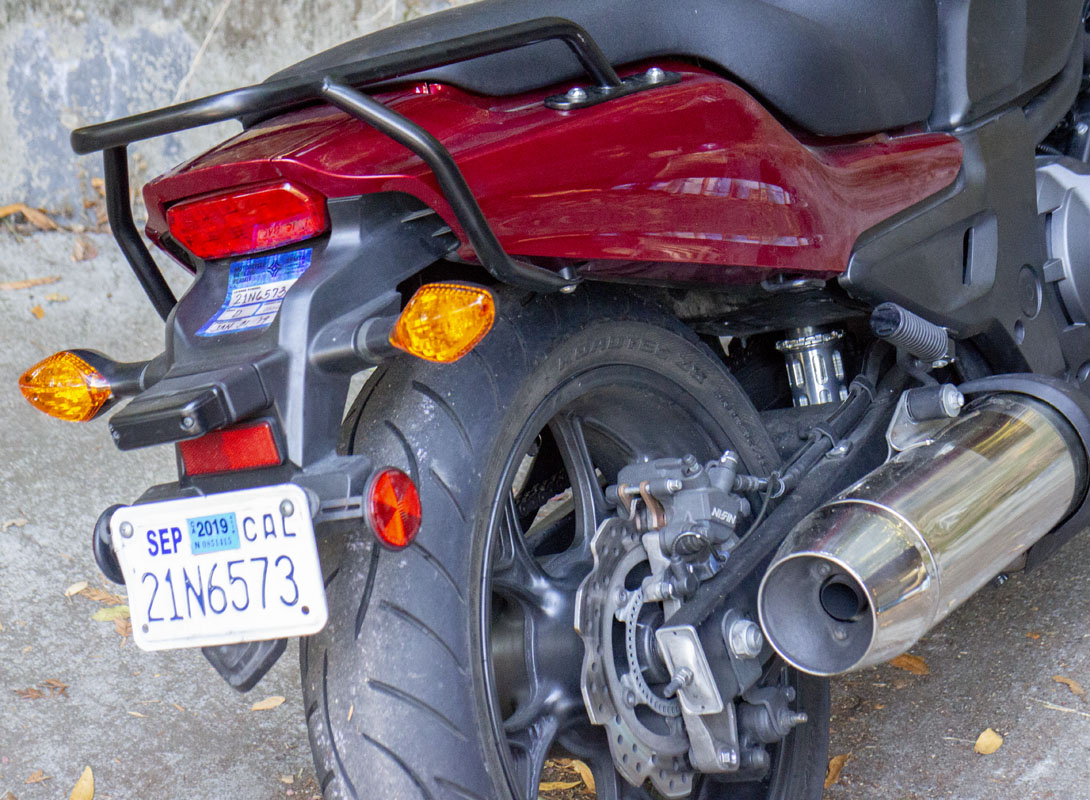
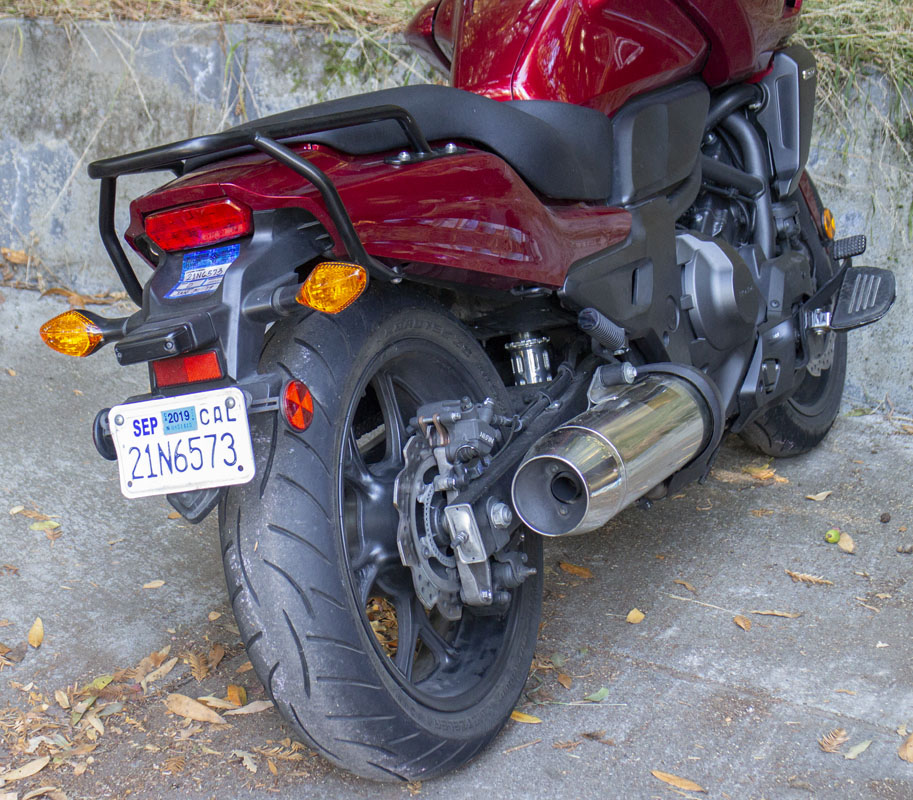
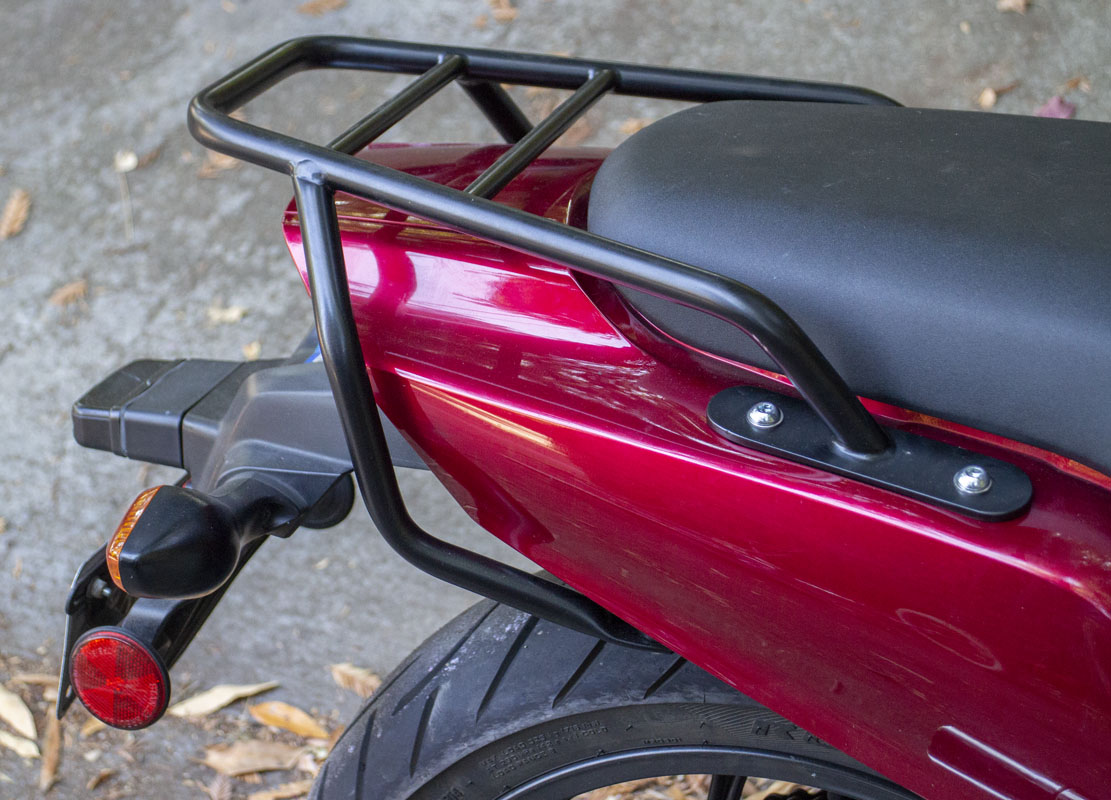
Rack:
There are racks available for this bike from Honda and other sources. They all look to suck. I had to order this rack specially from Germany as it isn’t available in North America. It’s a Fehling 6140 rack. It’s one of the best designed racks for this bike on the market. I’m looking forward to getting some cargo capability mounted to it soon but the foundation is now solid.
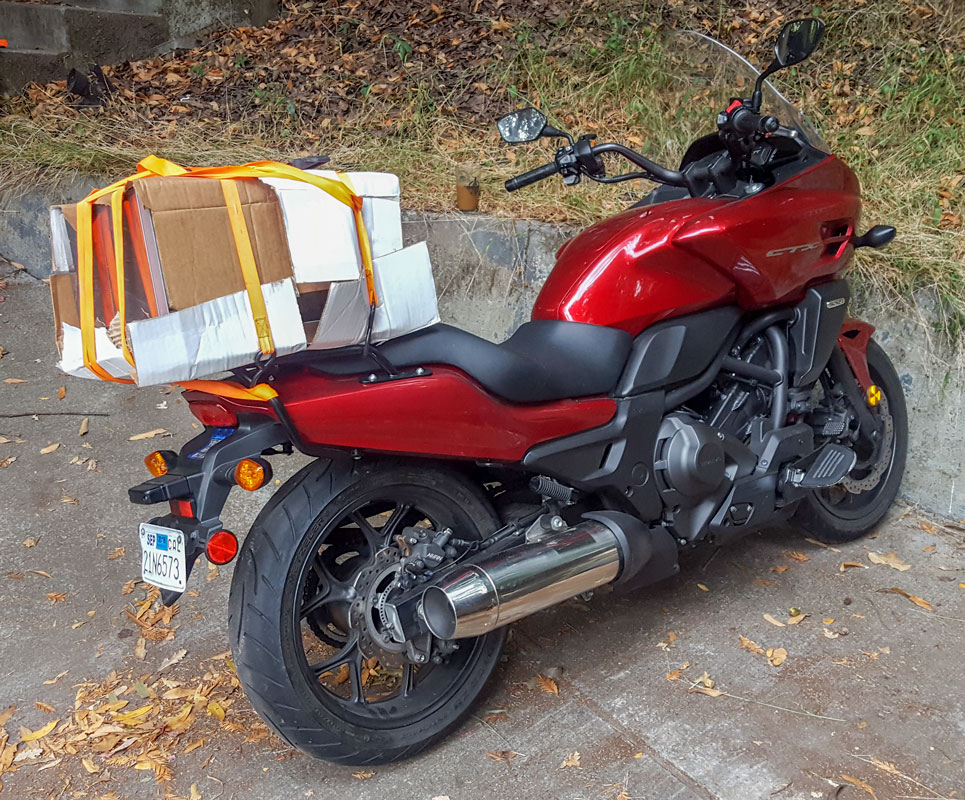
A good rack makes a real difference. Here, it’s loaded with a 40 lb microwave to take into work for some experiments.
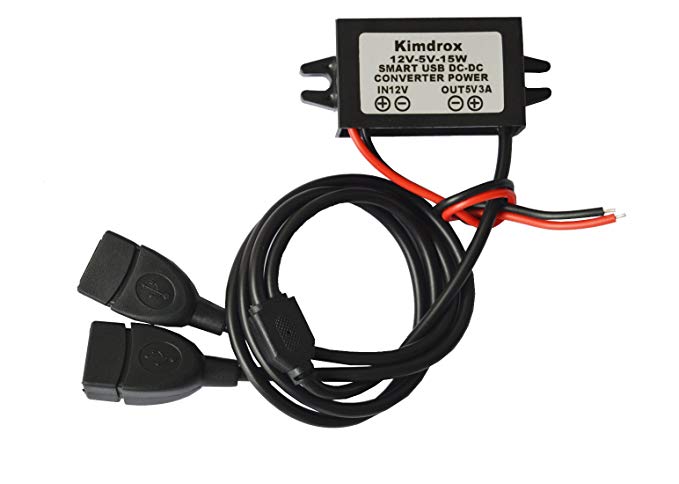
USB charger:
Nothing crazy here. I just made sure I could charge devices in my trunk.
Mirror modification:
I haven’t done this yet but it is on the short list of what to do next. The mirrors stick out too far for easy lane splitting. I’m going to hack these or another pair to move them inboard about an inch. This will make my life a lot easier. Look forward to this.
Race Throttle:
This is a pretty big project. It’s moving forward slowly. It’s happening.
After all of the gearing changing that I did, I experienced an odd behavior in the transmission so I figured I should clear the system and see how it changes. It cleared things up and everything ran properly after that.
CLUTCH INITIALIZE LEARNING (PCM)
NOTE:
• If the PCM and/or clutch assembly are replaced, perform this procedure.
• Before starting this procedure, check the following:
– PGM-FI system and OCT system have no OTC.
– Engine idle speed is normal.
– Transmission is in neutral and cooling fan stops.
• Do not operate the throttle during clutch initialize learning
- Warm up the engine to the normal operating temperature (engine oil temperature: 50 – 110°C/122 – 230°F) and stop it.
NOTE:
If the PCM is replaced with a new one, when the ignition switch is turned on the “D” and “S” indicators [1] will come on to indicate that the clutch initialization learning procedure is necessary. Furthermore, if the large “L” (extremely low oil temperature indicator) ([2], or small “L” (low oil temperature indicator) [3] is displayed on the shift indicator, the engine must be warmed before proceeding.
- Turn the ignition switch ON with the engine stop switch “RUN” while pushing the D switch [1] of the N-D shift switch. The MIL [2] will come on.
Release the D switch after the MIL goes off.
- When only the dual clutch assembly is replaced: No indication appears on the shift indicator [3].
- When the PCM is replaced: The “D” and “S” indicators [4] come on.
- Operate the N-D shift switch [1] in the sequence as follows:
– Push the D switch
– Push the D switch
– Push the N switch
– Push the D switch
– Push the N switch .
- When only the dual clutch assembly is replaced:
The PCM is ready to clutch initialize learning when the “D” and “S” indicators [2] lights, and the “-” [3] is displayed on the shift indicator and blinks at interval of 2 seconds. - When the PCM is replaced:The PCM is ready to clutch initialize learning when the “-” is displayed on the shift indicator and blinks at interval of 2 seconds.
NOTE:
When the engine is not warmed up enough, the large “L” [4] (extremely low oil temperature) or small “L” [5] (low oil temperature) is displayed on the shift indicator. If so, warm up the engine until the “L” on the shift indicator goes off. Stop the engine and perform the steps 2 and 3 again.
- Start the engine and let it idle. The”-” [1] on the shift indicator starts blinking at interval of 2 seconds. The Clutch Initialize Learning is successful, when the”-“, “D” and “S” indicators [2] go off.
NOTE:
The clutch initialize learning is unsuccessful, if the “-” starts blinking at interval of 0.5 second or it goes off, and the “D” and “S” indicators stay on. Perform the initialize learning procedure from step 2 again.
- Stop the engine.
- Restart the engine, push the D switch of the N-D shift switch and check that the “D” indicator comes on.
Here’s a cool project: CTX-OBD, Using a Raspberry-Pi to extract information from a Honda CTX-700 ECU
Interesting that it mentions Sumitomo HM090 connectors. This is a nice lead on where to get connections.