In the short time I spent riding on my last mountain bike, the 2021 PVD MiG-31 Firefox, I fell in love. The bike was a stunning advancement in modern mountain bike geometry (PostForward). It felt amazing on the trail. Compared to older bike designs, it was lighter handling and cleaner while at low speeds and traversing but also just as composed and steady blazing down chunder. It climbed better and went down as well as the Warbird. I was having a great time on it. Then, just as I was just starting to get used to it and find motives for technique modification, disaster struck. The printed parts started failing. First it was the stem, later the chainstay yoke.
The printed parts were designed too thin. That led to catastrophic failures. The bike was now broken, unrepairable, and for all the wrong reasons. I was crushed because a bad decision was turning a lot of hard work and otherwise good design into trash.
Lessons got learned.
Now, without that sweet candy, I needed to get it back. I paused all of my other projects and set out for a full redesign of the mountain bike. The mountain bike is the heart and soul of my design work and it has to be the pinnacle of what is being done. That’s my game, that’s my race.
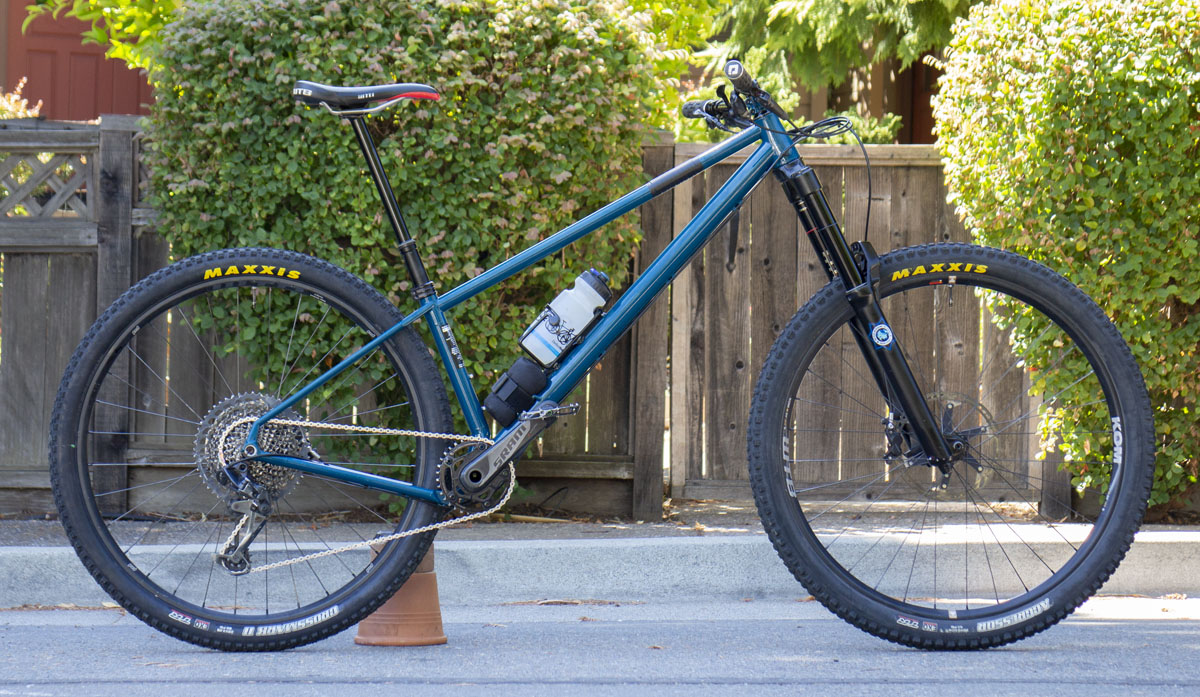
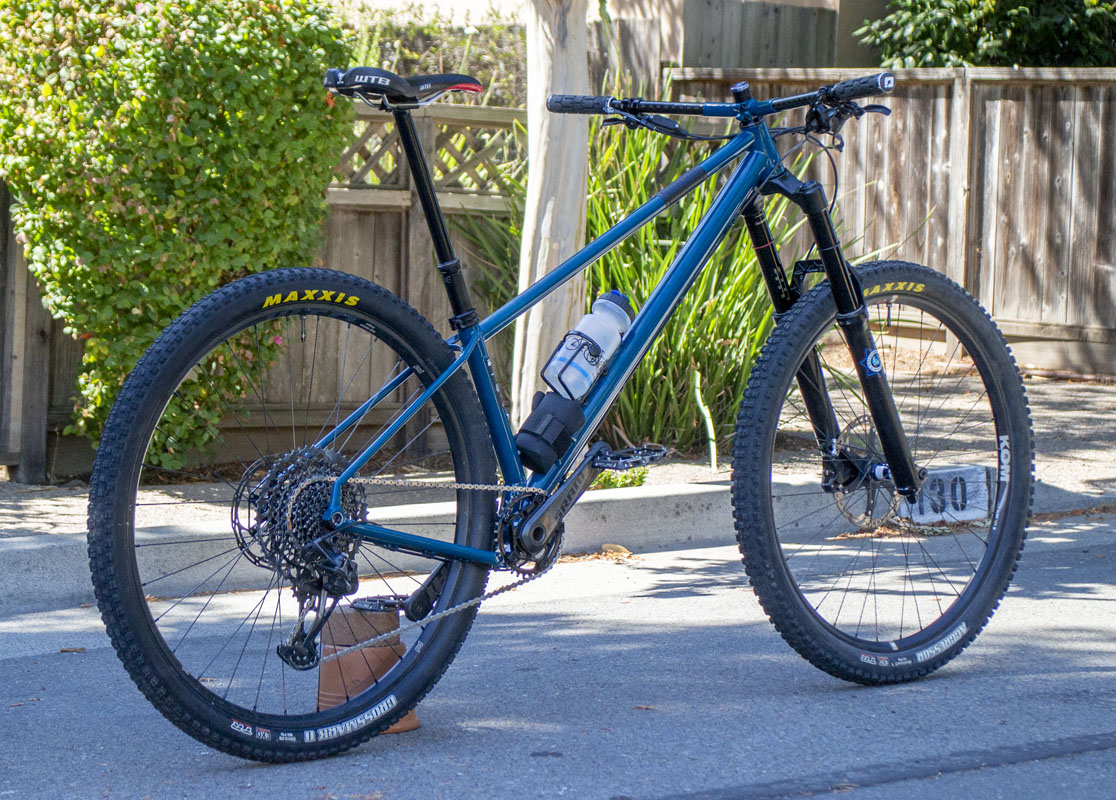
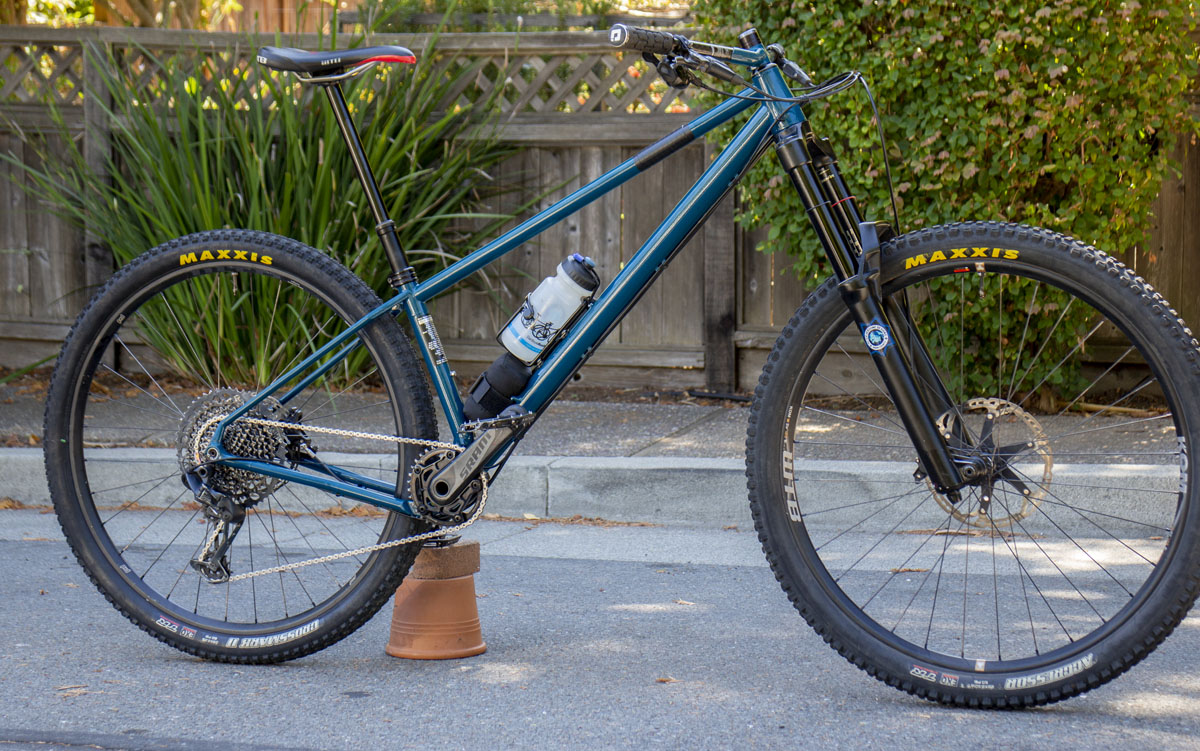
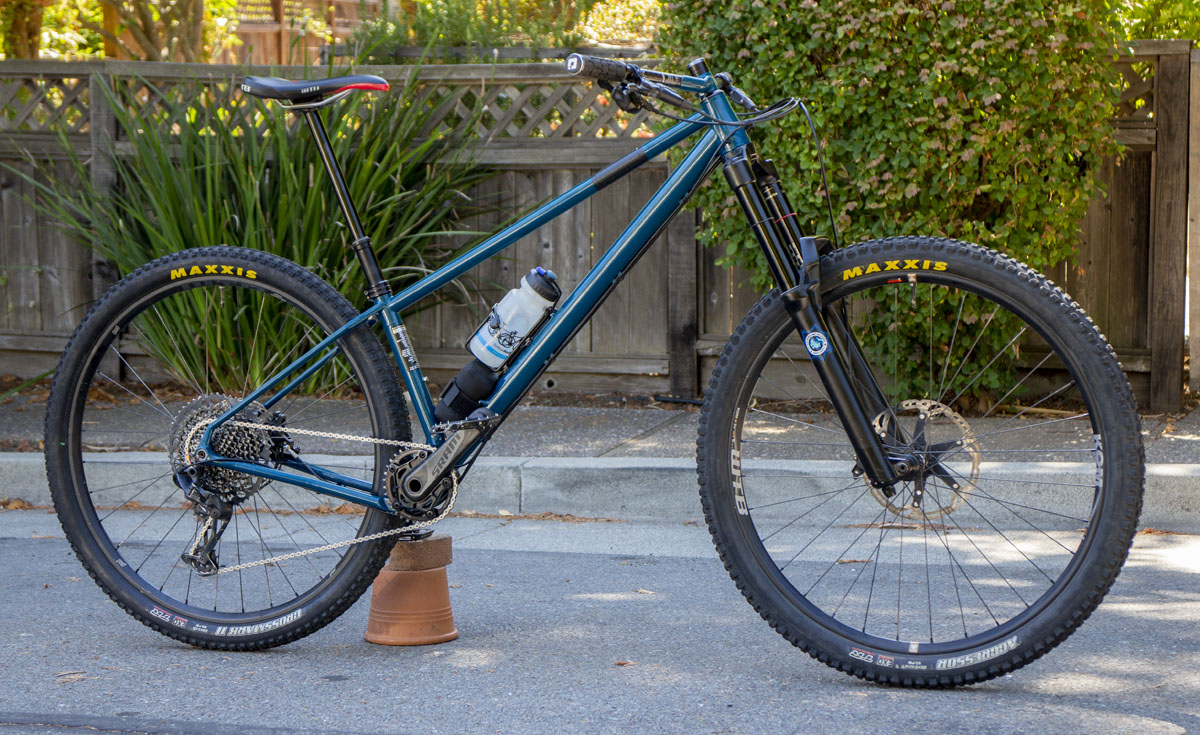
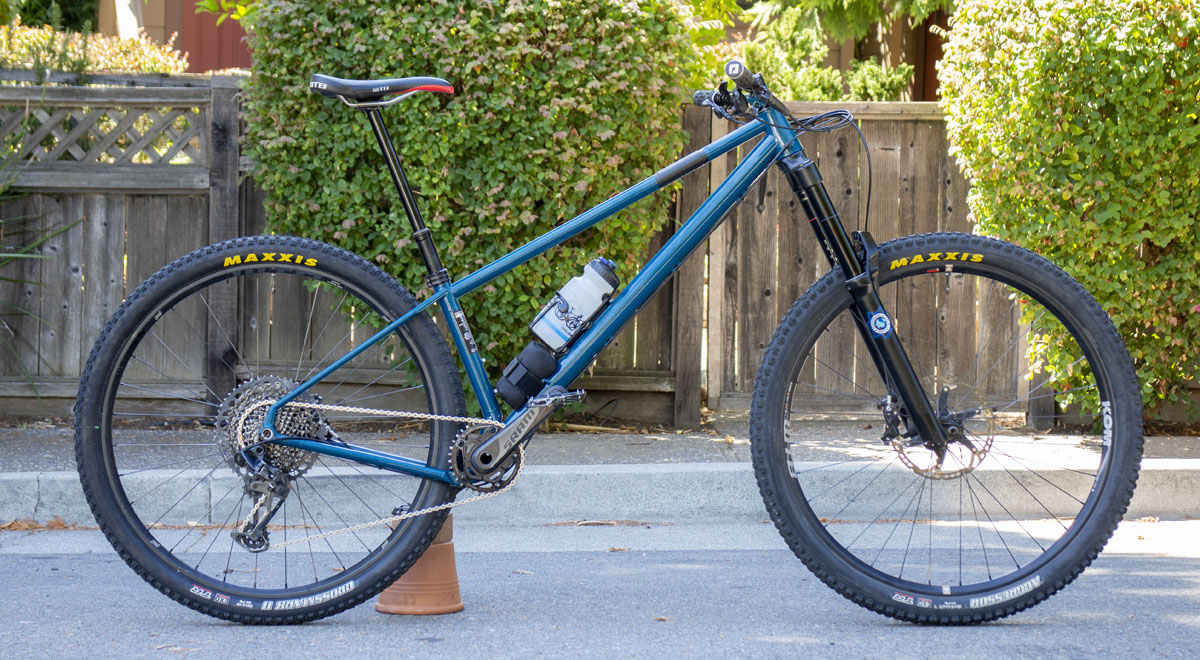
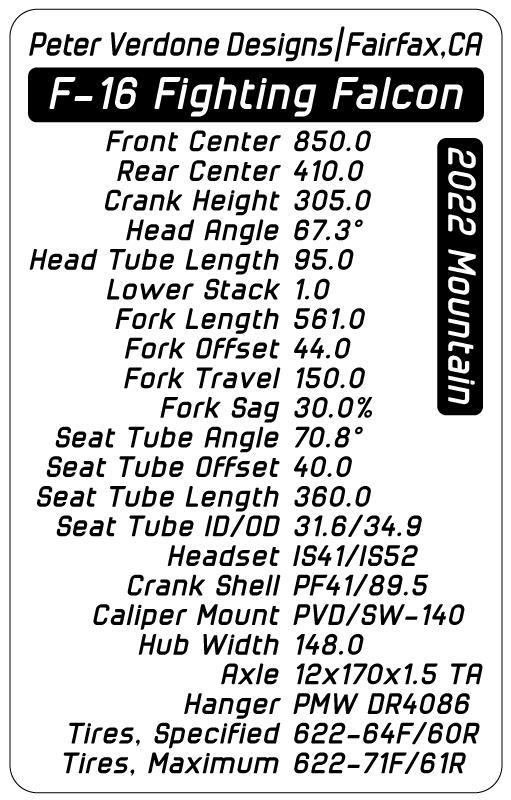
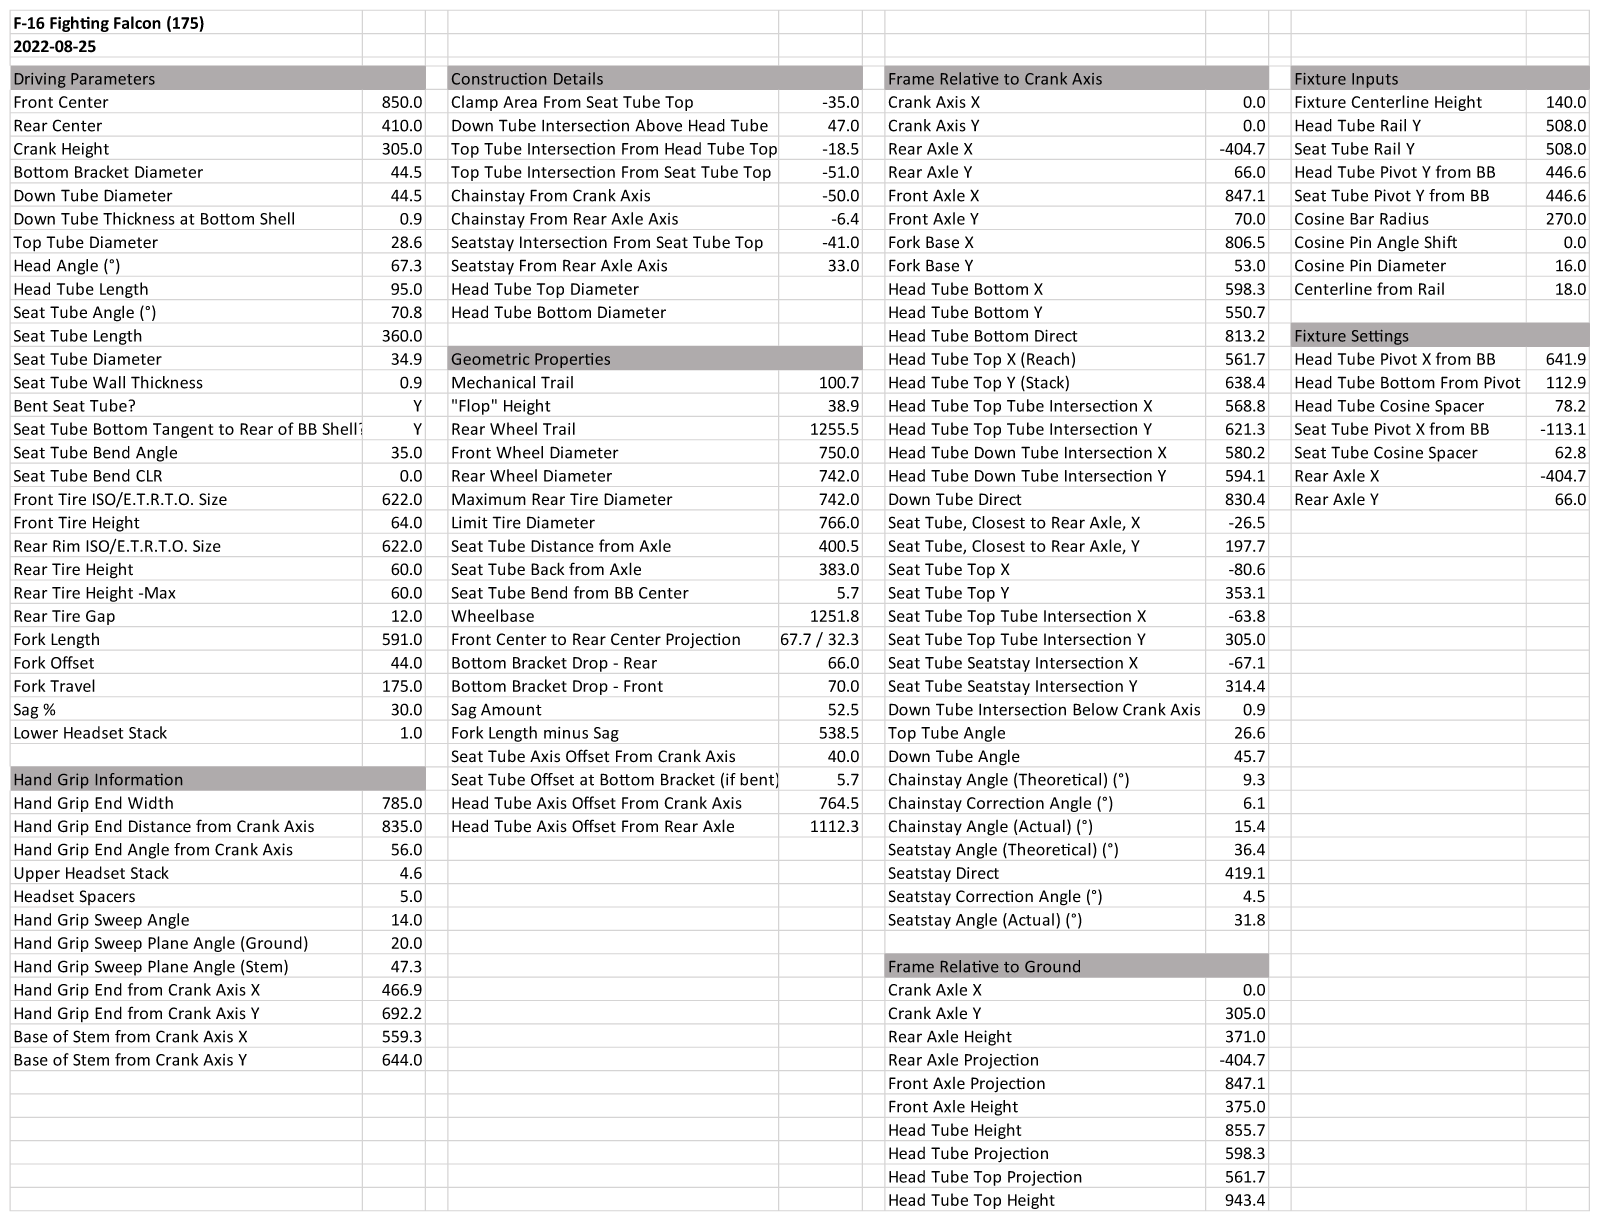
To replace the MiG, I’ve built the 2022 PVD F-16 Fighting Falcon. A bike named for one of the most iconic aircraft in modern aviation, the General Dynamics F-16 Fighting Falcon. It was, for good or bad, the point of the spear for projecting American power around the world. This is a very fast and flexible fighter jet that has been actively used by the best pilots in the world for the last 48 years. More, the USAF plans on using this plane for another 20 years. Wow! That’s a near 70 year run.

Early on I knew that I was going to push the geometry for this bike even harder than I had on the MiG, but also dig far deeper into the full redesign of the printed parts. Modeling for printing is a challenge for those of us that aren’t elite surface modelers. I wanted to fix all the little issue that had bothered me in recent iterations. I’d even have a new handlebar design.
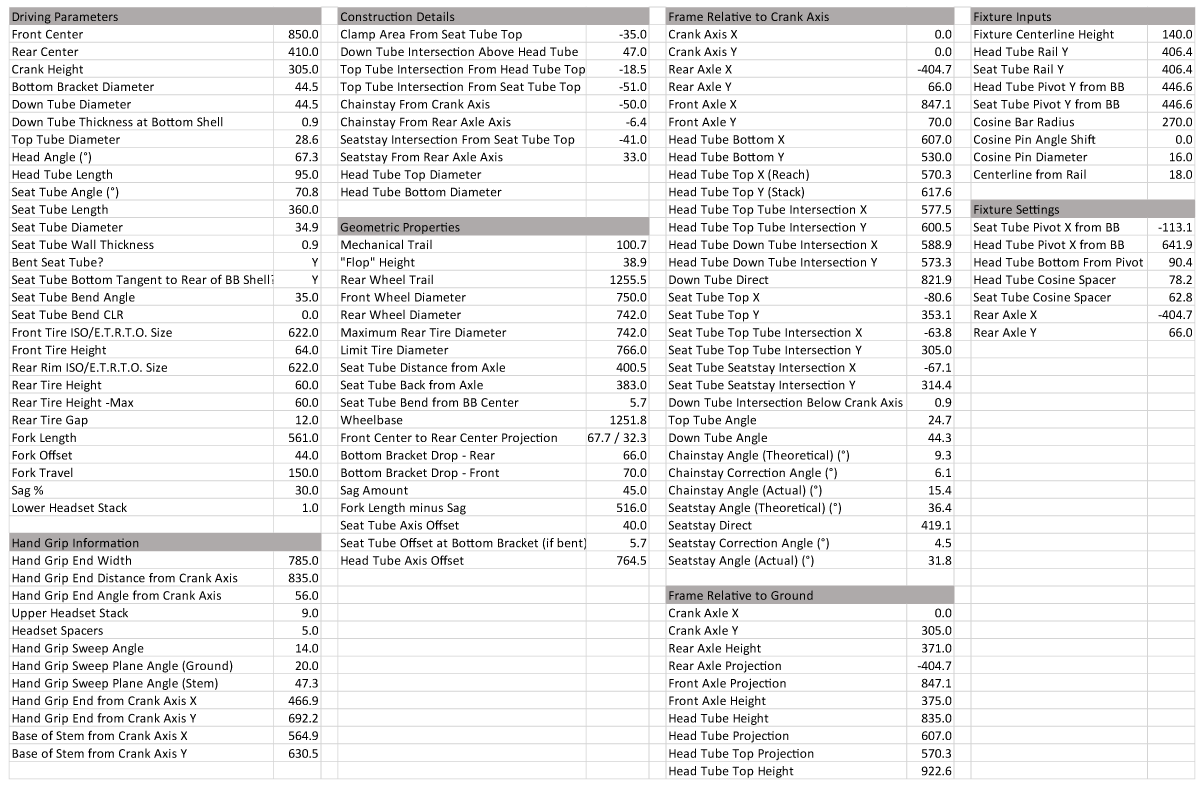
![]()
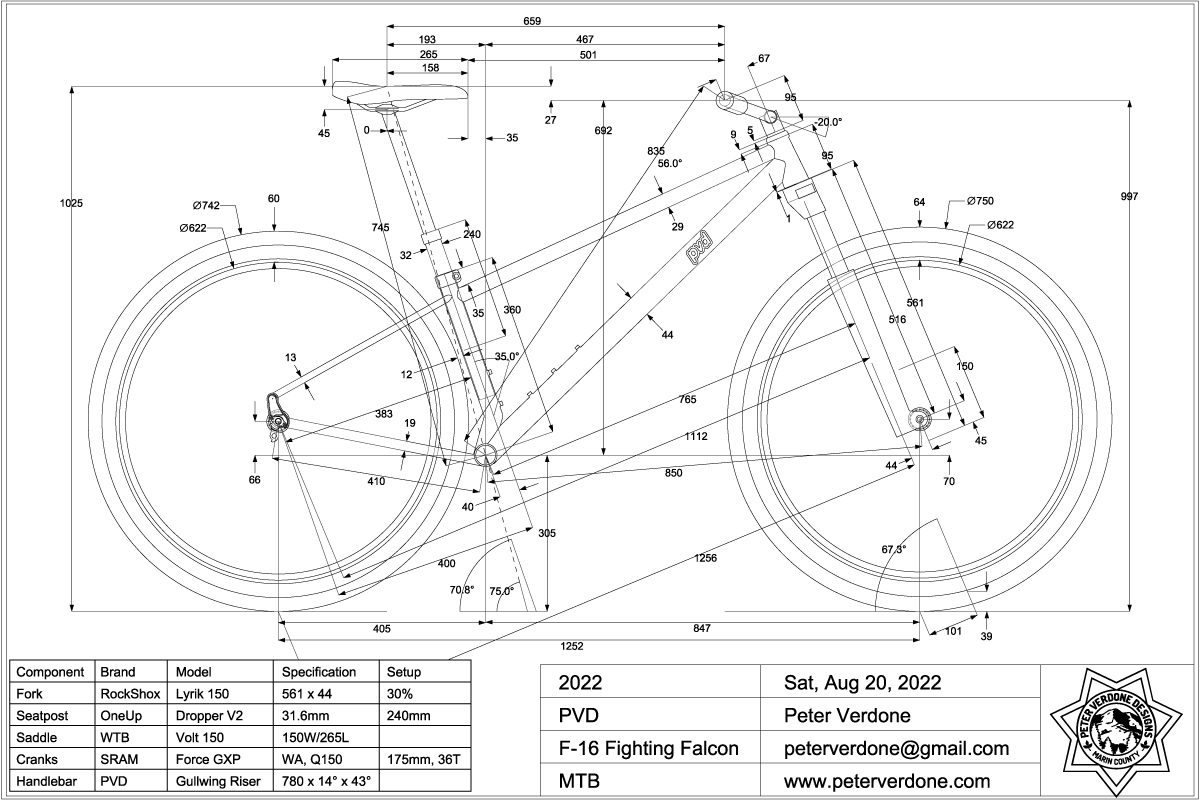
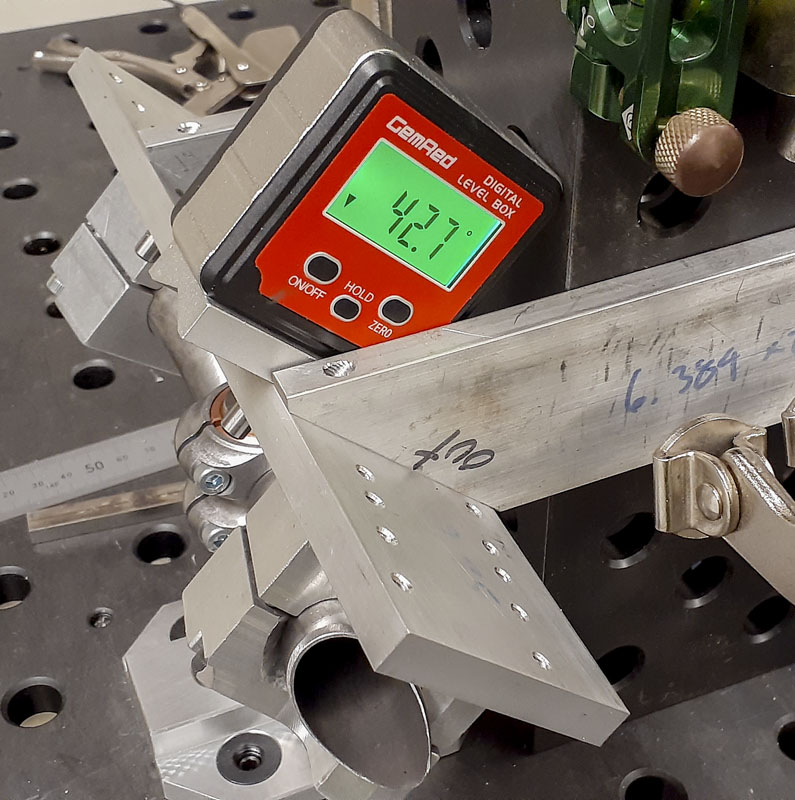
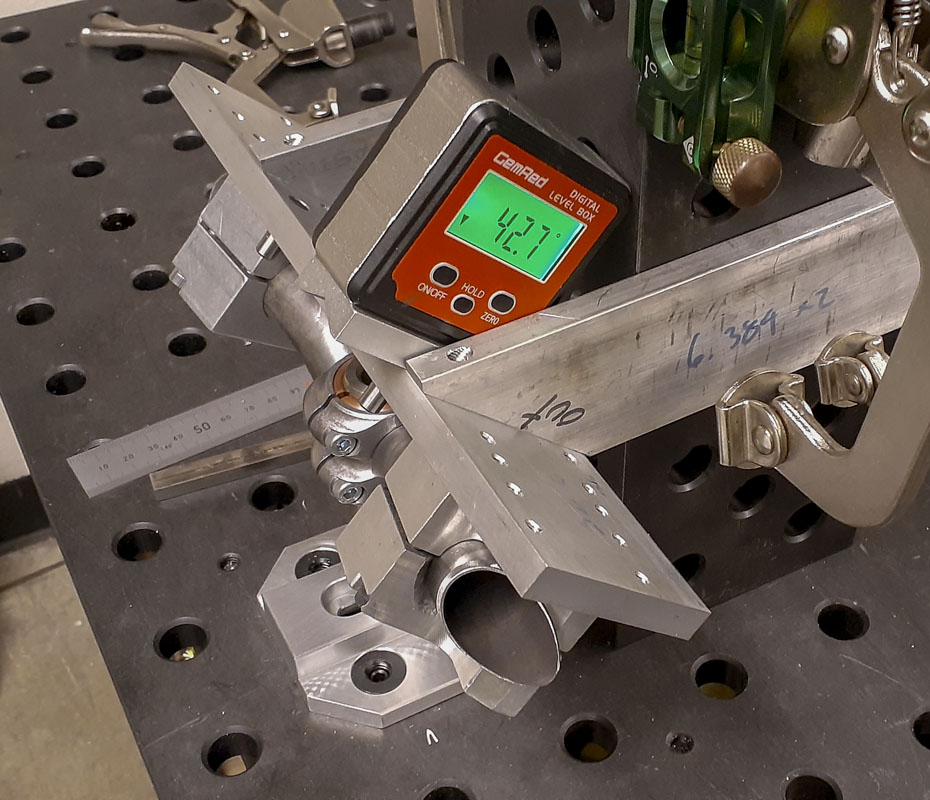
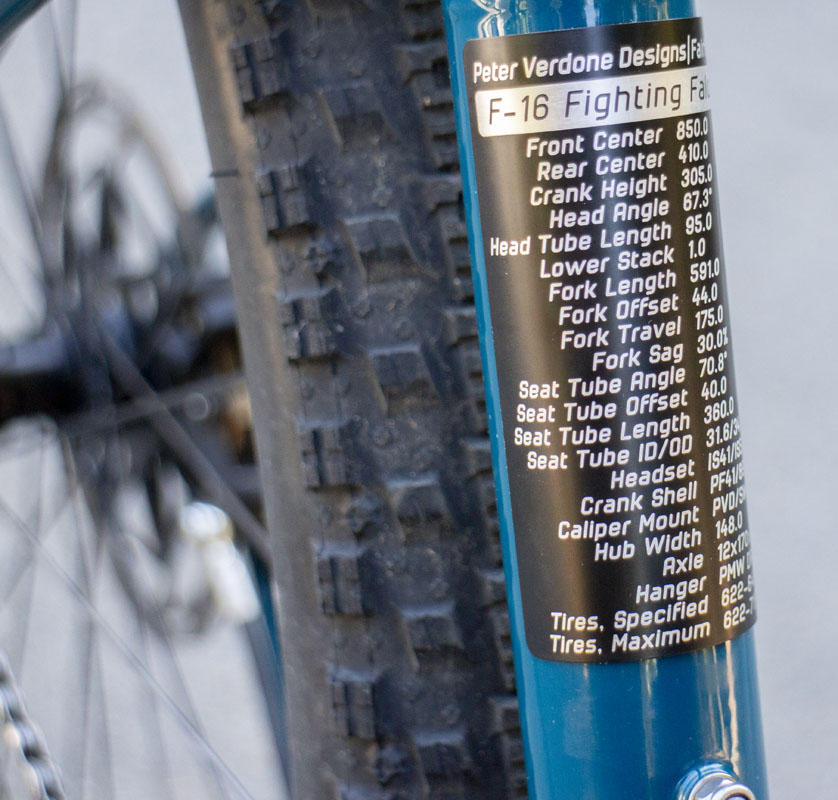
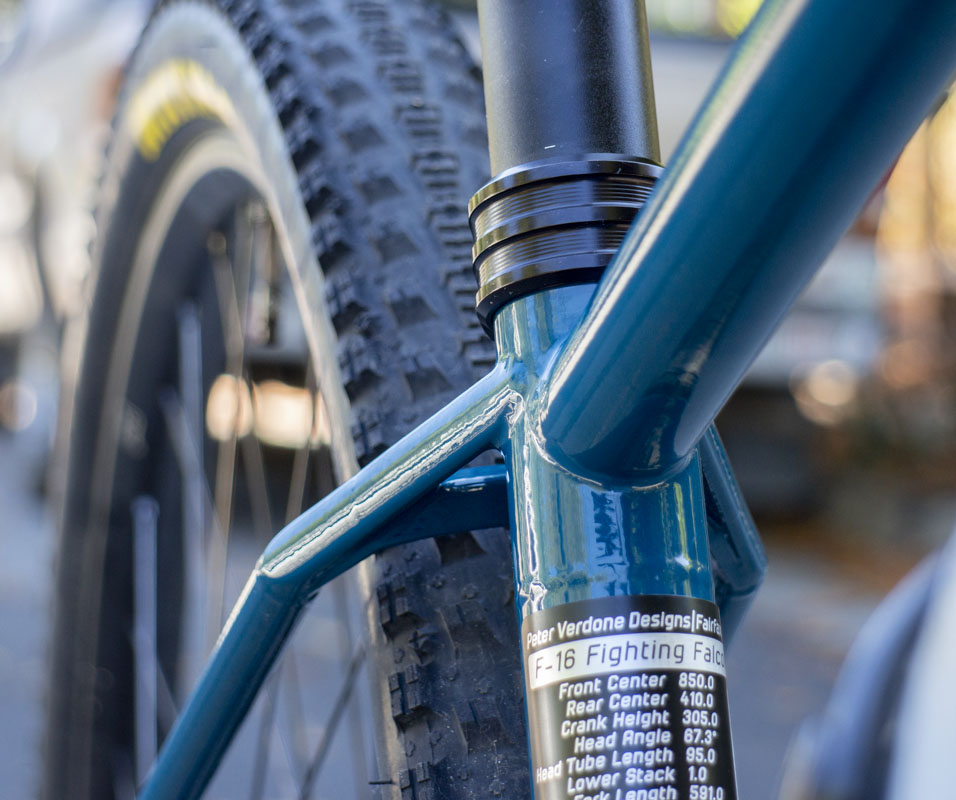
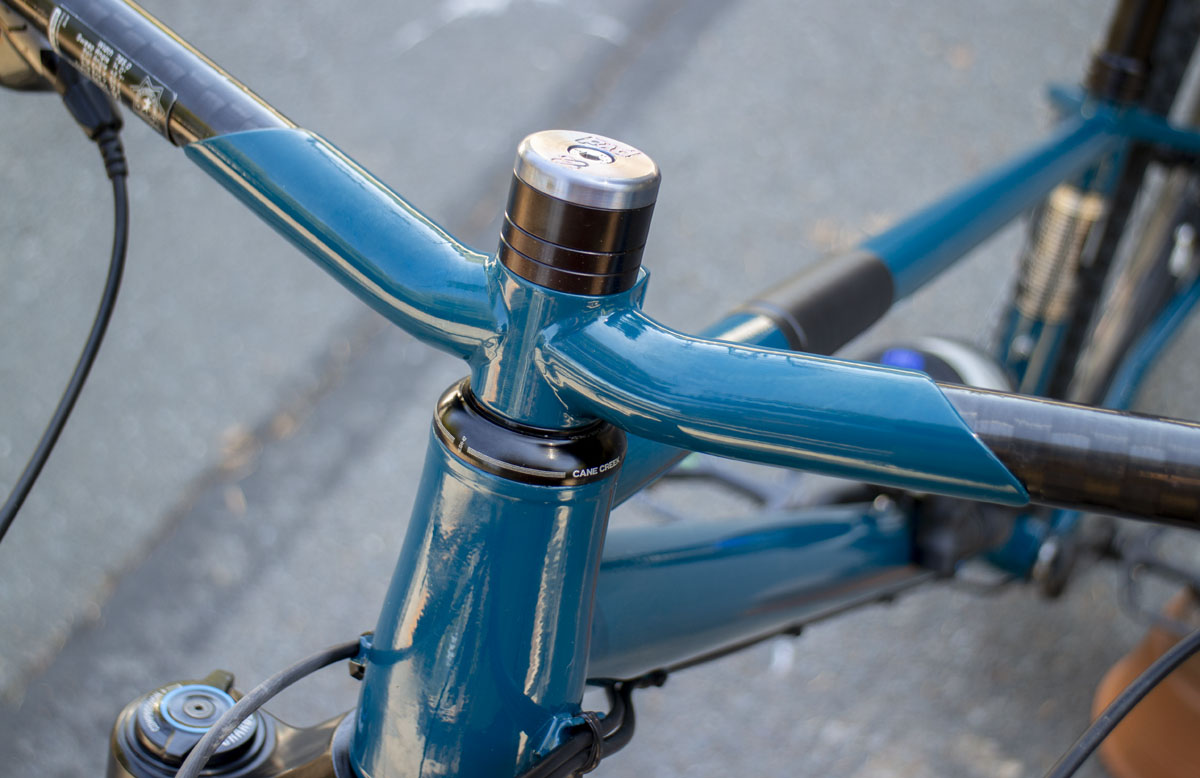
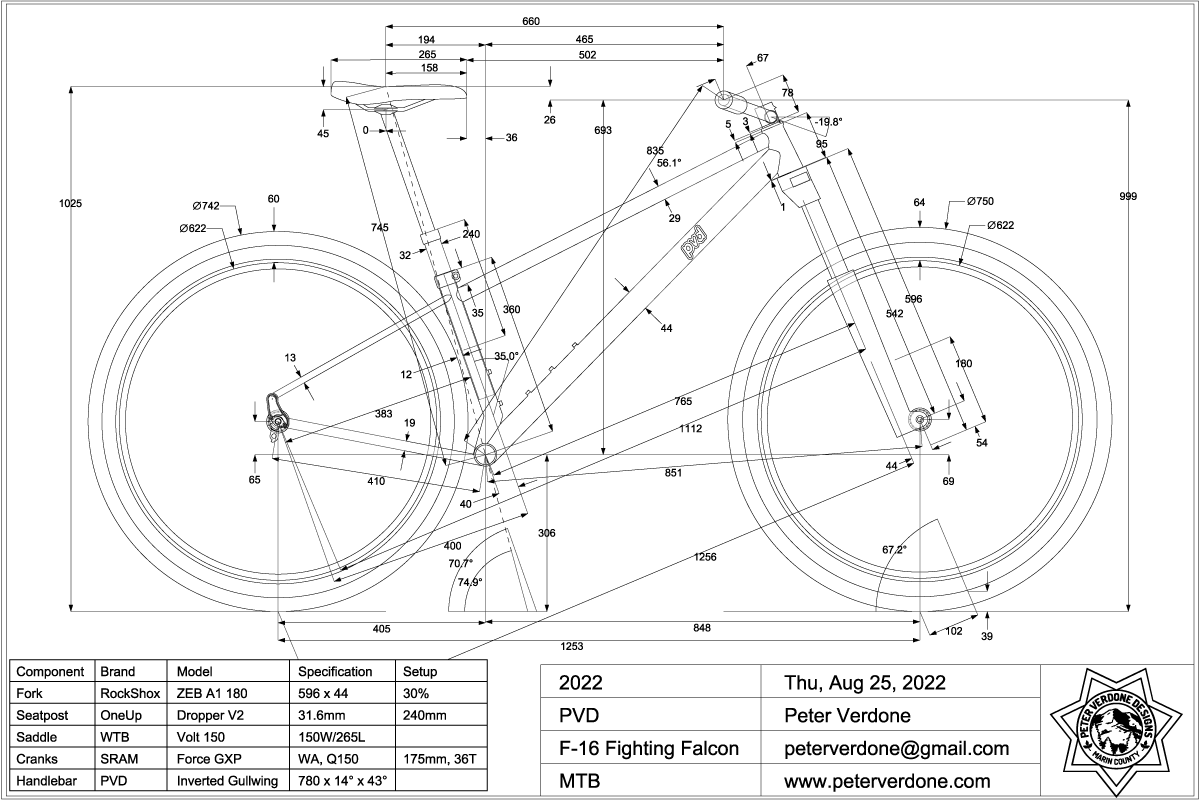
The geometry is continuing the PostForward concept that I’d started on the MiG. Steepening the head tube while keeping the modern front center length, thus reducing flop and heavy steering. I had intended that the head angle of this bike be 67.5 degrees, the steepest I’ve done for a mountain bike in over a decade.
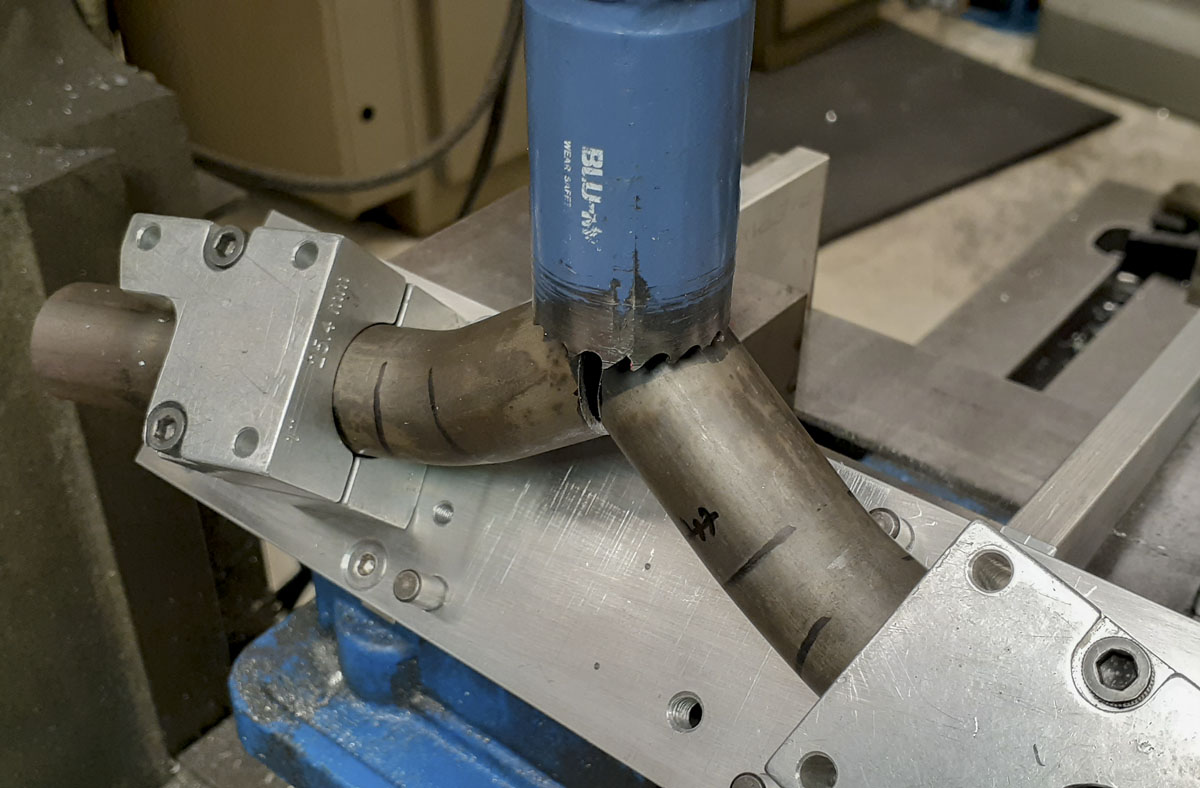
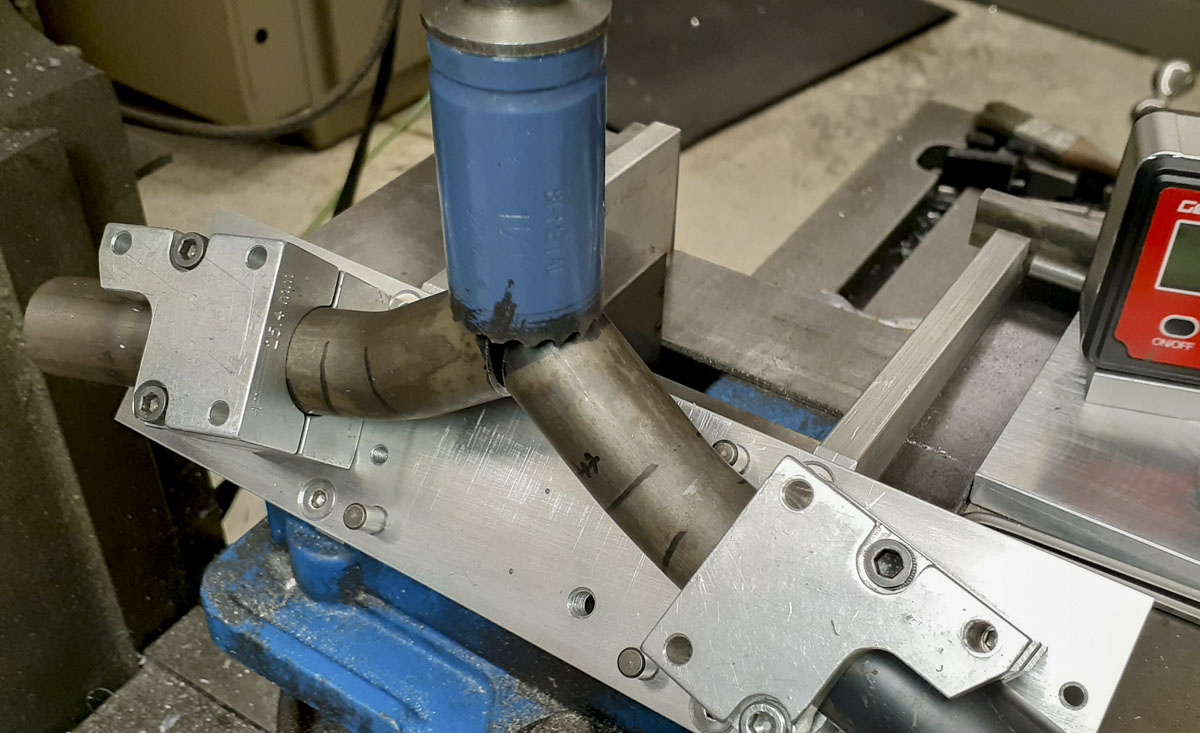
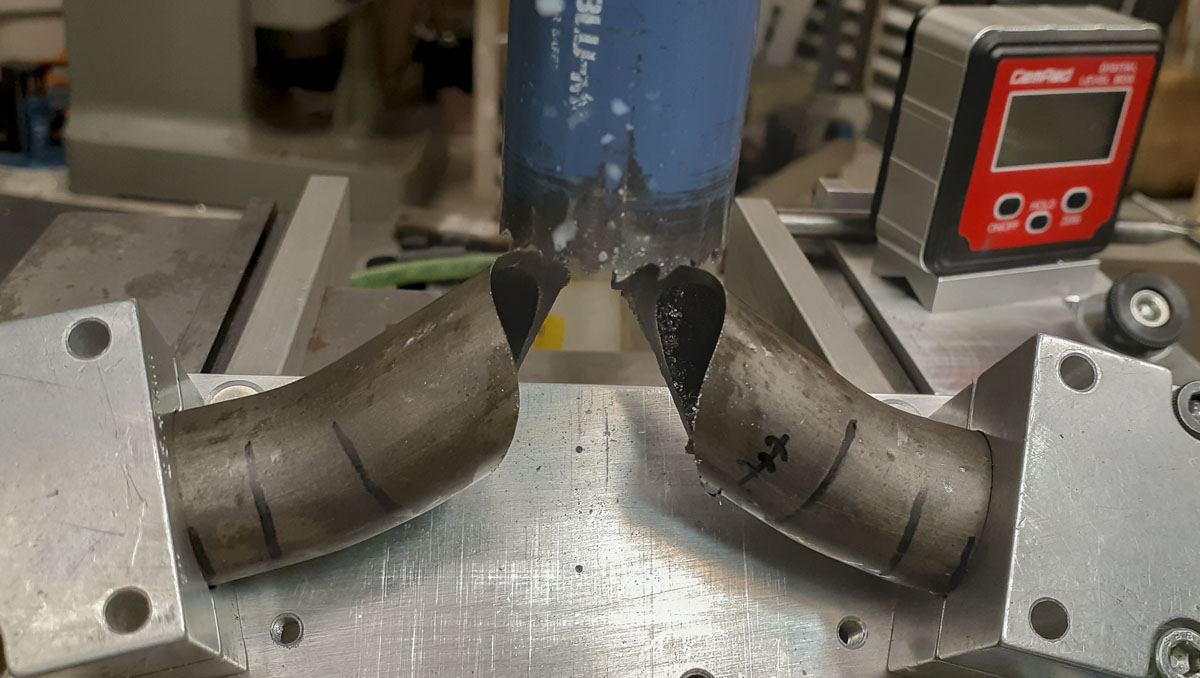
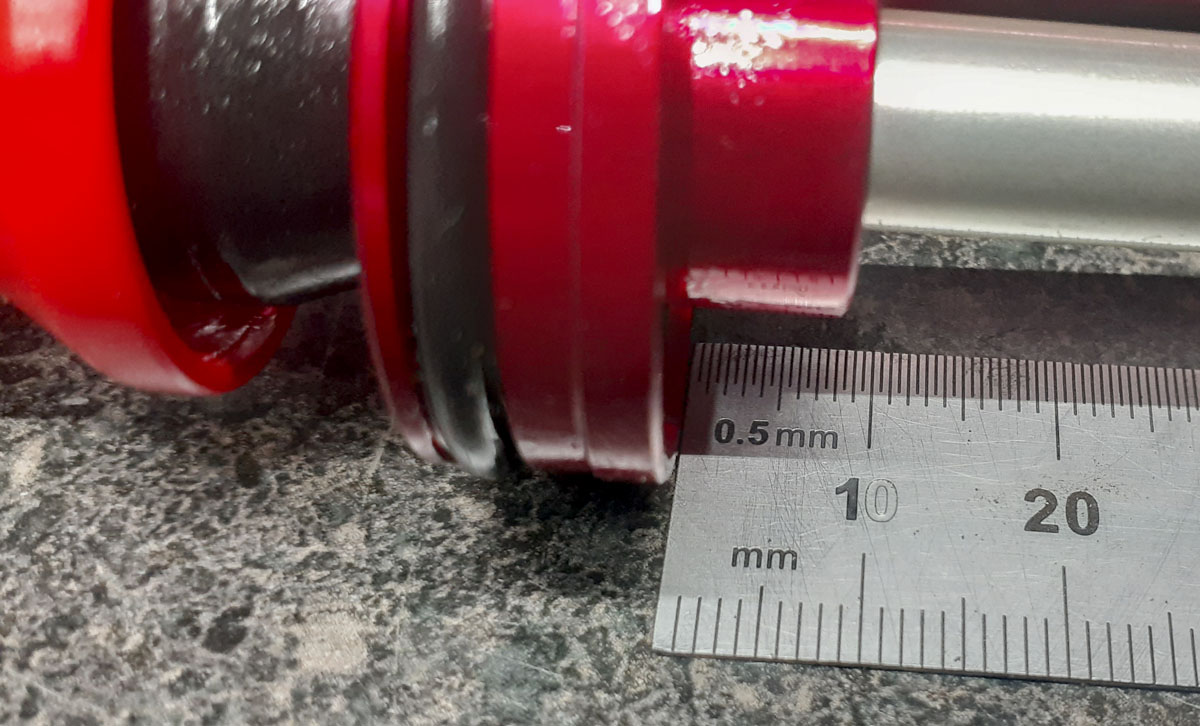
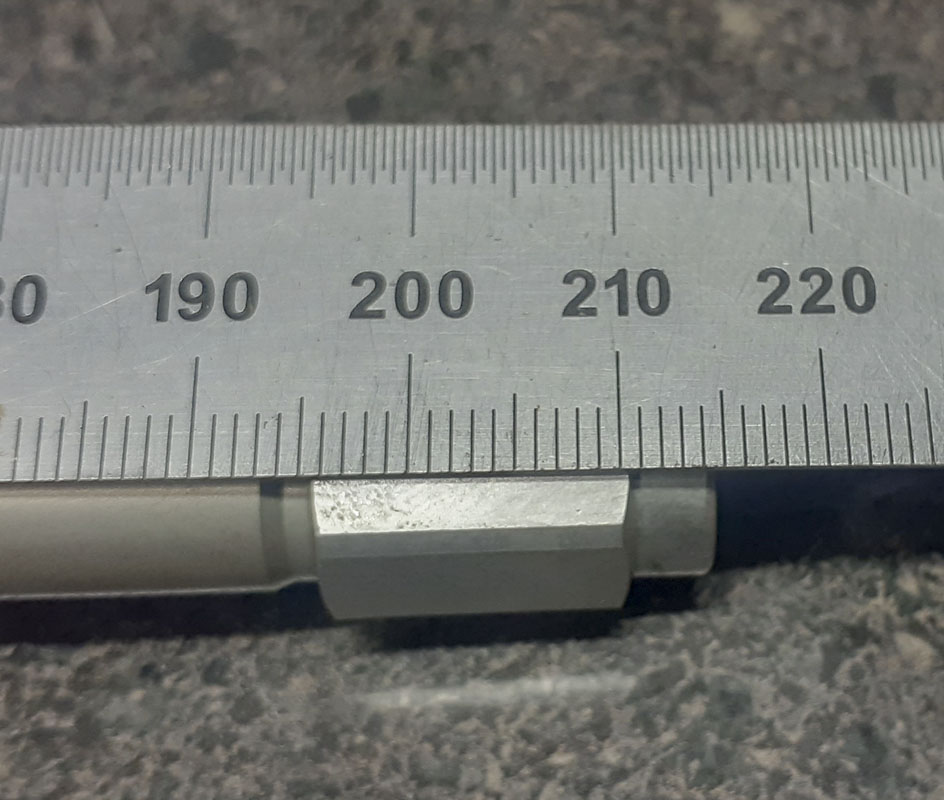
While cutting tubes for the front triangle, I made a mistakenly short cut of the fancy 1.75″ down tube. It was now just a millimeter or so off and I had do decide to either scrap the tube, shorten the front center, or slacken the head angle. I choose to slacken the head angle by 0.2 degrees as that was the least meaningful change that would be sensible. That’s why you see that funny number.
These are practical decisions that we need to make sometimes to bury our mistakes. When I’m doing my best work, each bike will be a significant departure from the last. In that involves so many changes in tooling and processes that work in the shop turns the mind into soup. A thousand little details that need to come together. We will see this come up again in this post.
The change in head angle brings the flop from 42.5mm (on the MiG) to 38.9mm, an 8.5% reduction. More, compared to the 48.4mm that the bike would have at a 65 degree head angle, a 20% decrease. That’s massive.
I’m moving the effective seat tube angle up another 0.50 degree to 75 degrees. This moves the saddle another 5mm forward. I’m really at the edge of what I can handle on my arms but there are real gains to this position. The balance is the key. I believe that 76 degrees is too much for me and where I generally ride. 74.5 was pretty good. Hopefully, 75 degrees will be better without too many drawbacks.
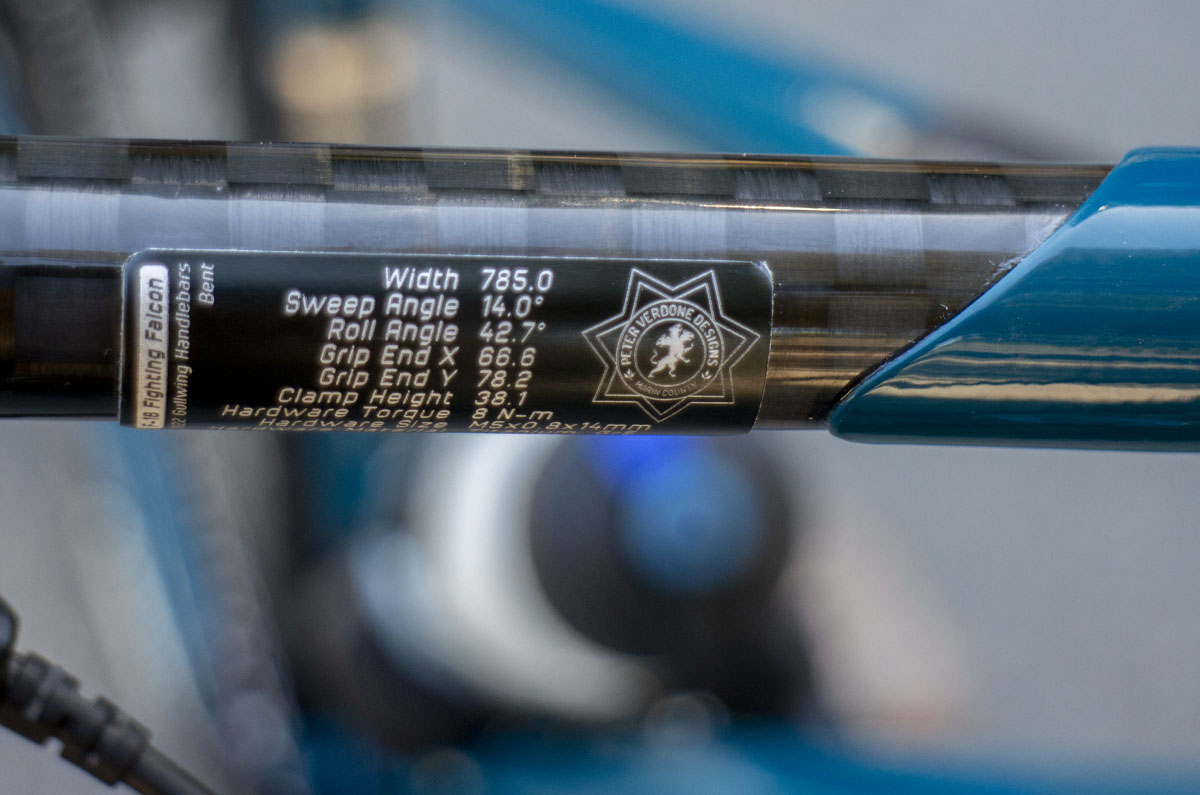
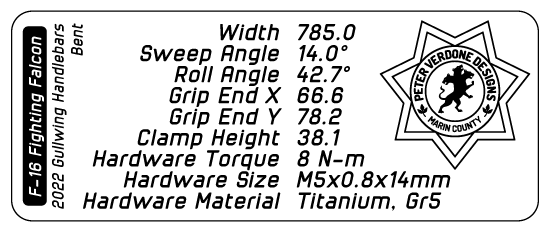
For those that are interested in the rider; 5’10” (1778mm) tall, average proportions, 210lbs, heavy build, not strong, poor upper body and core strength. 52 years old and getting shittier. Grip ends at 835mm @ 56 degrees. 20 degree bar roll.
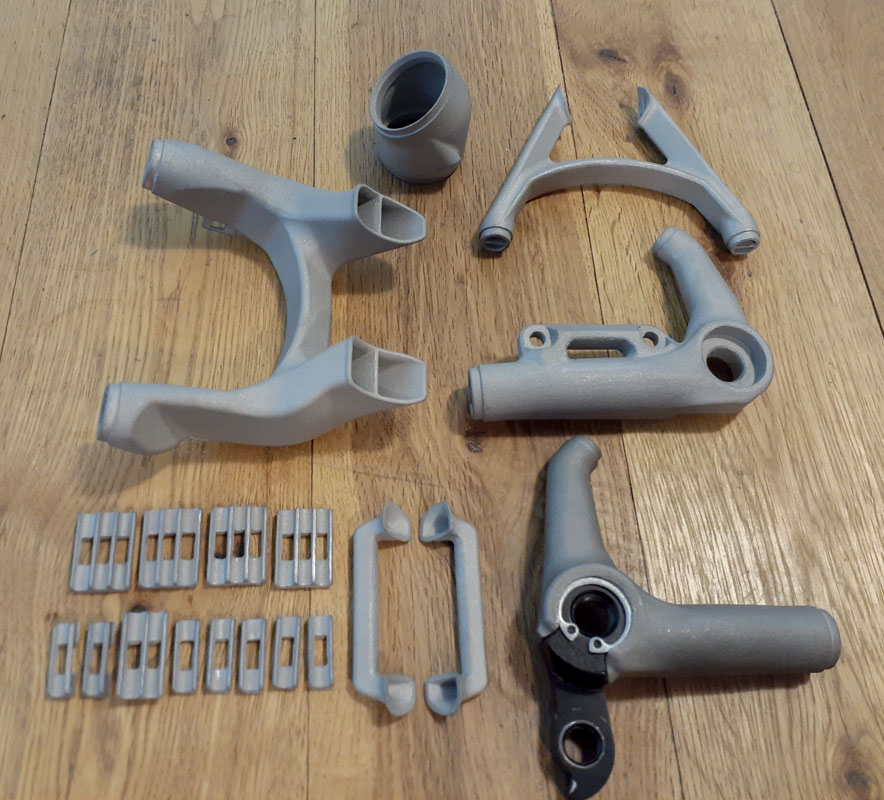
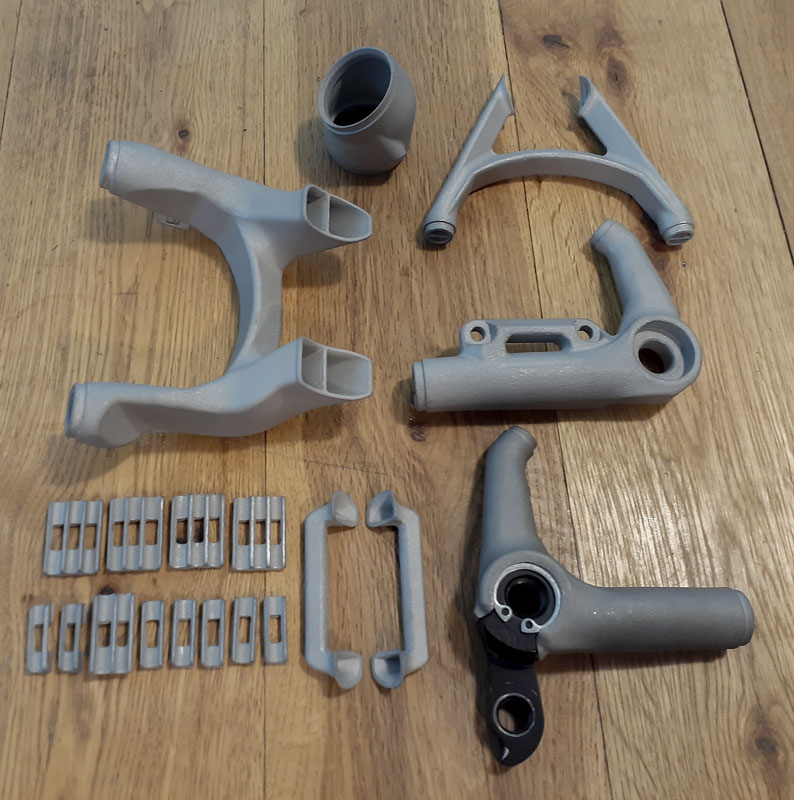
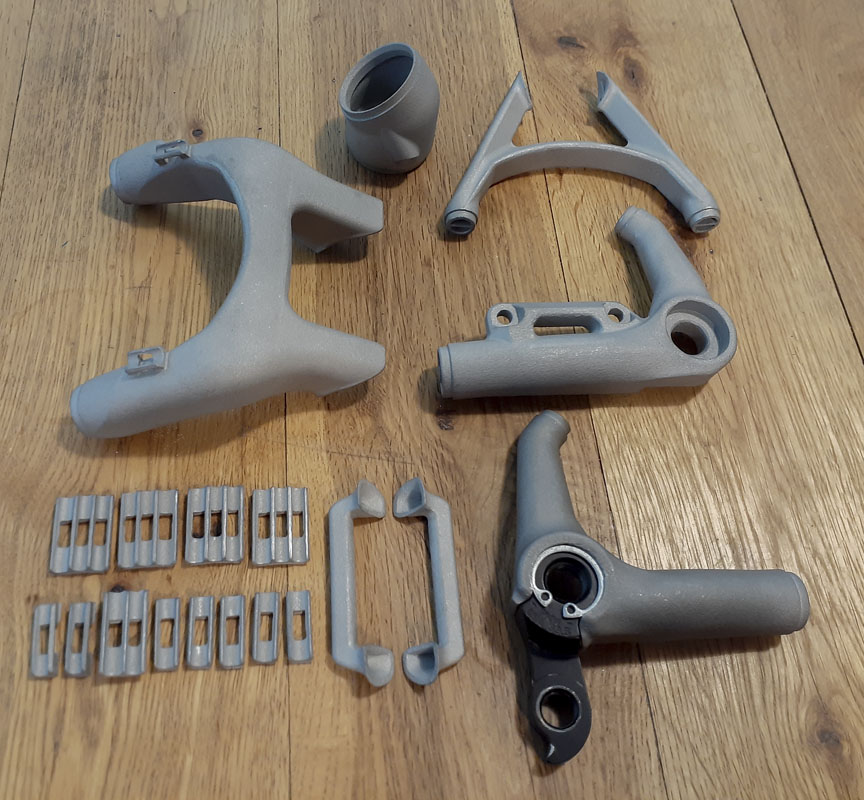
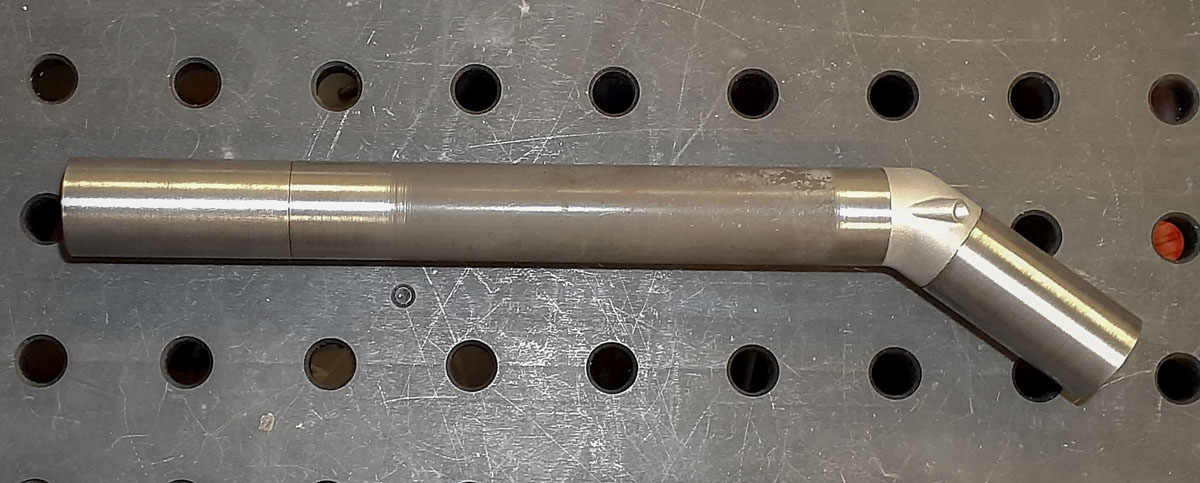
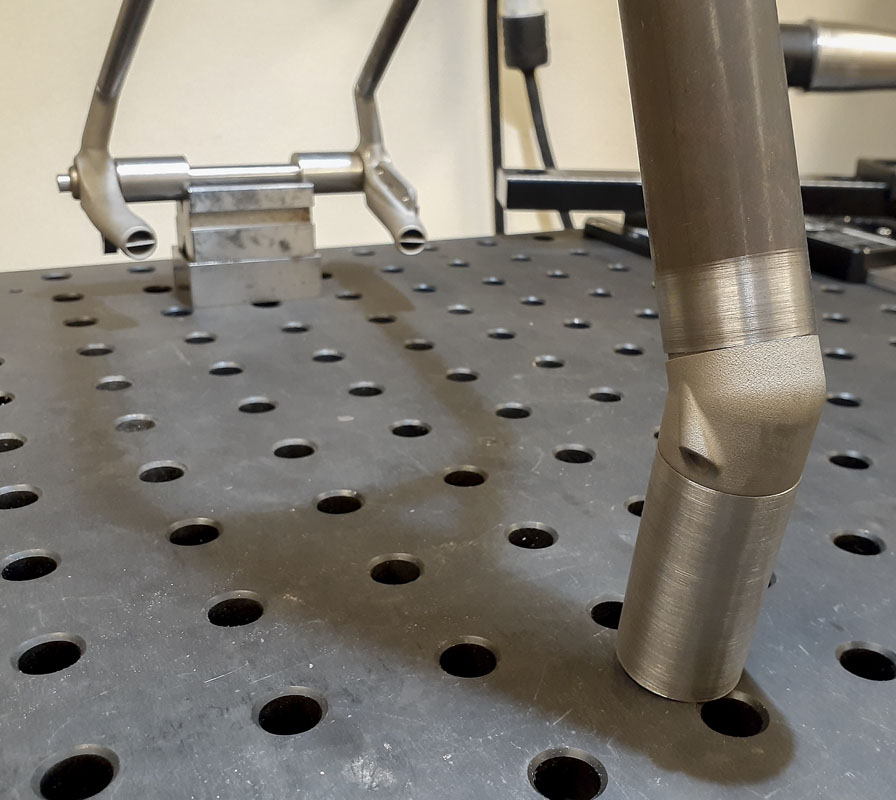
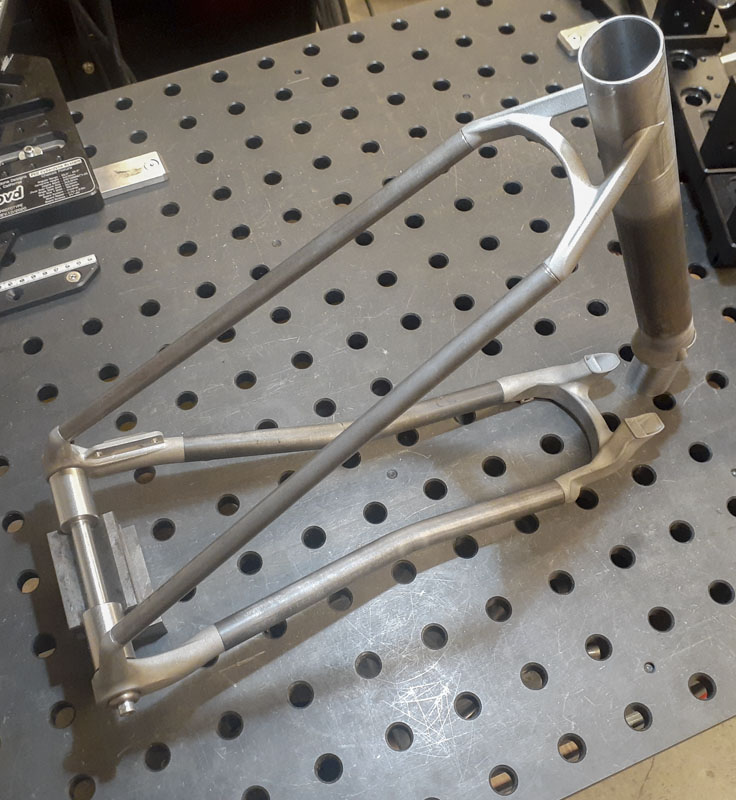
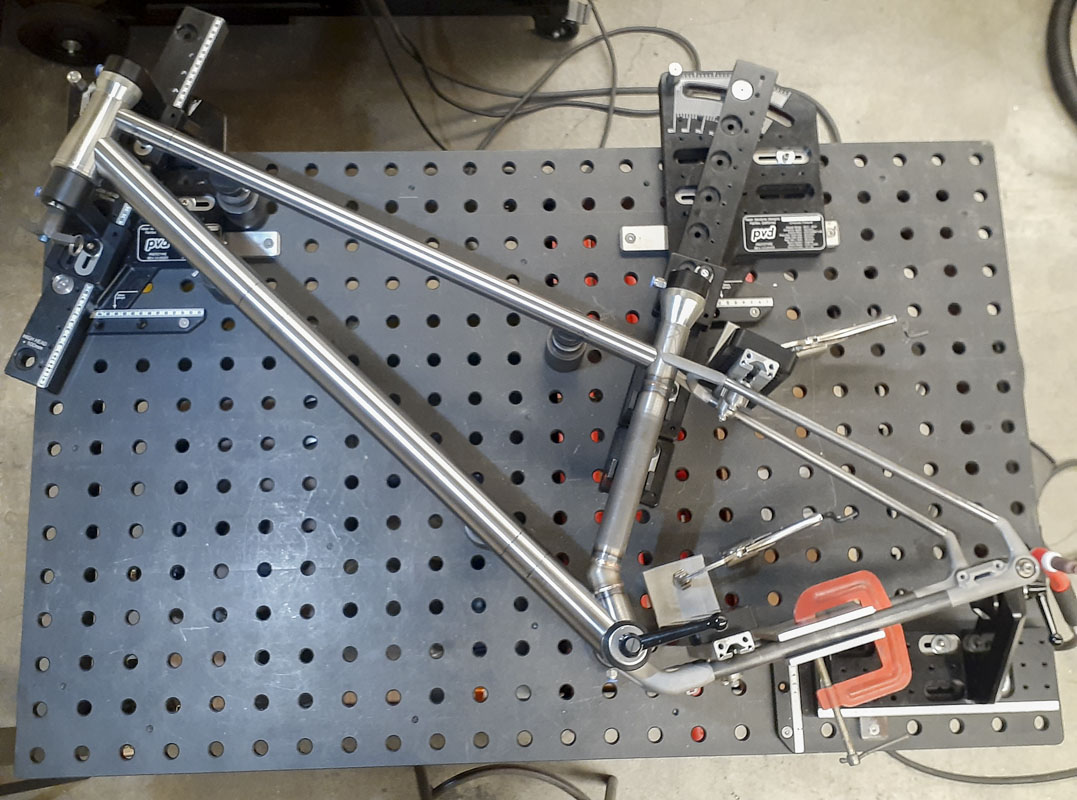
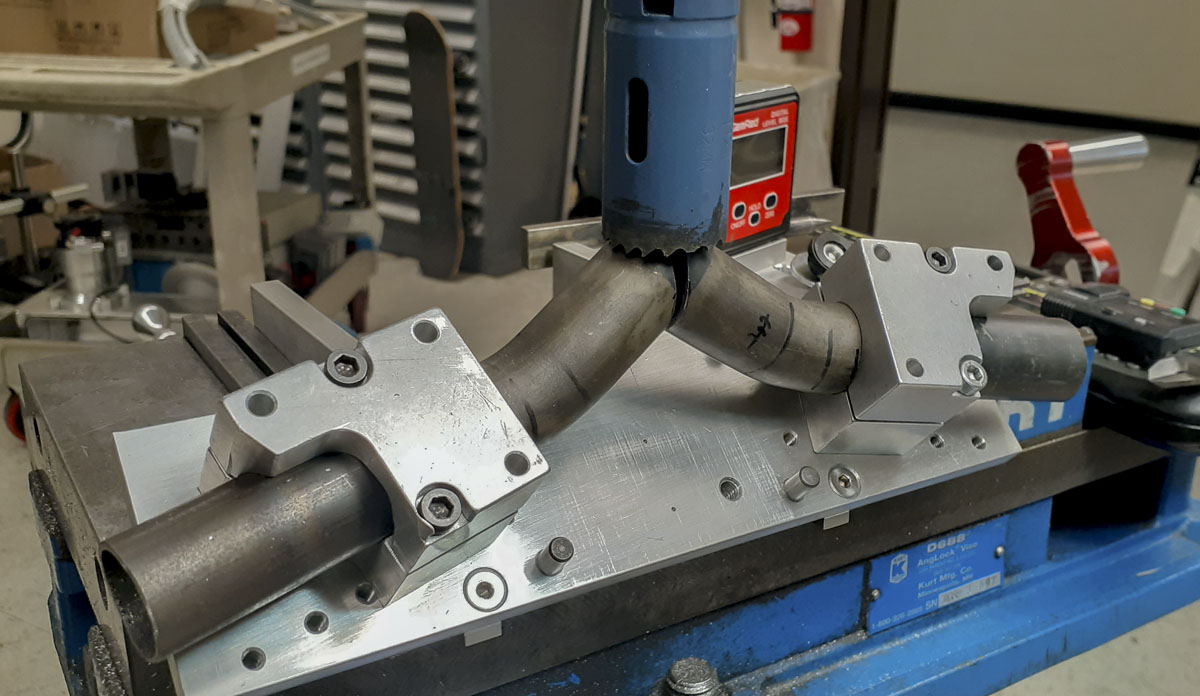
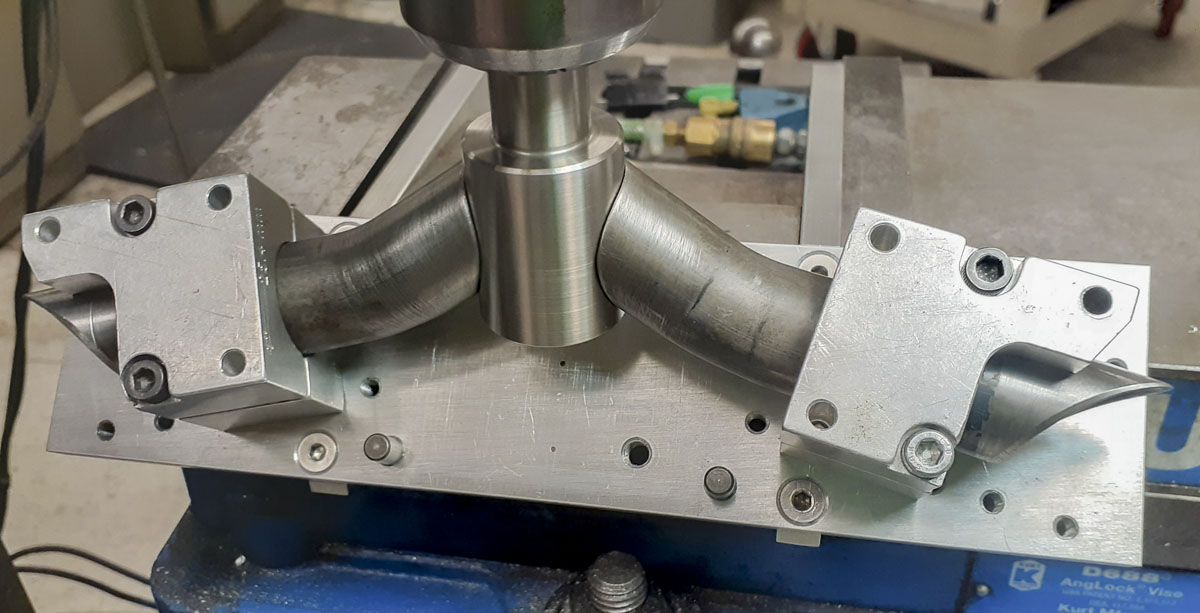
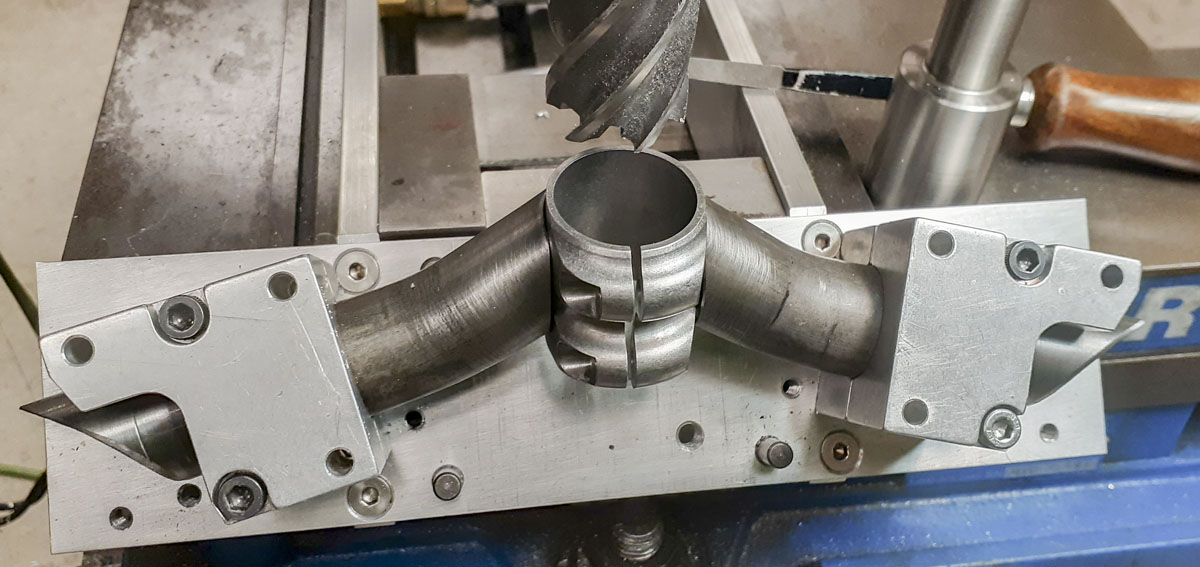
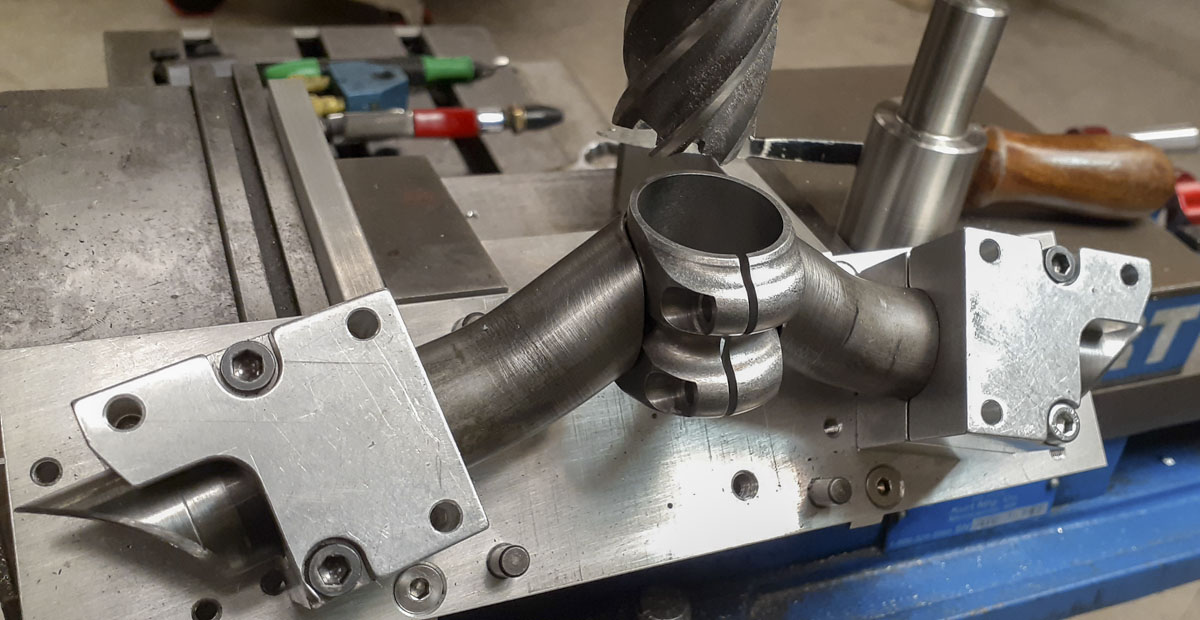
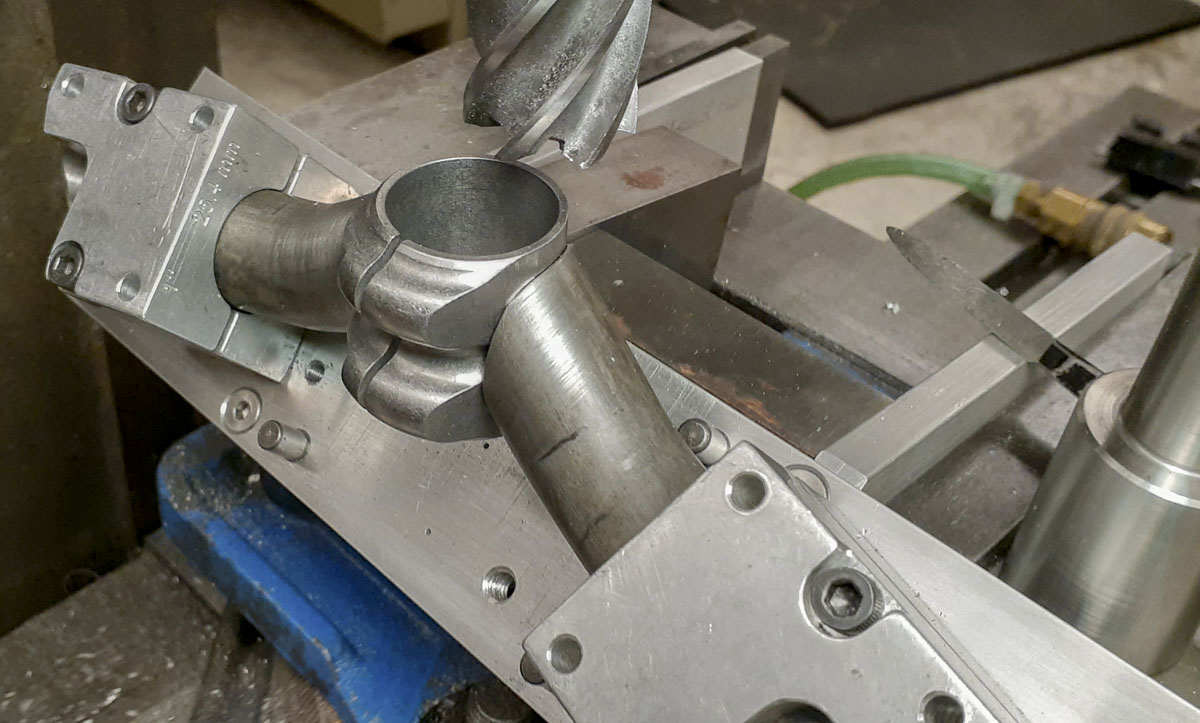
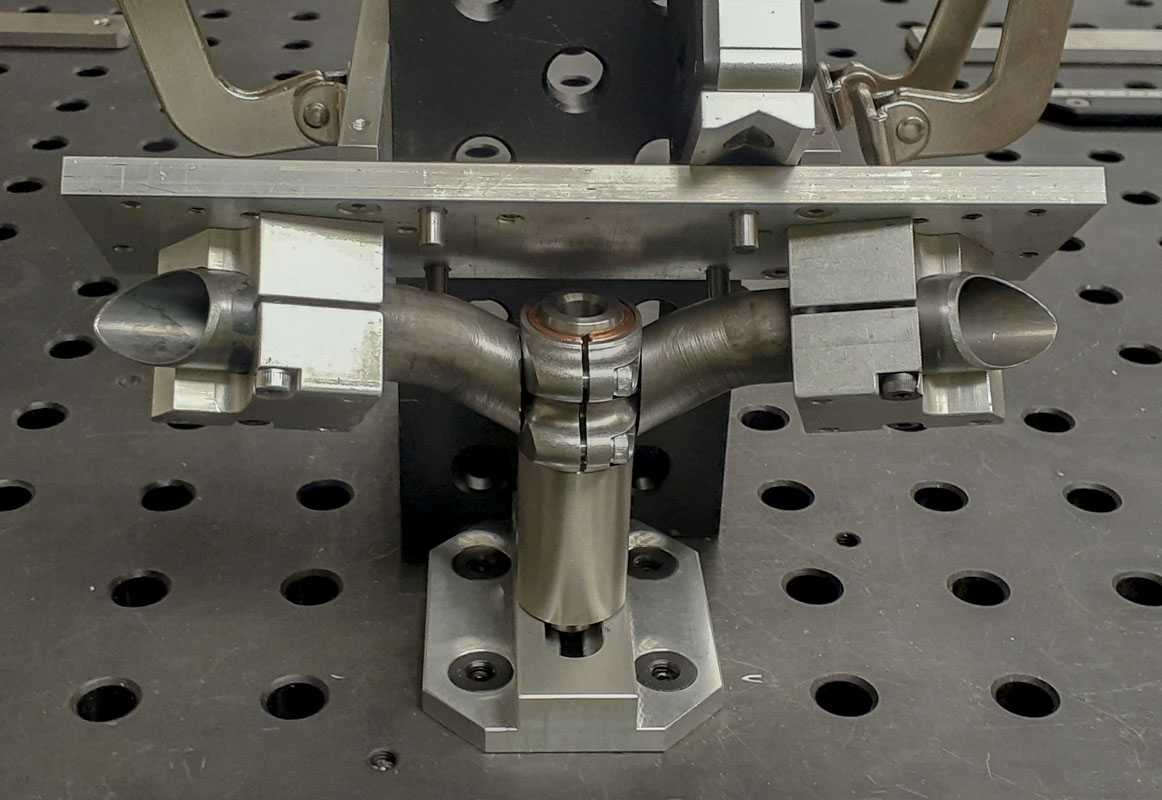
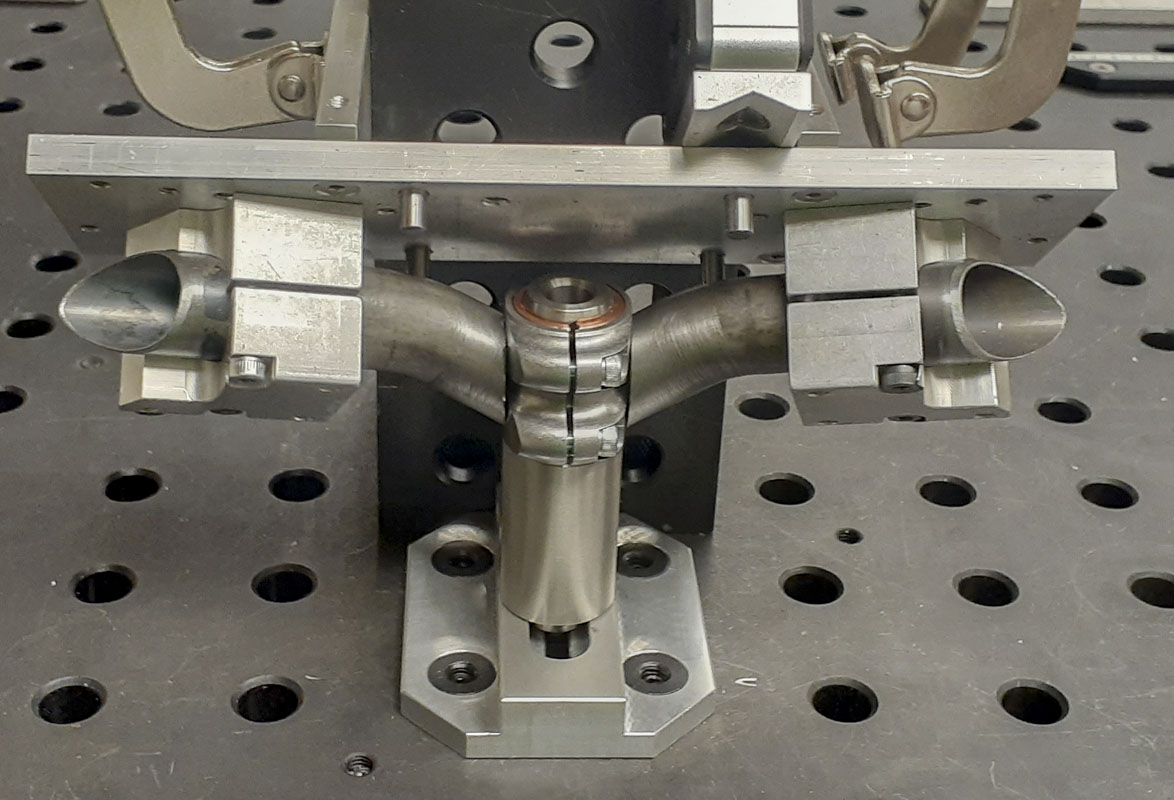
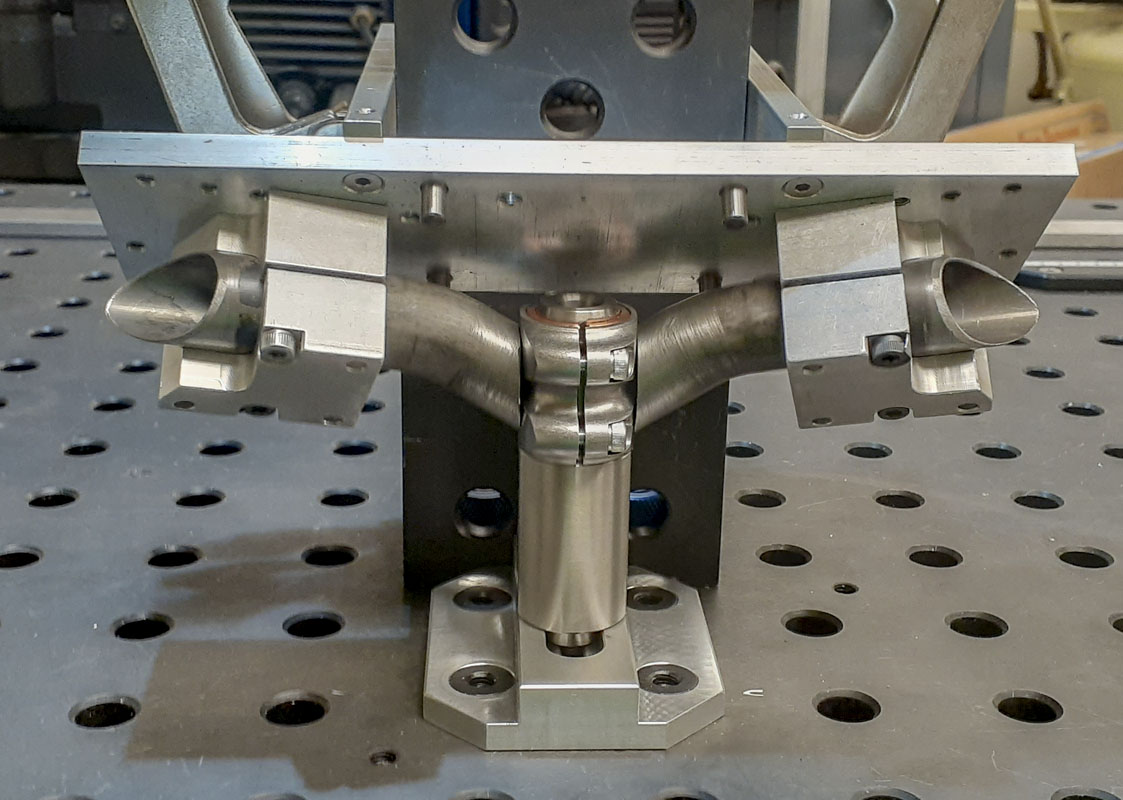
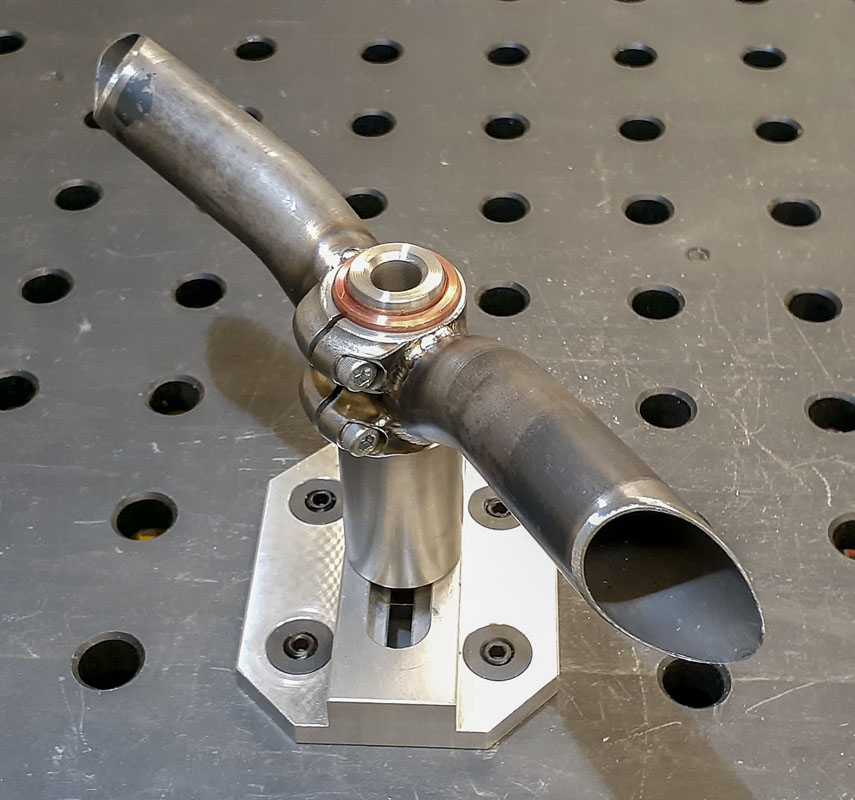
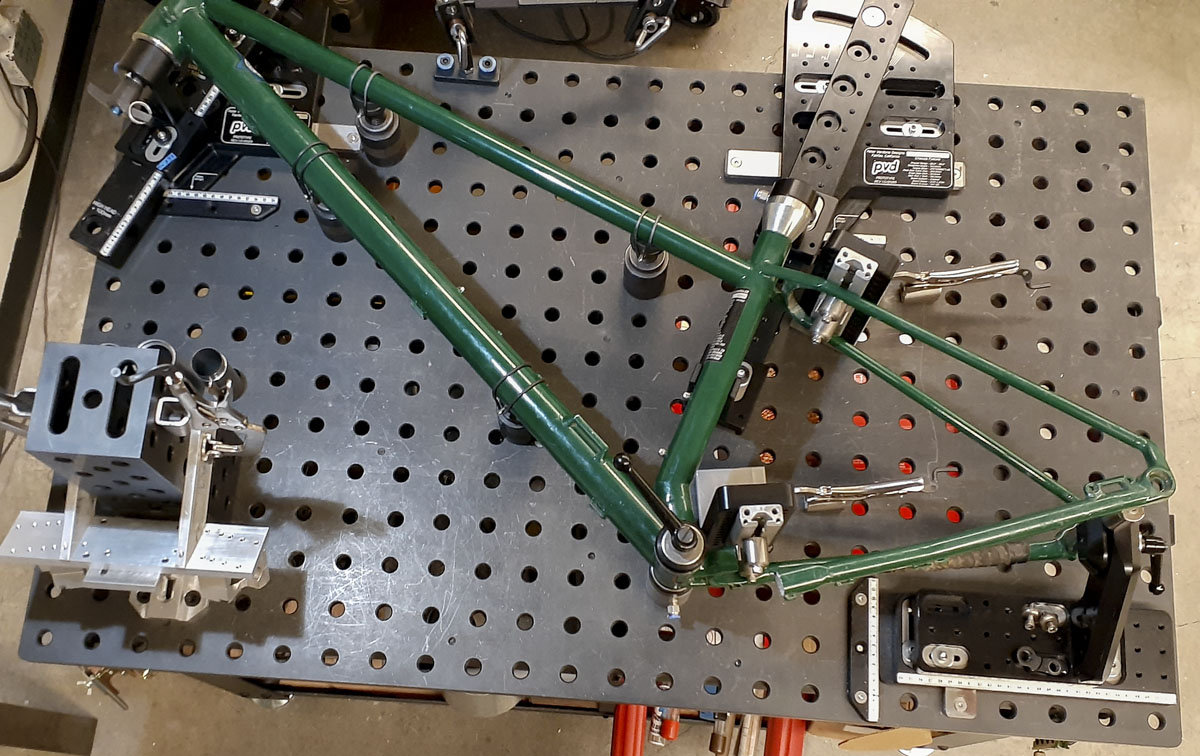
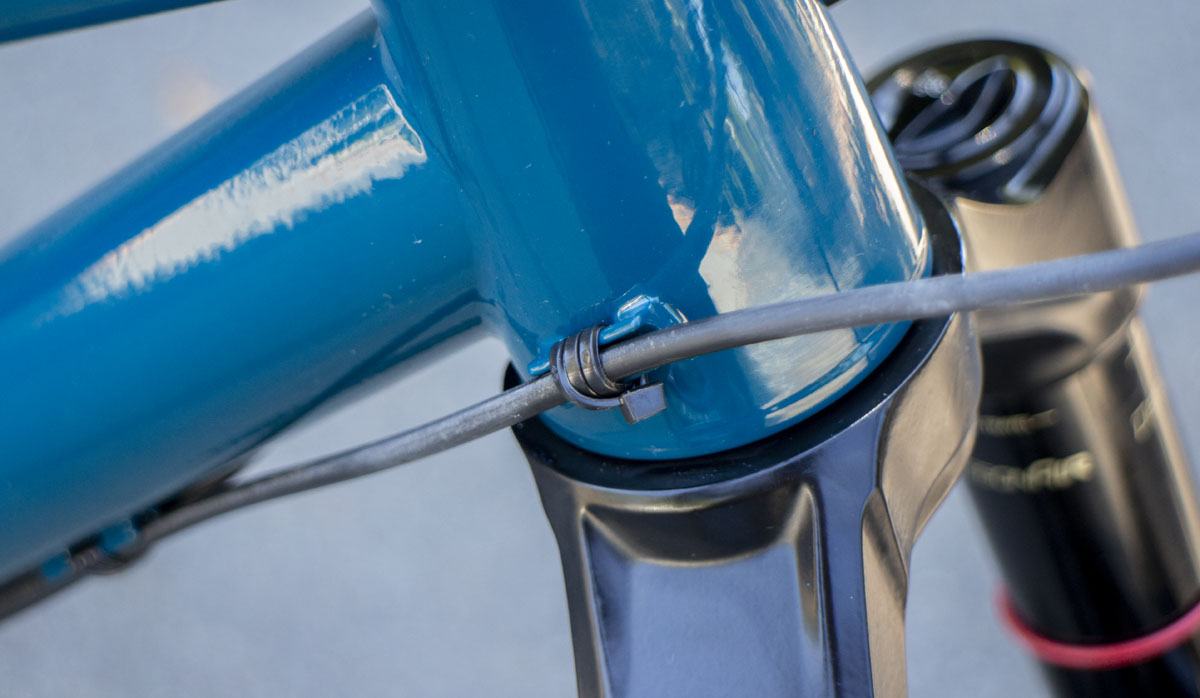
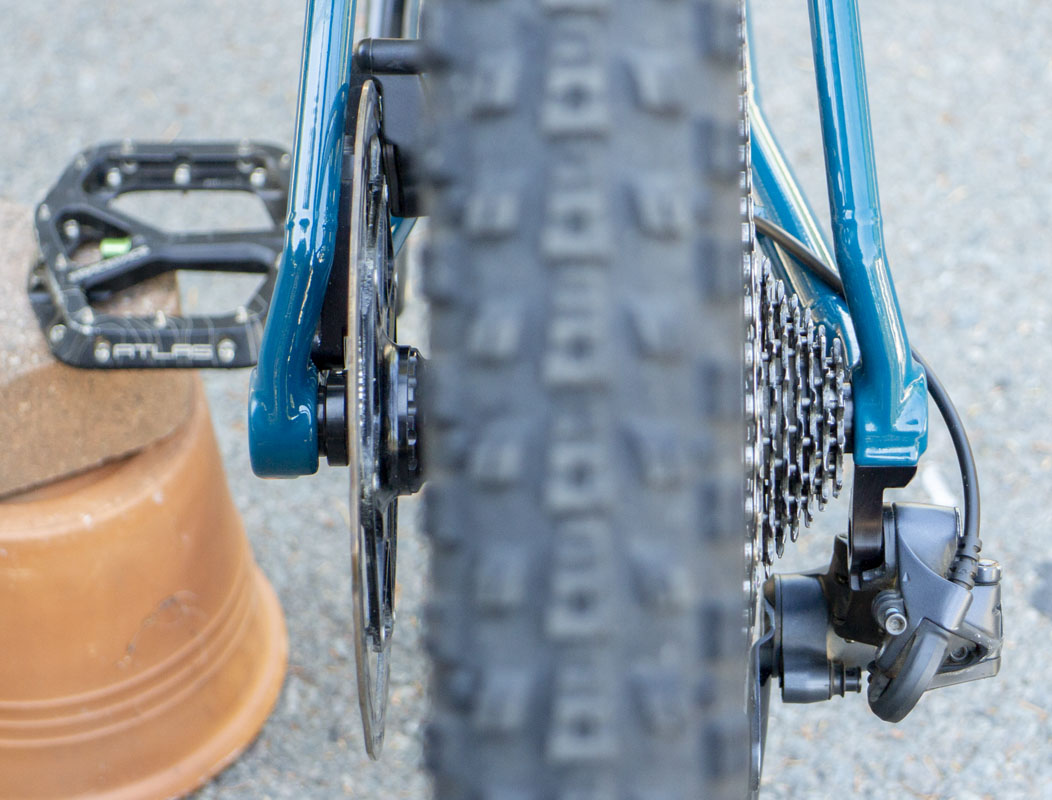
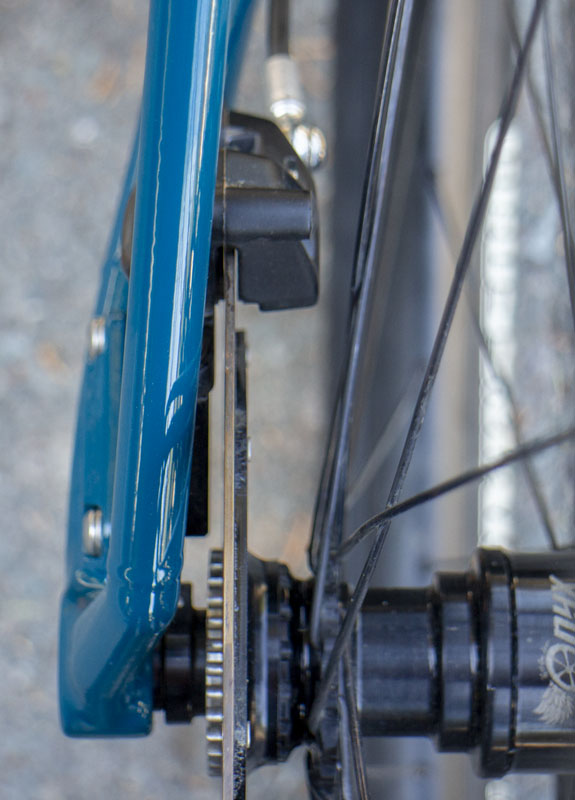
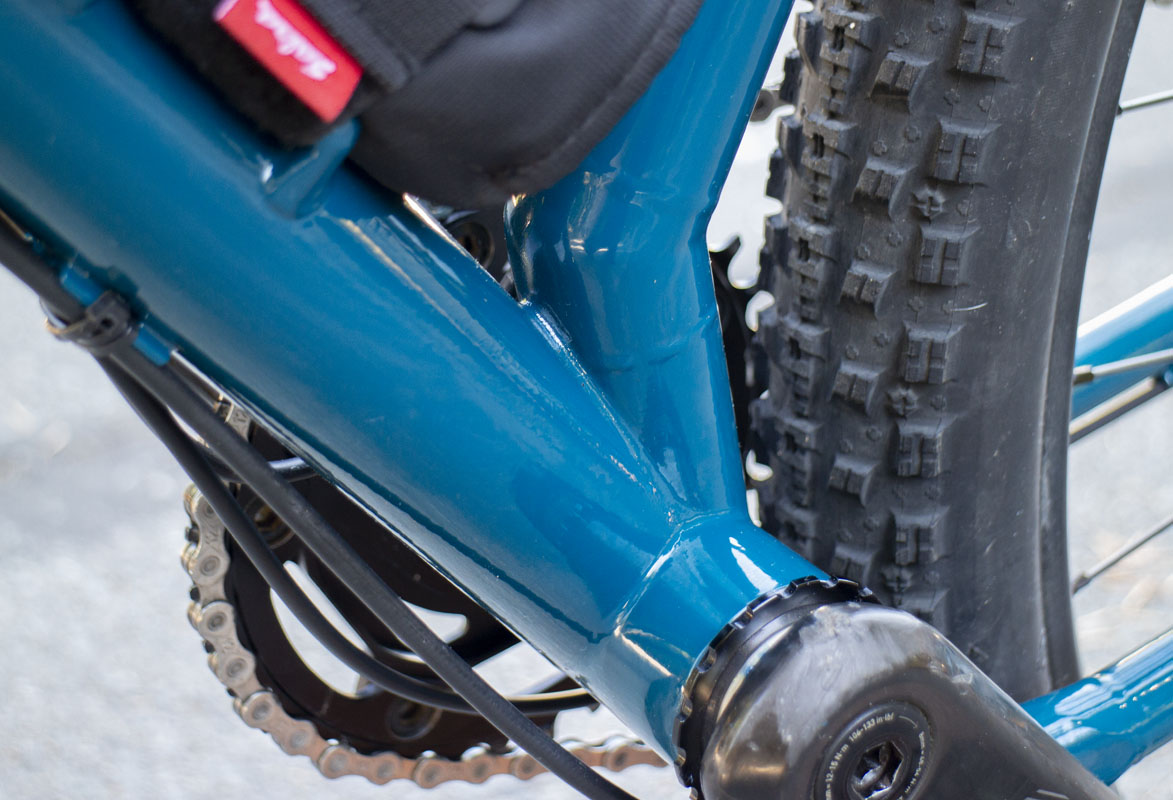
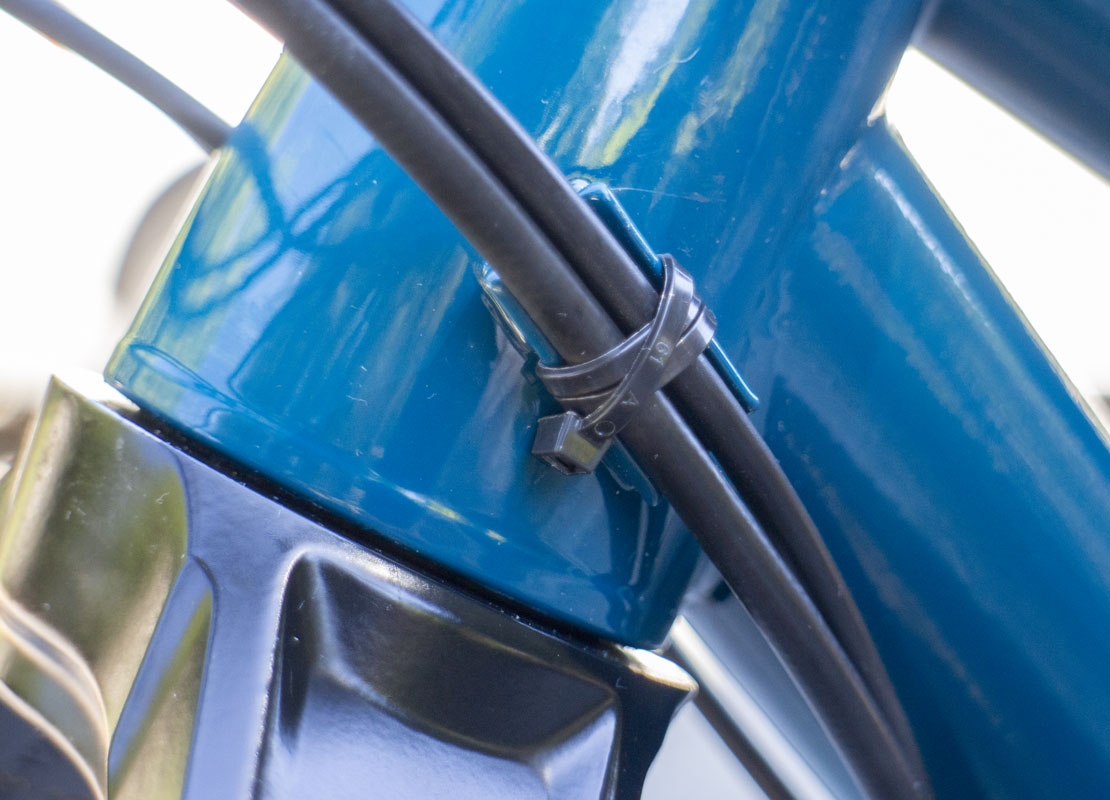
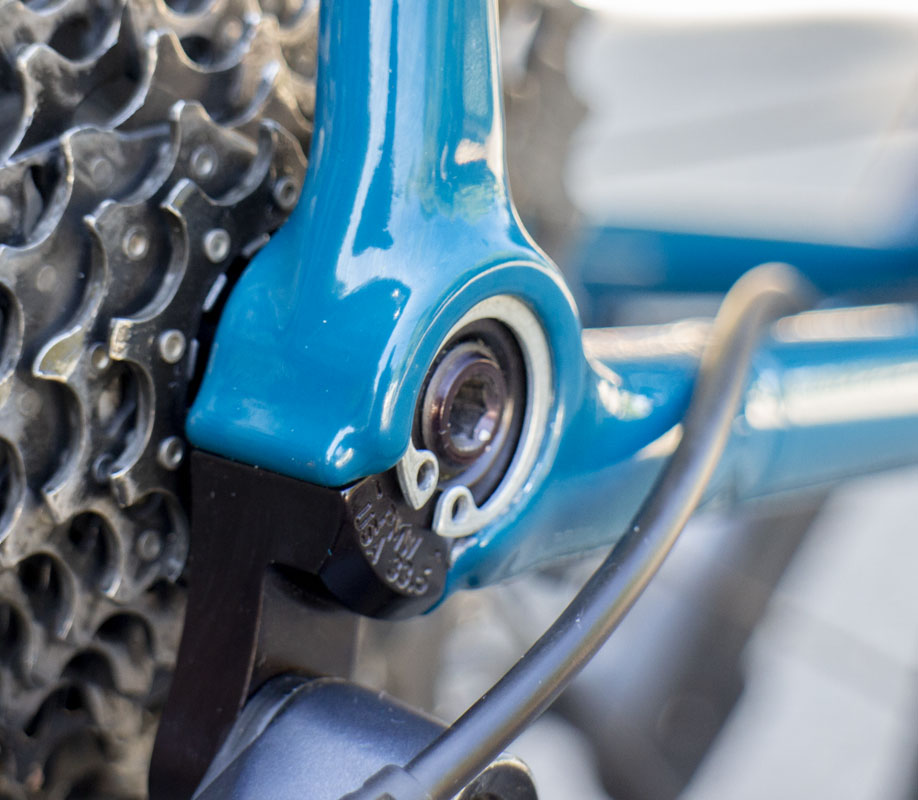
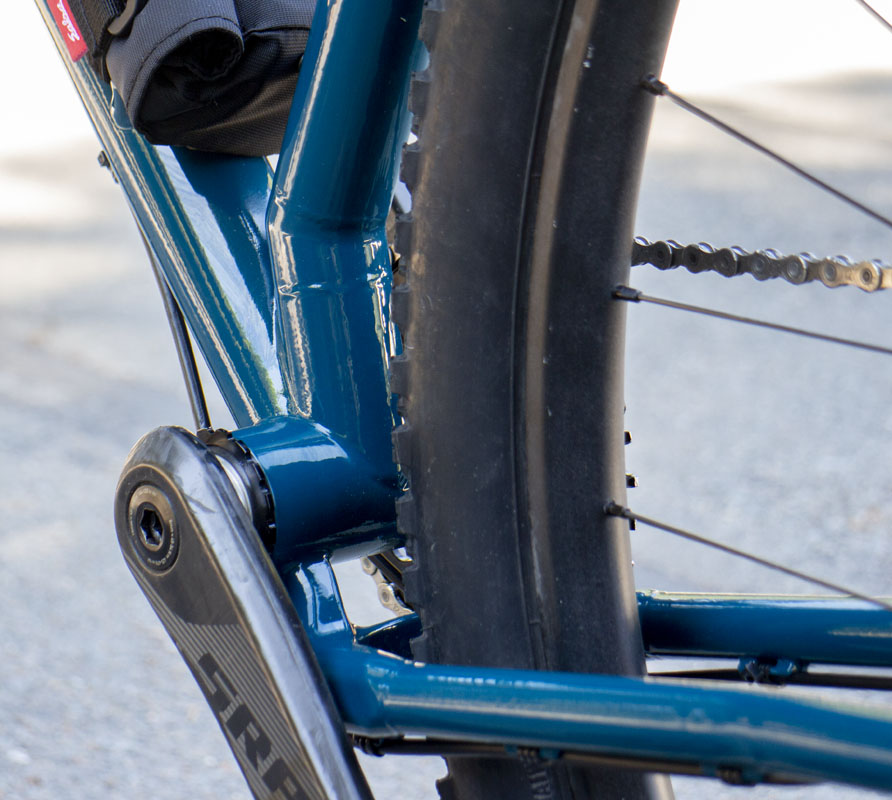
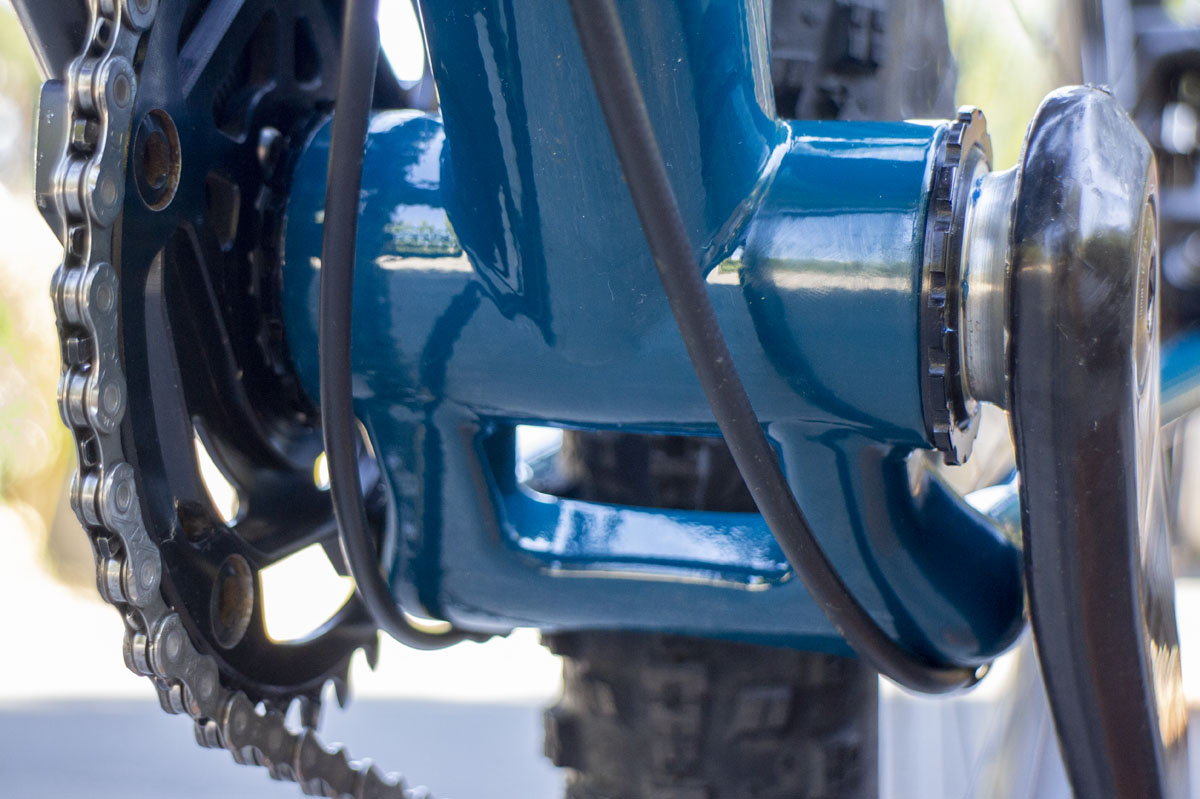
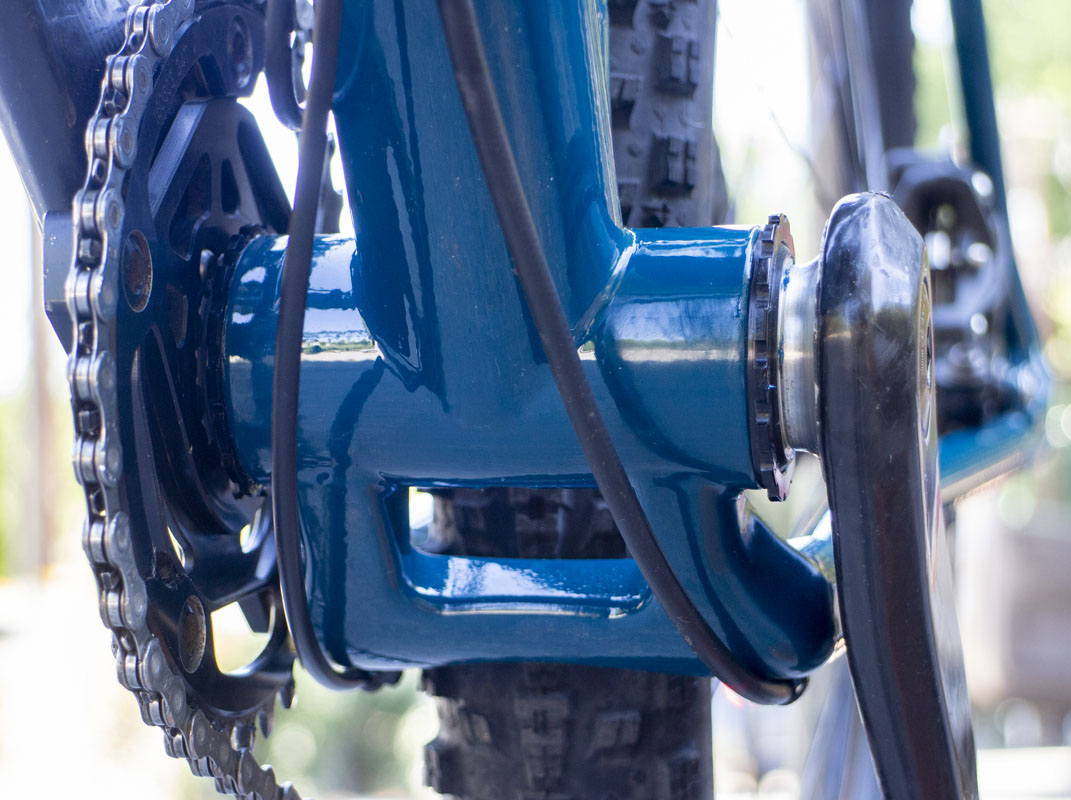
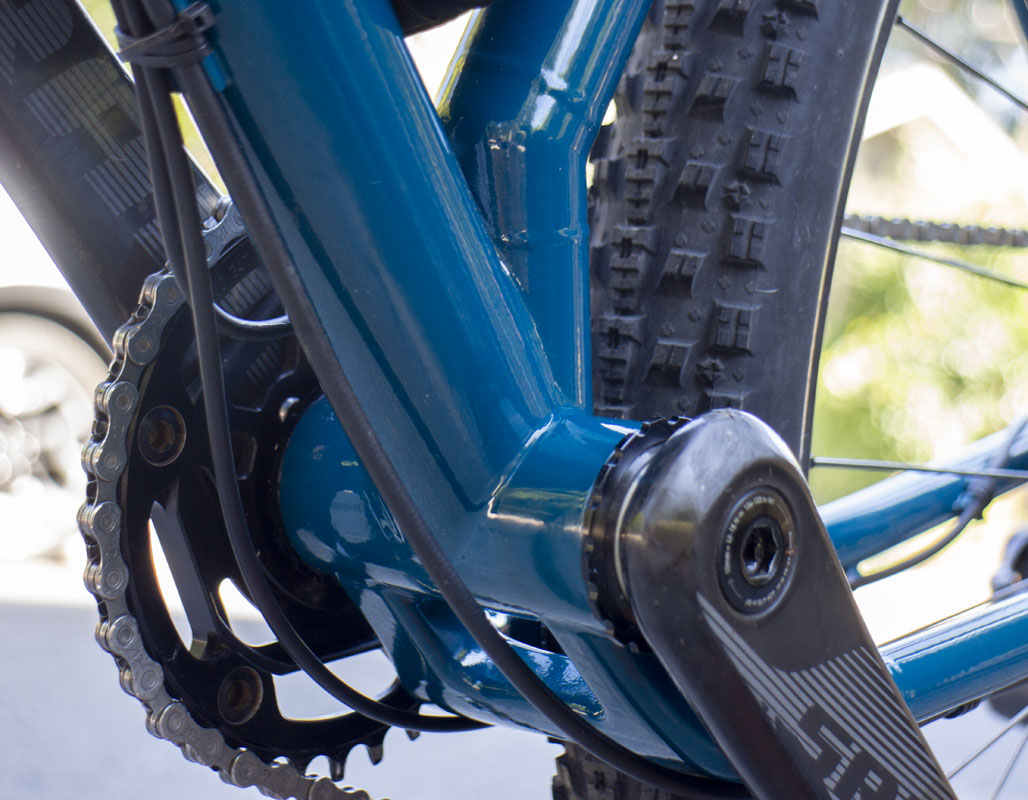
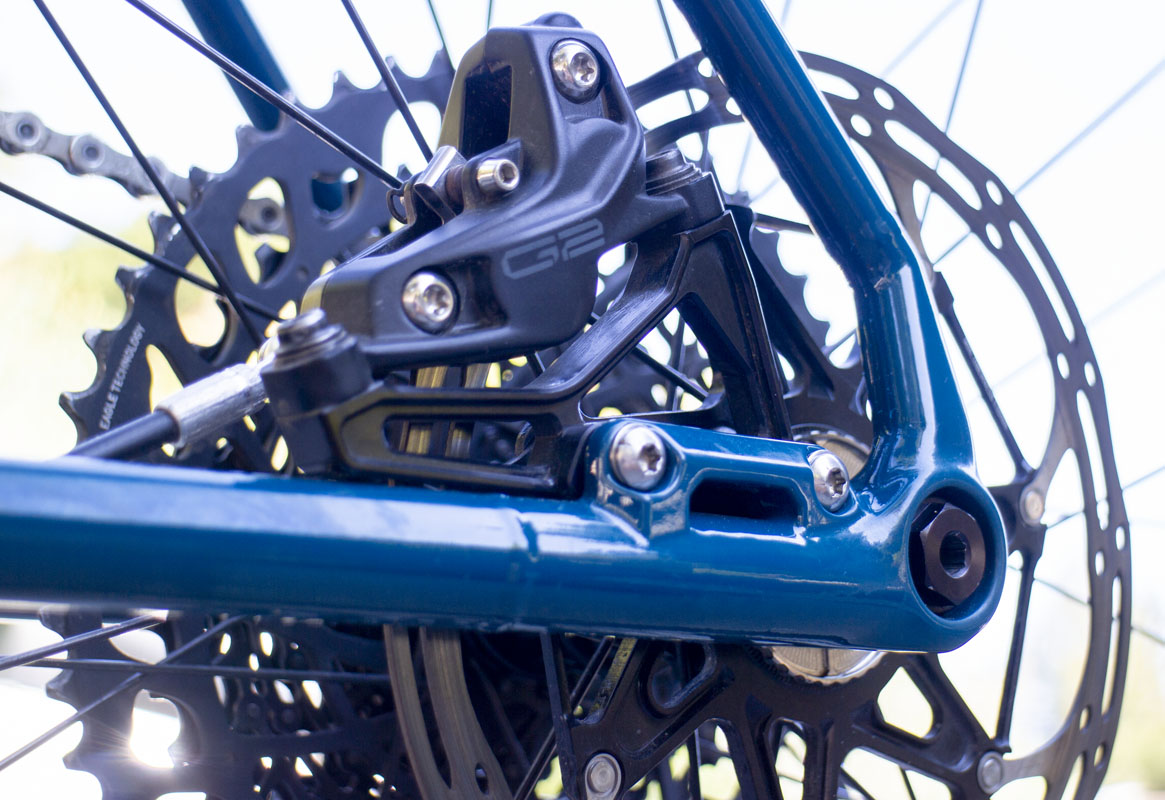
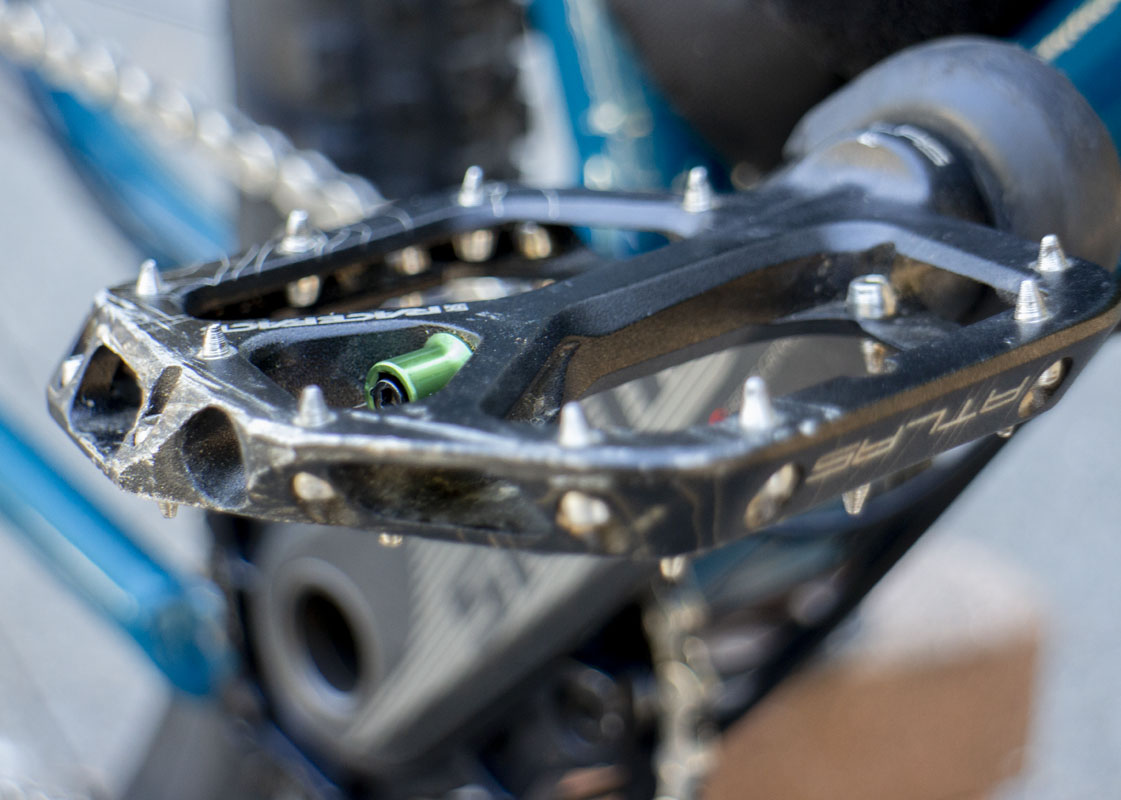
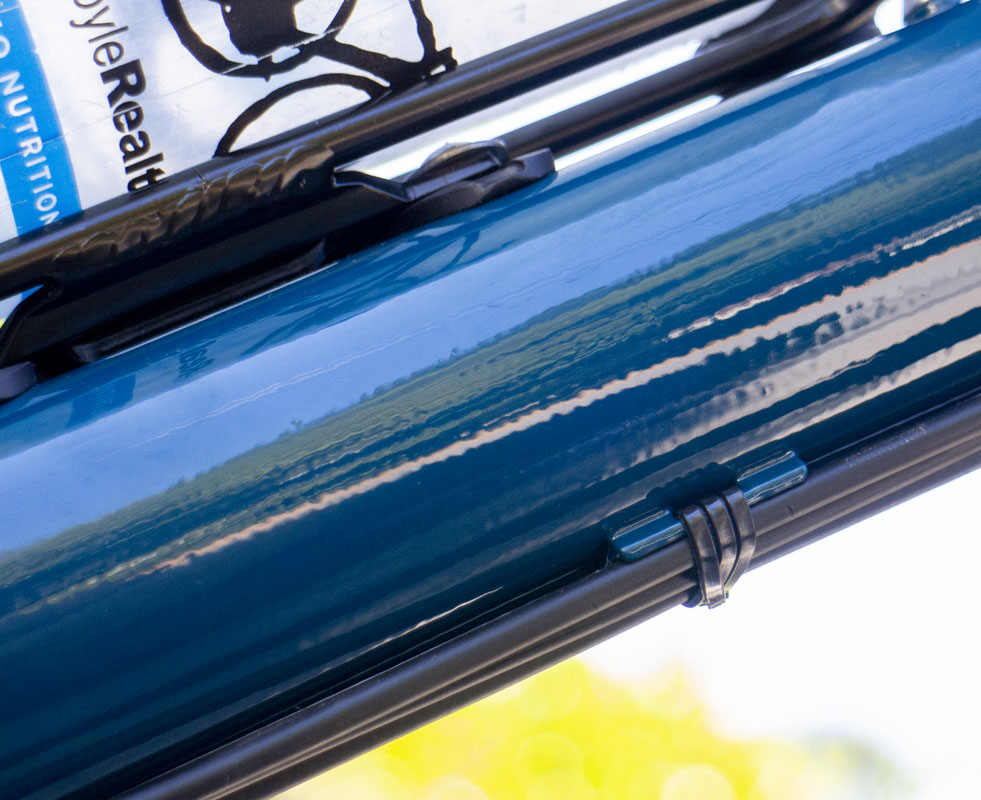
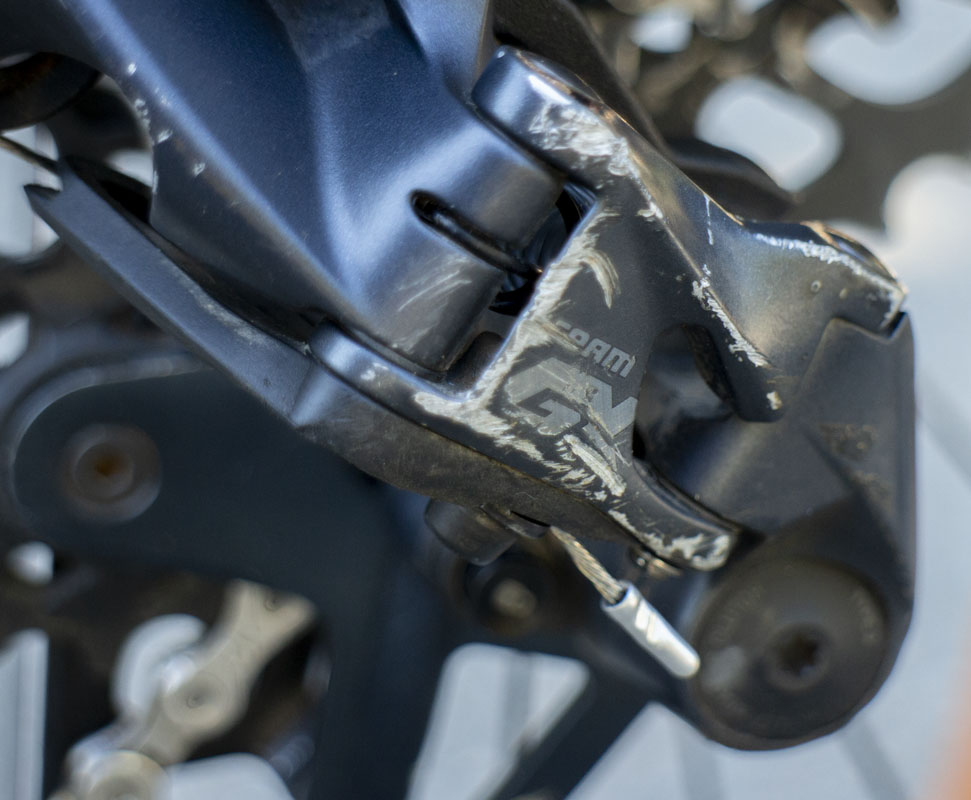
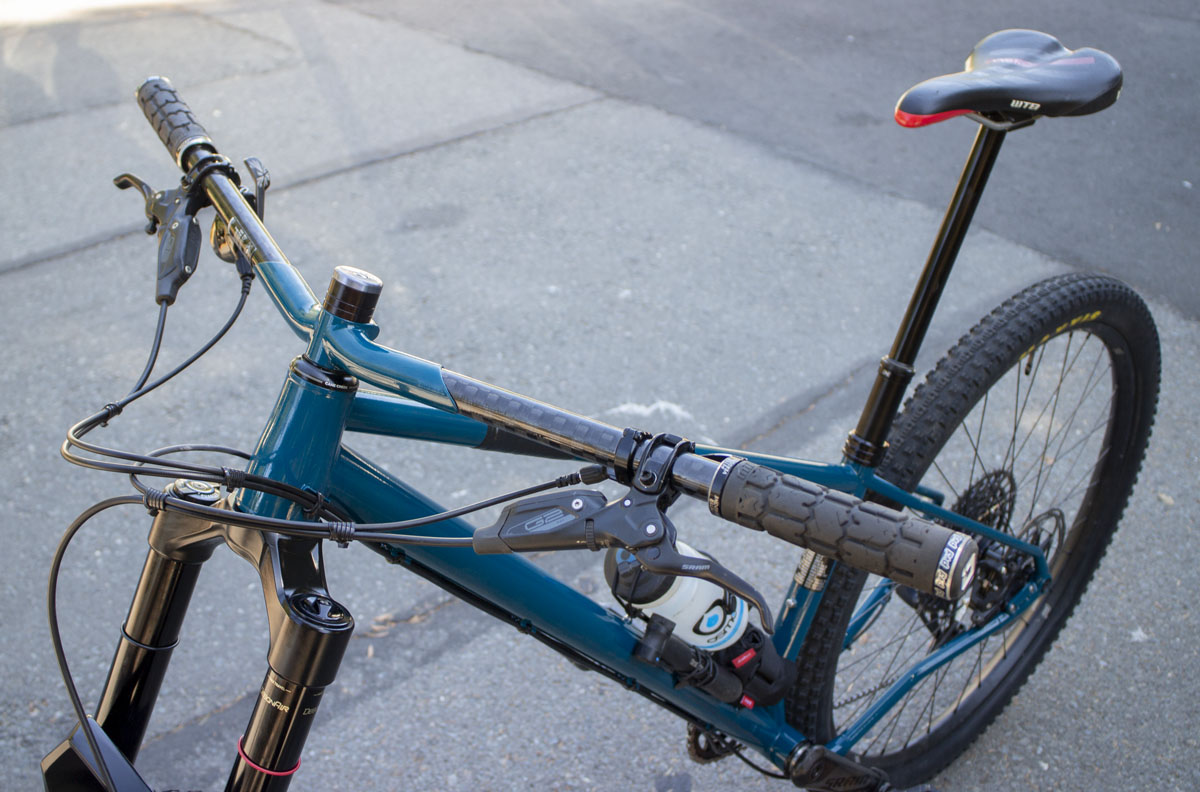
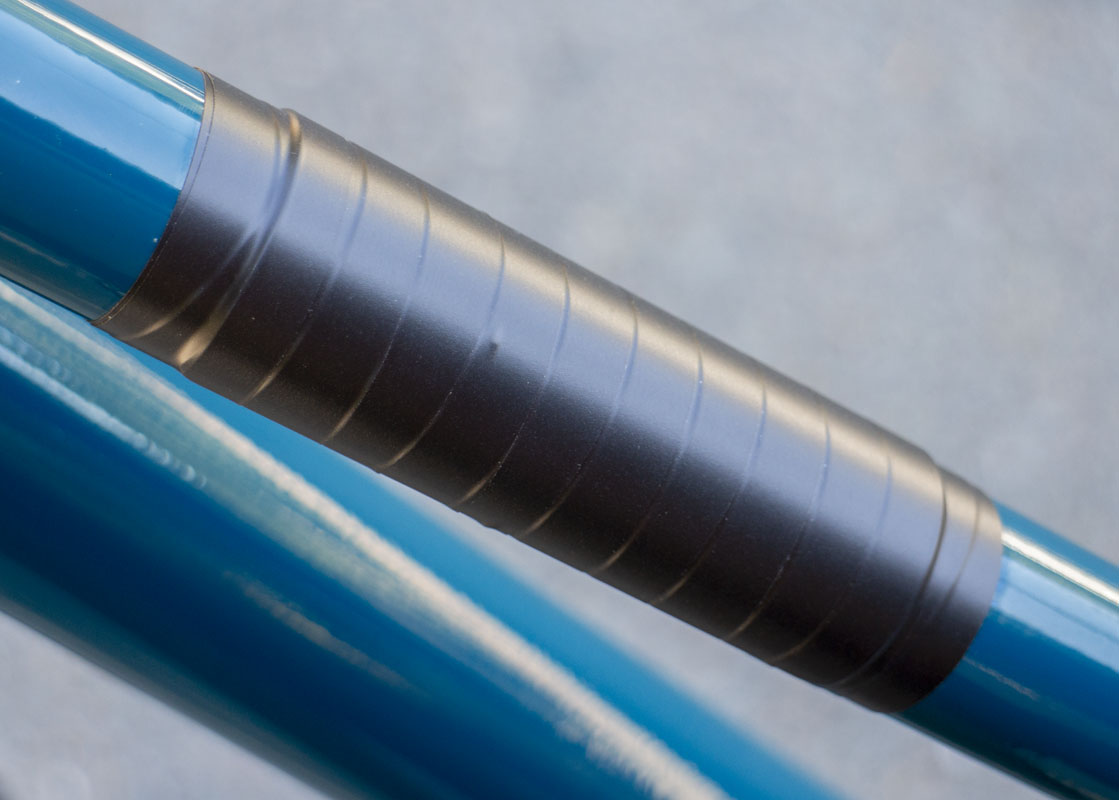
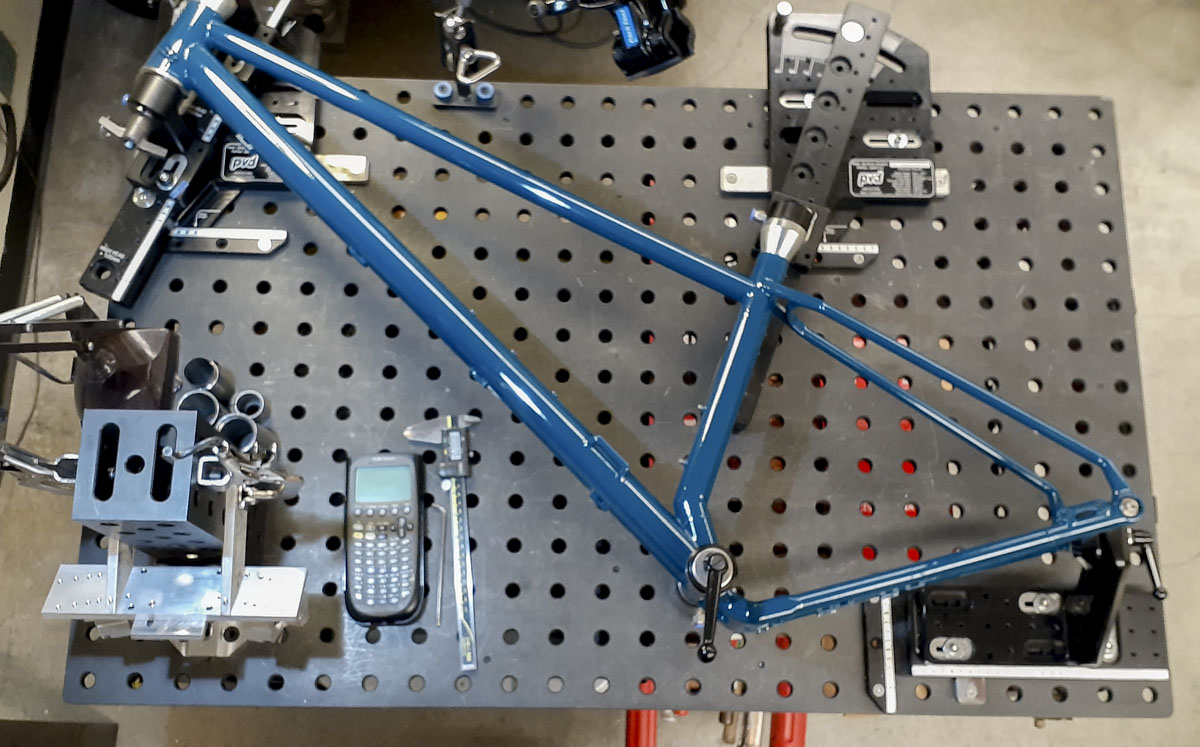
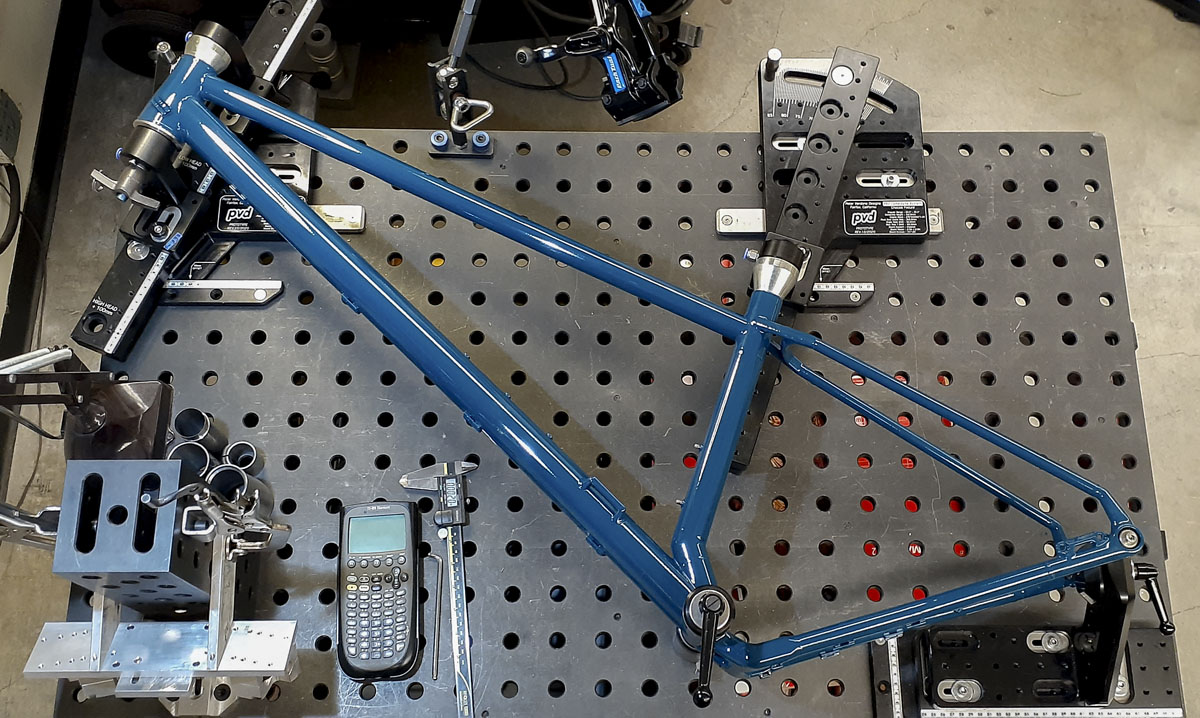
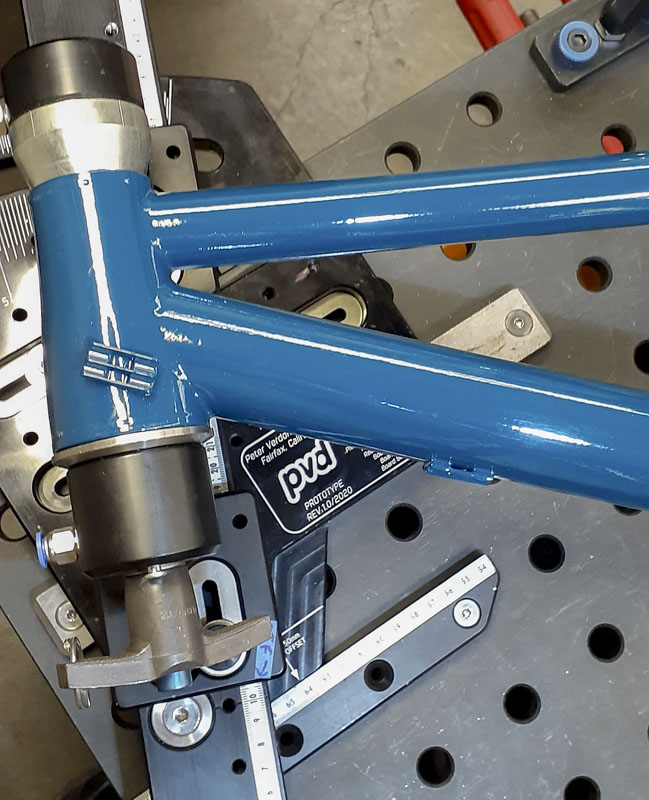
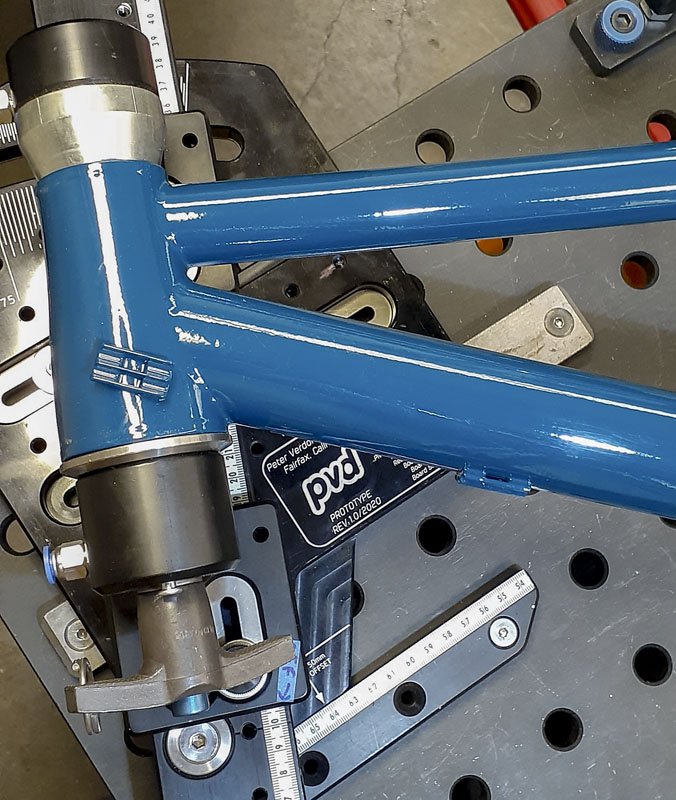
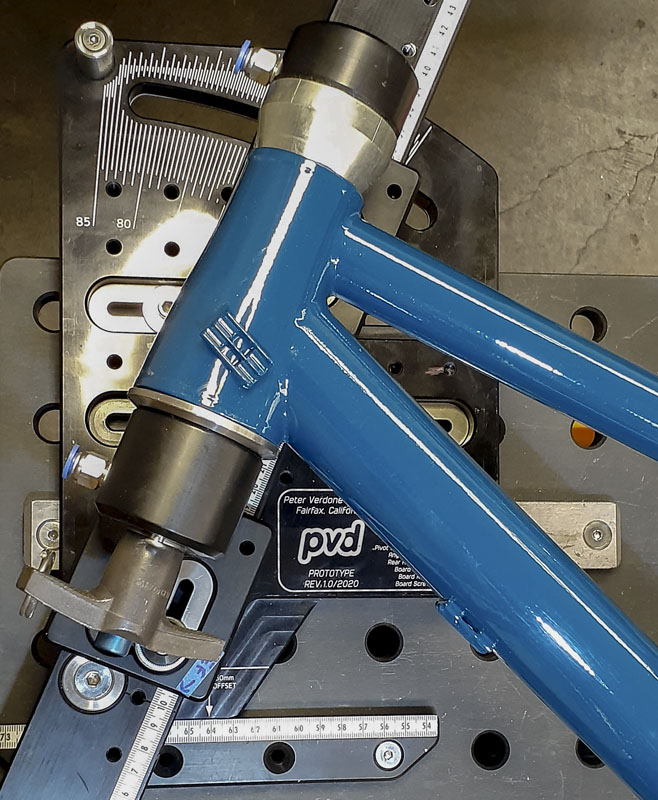
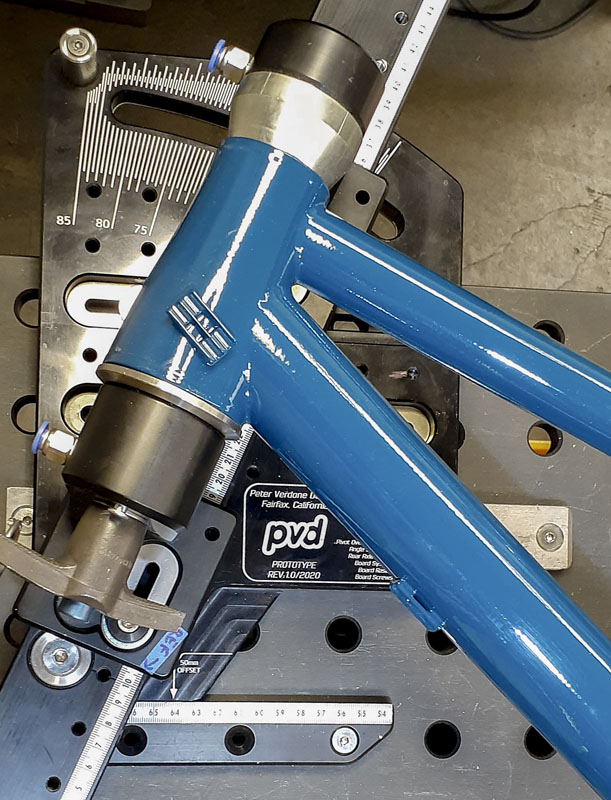
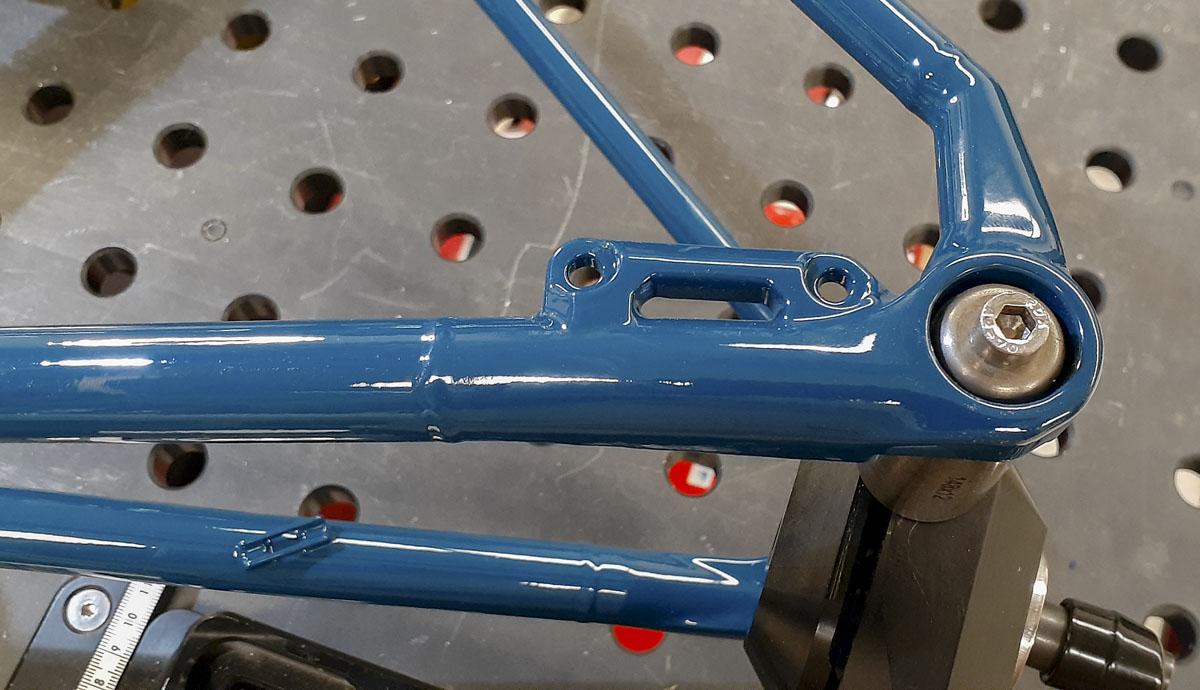
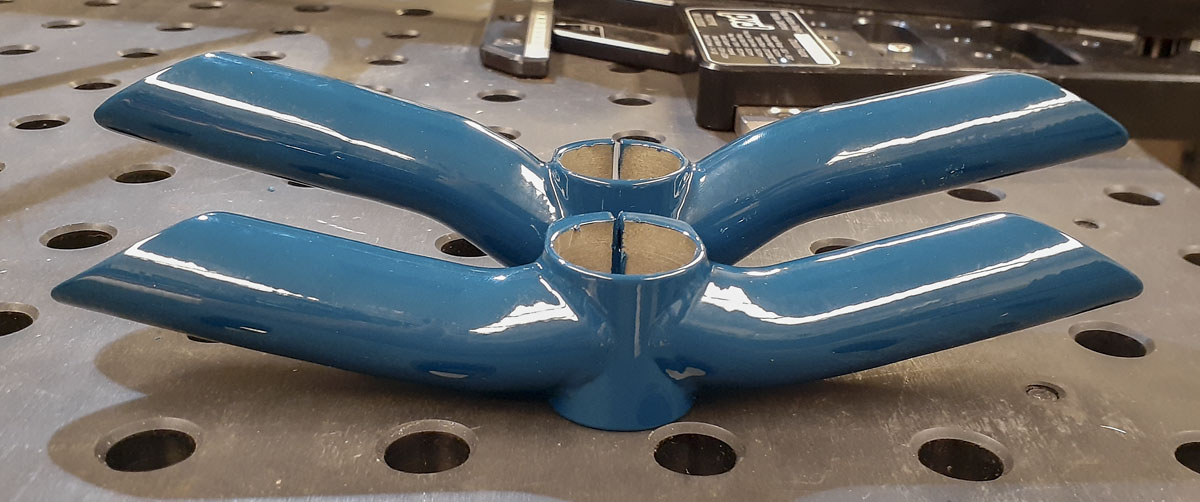
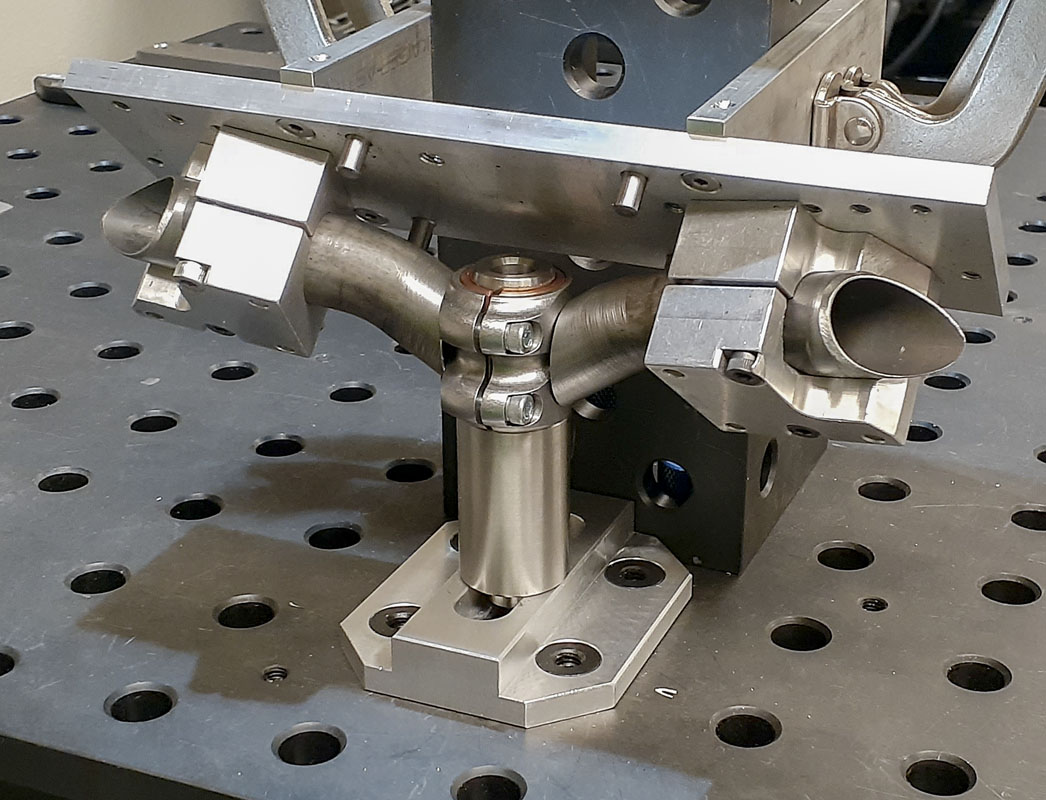
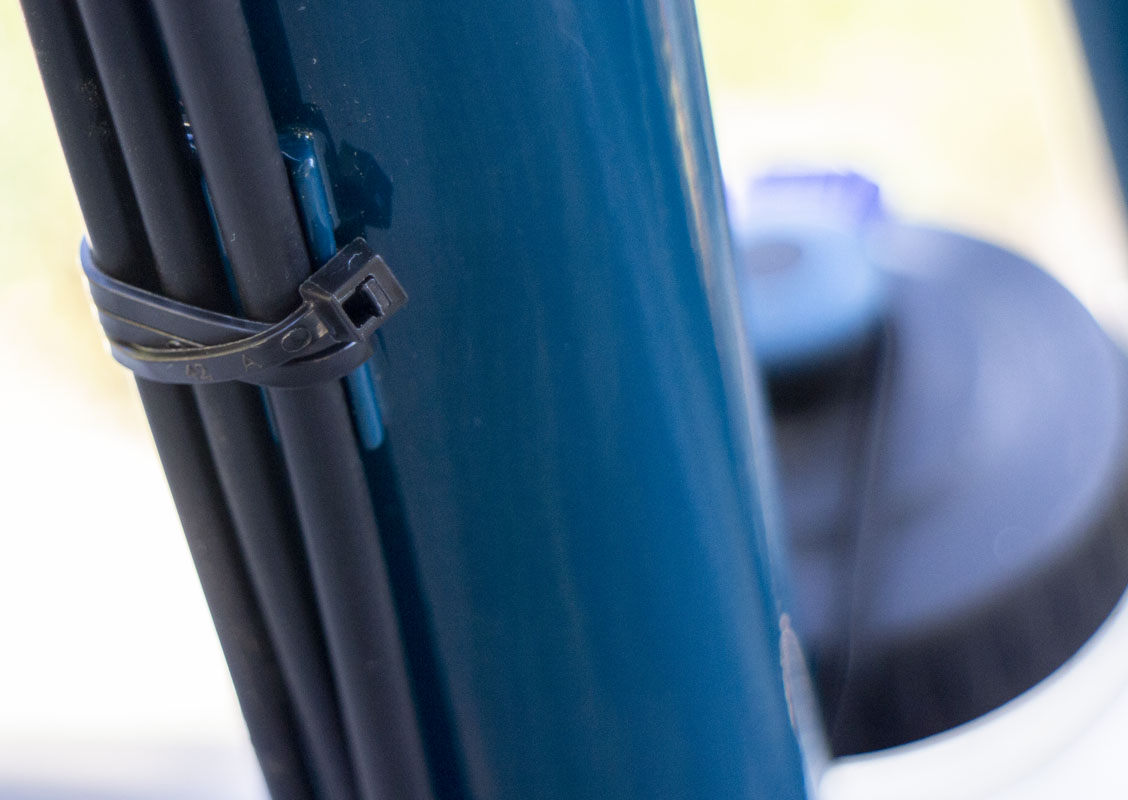
Below is a lot of printed metal, 690 grams. Every one of these parts saw massive revision in shape and detail. Some grew larger, some smaller, some added that weren’t there before. The cable guides are hyper low profile and narrow to bring all the lines closer to the bike. There are also more of them to keep them right on track.
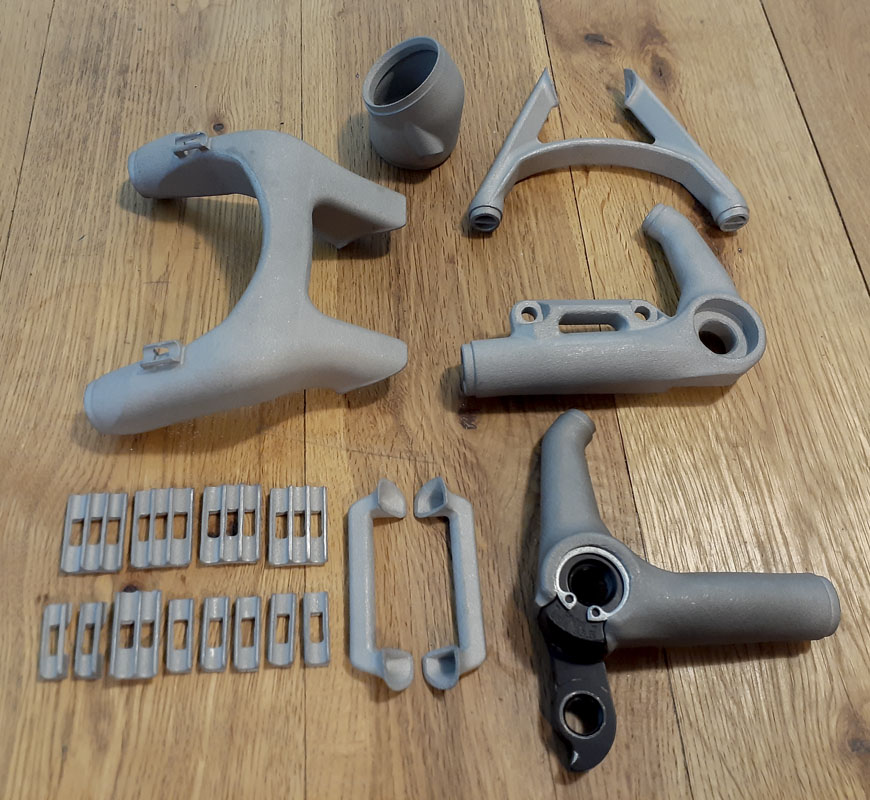
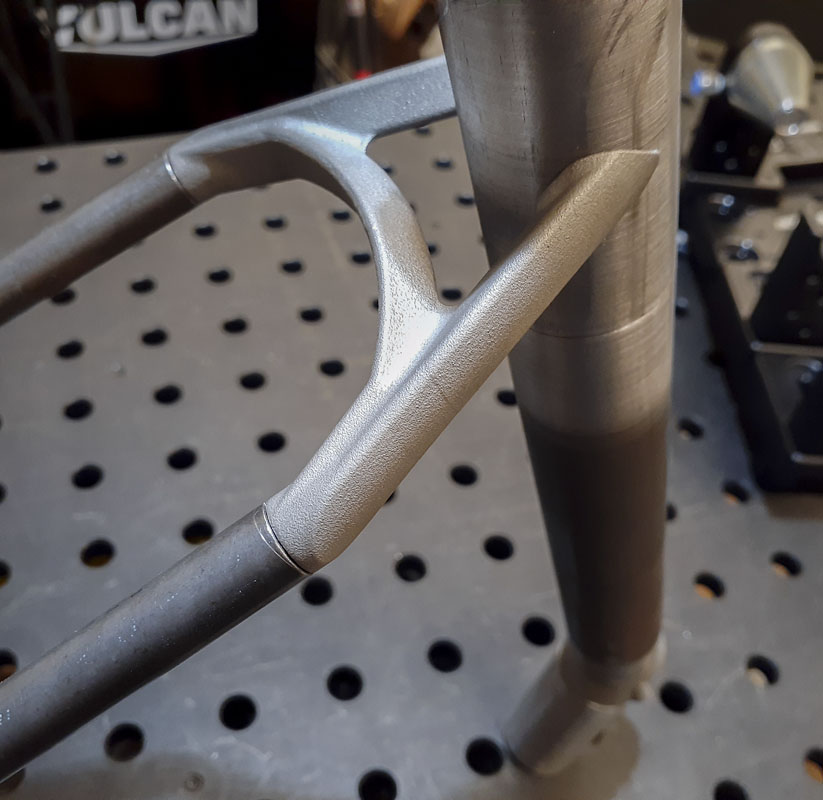
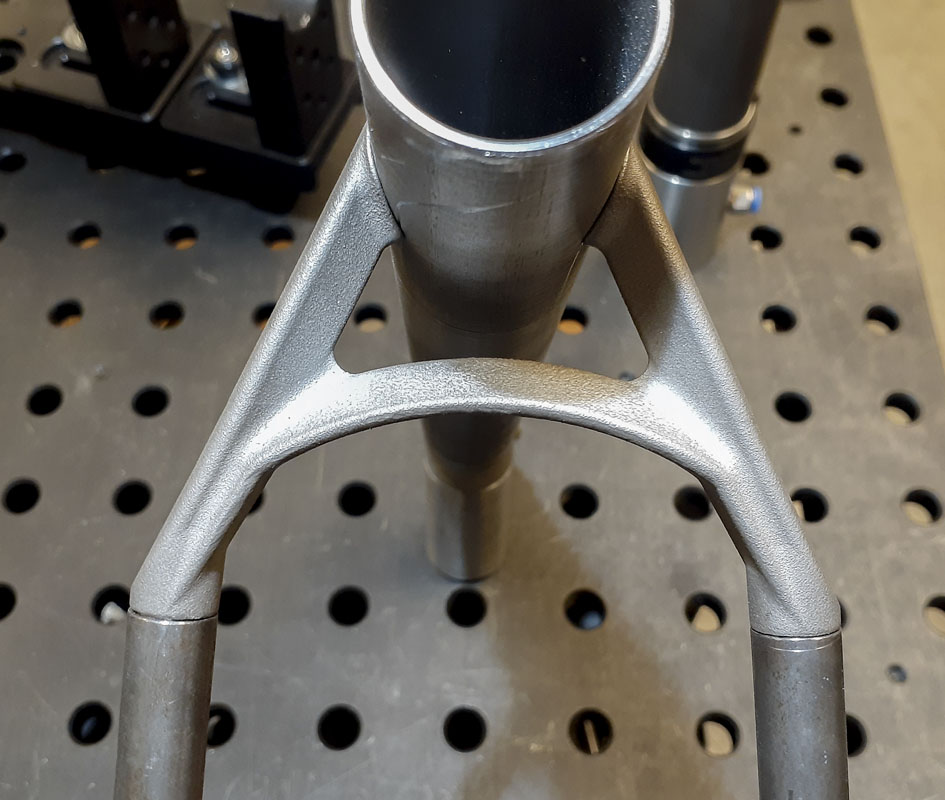
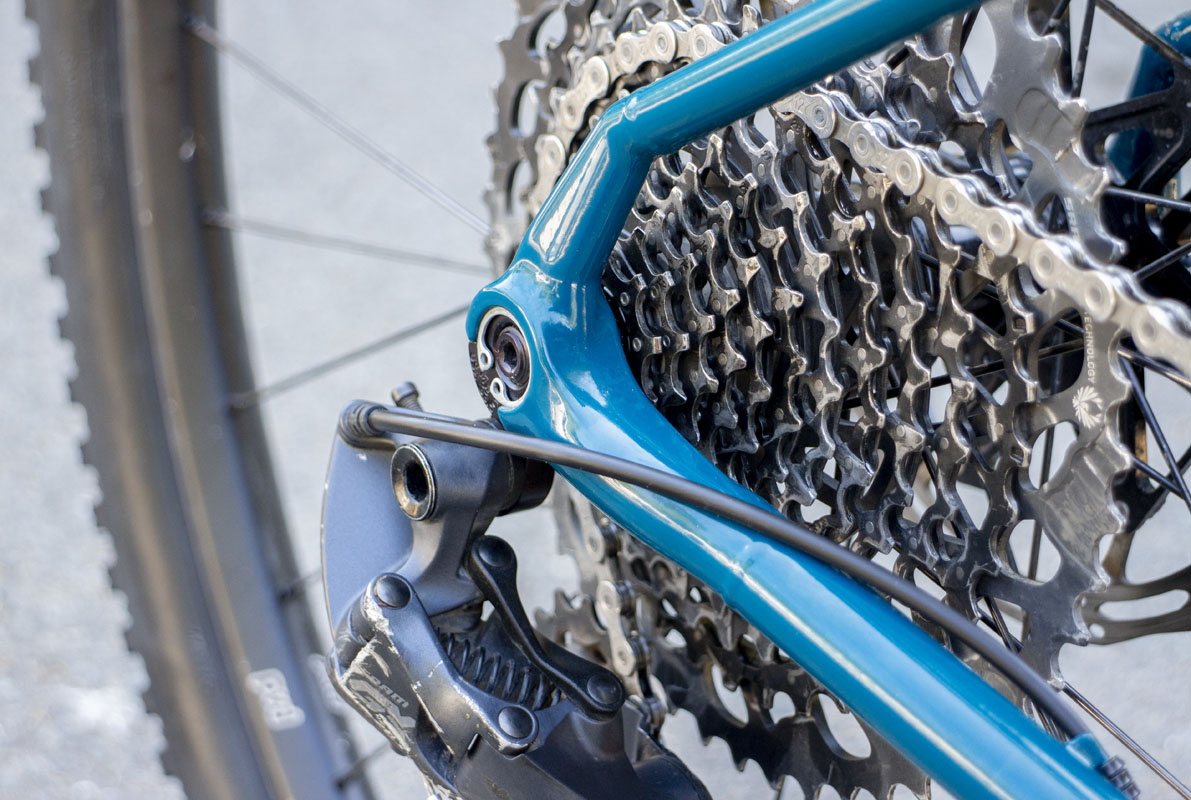
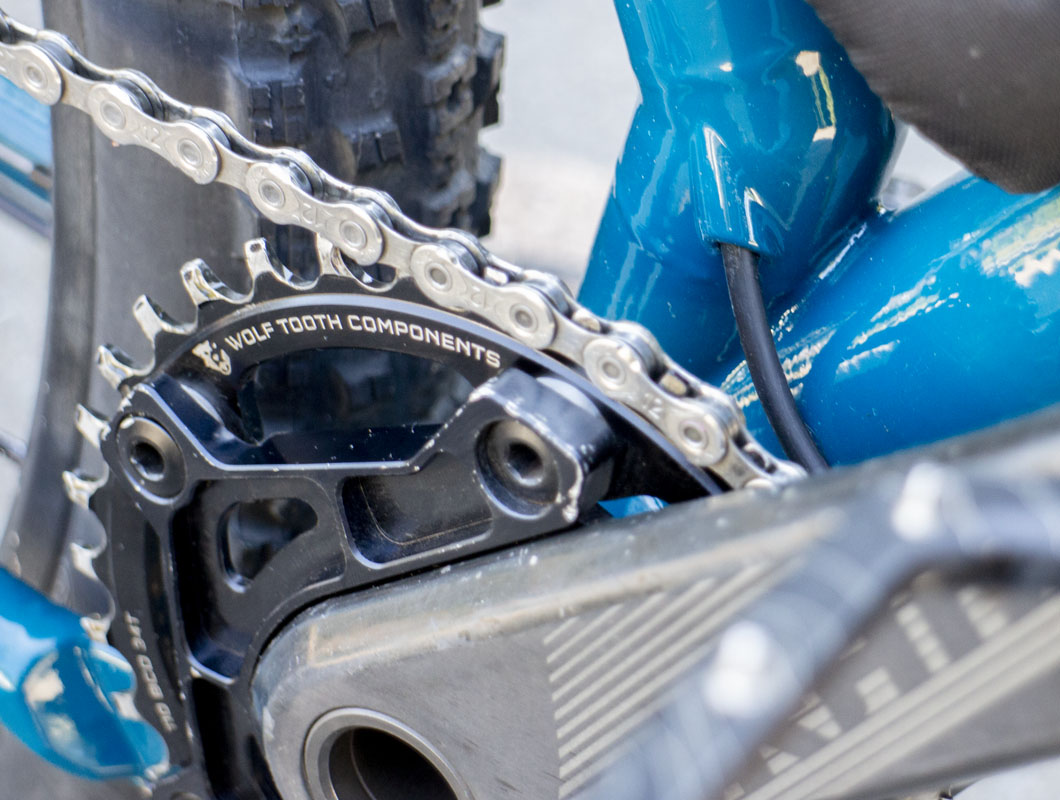
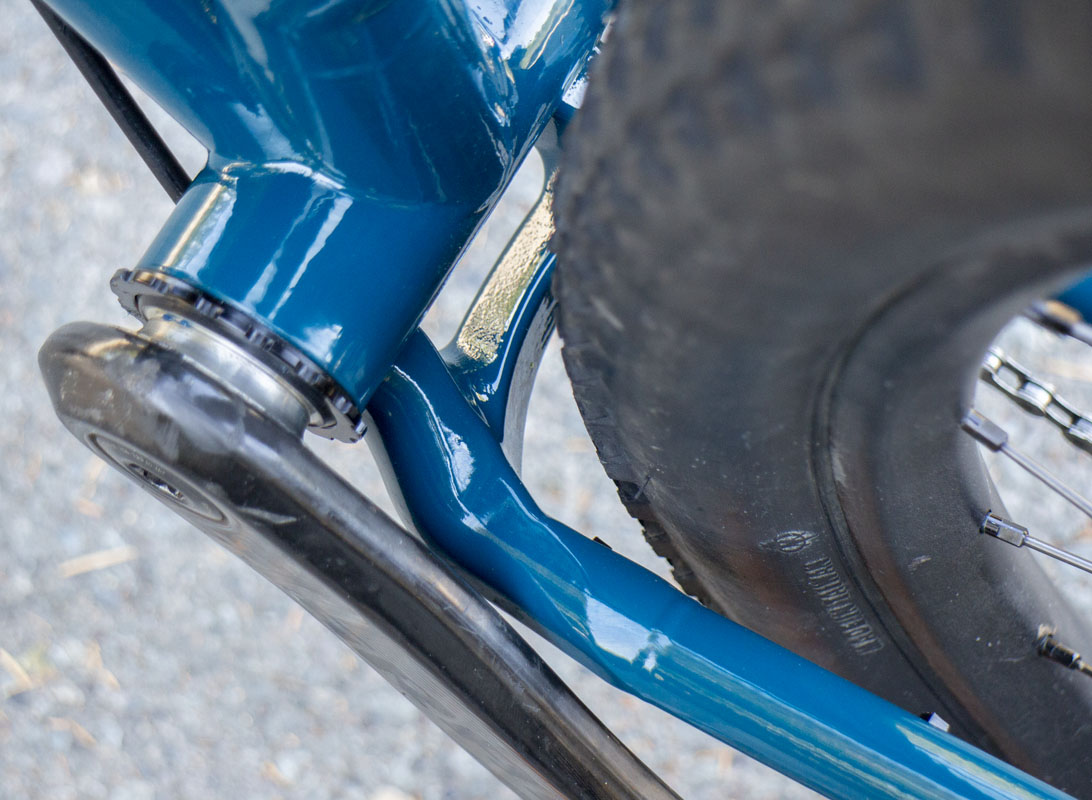
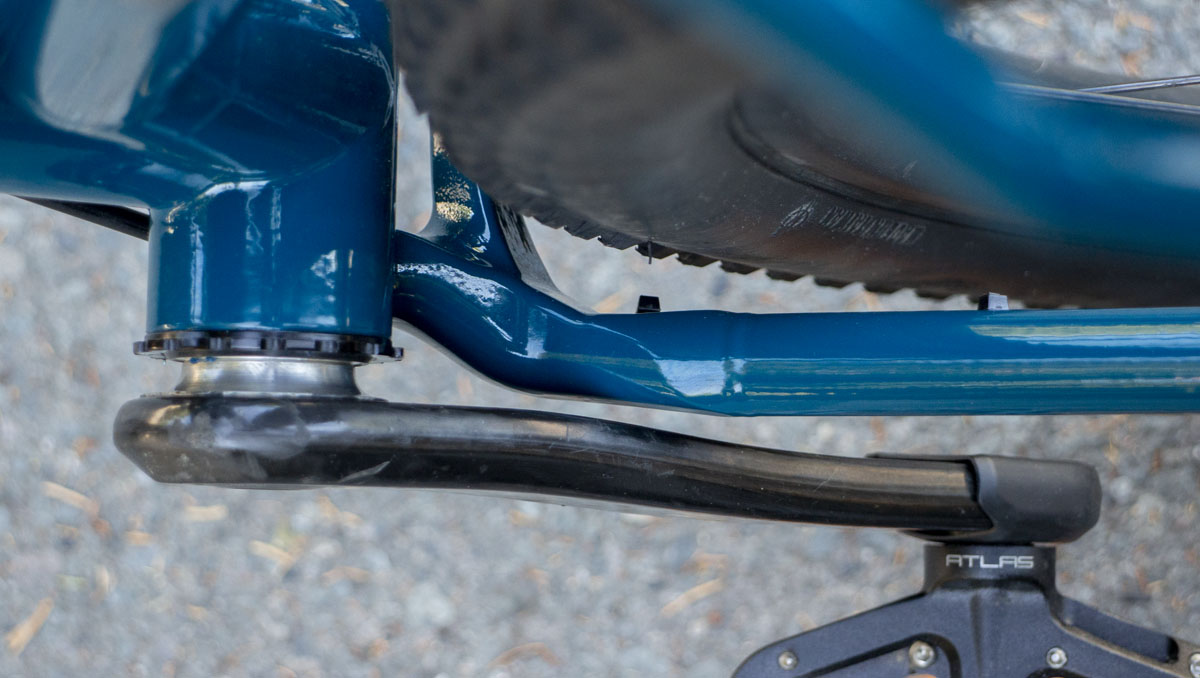
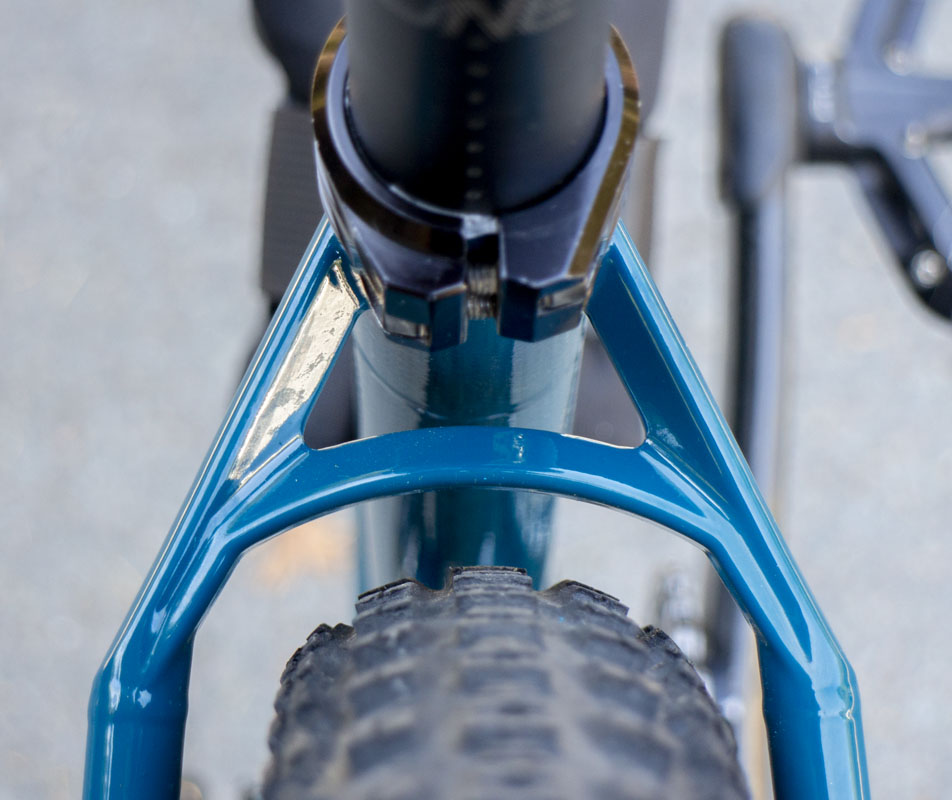
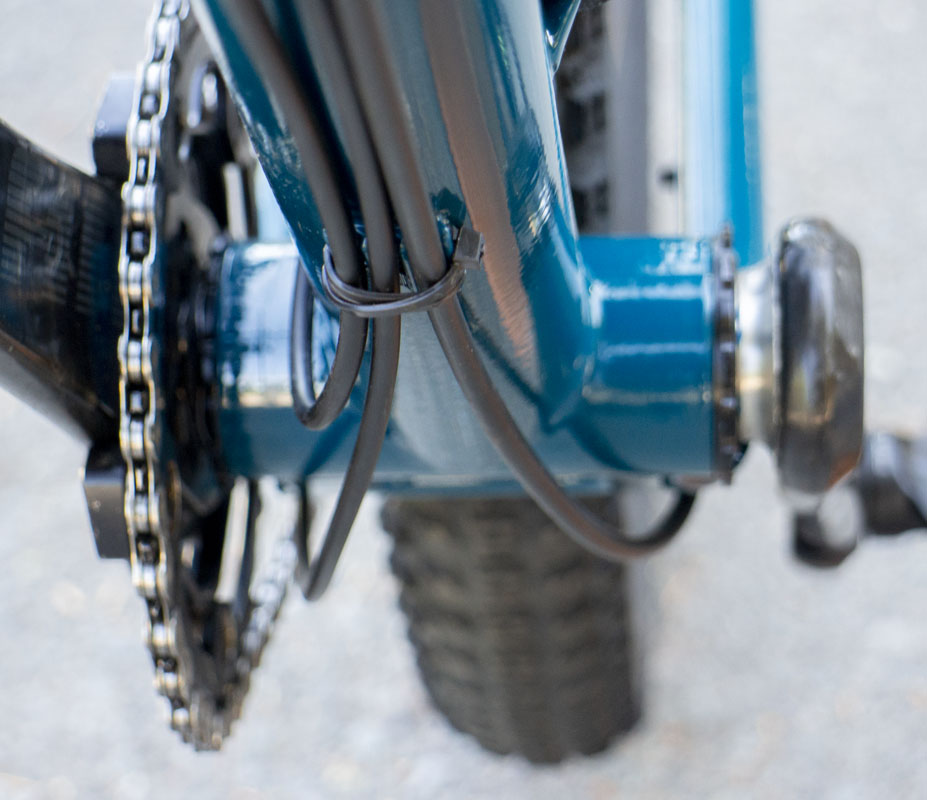
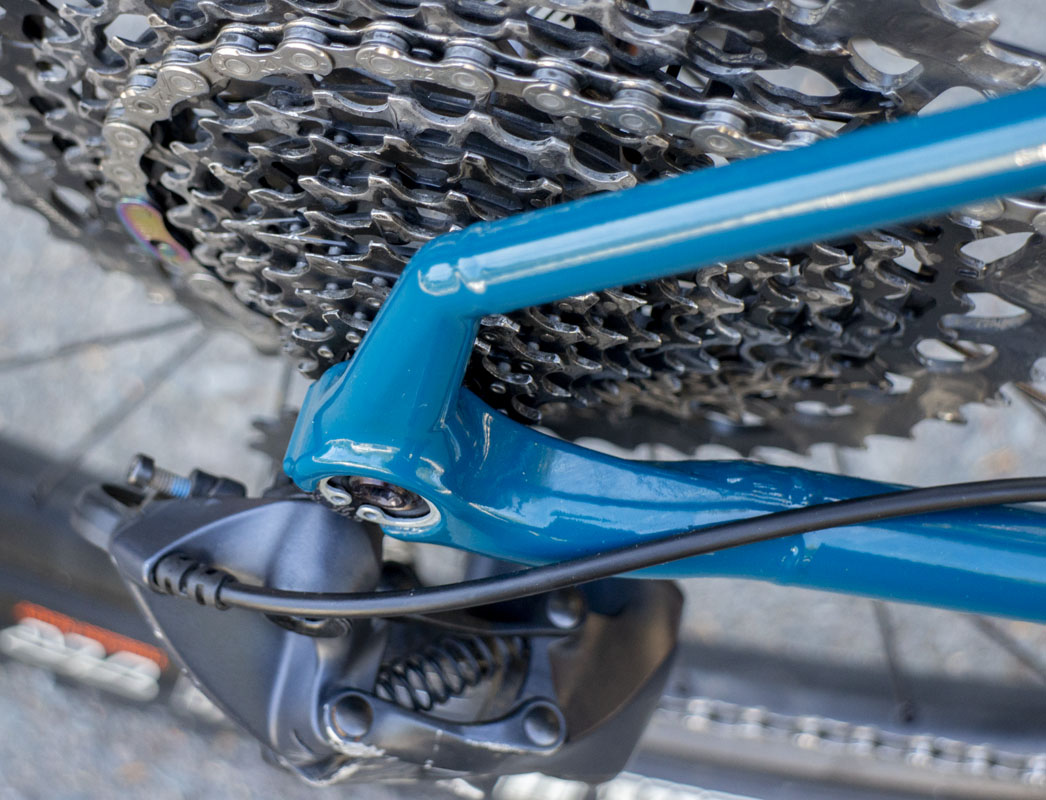
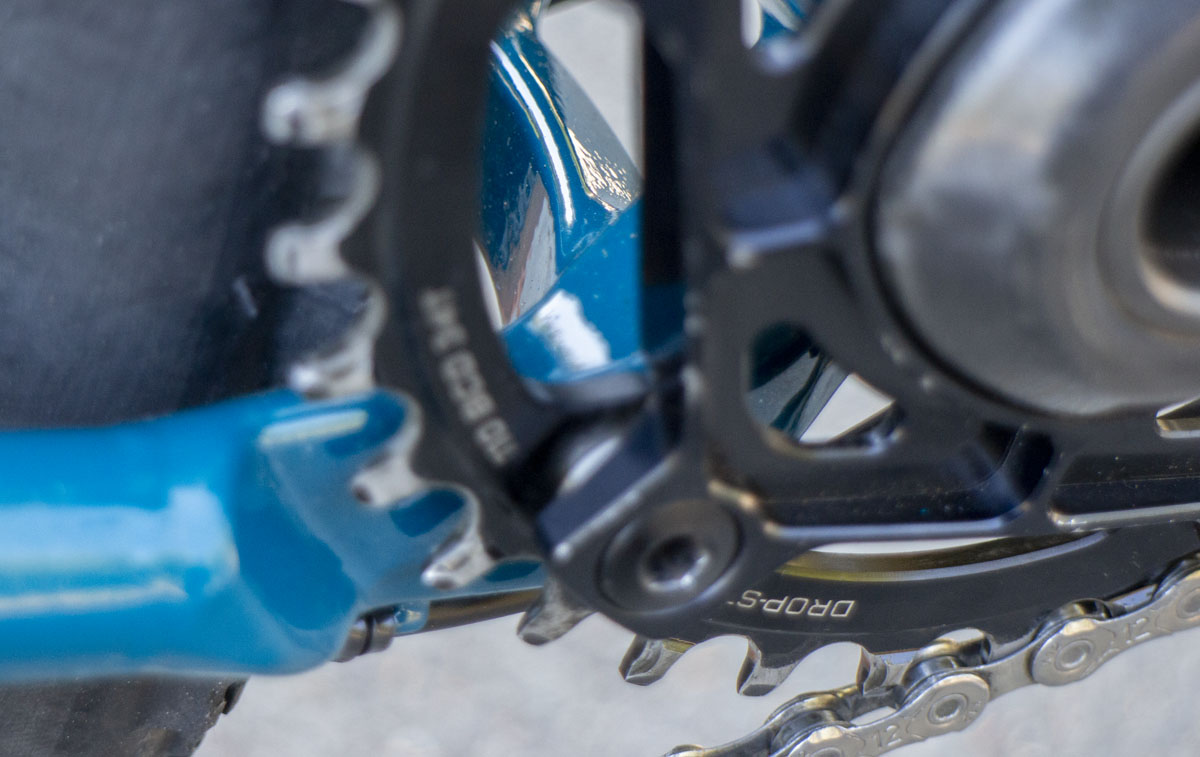
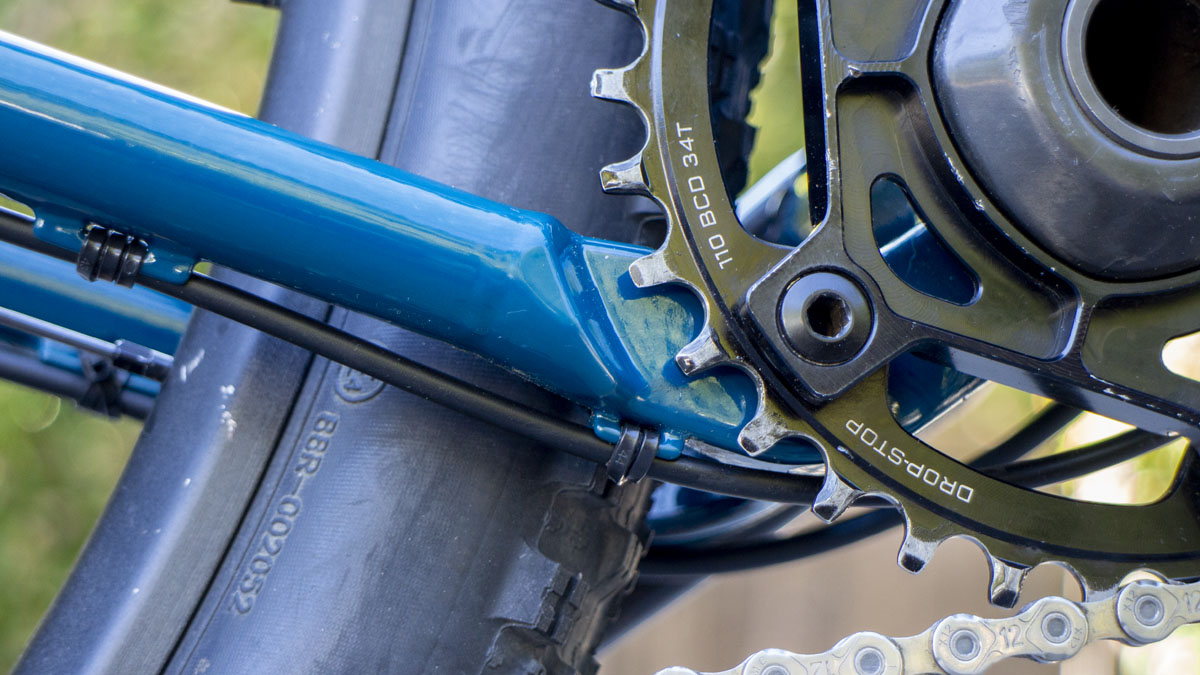
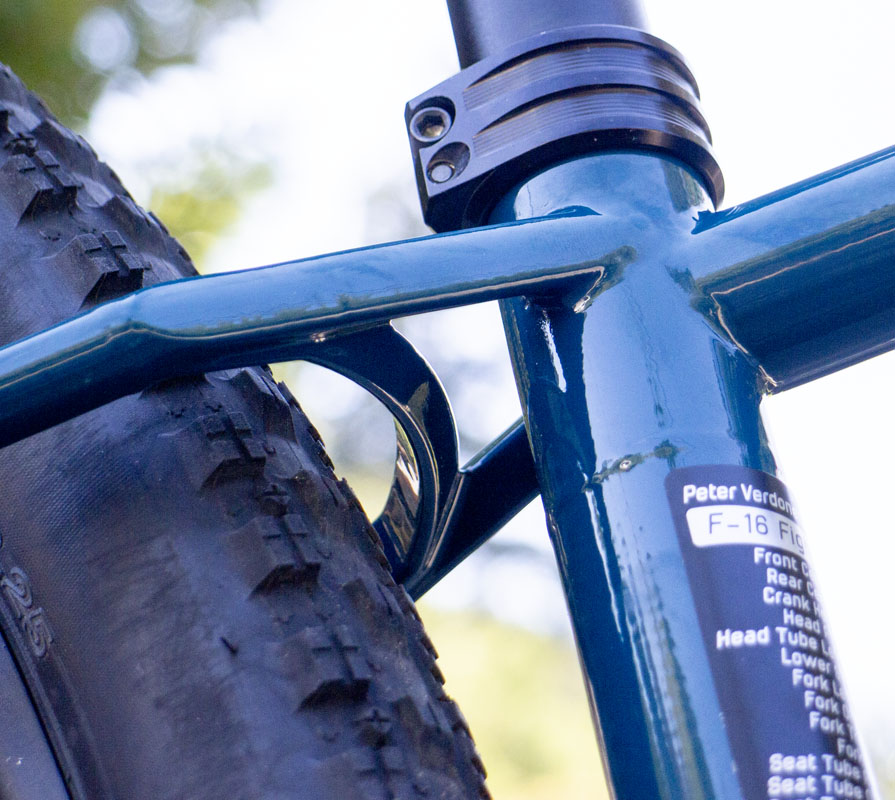
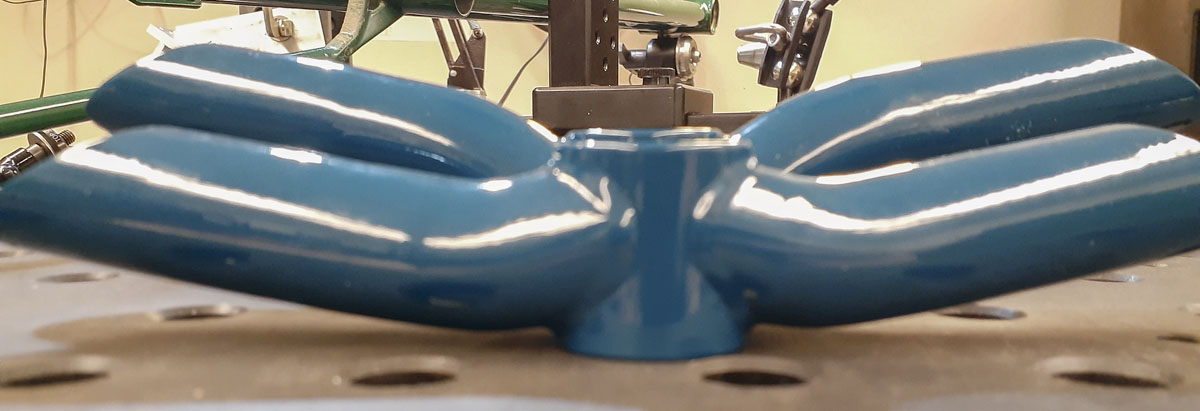
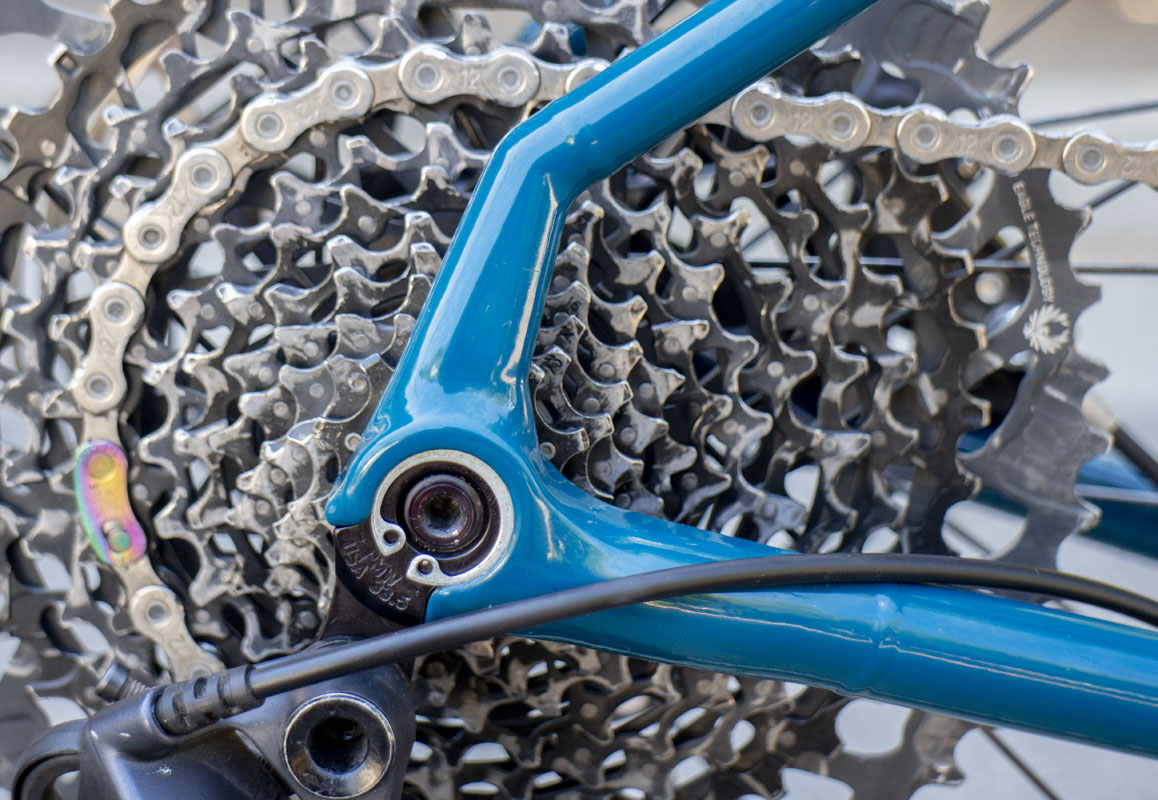
The drop stay has been added to the chainstay yoke. I’m holding my nose on this as I think that it looks like crap. At least it’s symmetrical. The thing is, it solves a lot of problems; 36t chainring clearance, 410mm rear center, easy to weld, and quite compact in ways that improve the structure. I also did additional work on the shape to ensure clearance for a true 622-64 tire with the Q150/50CL cranks. I say 50mm because I’m trying to keep some space to move the chainring more inboard for increased efficiency on climbs. This is another direction that’s I’m trying to go, narrower chainline along with the narrower cranks. I’m really excited about all of these.
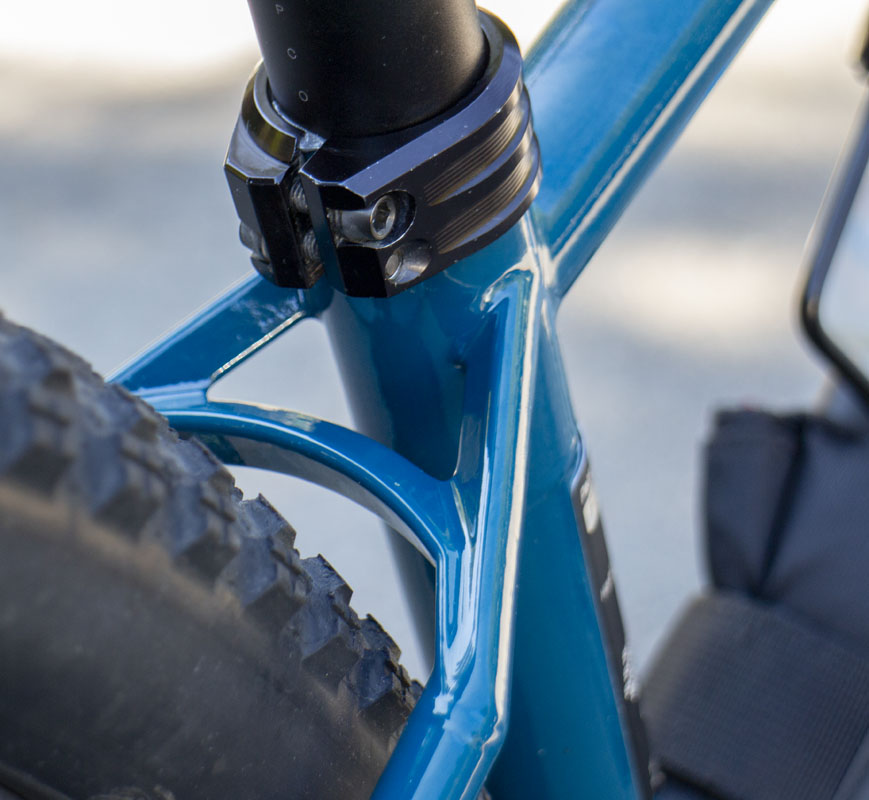
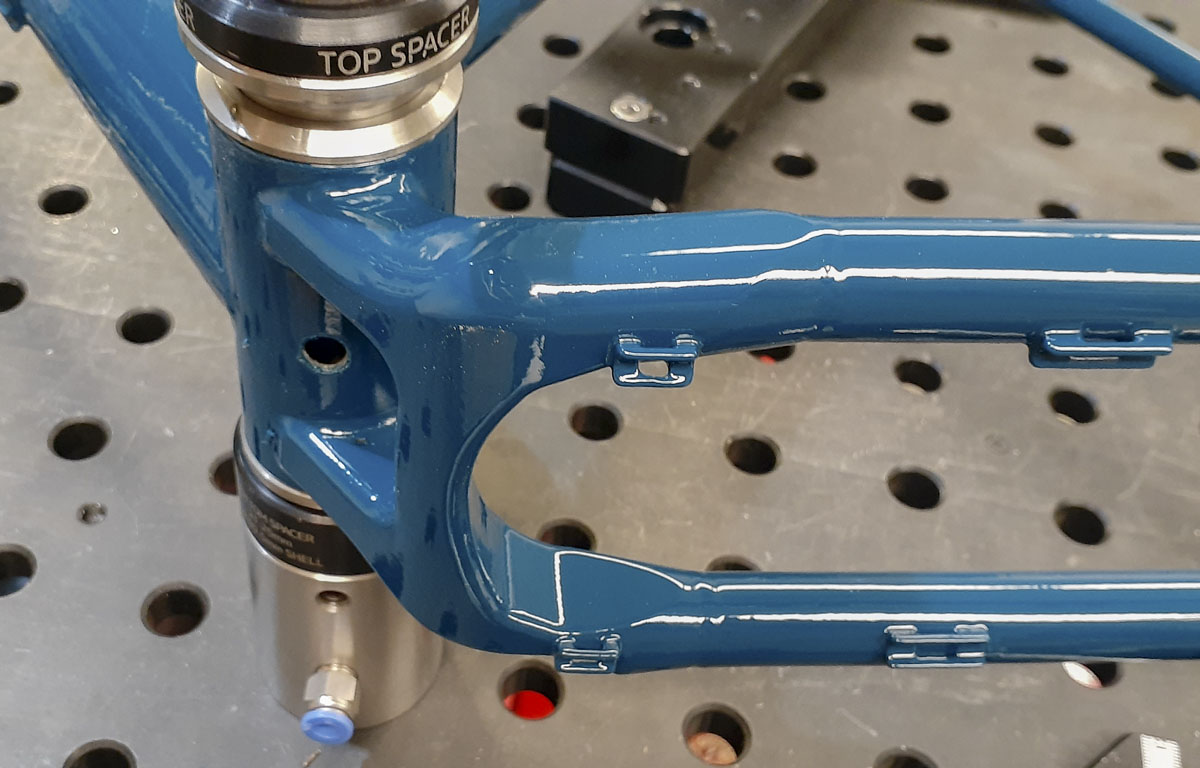
Once again, I’m evolving the seatstay yoke. The aspect ratio of the triangular struts has been reduced to get a bit more air on the inside of the intersection area by the seat tube. It makes the rear end more airy and look lighter. The big reason for the geometry of this is to solve a problem. I have fat legs. I need clearance when pushing my leg against the bike. This maximizes that while adding considerable strength to the rear end.
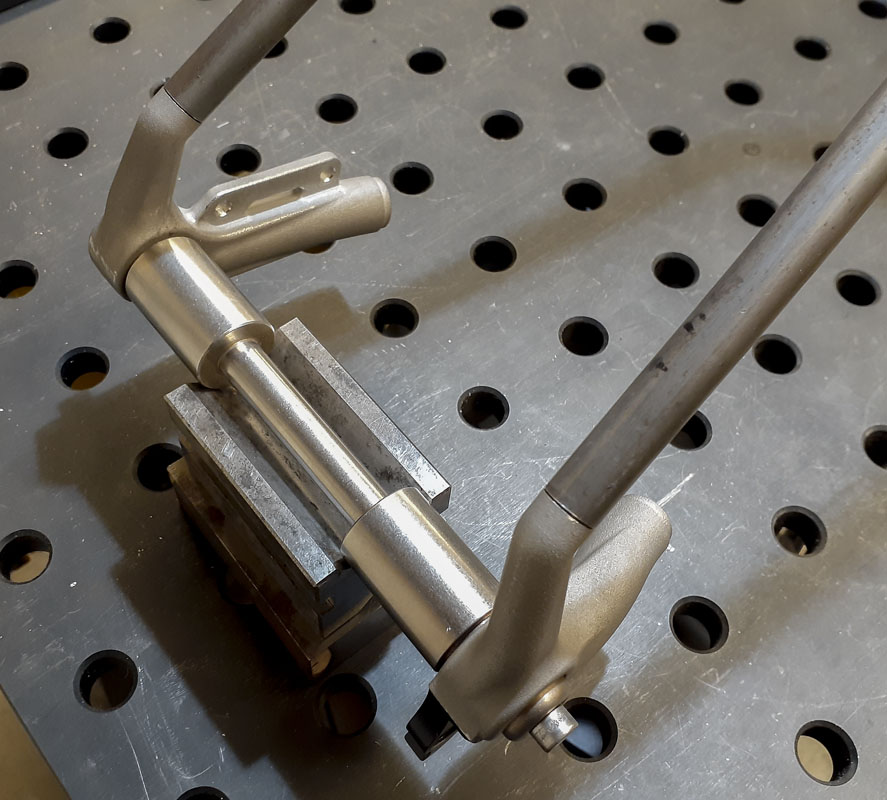
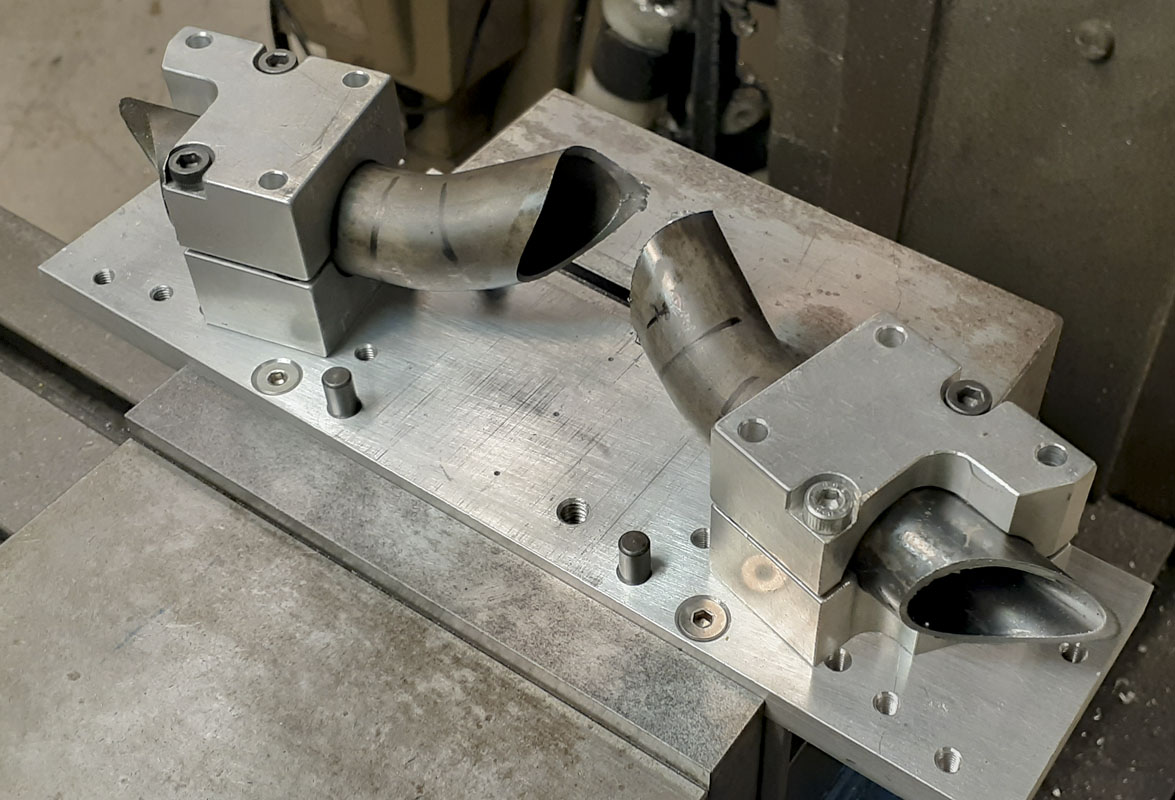
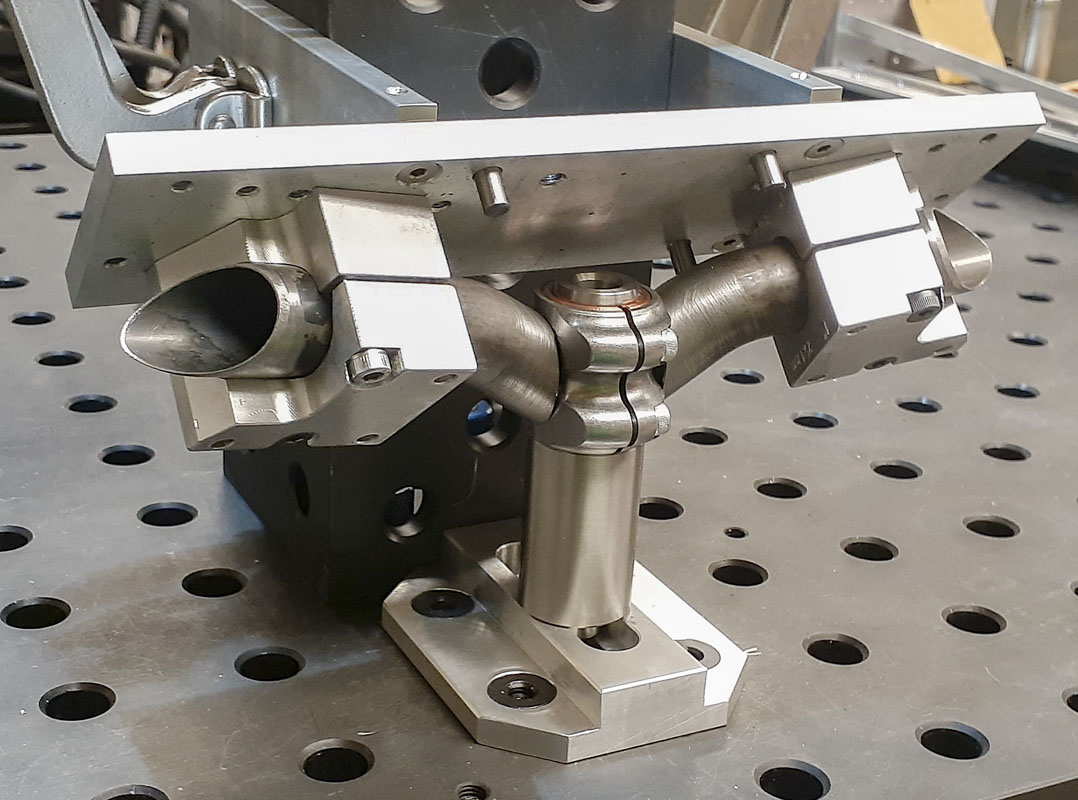
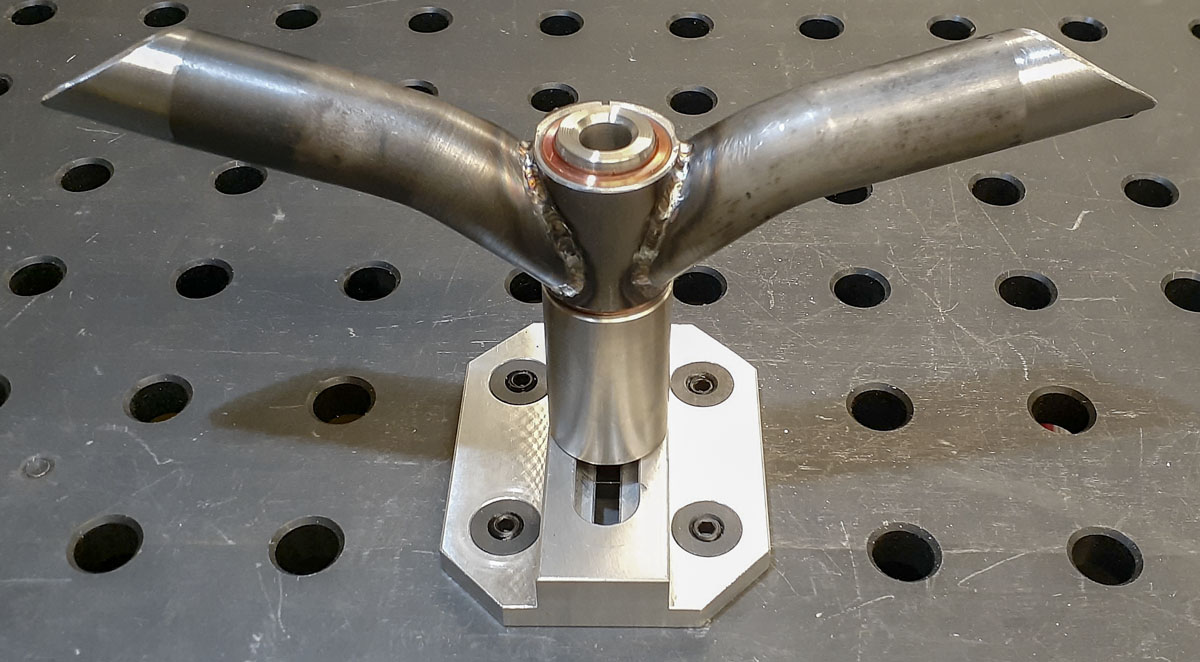
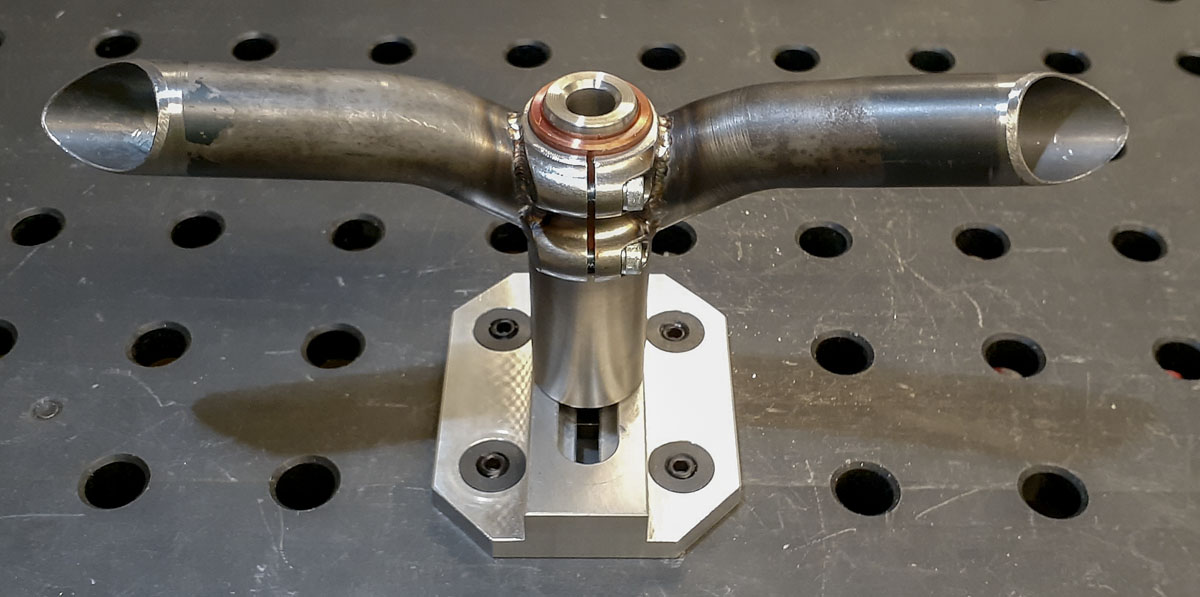
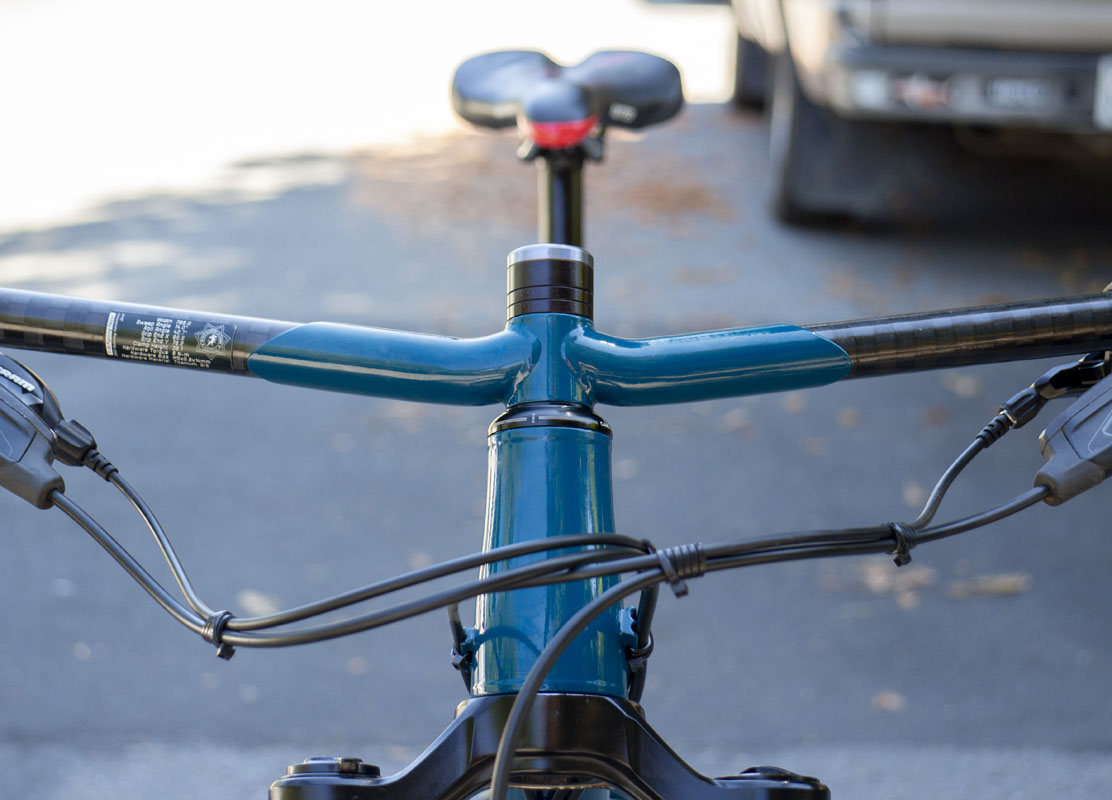
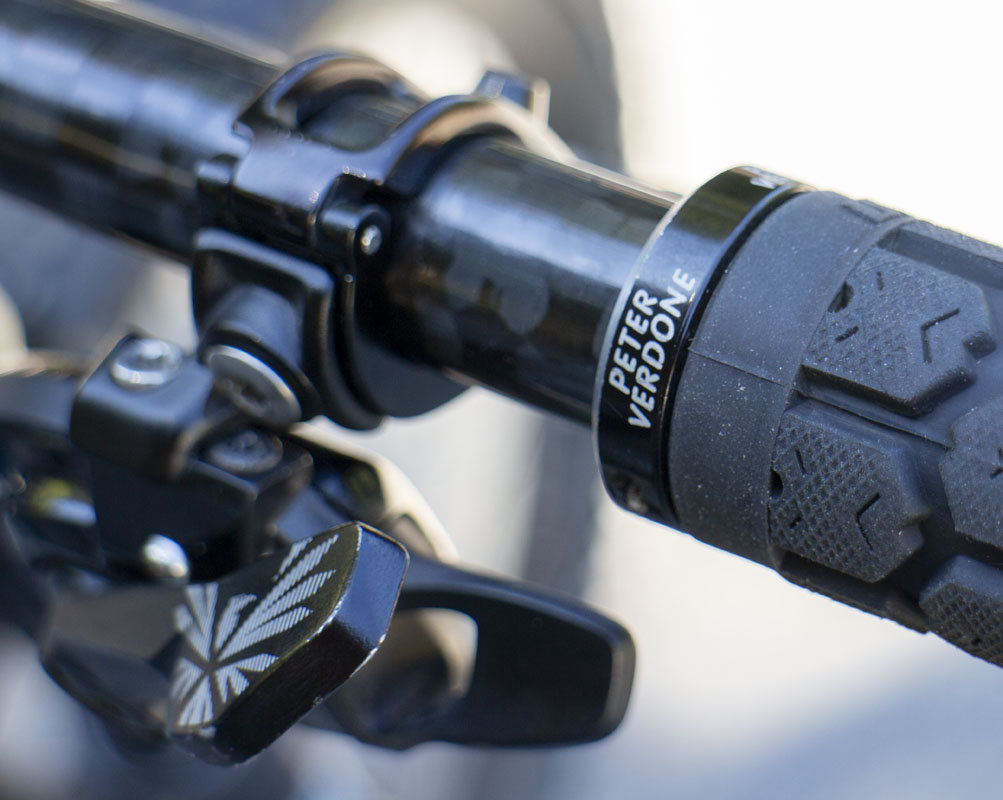
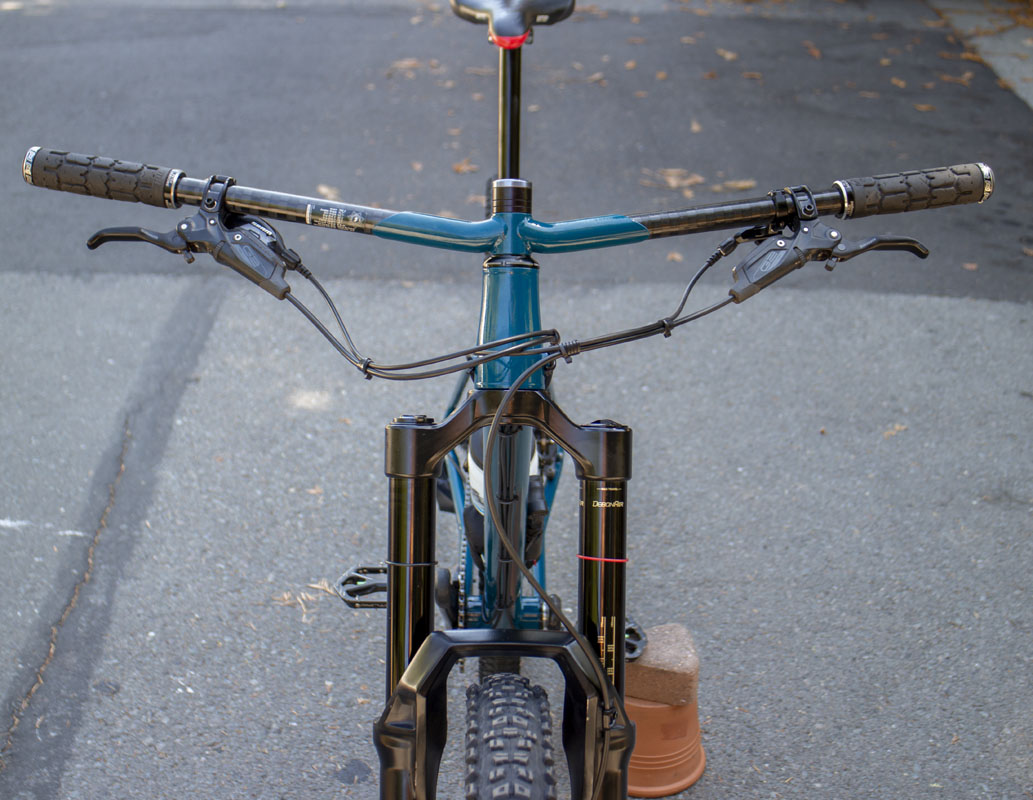
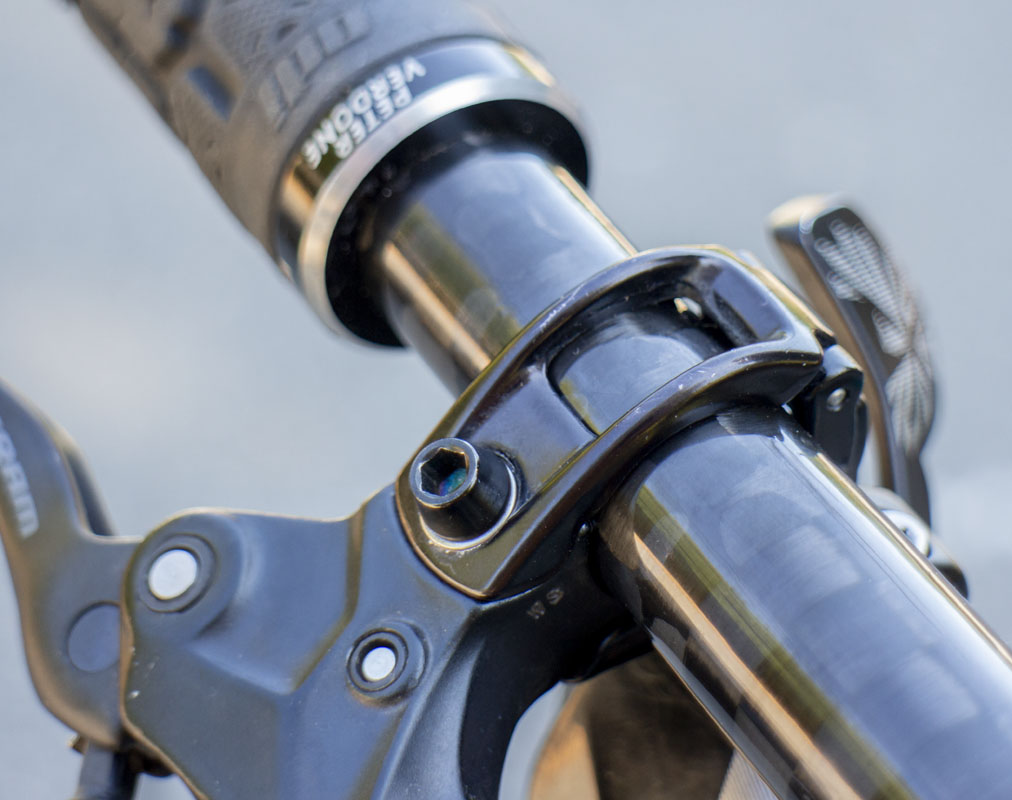
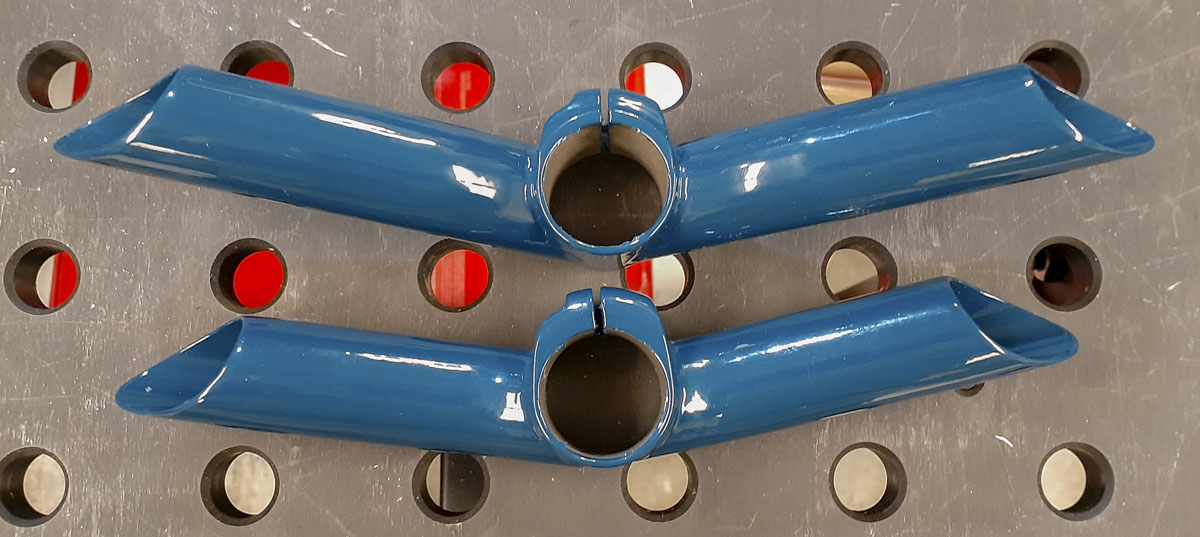
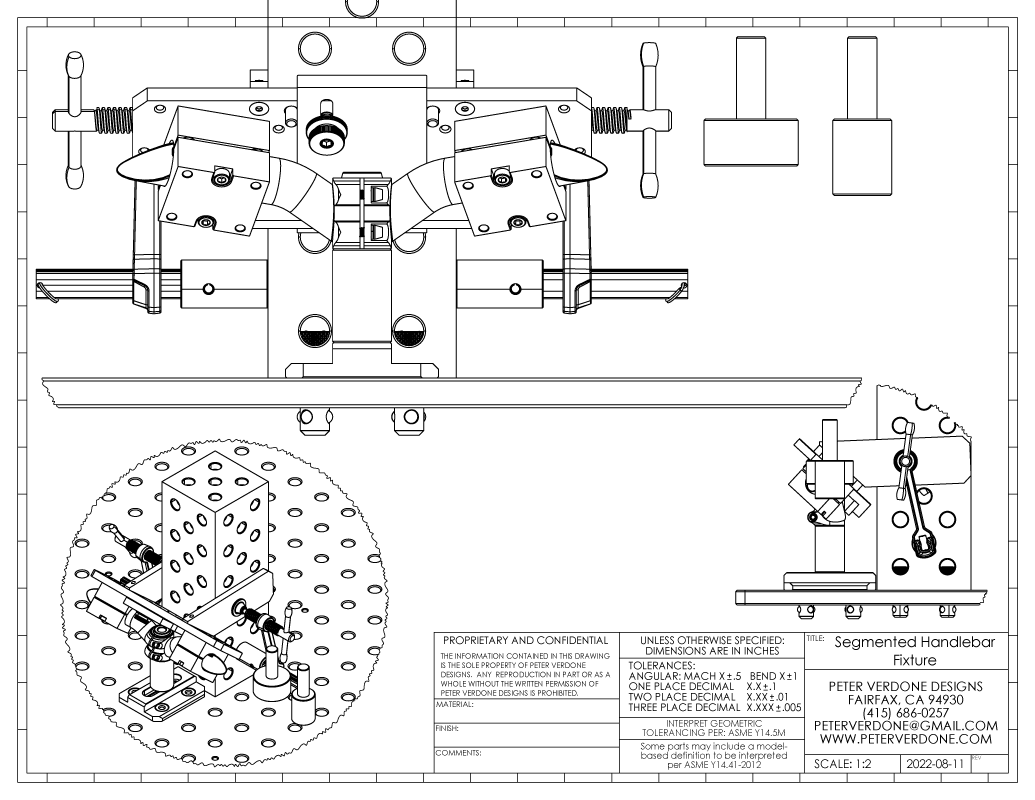
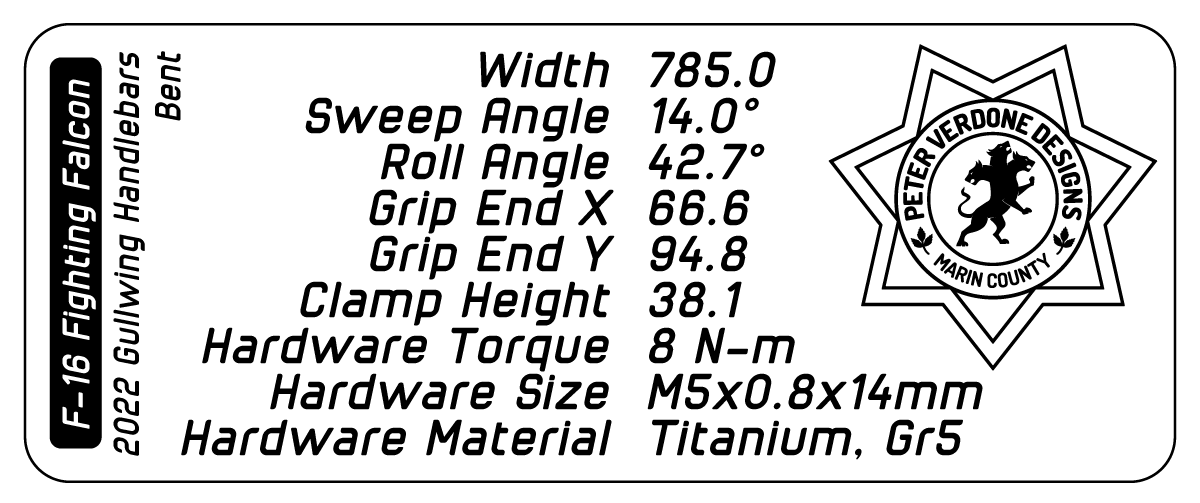
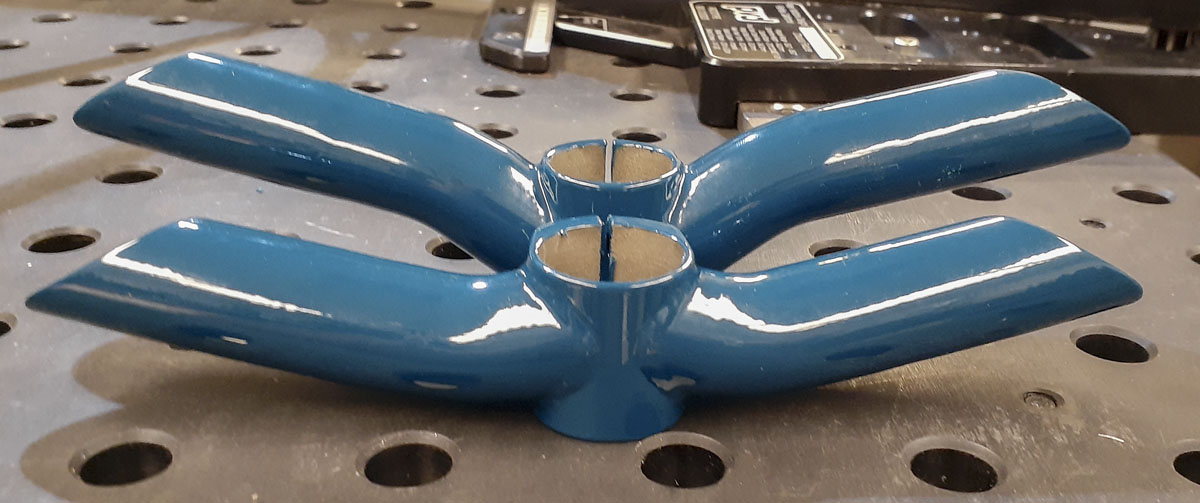
Aside from all of the other work that went into this bike, the real star of the show (for me) are the new handlebars. I’ve been doing these segmented bar/stem systems since the Warbird of 2018. There have been a variety of different types made in several types of instances. I’ve found new reasons and understandings. With that came revisions to the parts and tooling. Now, I do that again.
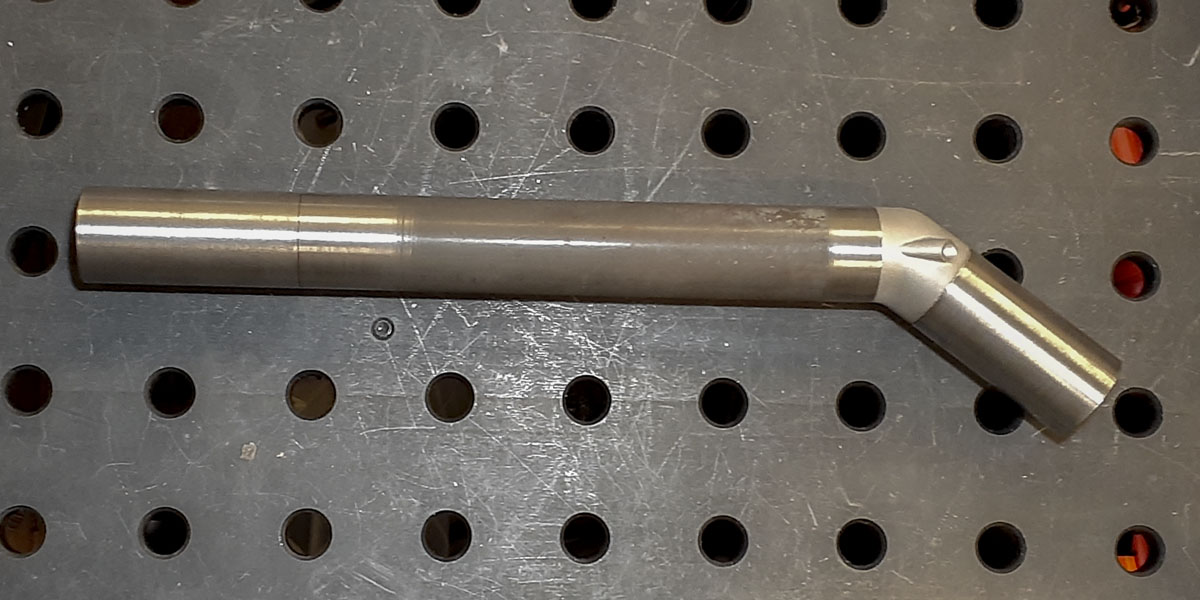
The design was driven by the failure of the printed system from the MiG-31. In the recovery from that and in the rush to get up and running quickly, I produced bars with segmented struts and gussets, without a cross connection to the other side.
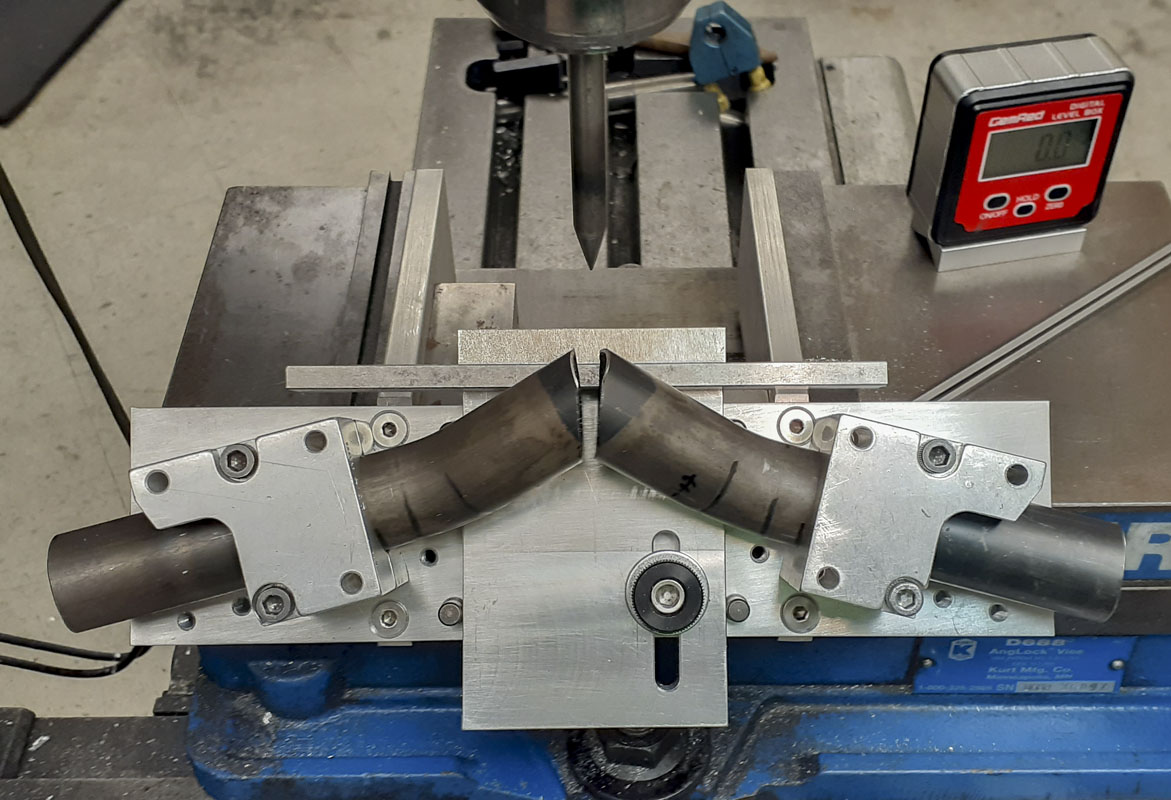
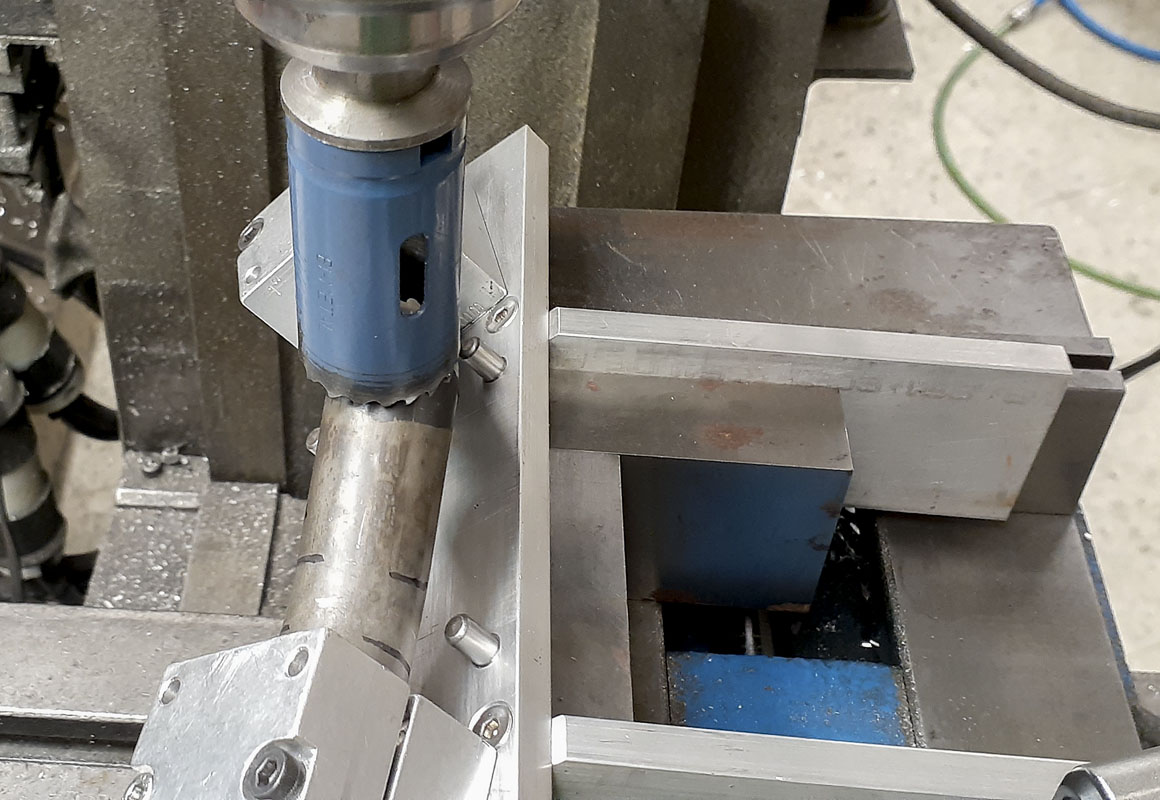
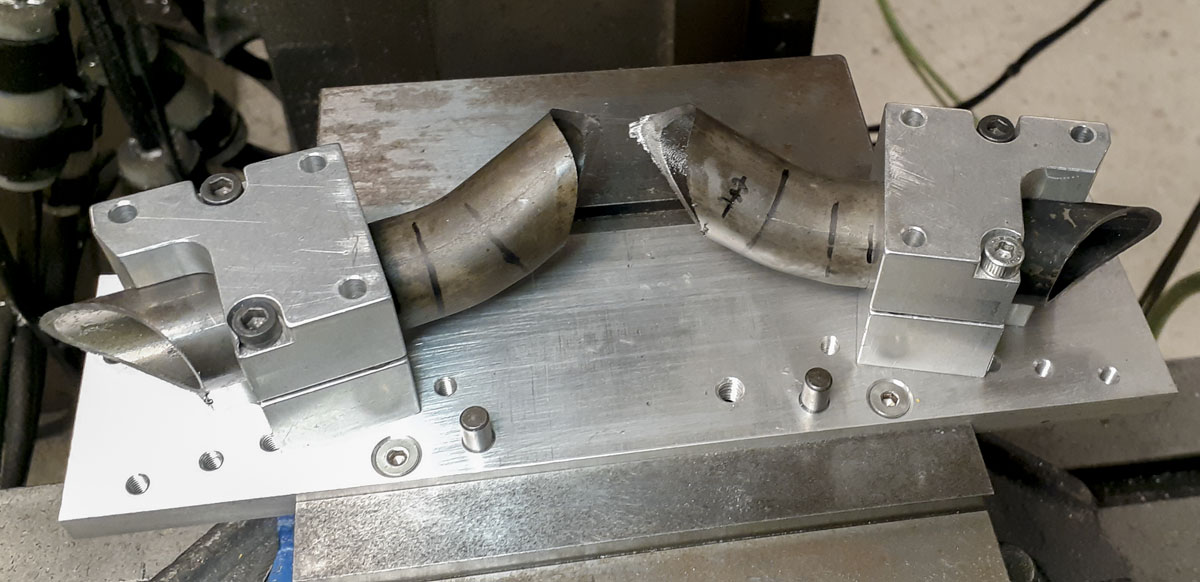
I had been worried about this in the past, thinking that it wouldn’t be strong enough to come directly from the lug. I decided to try it as the geometry I had done with the printed part wouldn’t allow it otherwise. I had nothing to risk but another catastrophic failure on the trail. It turns out, it’s fine. The bars were just as nice as others where there is connection from either side. Since that set of bars were brutally hacked together and the wrong geometry for the new bike, I needed to do another set but right. To make these new bars, I’d need a proper bend. Another very expensive bend. But I did it as the project required it.
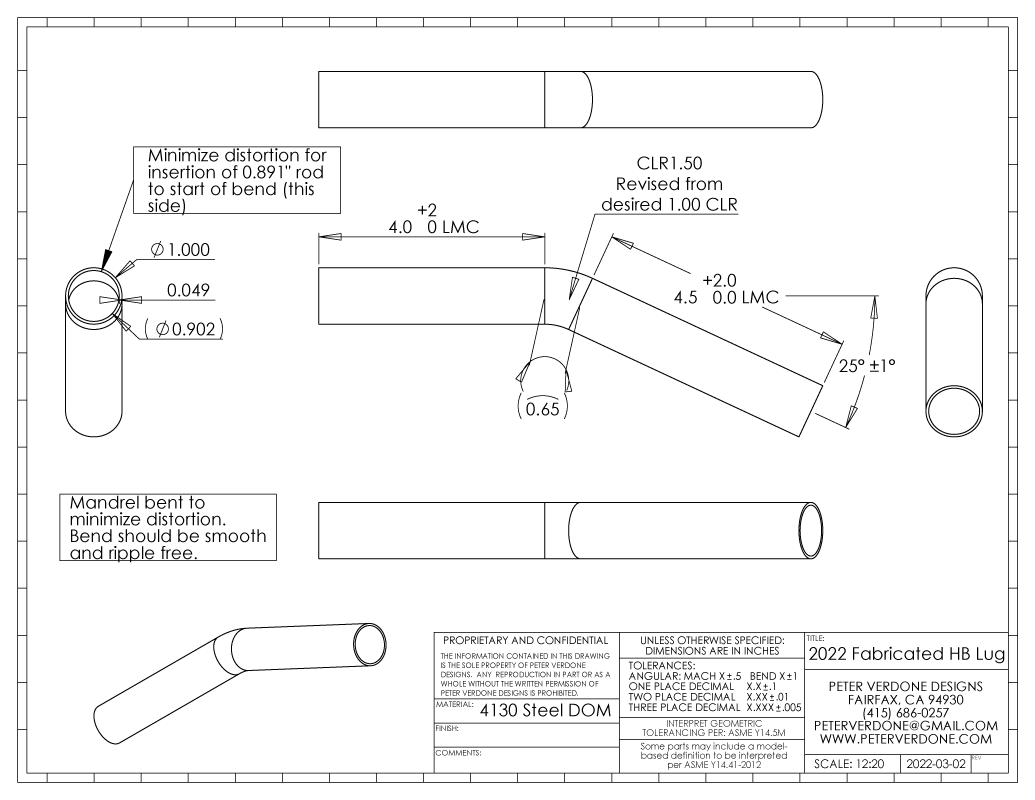
Luckily, after the failure of the MiG bars but before the chainstay yoke failure, I had begun implementing the new design for the bars. I needed tubes bend with a CLR at 1.5D. That’s pretty nuts and for that you pay and you wait. I ordered bending in mid-March and had the tubes in hand about 6 weeks later, well before I had to really consider another set of bars.
![]()
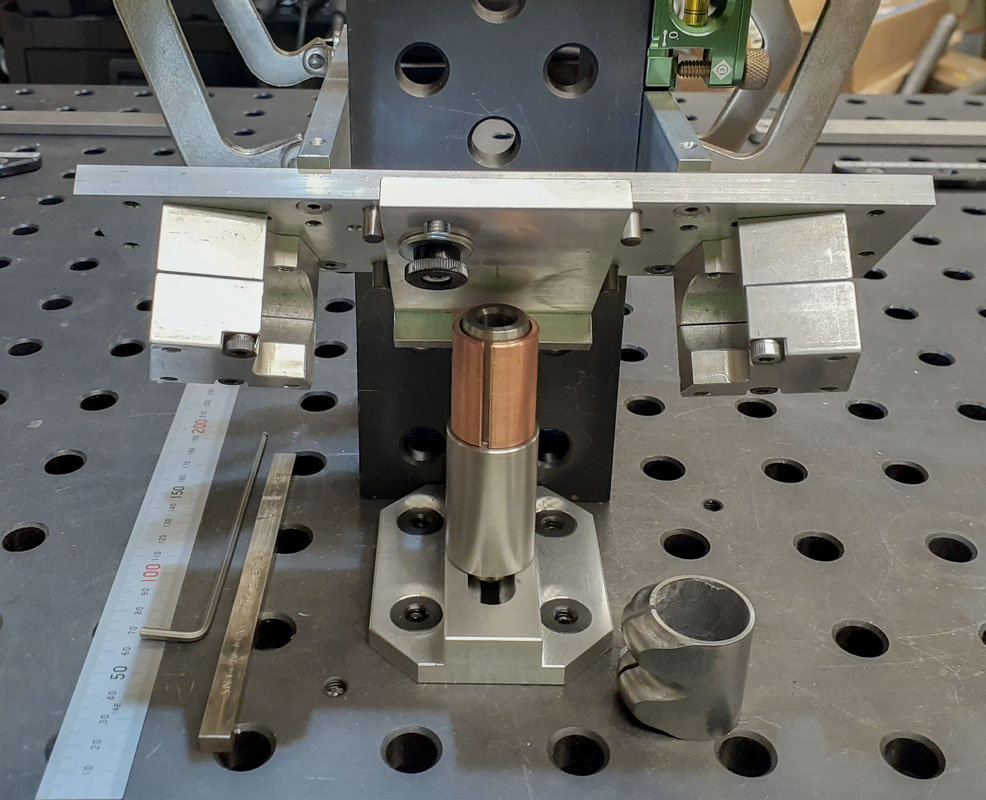
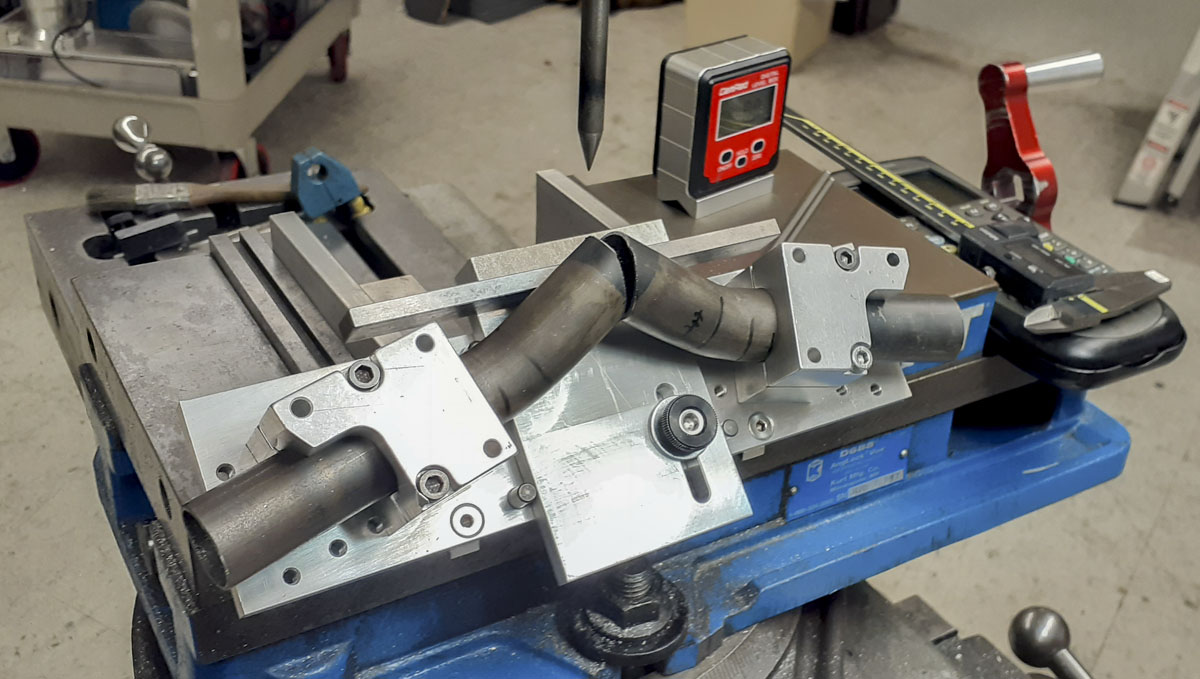
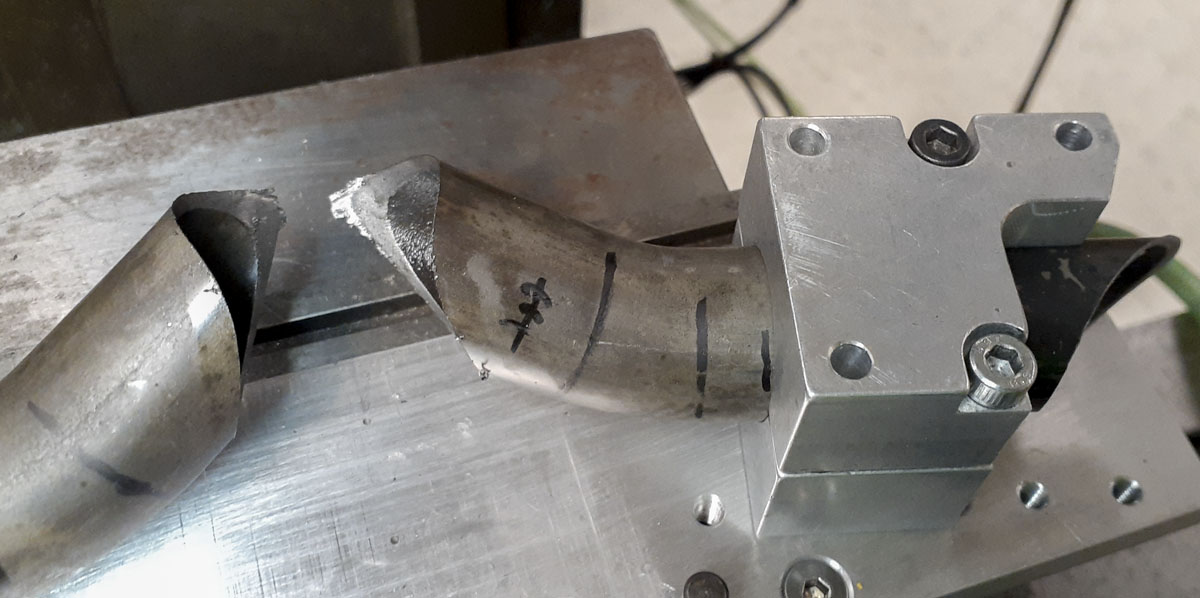
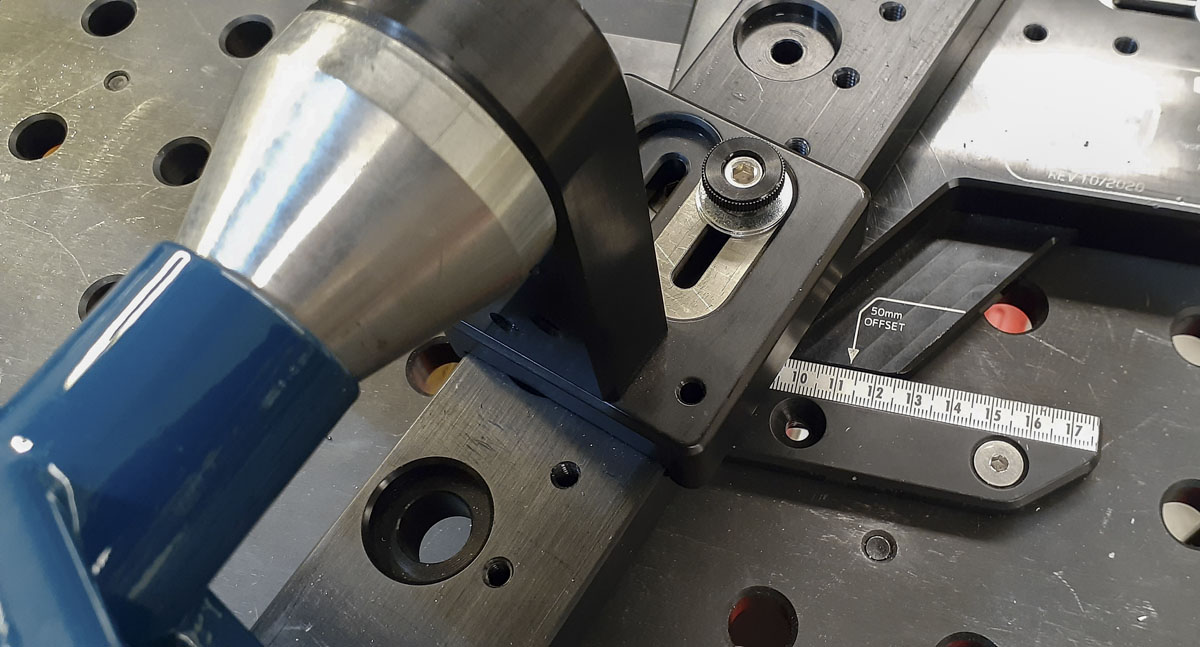
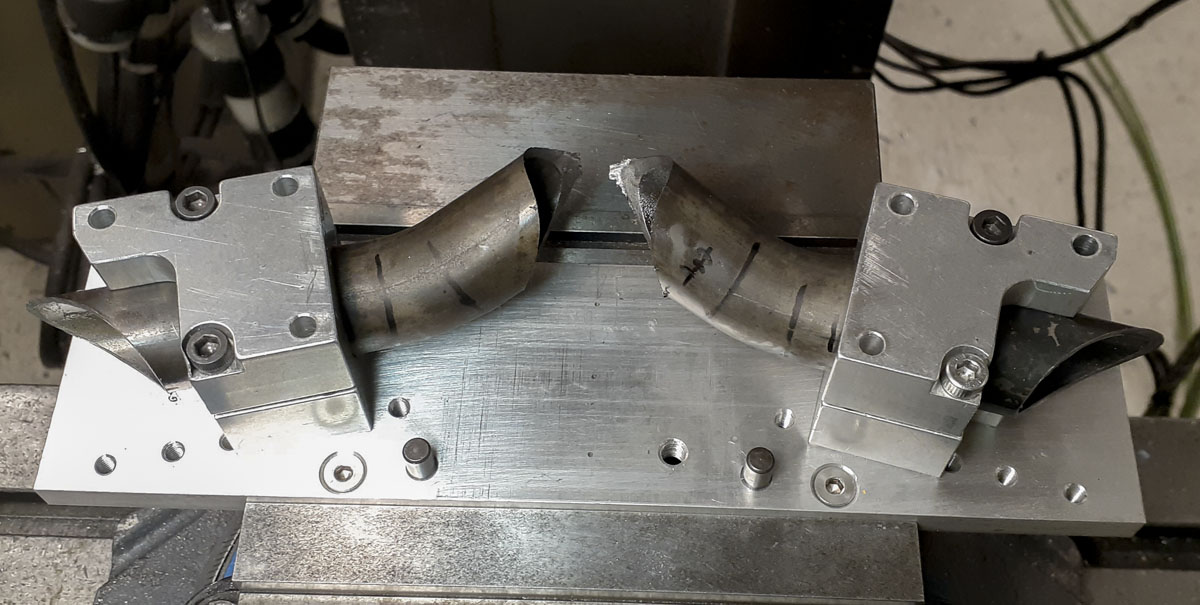
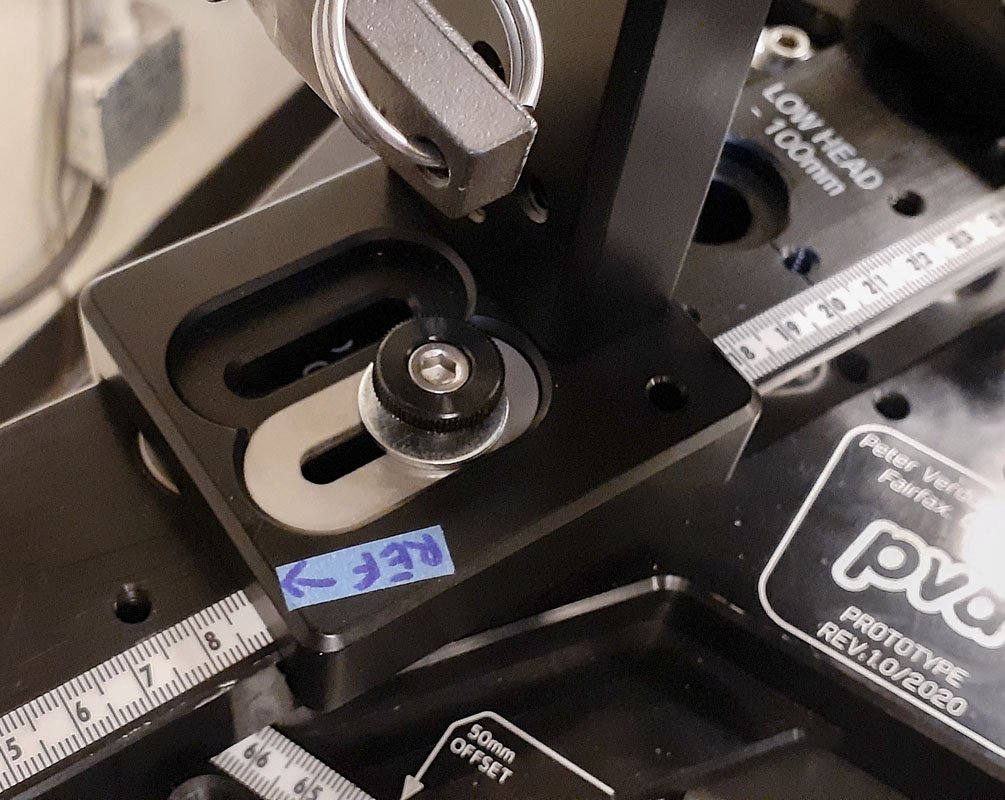
Additionally, my old tooling was proving to be problematic. I needed more precision with mitering, more rigidity, and ease of setup for low, high, short, and long setups. This pushed construction back another week but it was the smart move for the future. I needed to sink time into a good design. Just as leveraging the fixturable welding table and tooling has worked so well for my frame fixtures, how could I do the same for handlebars? I had a 4x4x12″ pillar and various connecting pins on hand. I had clamps. I just needed a way to make one tool help with both cutting and welding.
As I mention when I developed the PVD Cyberdyne frame fixture, when I work on these parts and concepts that few others are doing, I can’t copy or buy other tools that framebuilders are using. Sure, I can look for inspiration from another solution but I’m most often going to have to make something else. Developing tooling leads to new ways of thinking that extend back into the parts. Just as doing the math leads to new understandings and solutions, tools do as well. Many of the new bike designs of the last few years have been lead by math and tooling. This is worth looking into for the novice.
Just like with other complex tools, I had to learn how to use this after designing and making it. That’s always fun. We find out about what we hadn’t thought of during design. What was left out or not considered. Sometimes, we learn of new uses and how to gain more precision or rigidity. All of this slows things down but has to be paid attention to.
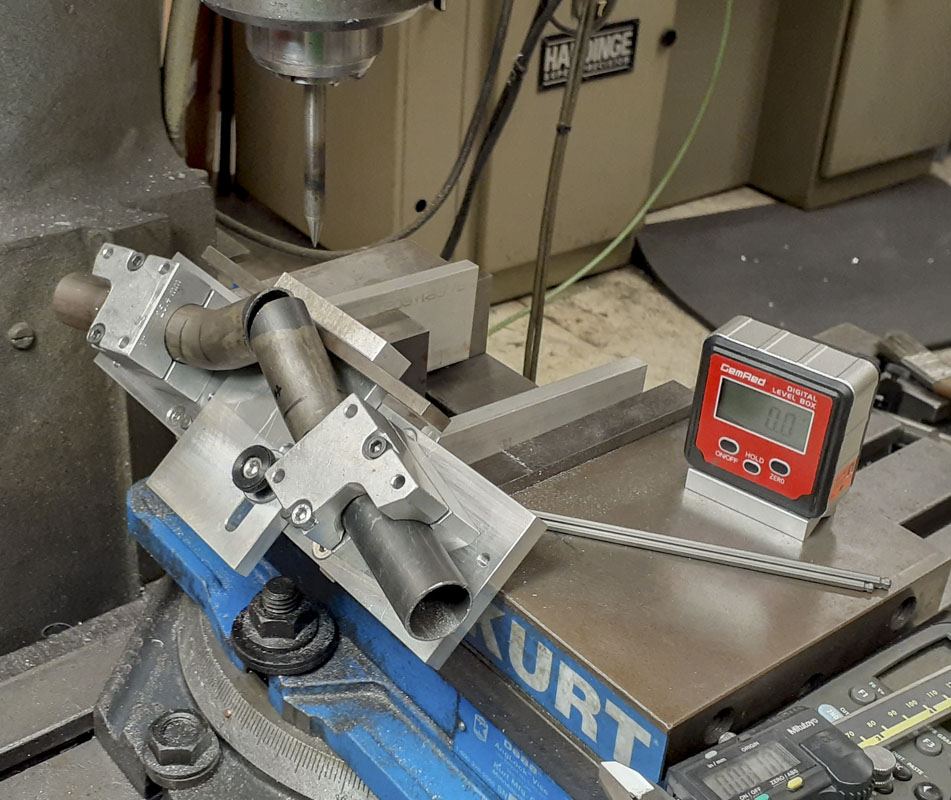
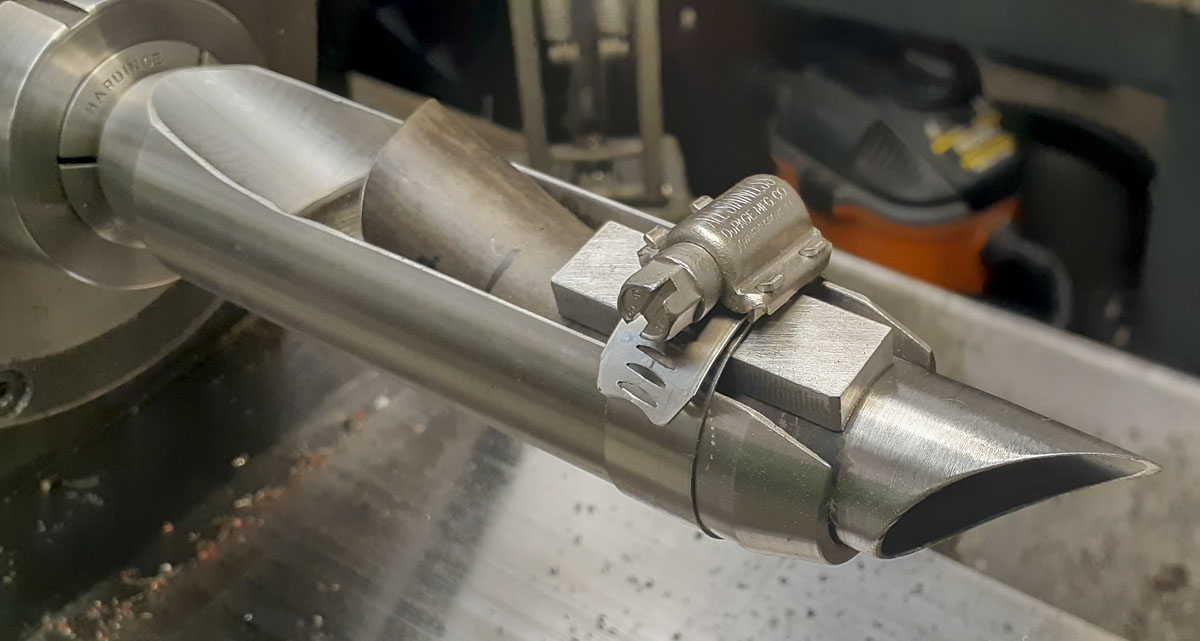
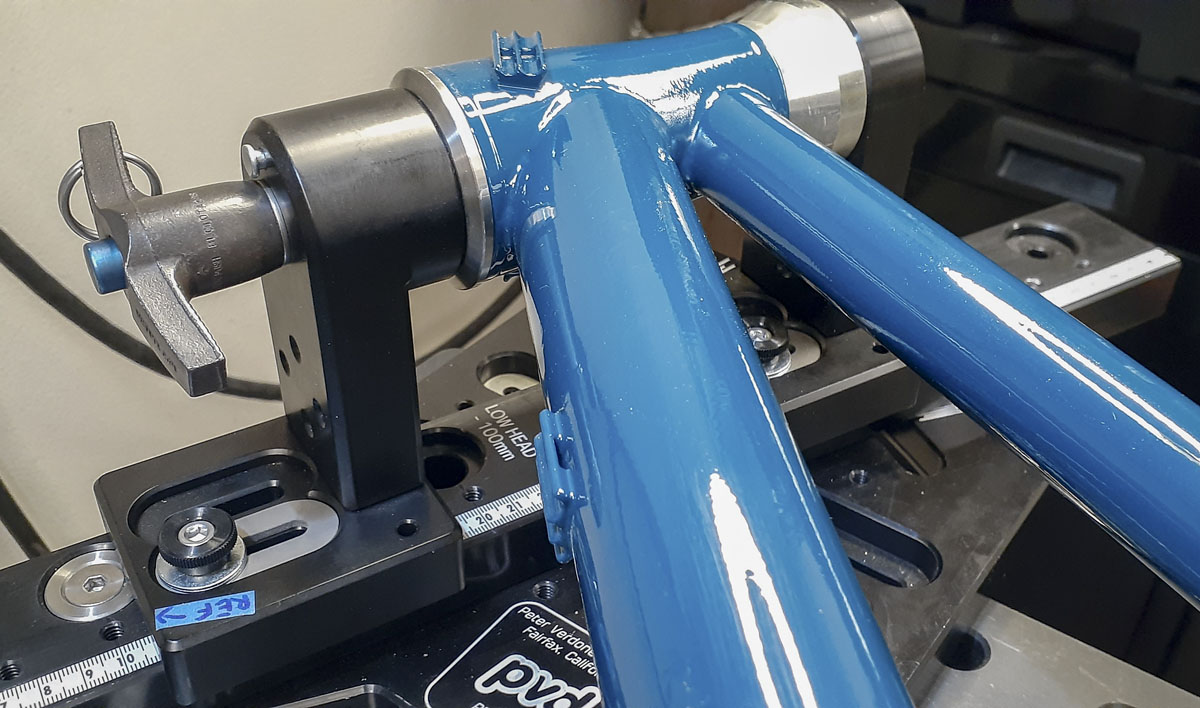
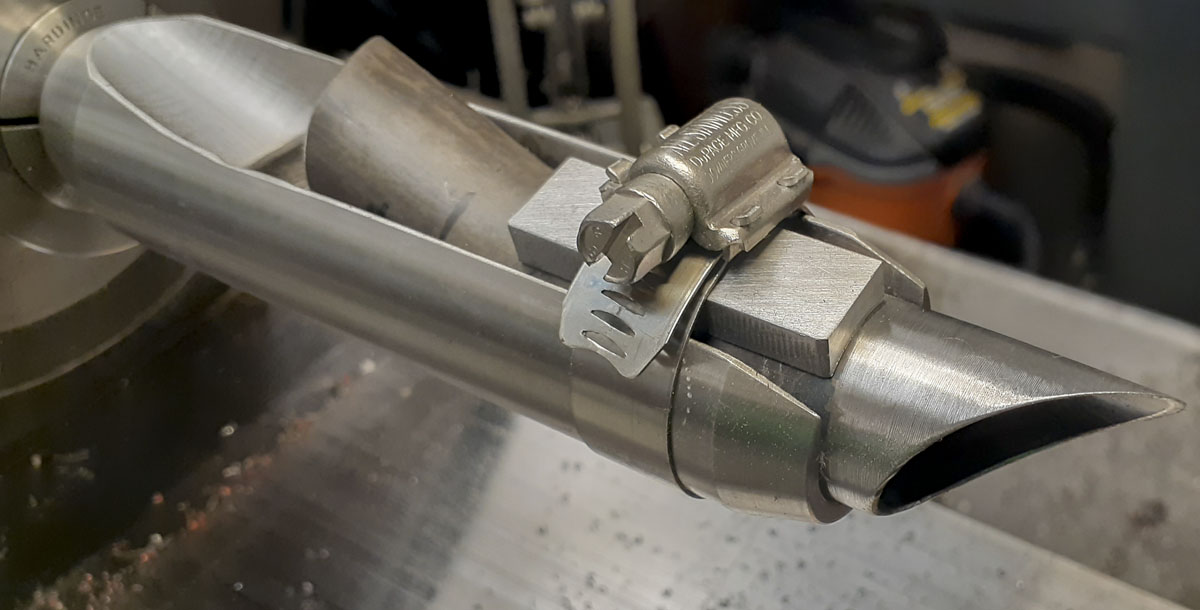
I even made an arbor tool to hold the bent and cut bar lug on the lathe so I could add a 1 degree taper to the end that will really lighten the look when done. This is just something aesthetic that has been eating at me for years.
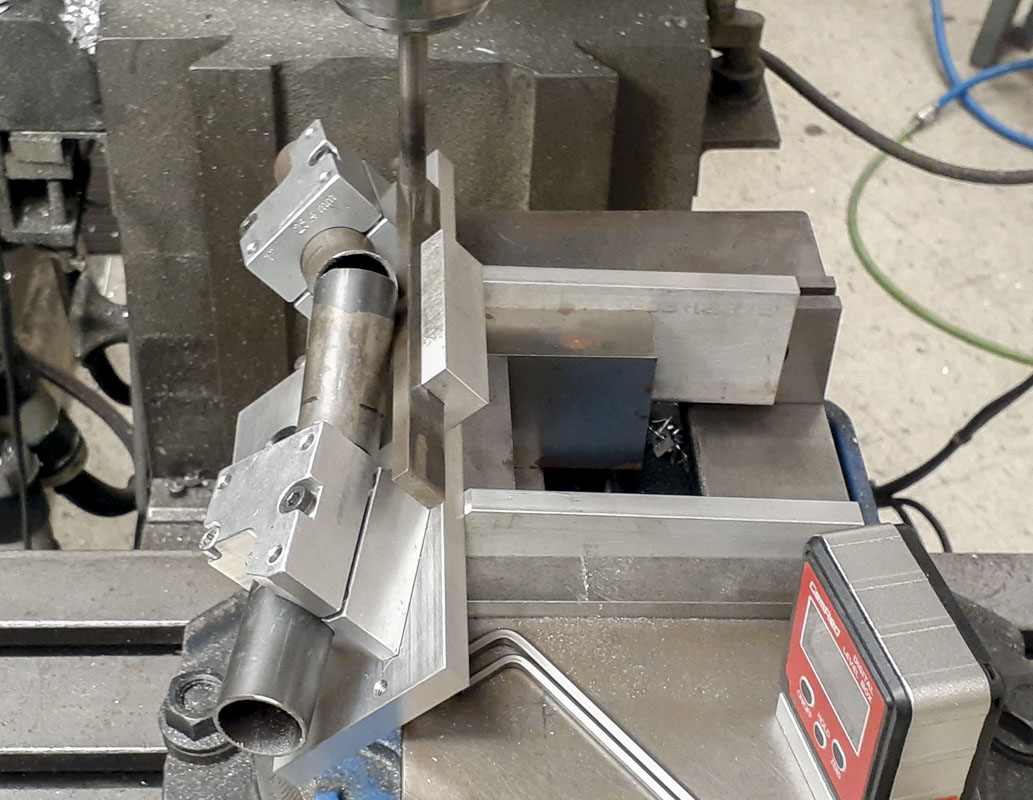
Looking back on using this fixture, I think that I implemented it incorrectly. While it’s nice to have the handlebars in a meaningful orientation on the table, It may have been better if I had put the bar lugs on the table surface and the steerer lug on the pillar. This would expose more of the joint for tacking and welding before taking the part out of the fixture. That would extend the usable reference of the handgrip axis as the whole table raster becomes part of the tool. It also may be more rigid and easier to clamp in place.
I took some time to draw the revised design for the fixture. I think that this orientation would actually work a lot nicer. It keeps the bar axis planer in reference to the table. The wider pin stance for the bar plate add to the precision location. There we go, re-write history and have this be done!

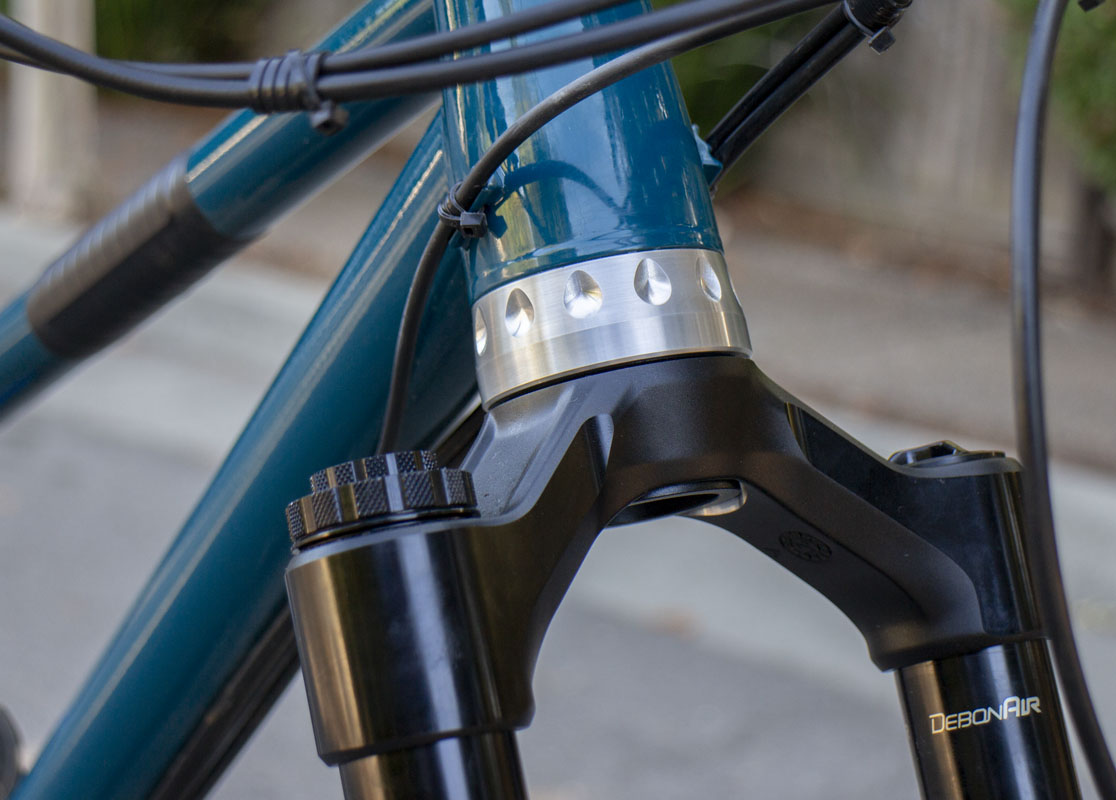
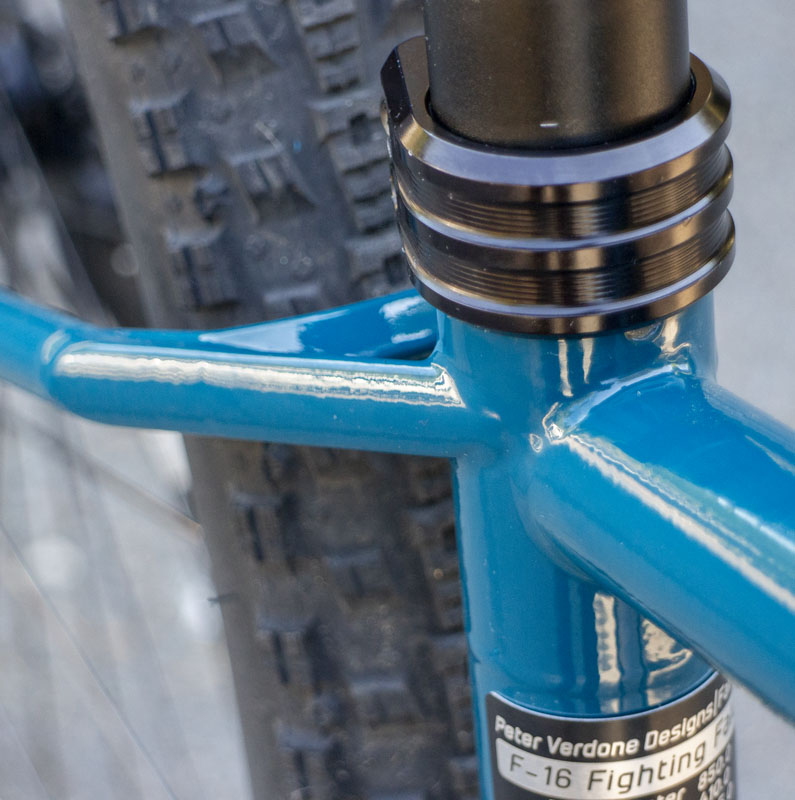
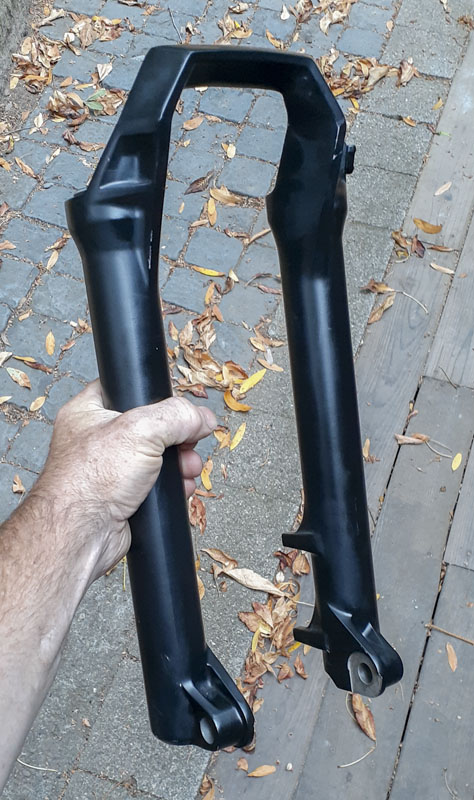
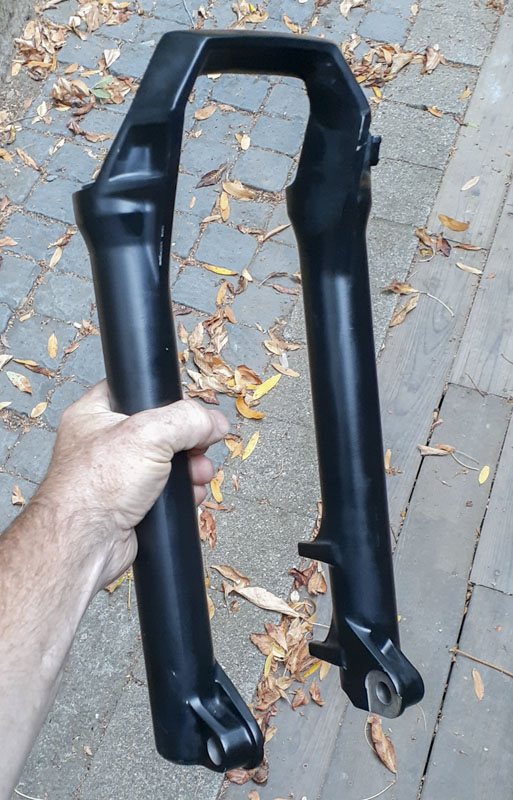
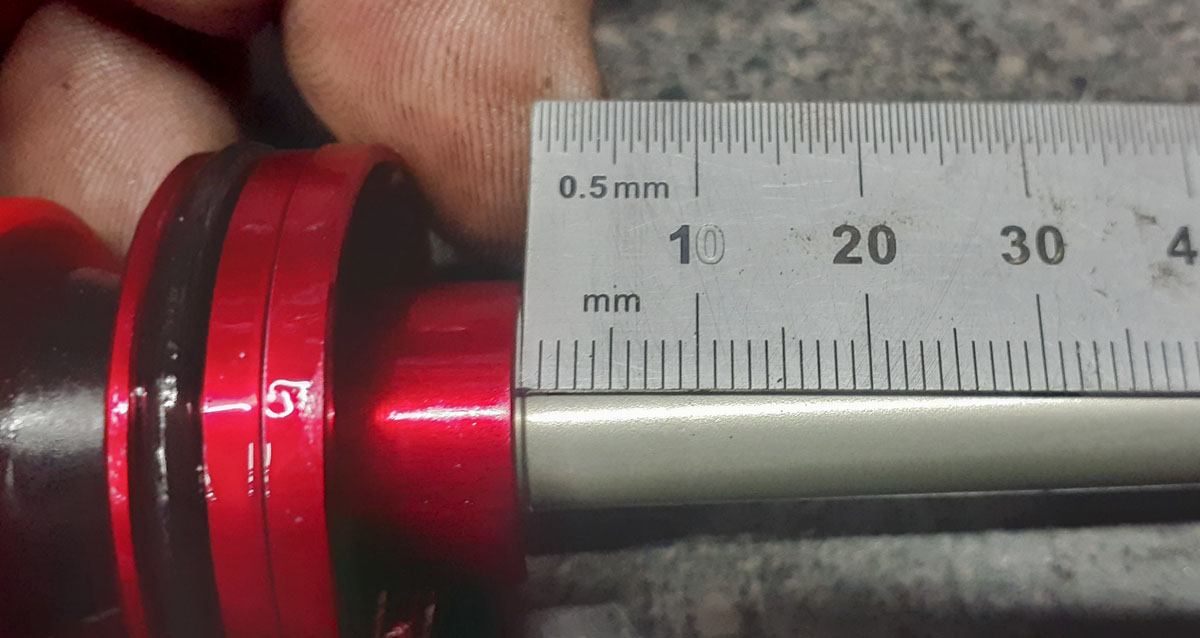
The ‘as designed’ fork has been changed from the Firefox for this bike. The 150mm travel remains the same but the offset is slightly different. The reason for this was that I felt like the Pike was a bit flimsy for the use I was giving the bike. I’m sure that it wasn’t going to break but it just felt like it was fluttering about. I passed that fork to my wife’s new bike and I obtained one of the new Lyrik Ultimate D1 forks. I’m hoping that this feels as good as they say.
I was hoping to make a change to 160mm travel fork but I had already ordered this fork and switching given the supply chain issues would have been a nightmare and an even longer wait. I like the feel of the 150mm fork on regular rides but the 160mm travel would give me a bit more range into the rough. I can change this later (surprisingly expensive now) with a light geometry change. (see later in this post)
The fork from RockShox is a green color, “Heavy Meadow Green – Gloss”. To go with that, RAL 5001 Green Blue was chosen as a complement. The problem was that my guy AJ at West Coast didn’t have that on hand. So I went with RAL 5020, Ocean Blue.
But the story doesn’t end there… Oh no. I fucked up. Pretty badly. This was really heartbreaking.
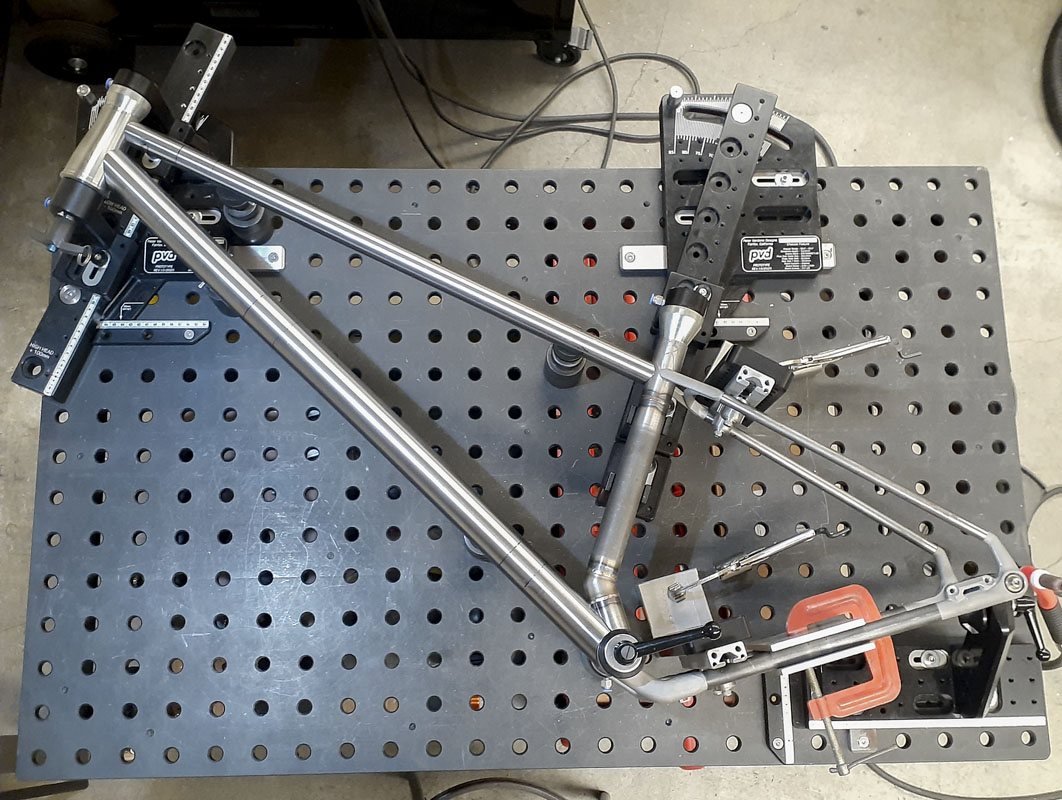
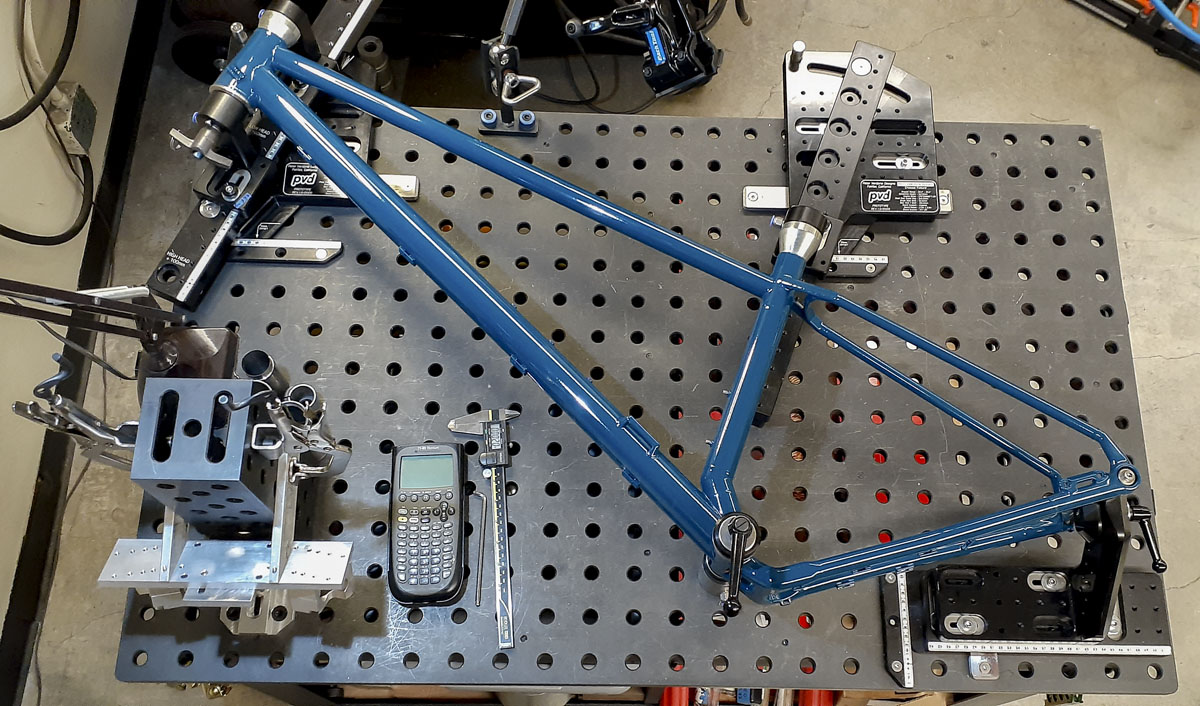
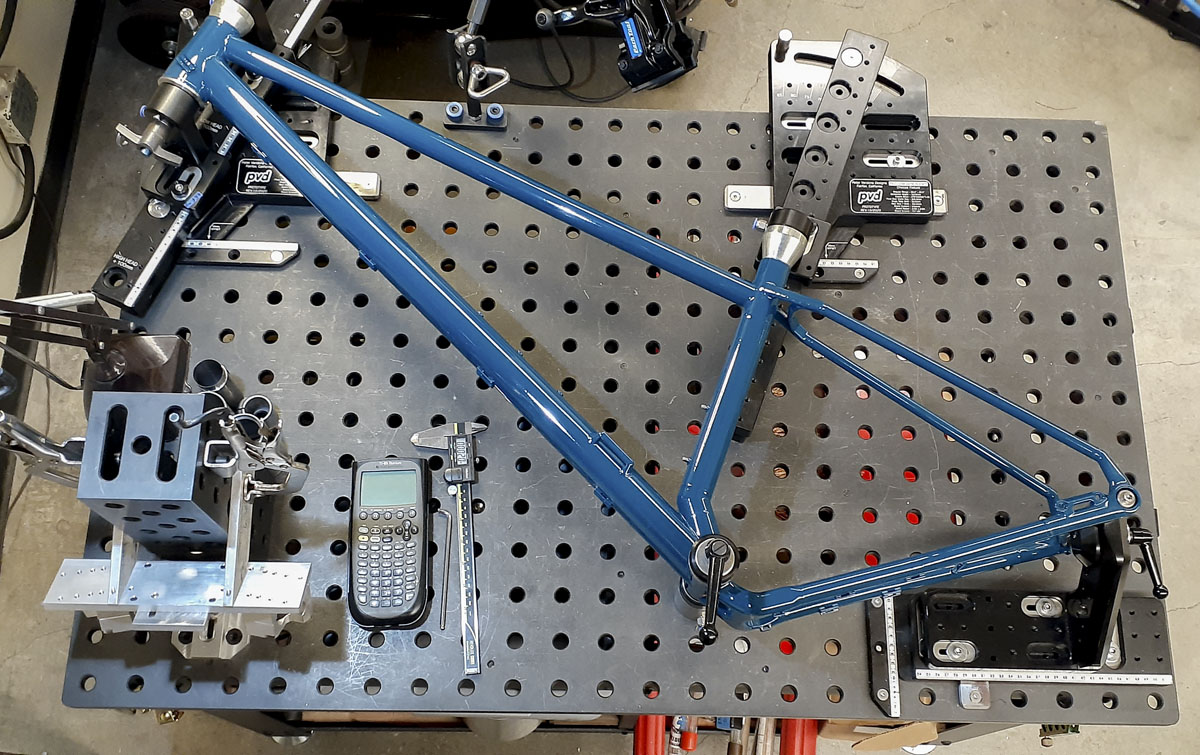
I discovered a problem as I was cleaning the shop in preparation for the new 2022 Fall Semester at San Francisco State University where I work. In addition to our first real semester back on campus after COVID, it’s always nice to do a big cleanup and set the stage for a fresh crop of energized students. I figured that I’d put my broken MiG-31 frame onto the fixture table, showing the fixture, frame, how it works, and the failure. A nice demonstration that could get the kids that come into the shop thinking. Students need to see real work more.
I went to set up the fixture for the MiG. A few quick and easy adjustments. But the frame wasn’t going back into the fixture easily. Something was wrong. I double checked my math and settings. Frames do distort and slightly change geometry when they are welded so it’s to be expected that a precisely set fixture to plan isn’t going to be right for a fully welded frame. The fixture was still way off.
Then I saw what I was doing wrong. Ugh. My heart sank.
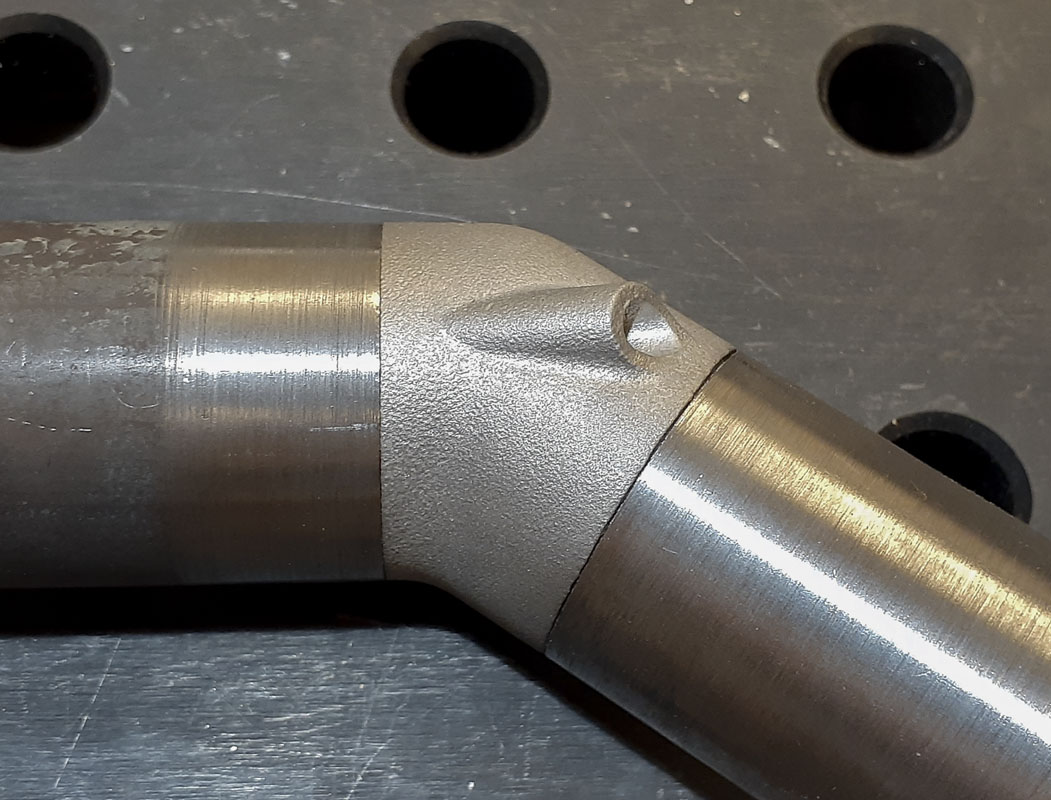
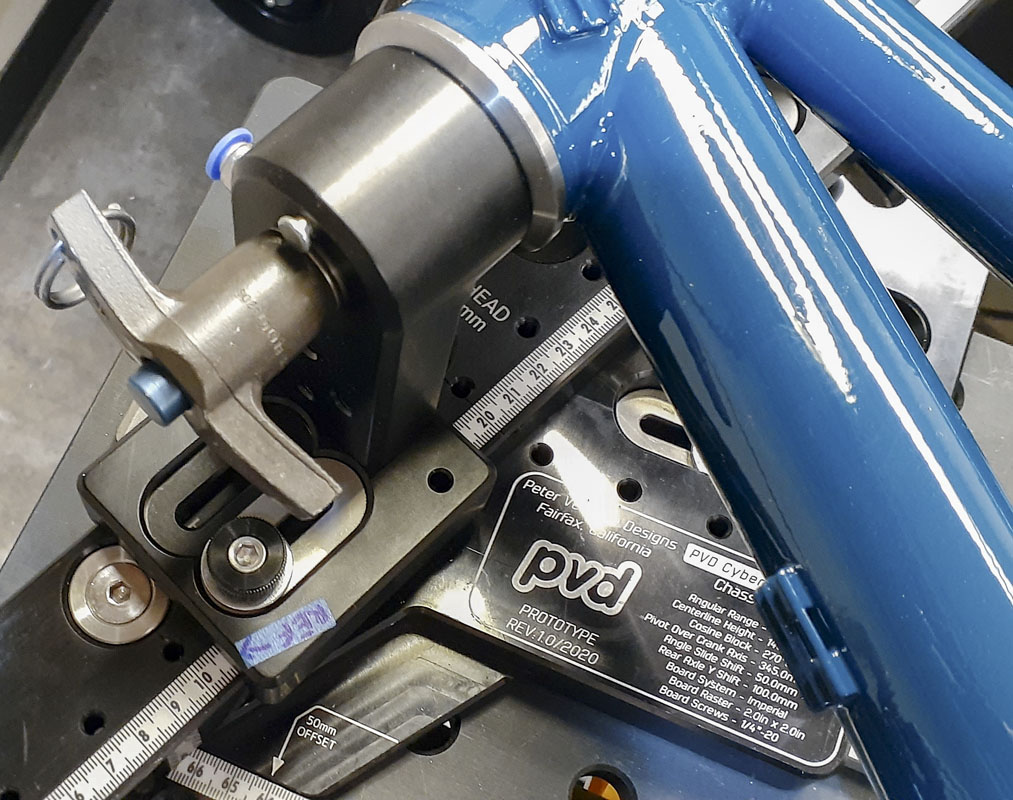
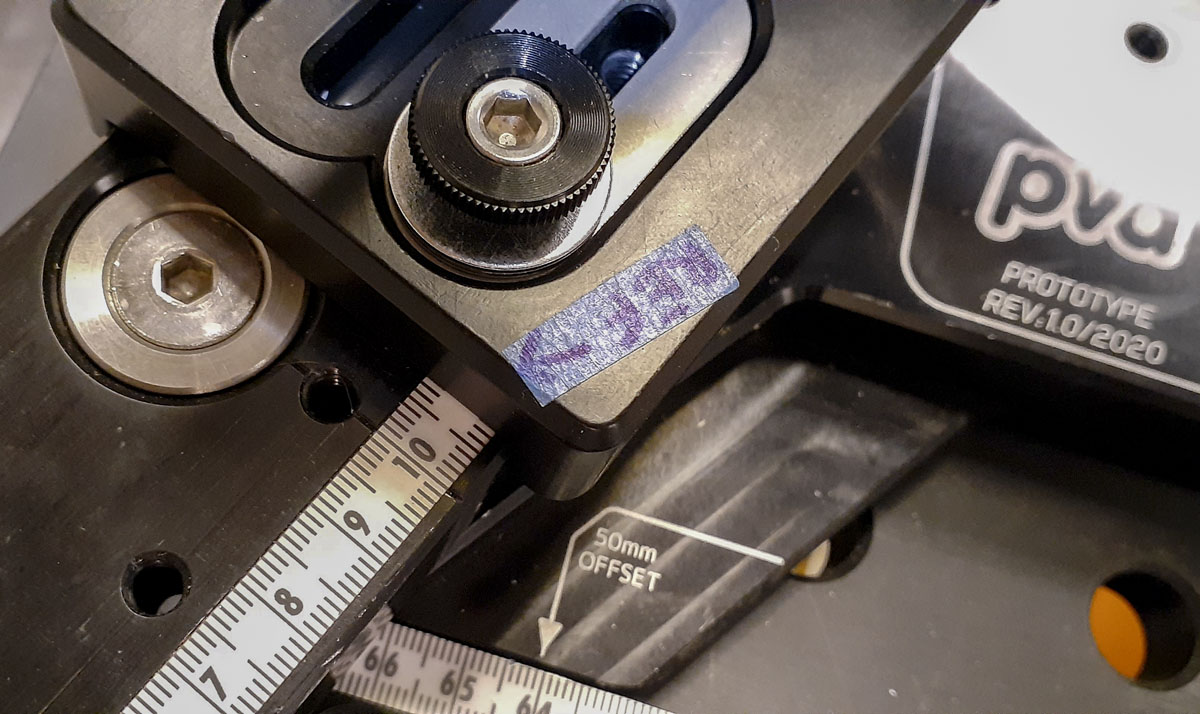
I had made a mistake setting the Cyberdyne frame fixture for the MiG. Setting the head tube height on the head tube axis requires reading the scale on one side of the slider that holds the lower head tube puck to the rail. I had read the wrong side for this setup. I need a mark on the slider that prevents this ambiguity. No mistake should be this easy to make.
Then I worried, did I make this same mistake setting up the F-16 Fighting Falcon? But I had already dropped off the frame to paint. I had to review a few photos of the frame in the fixture. Despite a lot of zoom and a grainy image, it looked like I had. Noooooo!!!!
I really can’t explain my thinking as I was the designer of both but there is ambiguity as it stood. Getting old is having an effect on the number of variables I can manage at once and I’ve had a lot going by in the last few weeks. I am going to mark the slider so that it never happens again.
To be honest, I almost had a panic attack. I felt like garbage. I paced the room. Anyone that’s made this kind of mistake can understand all of the thoughts going through my mind. Who’s the imbecile? ME! I kicked myself, swore at myself, and basically just sunk to a low low low.
What separates long term and successful people that make things happen isn’t that they don’t fail, they do. It’s that when they do, after they fail, they pick themselves up off the ground and get back to fucking work. I made a mental list of my possible options. I did a bit of math, hacked into some models. I looked at my tools in a new way. This is how I got from where I was 30 years ago to here. Failing and working it out.

I was actually in luck. Because of the way my fixture is designed, the steering axis is in the same location as it would be for any fork length as long as the offset was the same. I had ended up with a head tube about 19 mm higher than it should have been along that axis. I could use a longer fork with the same offset and the geometry would be nearly identical. Effectively, this would work just as designed, but with more travel.

![]()
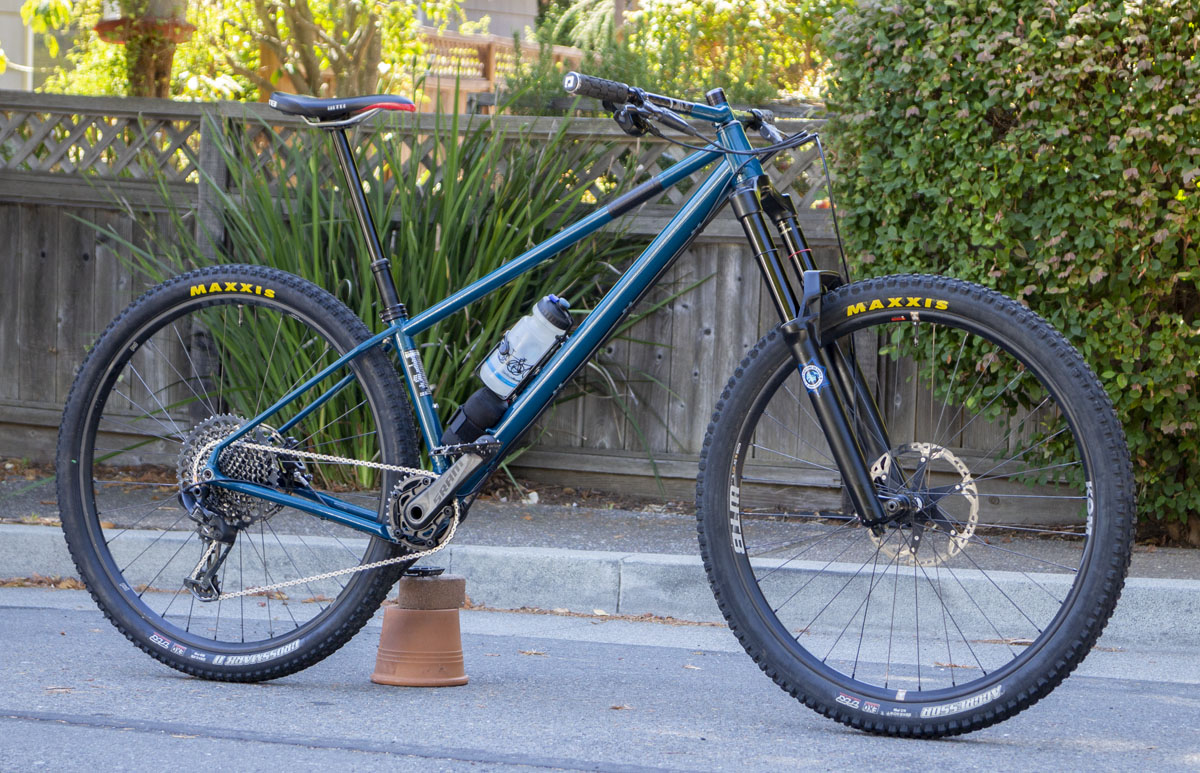
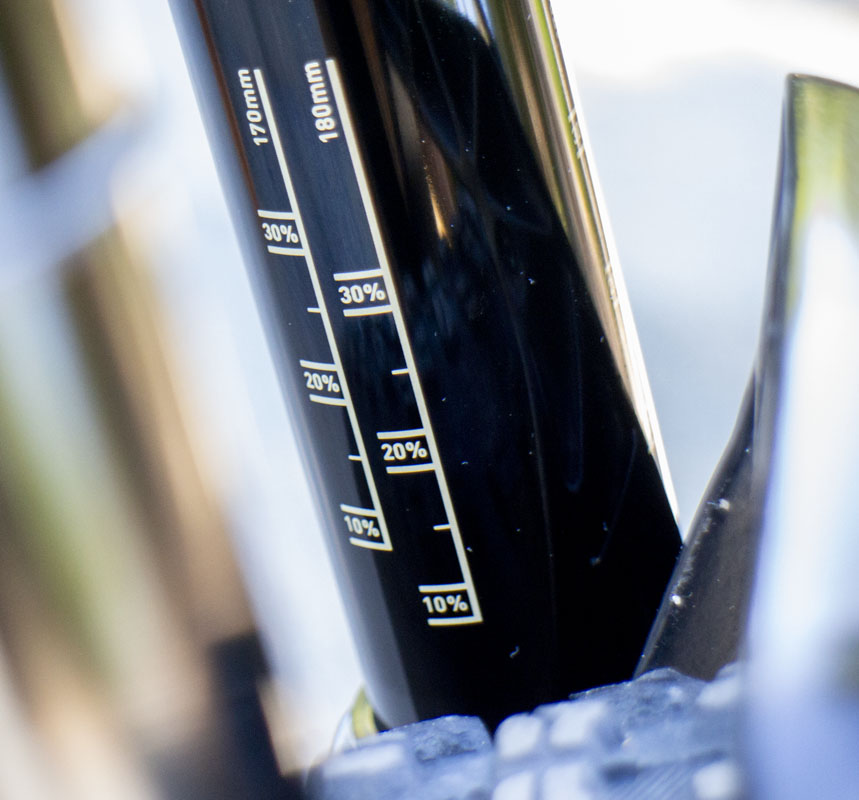
In the frame design, I’d be replacing the 2023 Lyrik 150 to the 2020 ZEB 180 that I had been using on the 2018 PVD Warbird. I will change the travel of the ZEB in the prints to 175mm. Then the fork length goes to 591mm and at 30% sag, 539mm. Understand that using a 30% sag factor, every 10mm of travel change will result in 7mm of sagged axle to crown change.
The ZEB fork can be configured to any travel from 150 to 180mm, although there is probably one that is optimized for the positive and negative spring volumes. It’s love to know which that is. The newer versions of the fork reduce this range so it should be better targeted. I can run the ZEB at the stock 180mm travel or 170mm with a new air spring assembly (00.4020.574.008).
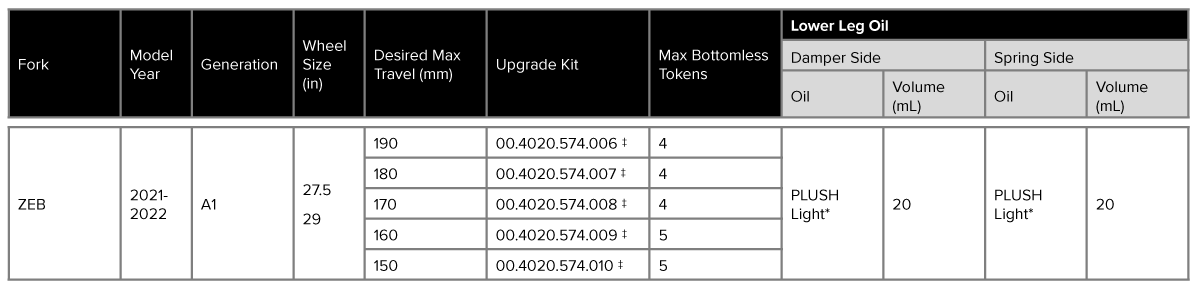
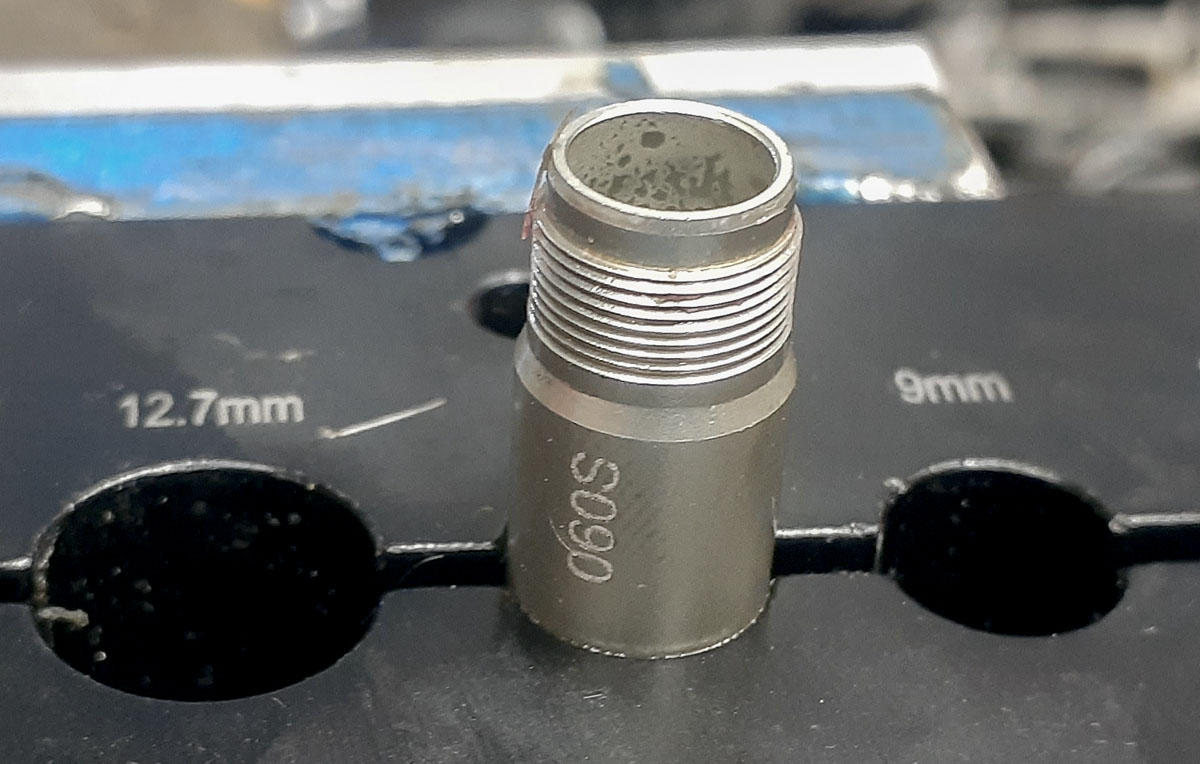
Since it will be until late October before parts to do this will become available, I was going to be cutting the 180mm shaft down 5mm to produce the 175mm travel ZEB that I’m looking for. This should just involve extending the threading at the bottom of the shaft and cutting it down 5mm. I decided to just leave the fork at 180mm for now.
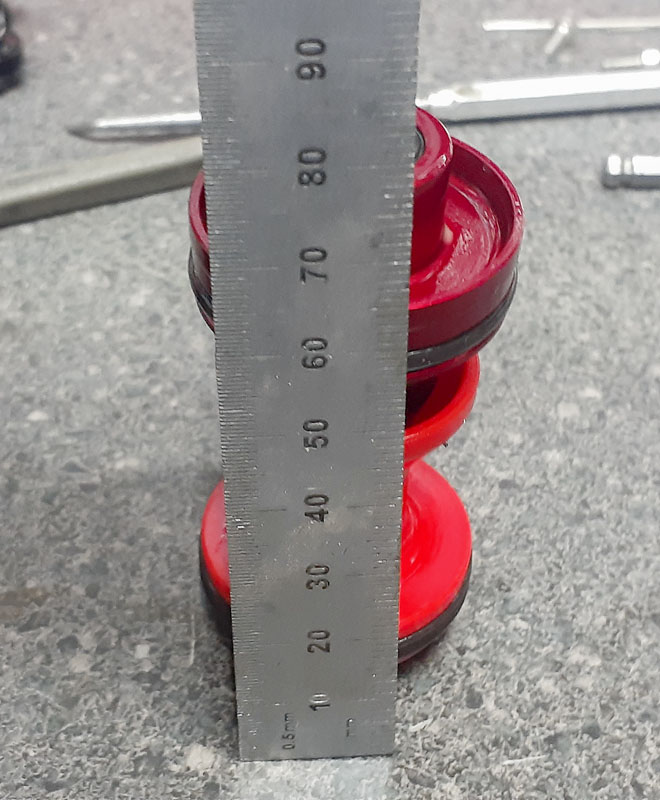
I believe that the thread is an M9x0.5 thread. To cut the shaft down, I need to extend the thread and it’s a bit fine and hard to jump in on an American lathe without metric threading. I needed a die. This is an odd size. I did find one but it was running right to the edge of getting this bike tougher.


With the increased height of the head tube, I’ll still have to make another stem. I’d have to get this done as fast as possible as the frame was at the powder coater advancing in the que. I didn’t want to make the call of shame. This would make me look the fool but also slow the bike moving through the busy vendor.
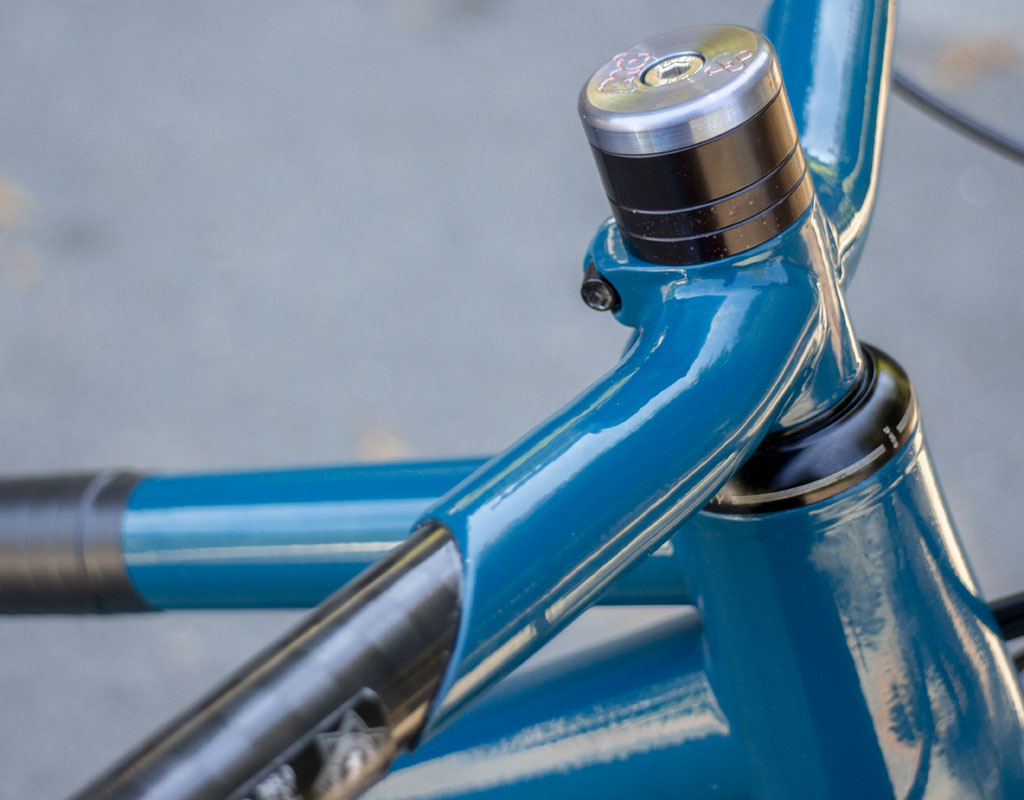
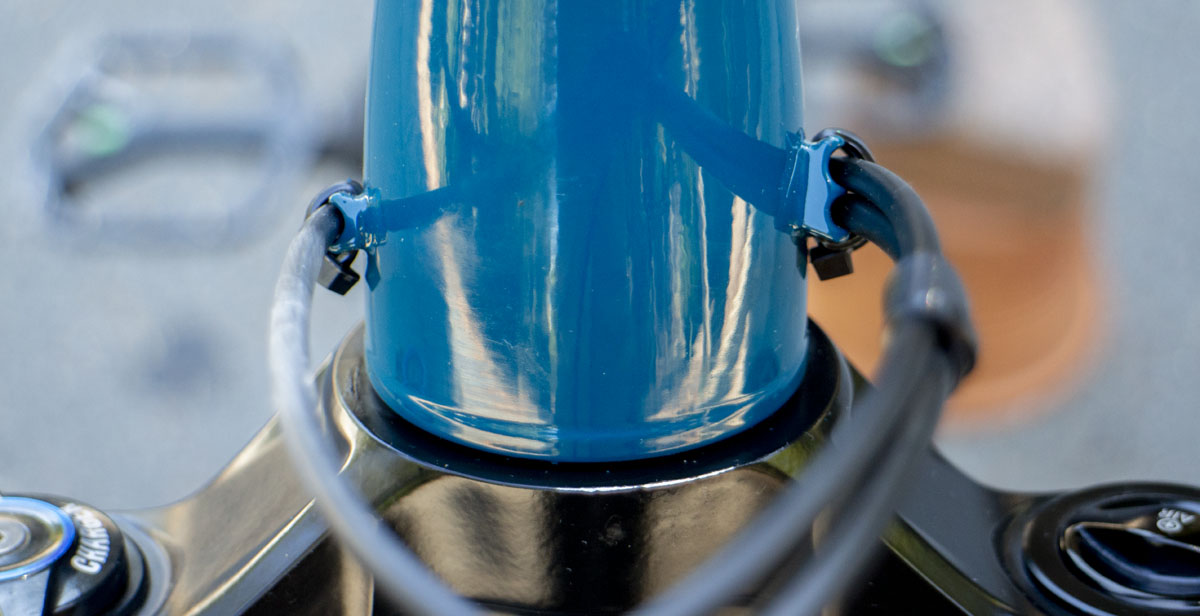
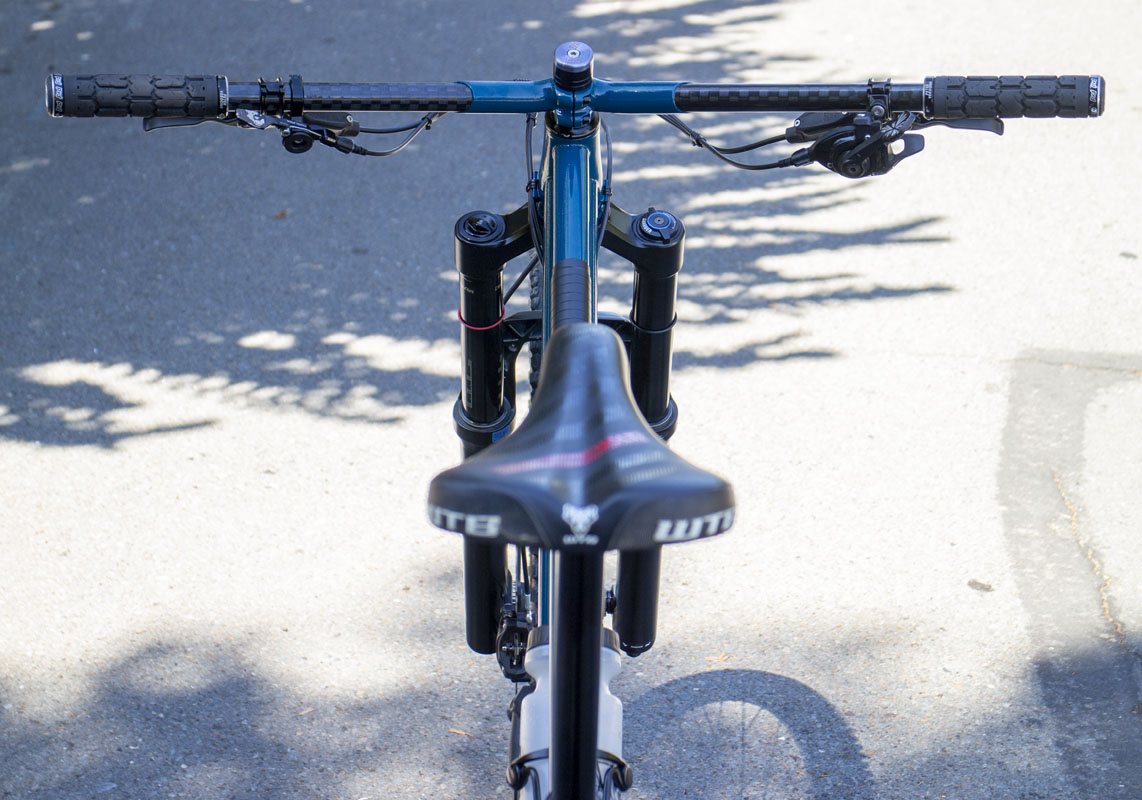
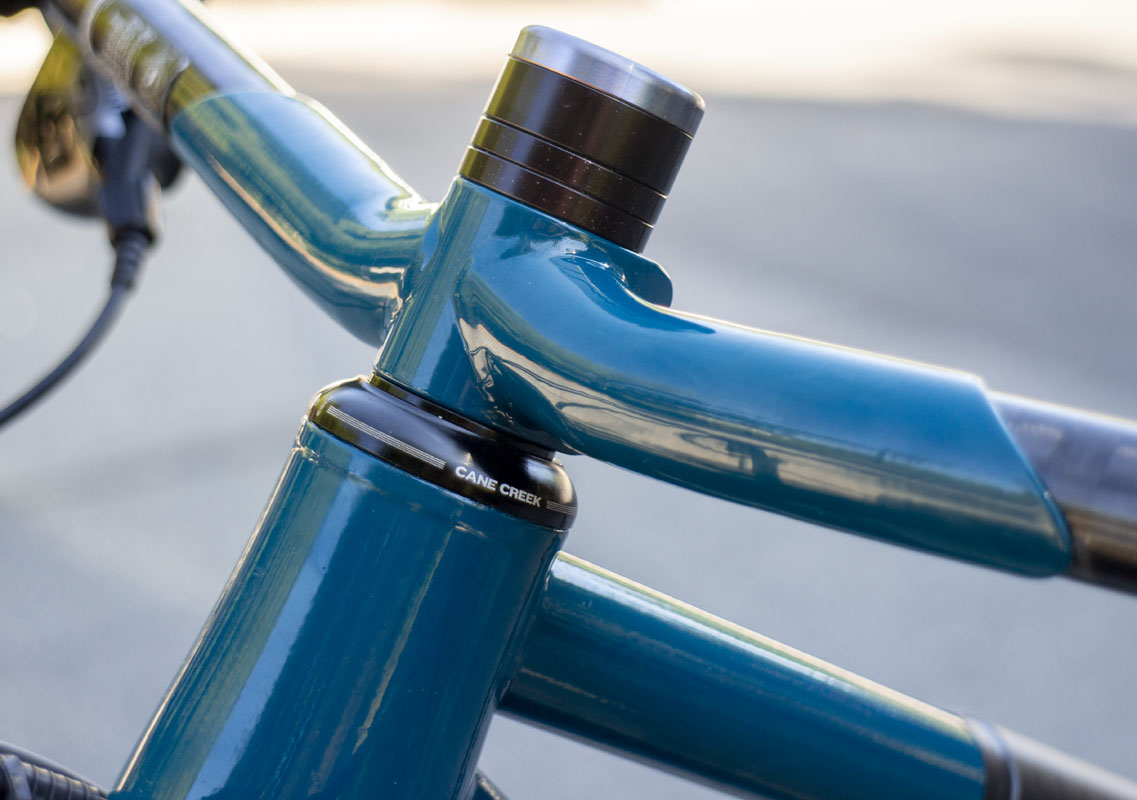
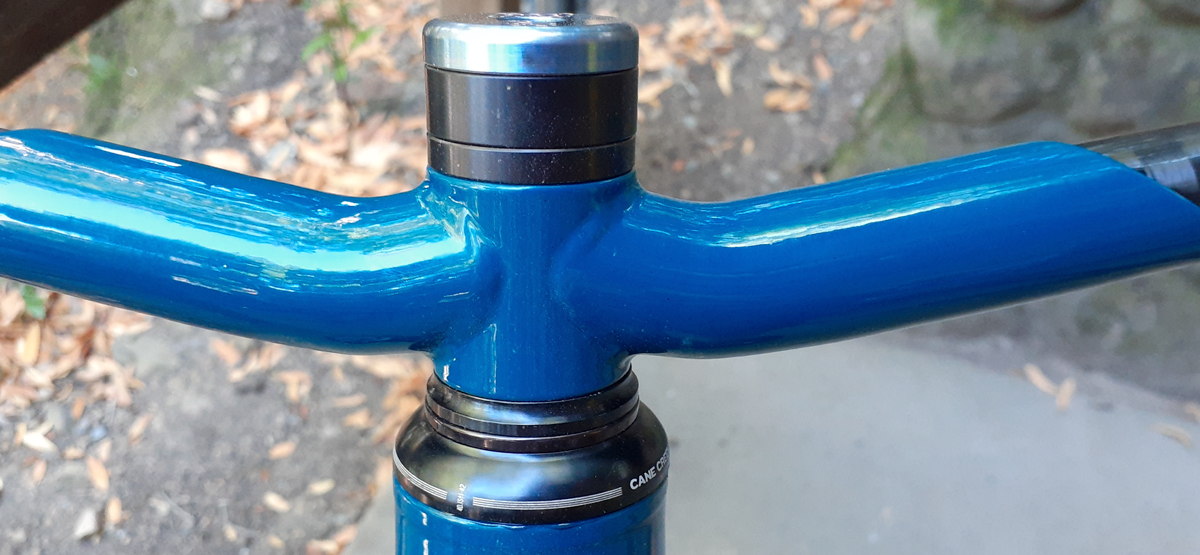
A new design appears, the inverted gullwing handlebars. With a Cane Creek Slamset top and a 3mm spacer under this stem, notice that the grip ends are in the exact same place as the original design. That’s a math based model that ensures that!
To confuse this some in the completed bicycle images that I show, more than 3mm of spacers appear. This is because I model around the unmodified Paragon Machine Works SP2002: Steel Stem Steerer Clamp. That has a height of 38.1mm. After I’ve fabricated the part, I cut that down as space allows to give me the lowest profile lug possible. As that amount on the underside of the binder isn’t determinable, I adjust accordingly in the final assembly. The cut clamp is 33mm, 5.1mm shorter than the stock part.
![]()
If I weren’t able to get my hands on the air spring assembly for changing travel to 175mm and if I wasn’t able to cut a longer one down, I’d have to ride the bike with the 180mm fork. so I need a print that will reflect that configuration and the 7mm taller fork, a 4.6mm Cane Creek Slamset at the upper headset to help offset the raised head tube, and the spacer removed from under the handlebars. Of course, the geometry is very close the original design intent. Head angle down to 67.2 degrees and a flop of 39mm.
The updated bike is much like it had originally been designed but with a 20-30mm longer travel fork that is a bit heavier. The Lyrik’s stated weight is 2,042g compared to the ZEB at 2,245g, a 203g difference. The 2022 Pike Ultimate that I had on the MiG was 1844g, so that would be 401g, but I had already determined that that fork wasn’t stiff enough for my needs. I really wasn’t looking to use such a heavy fork on this bike but it’s going to have to work. The question is, will I be able to take full advantage of the longer fork travel with the steeper head angle. I’m guessing that it won’t be an issue but actual riding will be the proof. Hopefully the crown will clear the down tube.
My hope is that this accident turns into a path of discovery. I hadn’t been looking at this bike to be a full enduro hardtail. It was meant to be a cross country bike. With the heavier fork and the less crisp feel that the longer travel will add, it’s not going to be that. It’s going to have a much stiffer front end with the ZEB with more travel, making it far more capable in the rough. What does that mean with the 67.3 degree head tube? That’s what I need to learn. The bike should feel far nicer going up hills than the Warbird with a nearly 1.25 degree steeper effective seat tube angle. The front end will feel far lighter with the 38.9mm flop compared to the 49.9mm flop of the warbird. A 22% reduction. Wow!
2022-08-27 Shakedown Ride #1. San Anselmo to Fairfax, over Bald Hill to Deer Park Singletrack. Then to Tamarancho (skipping the loop, Alchemist to Goldman counter-clockwise) then down Hobo. A short ride as I had a few things going on in the day. Still, a bit of climbing, a natural hiking singletrack down on one and an aggressive DH down on the other.
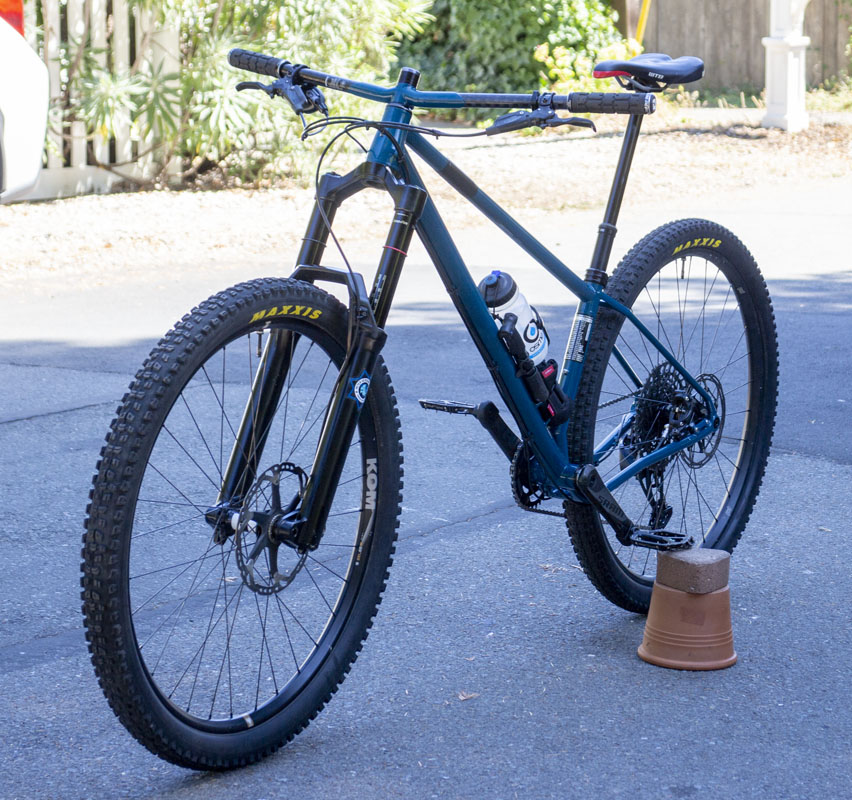
The bike is spectacular! The steering feels so incredibly light, it’s hard to believe that the bike has a 180mm travel fork. That’s true even on pavement. The Post Forward geometry is really paying off. While I had really wanted a 160mm fork, the 180mm fork now has a lot less drawbacks than previously thought.
The riding position is spot on as usual. It feels like home…but better. I still have to get used to how forward the saddle is. I prefer to feel a bit more stretched out on the bike but I wouldn’t want my bars any more forward or low than they already are for downhill riding.
I’m trying to find a condition where the 67.3 degree head angle becomes an issue in actual riding. That didn’t show up today. In extremes, everything was as predicted.. but I don’t have a big sample set yet. More hard trails are coming.
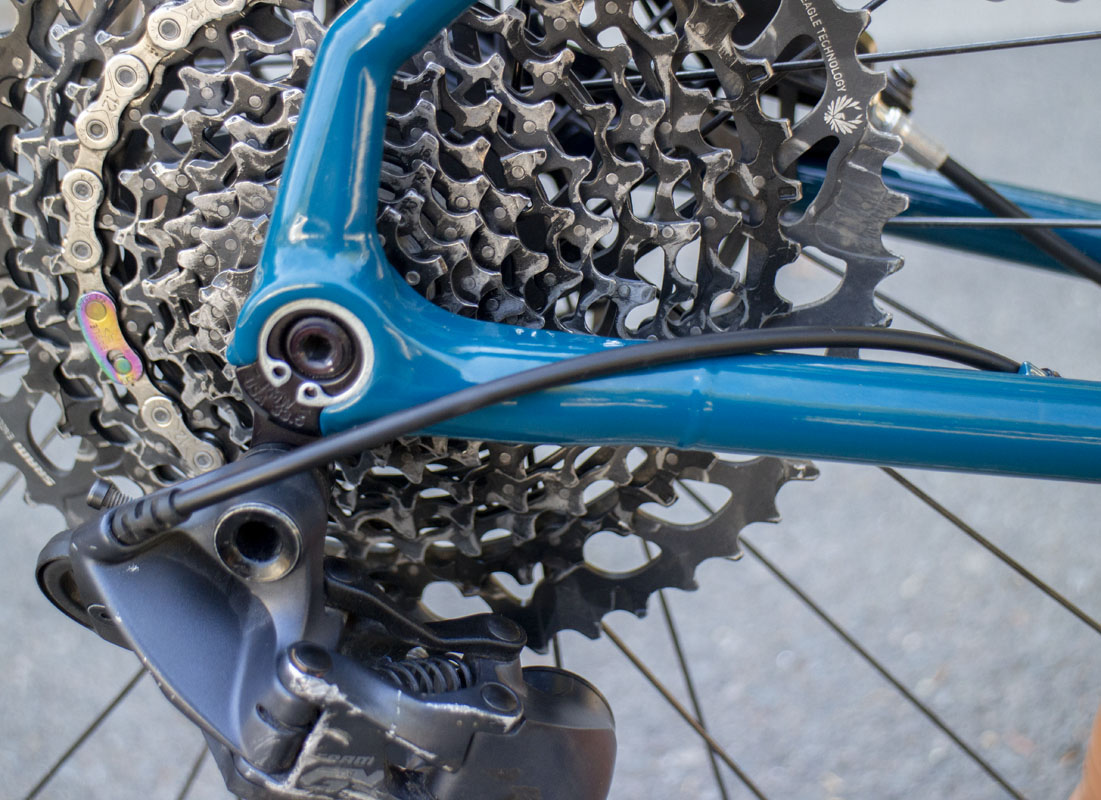
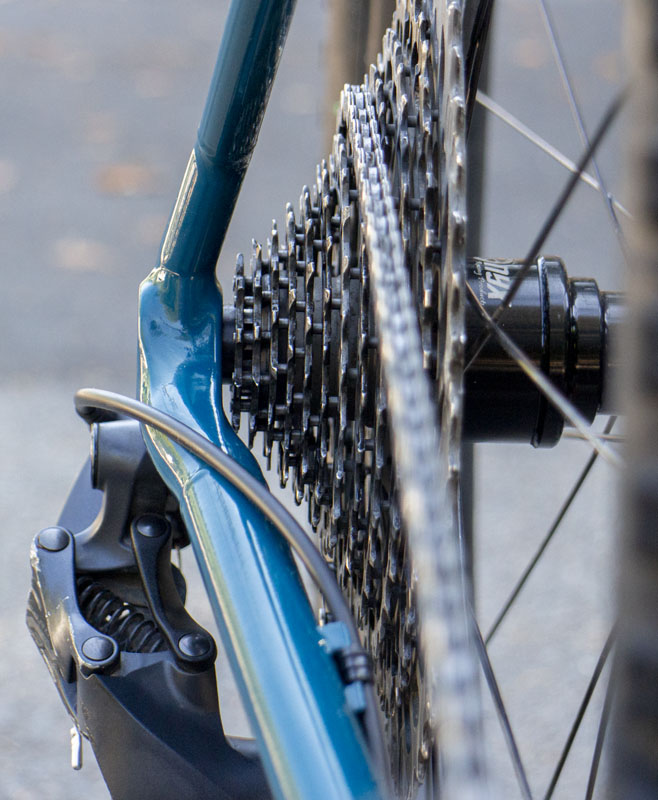
The worry I had when I specified the 75 degree effective seat tube angle was that it would be a bit too much. Again, low core and upper body strength comes up. Also, old. For sure, there is a bit of weight on my hands when on flat terrain. It’s on the higher side but not horrific or bad. When the bike is going uphill, there’s all payback as the bike was very composed even on very steep and slippery climbs while seated. That’s with 410mm rear center. That’s pretty epic. Combined with the 50mm chainline on the 148mm rear hub, the bike pedals like a dream up the climbs.
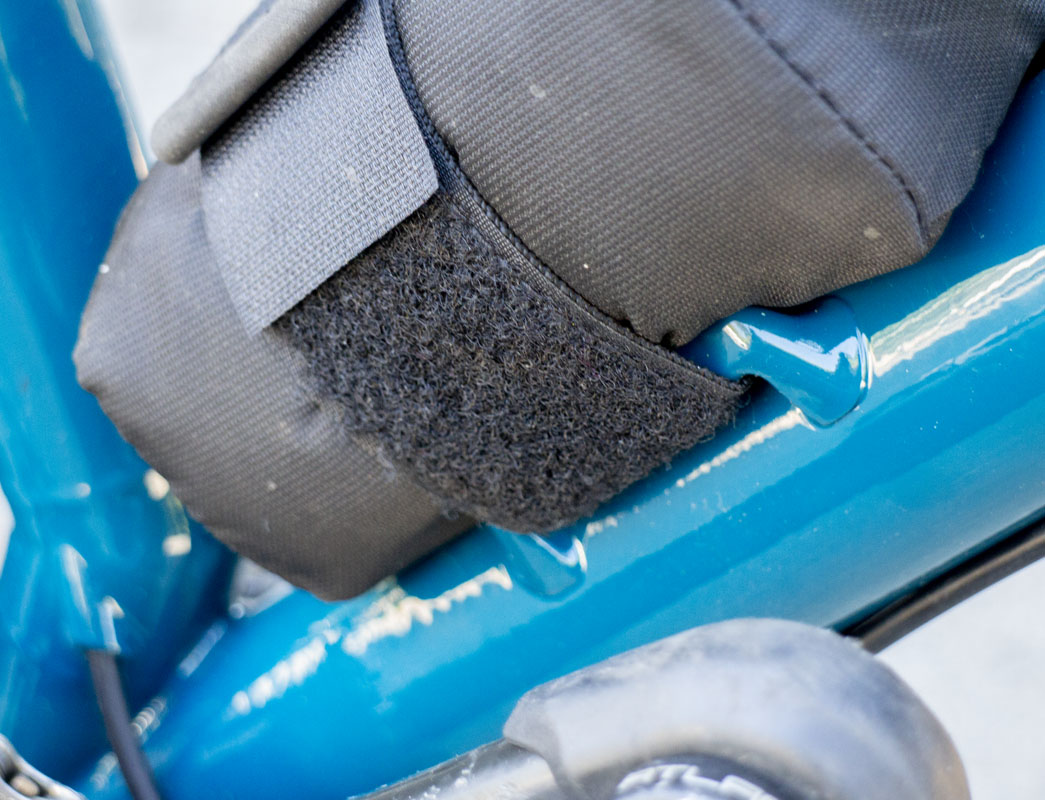
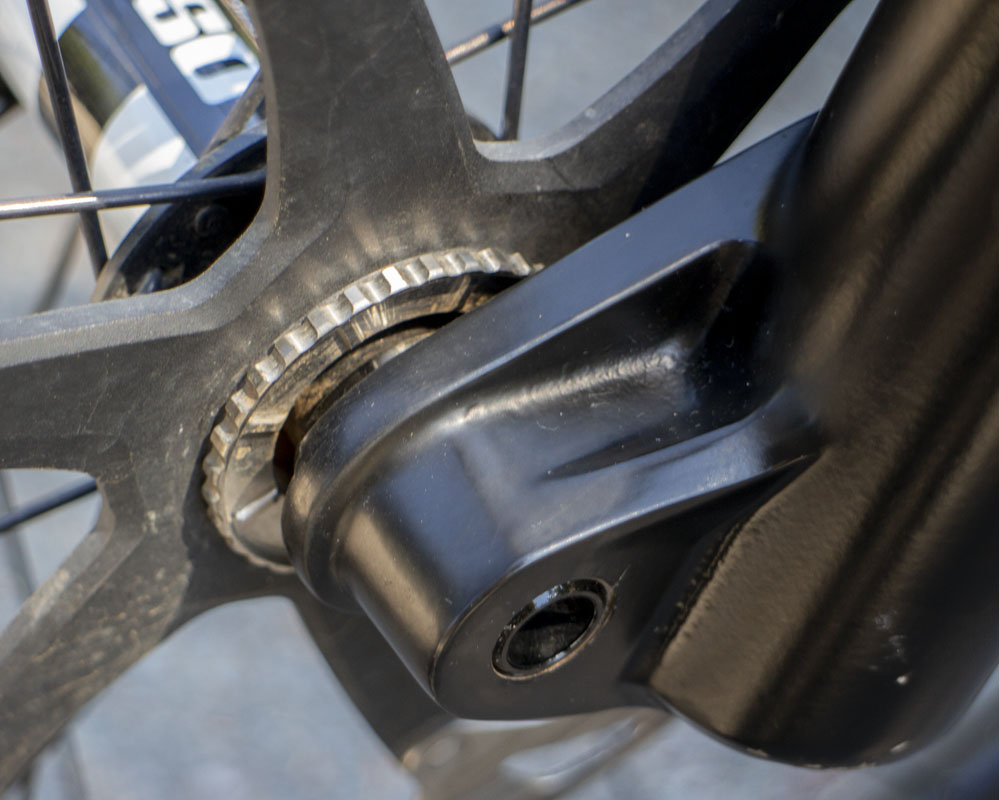
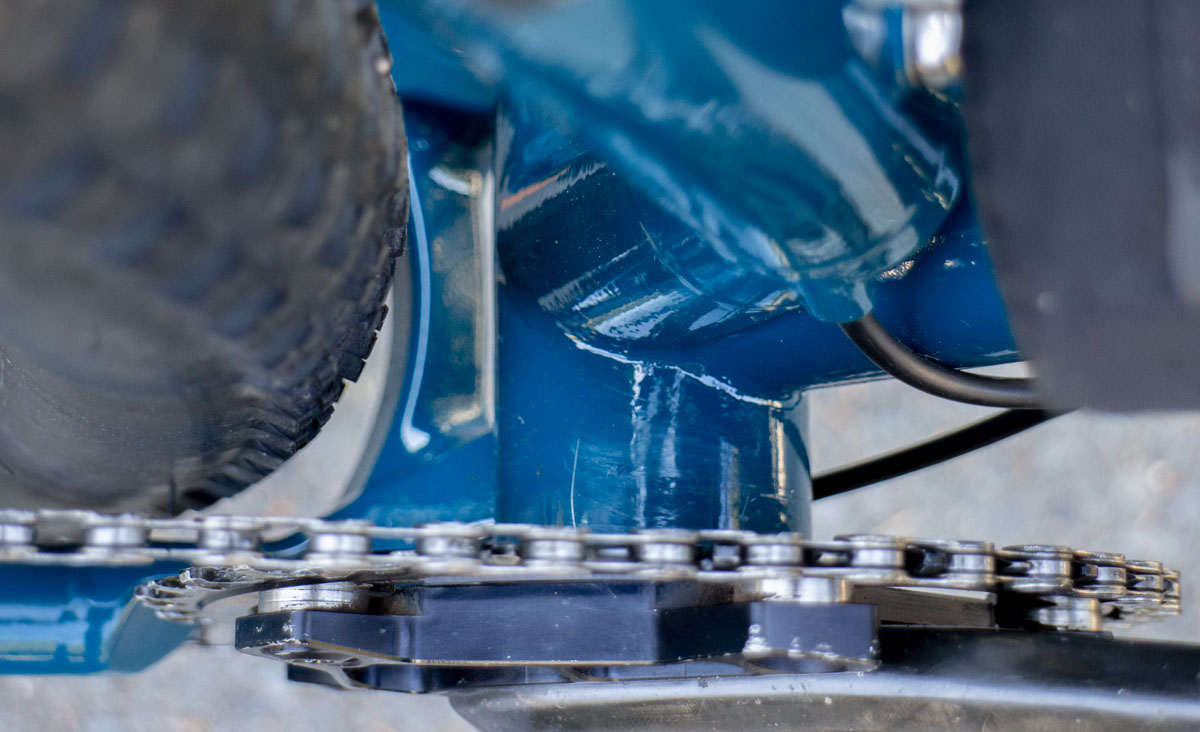
I put the bike together without any chainstay wrap. This was to test if the housing going over the top of the stay would protect it against the natural bouncing around. The stay is very low to the chain also. I had a bit of sticky Velcro in my pocket just in case. So far, no issue.
I wonder if the last braze on holding the derailleur housing is more of a problem than a solution. I would like the housing to lay right against the stay here but the braze on is holding it out. I still need to think on this.
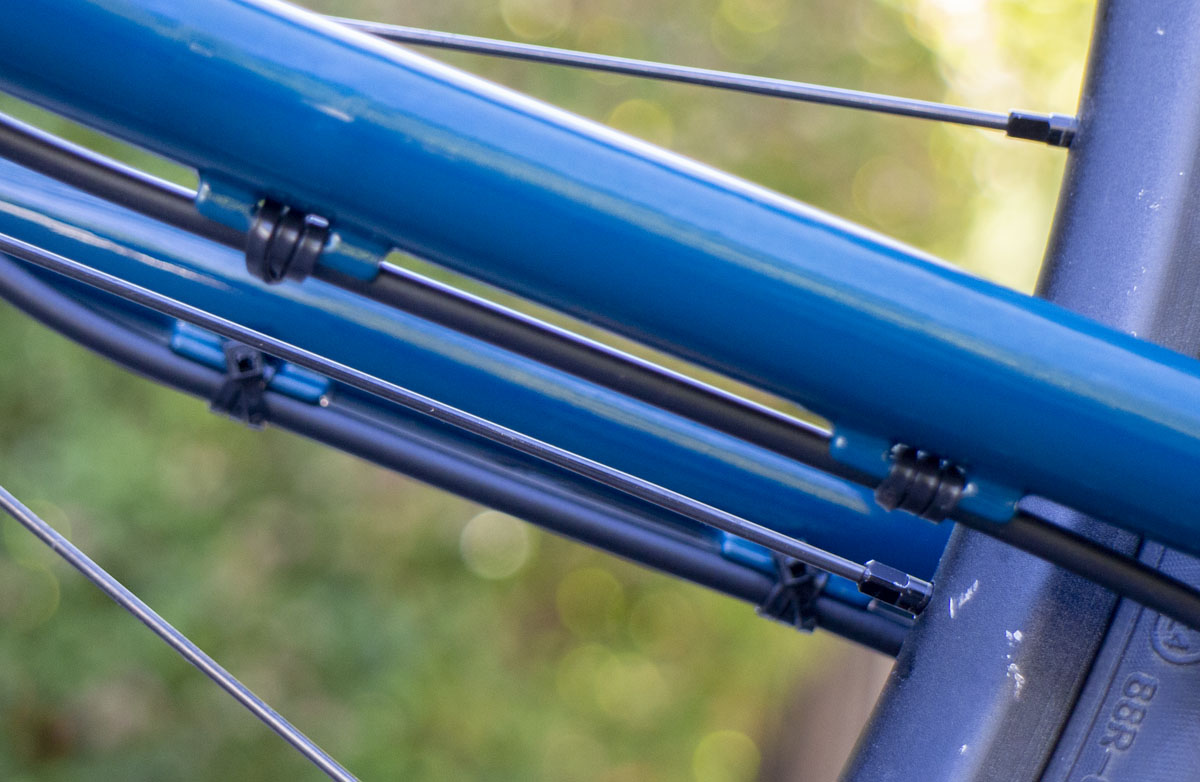
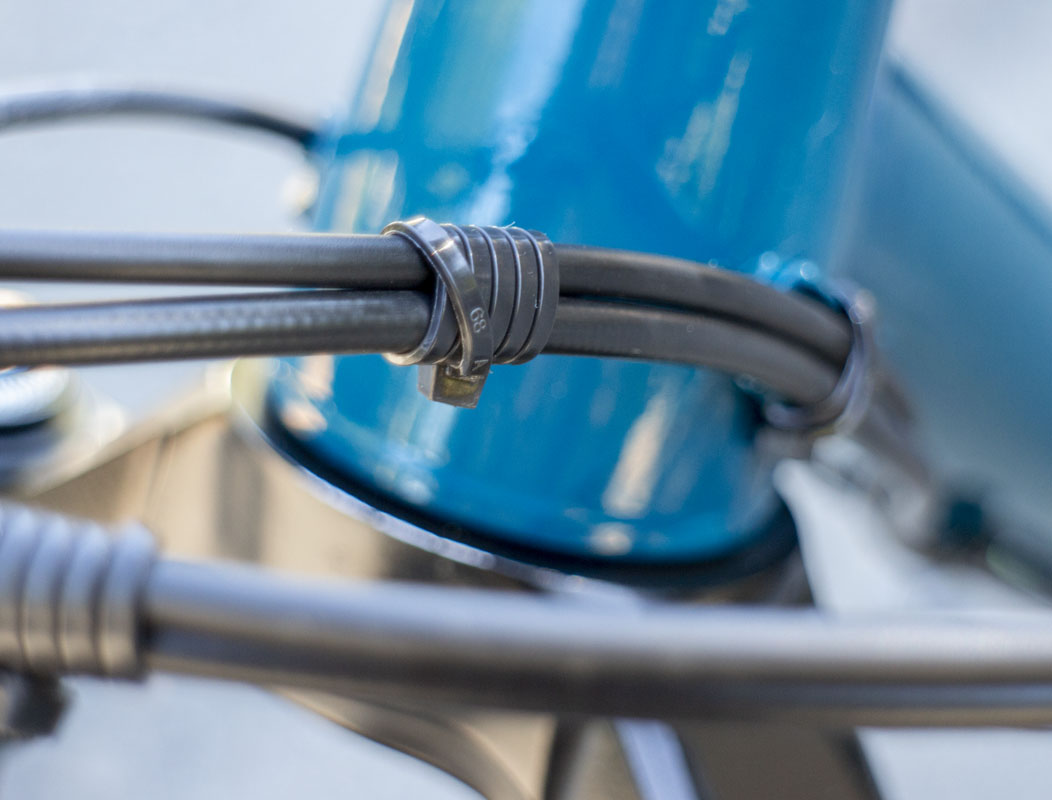
I’m trying to figure out if the control cable housing bundles on the down tube need some additional tape to keep tidy. Are they too close to the frame? These are questions I ask as I ride.
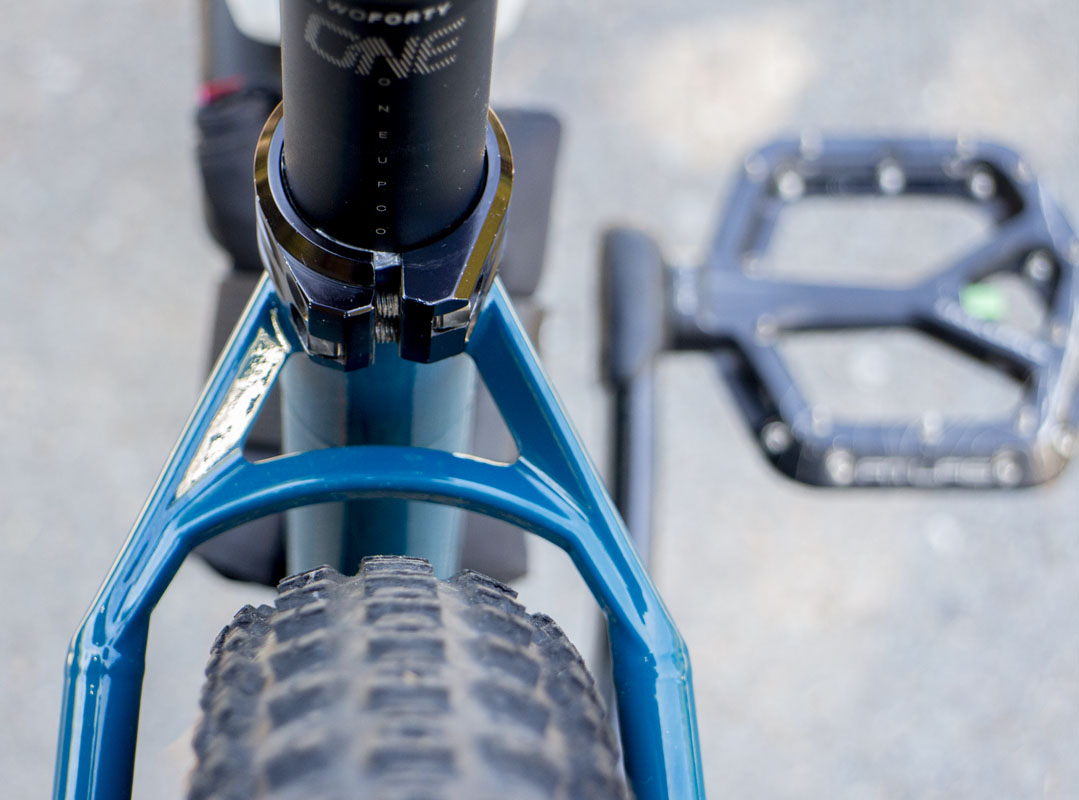
The final spacer arrangement for trail in the area. It’s about where I’d expect given the geometry calculations and the trimmed down binder. I don’t see much change coming up.
2022-08-28 Shakedown Ride #2. China Camp. Up Gold Hill, Quercus, Maytag, Q4, Q3, Q2, Quercus, Nike Site, drop E5 & E6, Hitler, JT Howell, Gold Hill. More of a real ride sample.
The steering is much more active on the trail. I believe that it is good but I need to get used to it. The heavier steering of the 65 degree angles does make things more solid but is that good all the time? Still riding more needed here. The bike was rock solid on the elevators and Hitler. Climbing, again, very very good. Riding position is just right, as predicted.
Steeper head is much nicer in all slower speed situations, especially tight corners and switchbacks.
I did decide that the 180mm fork has to go. I may try a much lighter damping fluid. The fork is too progressive to get real value on most rides , given that I’m riding much older than when I was first designing for longer forks. Looking at what is really used on normal trail, 160mm is the sweet spot if I can use 95% of it on every ride. I should be using a 160mm fork. I’m going to fix this soon. Stay tuned. This is going to be good.
2022-08-29 Update. I’ve got the 150mm Lyrik fork on the bike and it’s time for more testing. See: A new headset system on a separate post.