It’s been 2 1/2 years since the PVD T-47 Airspeeder shifted my understanding of what a narrow gauge bike could do. That bike is still well ahead of what anyone else is doing but I’d found it’s limitations and ways to improve it. During COVID, most of my riding has been on my all-road bike and my klunker. Simplicity and rawness has been a motivator. Finally finding the elusive flat mount brake combination opened the Airspeeder up to another level, and that bike was in need of change
What makes this new bike special?
- Hyper progressive geometry, building on the Airspeeder work.
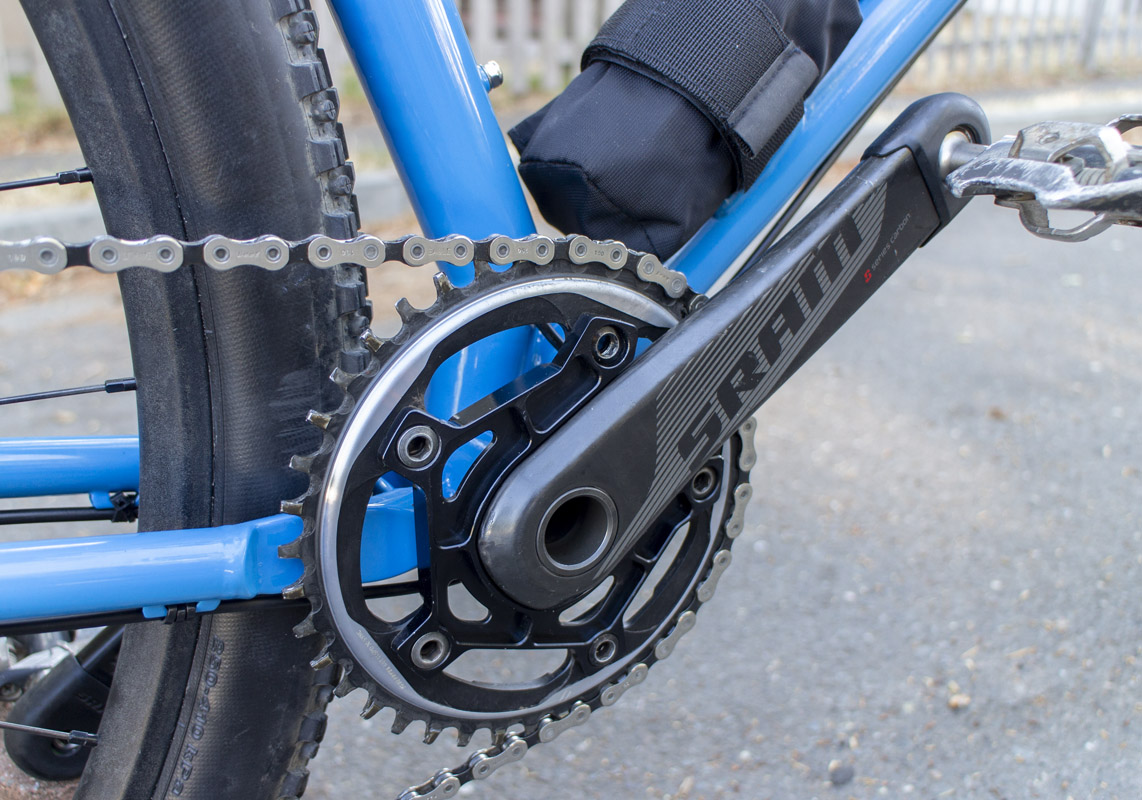
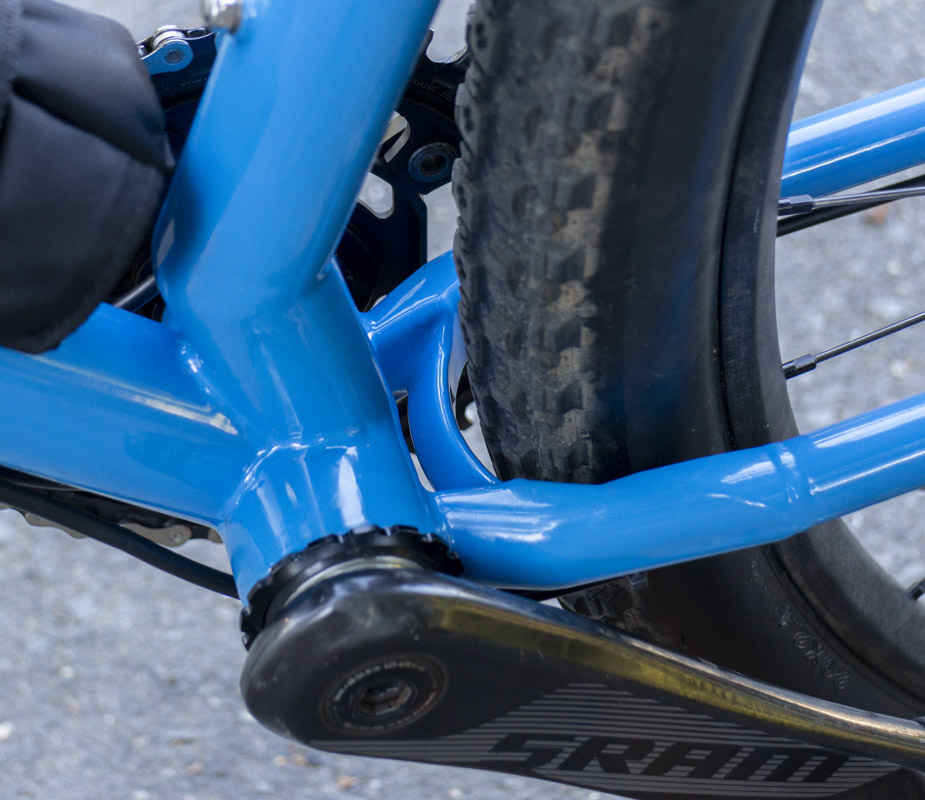
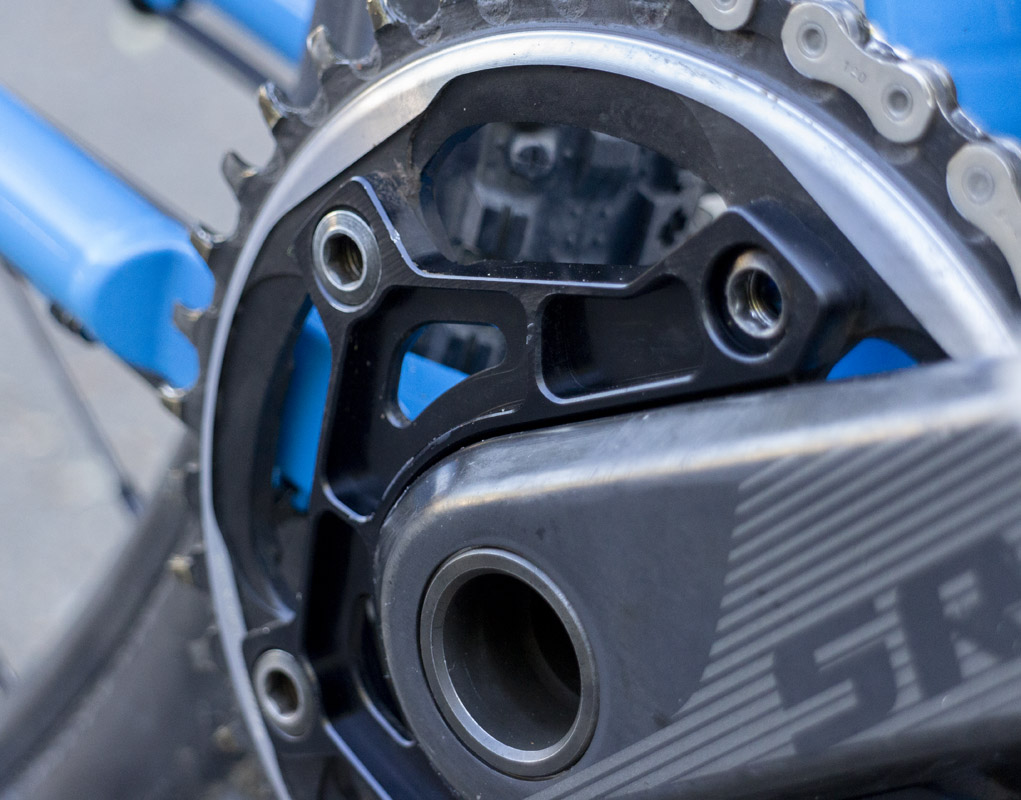
- Q145 Cranks
- Up to 42t chainring
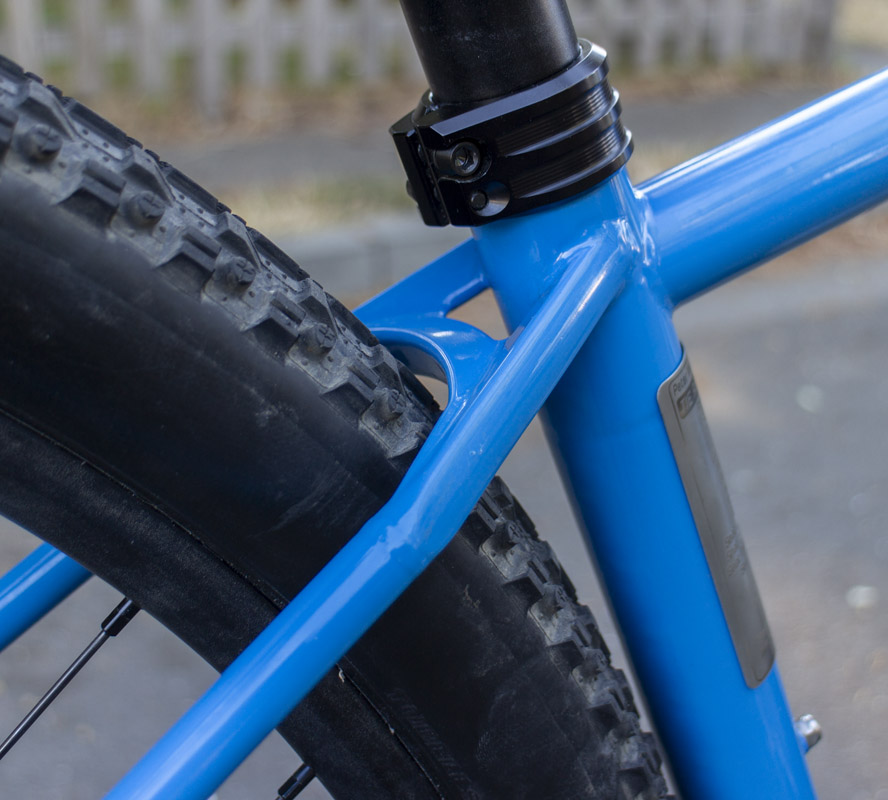
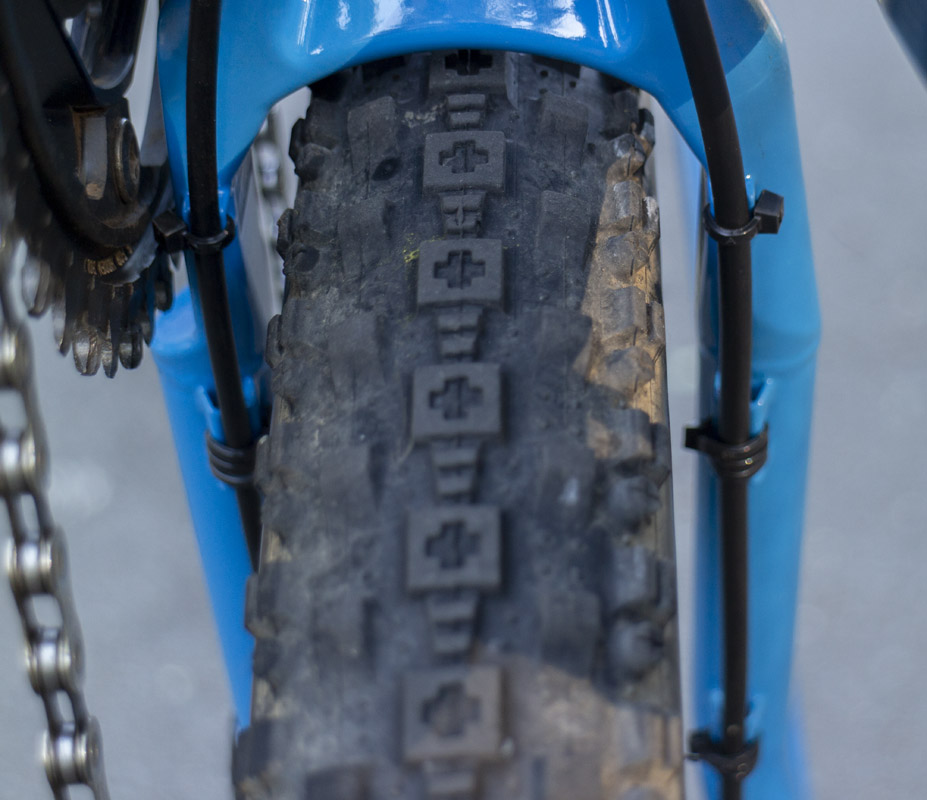
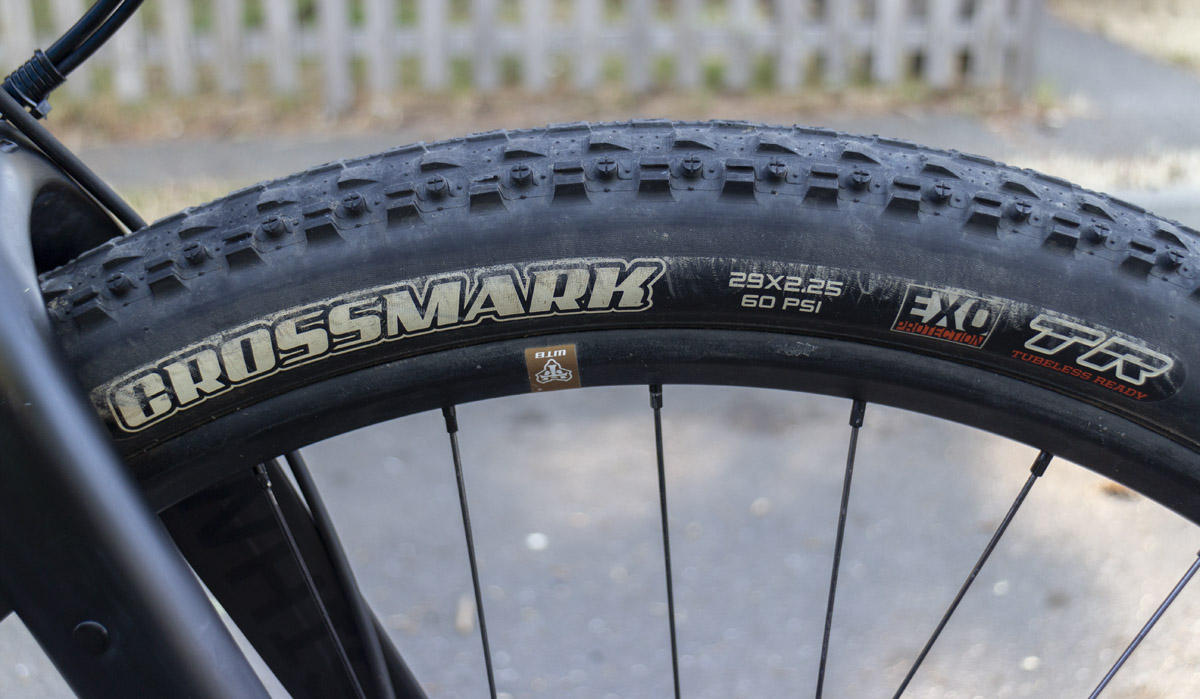
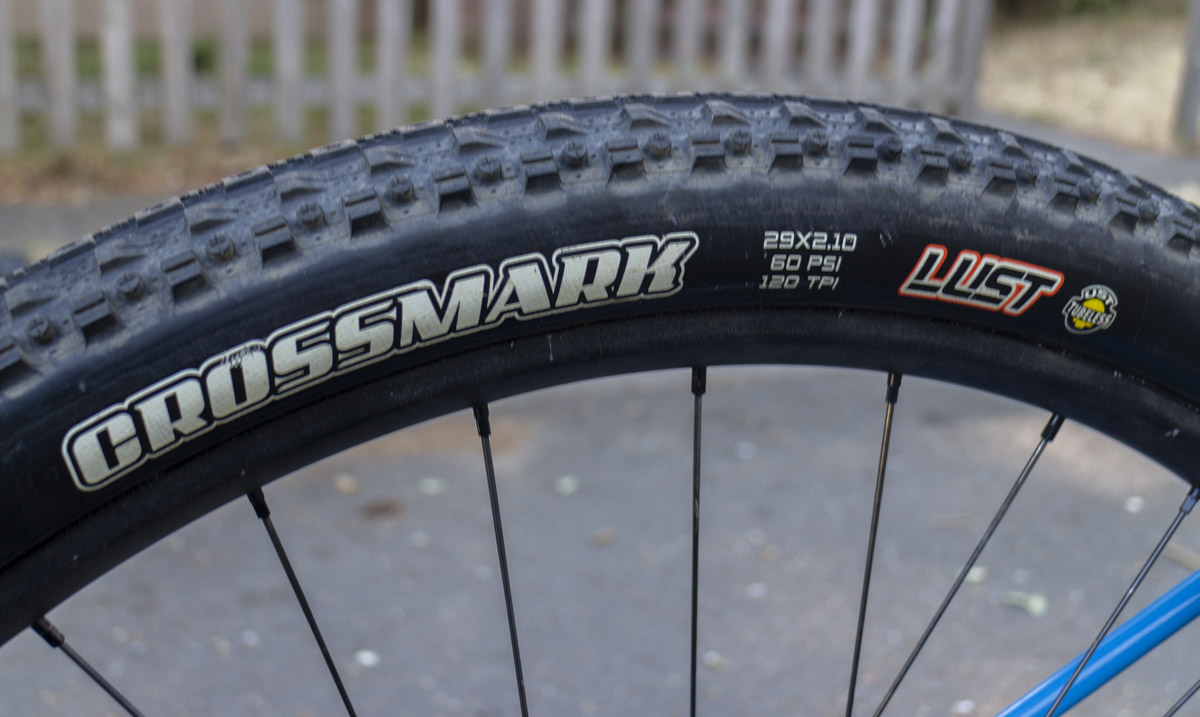
- Clearance for 622-53 rear and 622-60 front tires
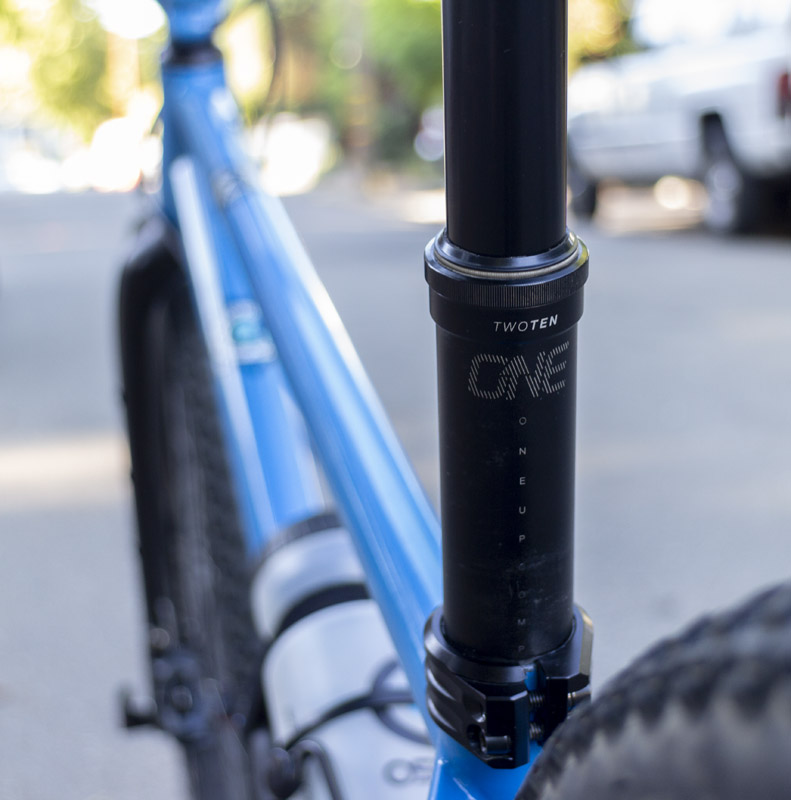
- Clearance for 250+ dropper seatpost
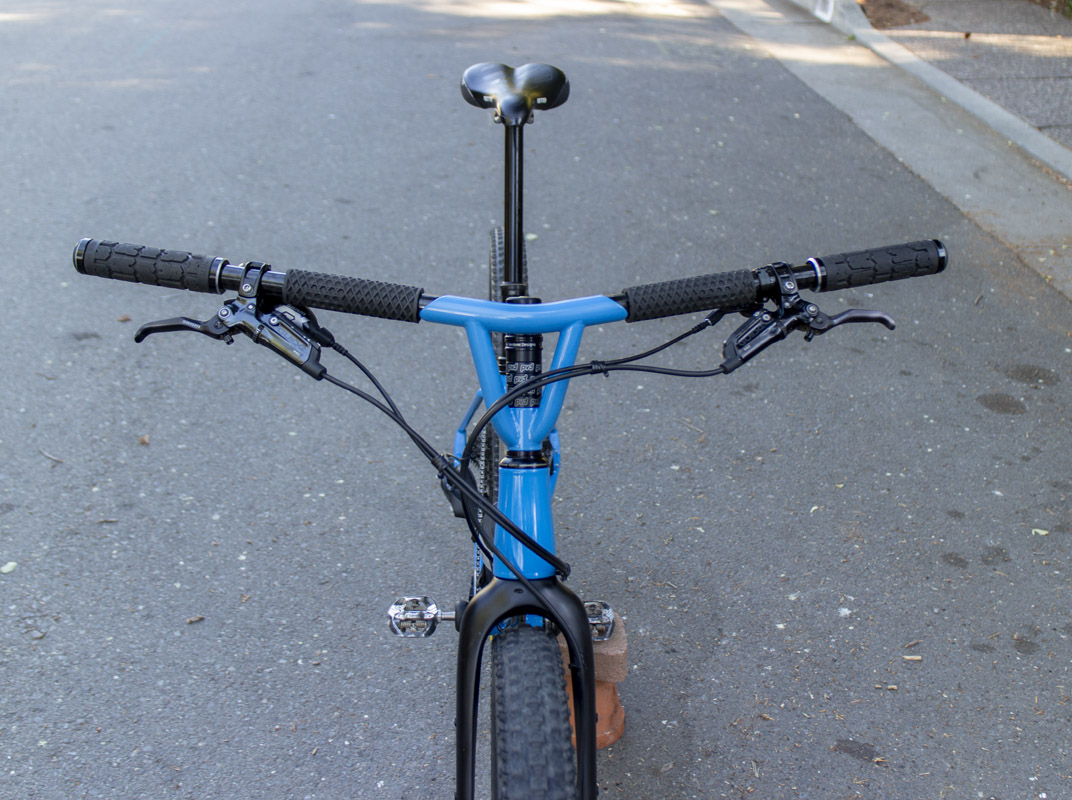
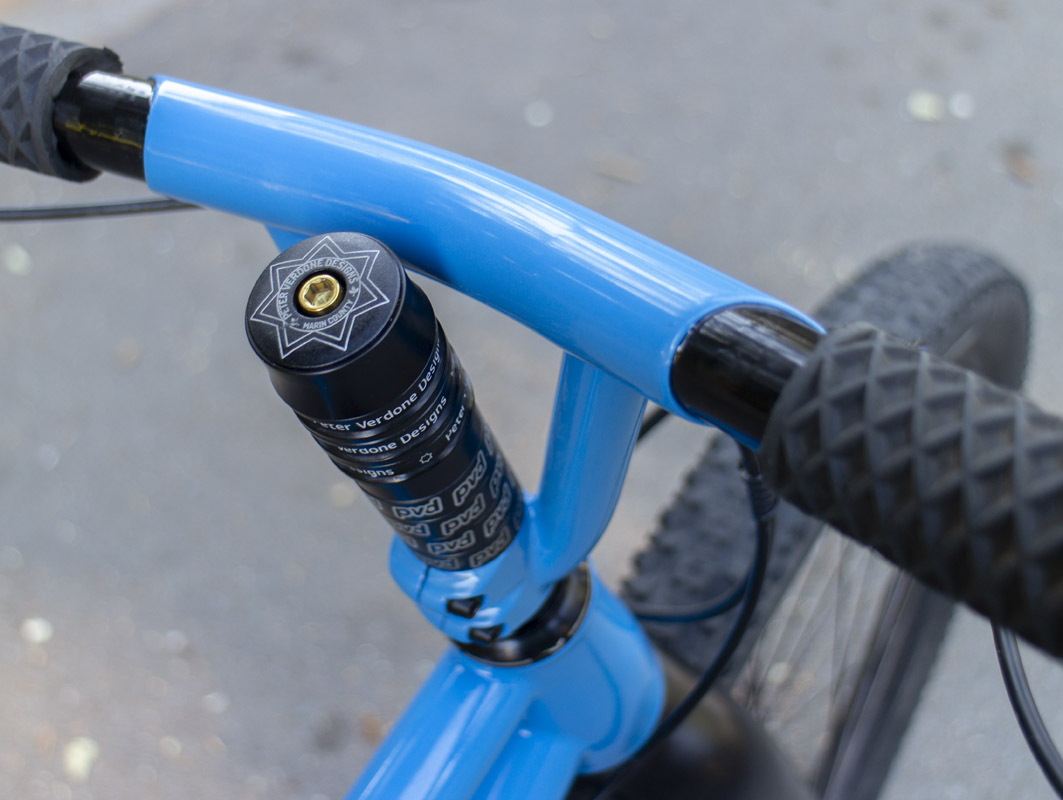
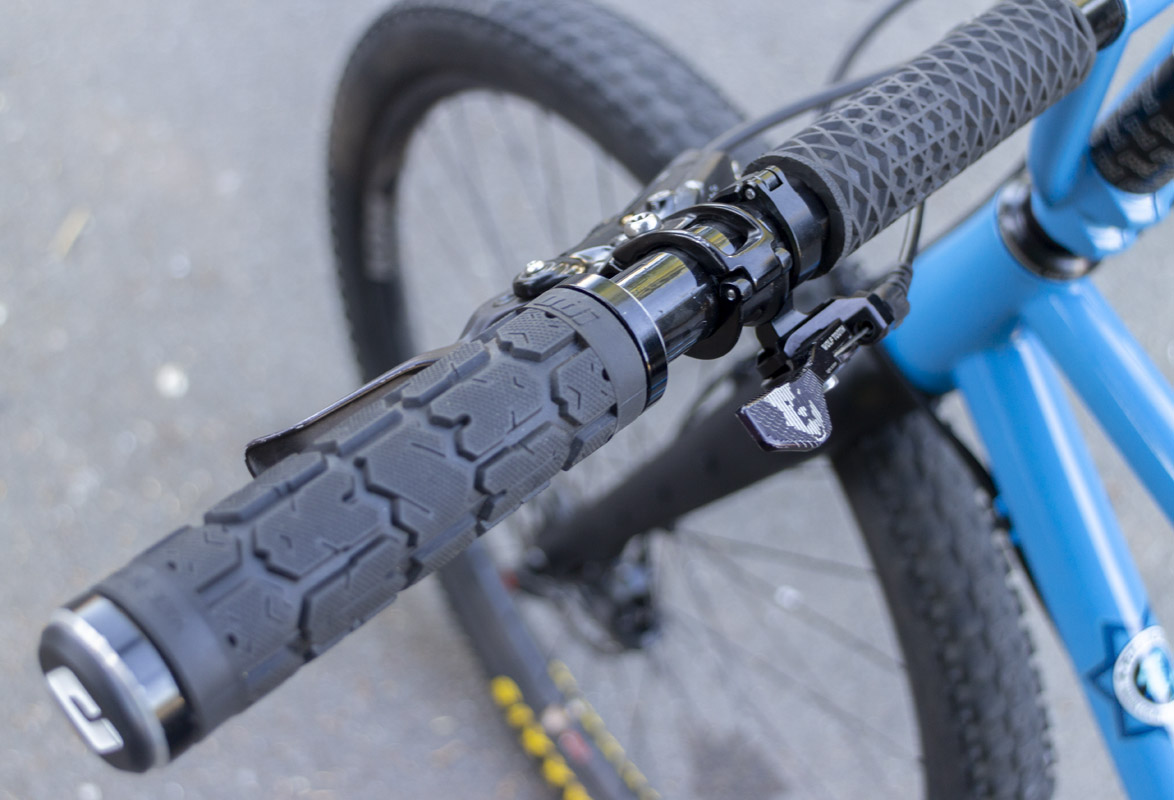
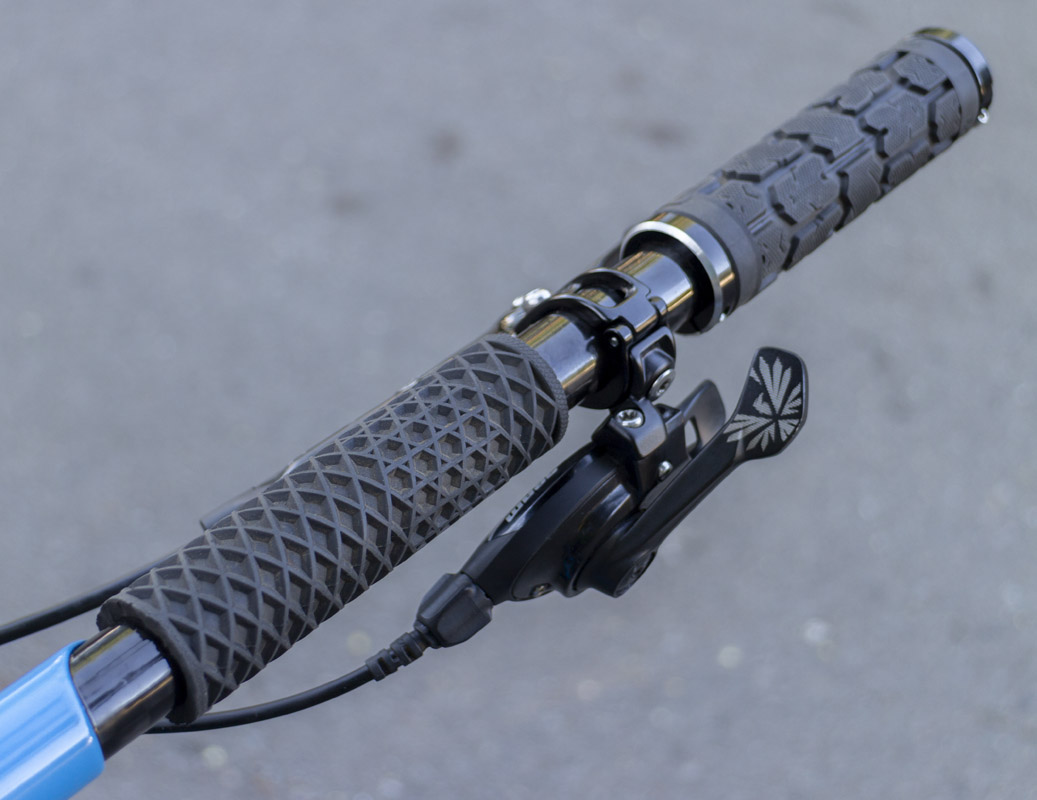
- Flat bar with 14 degree back sweep
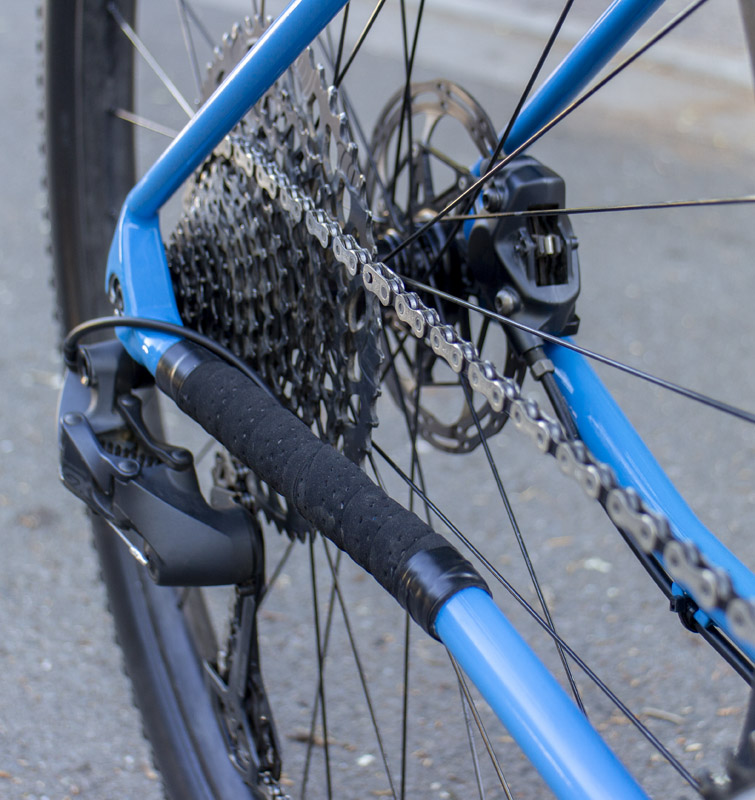
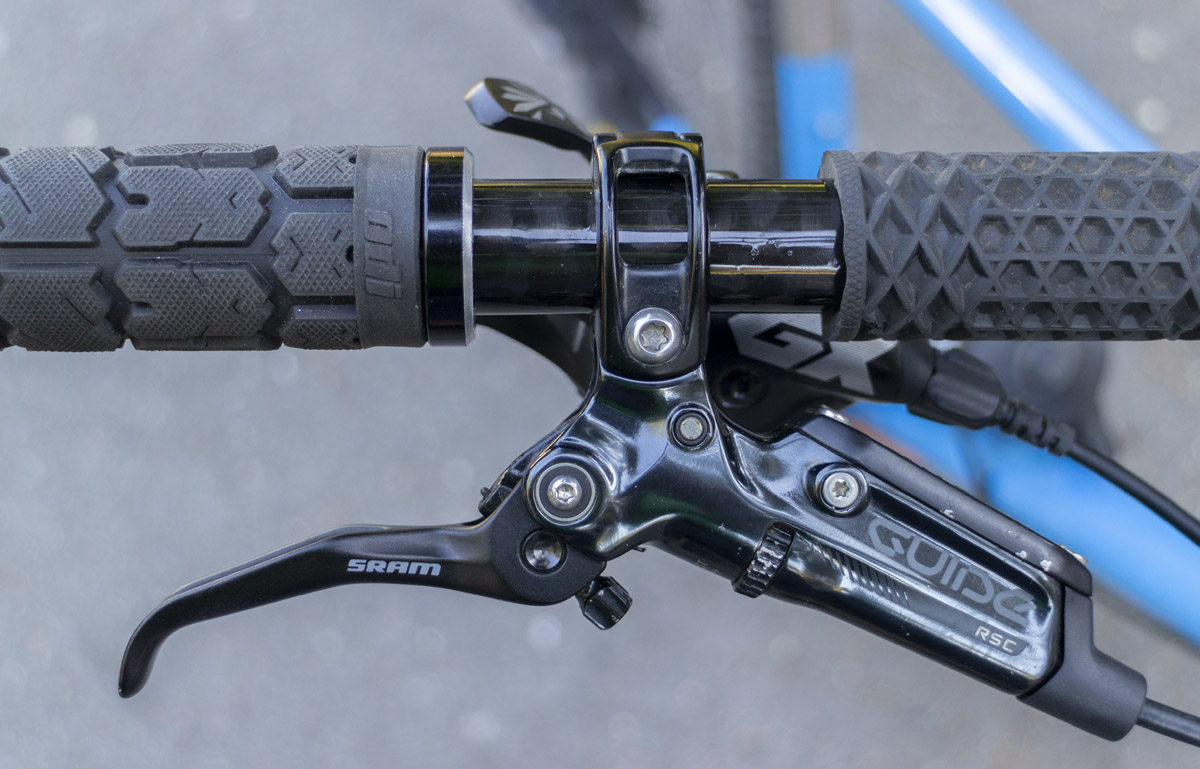
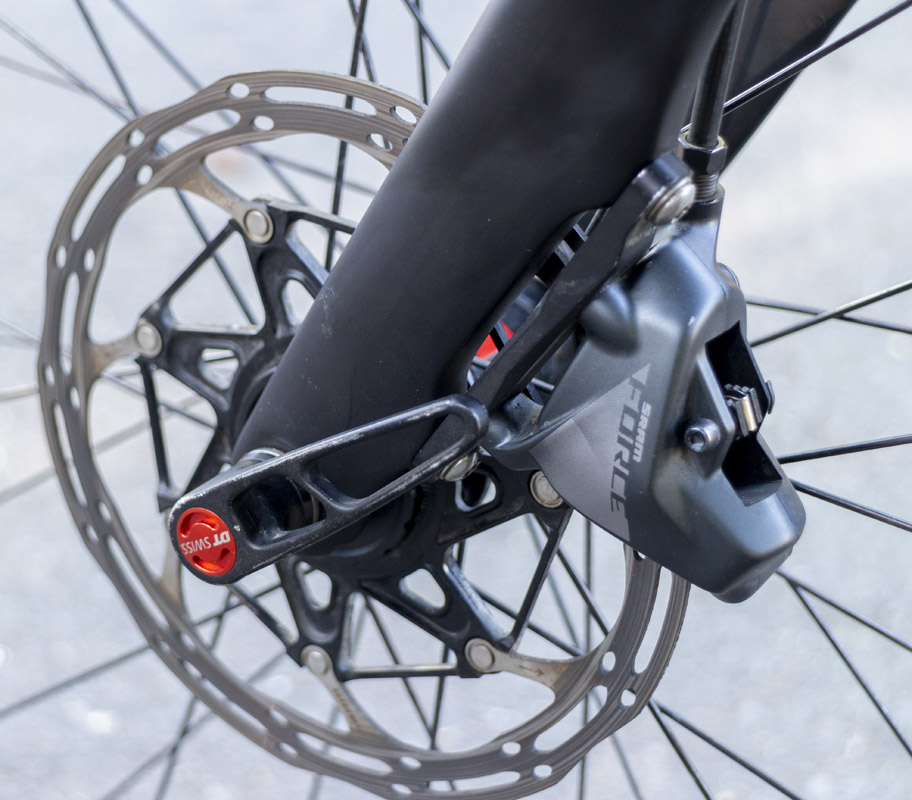
- Legitimate brake caliper and rotor selection.
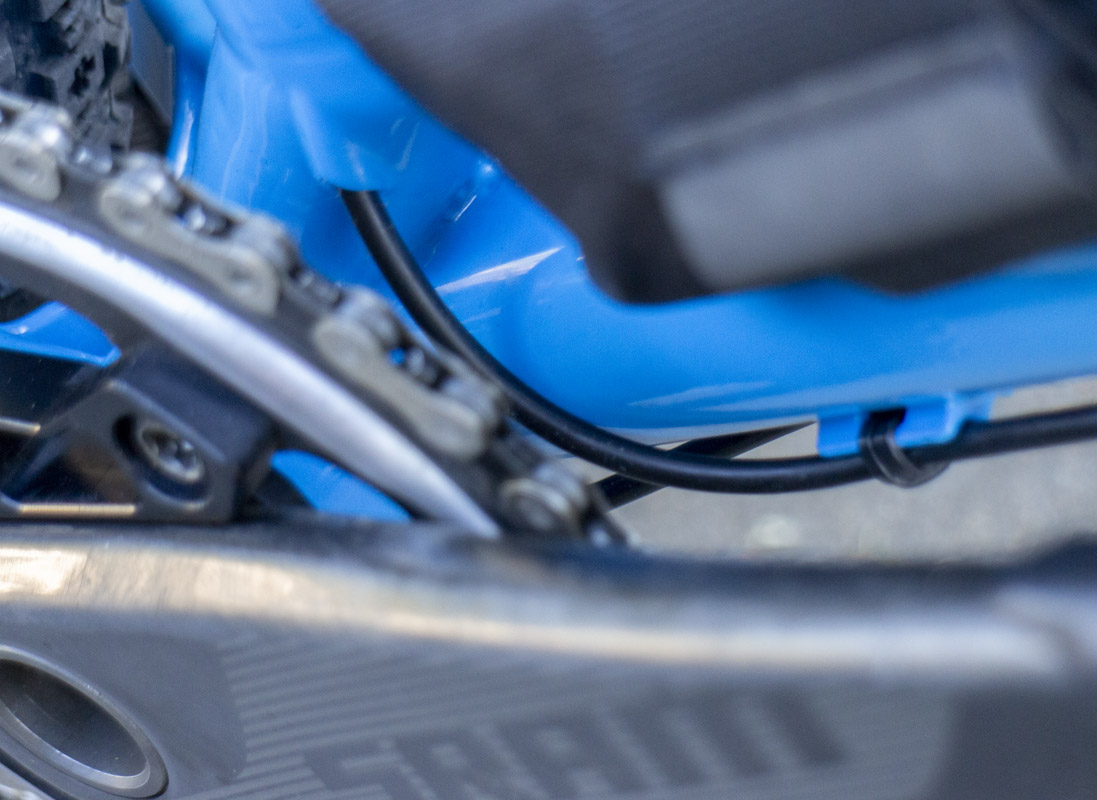
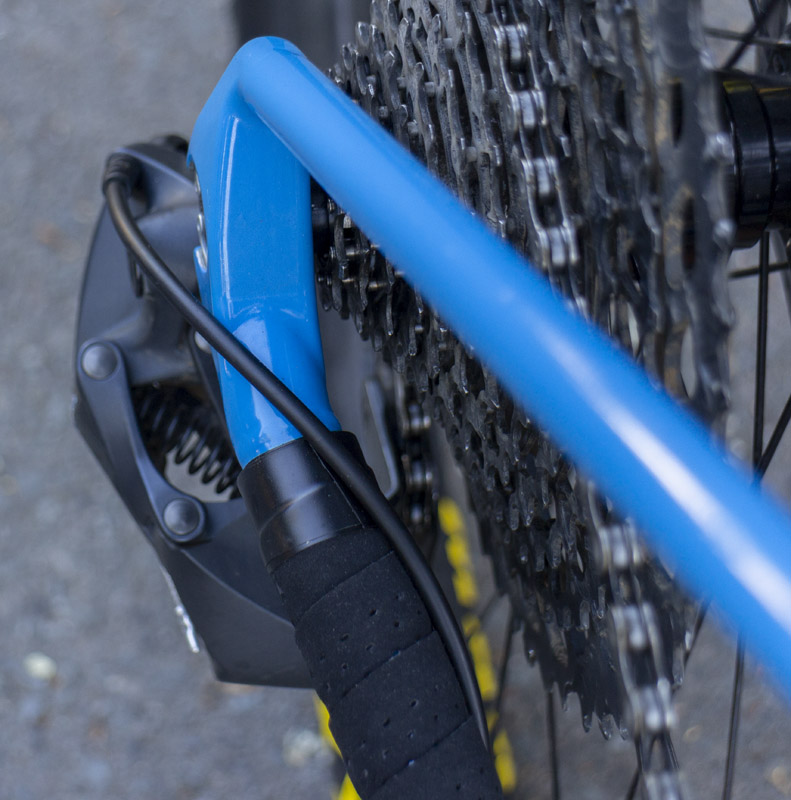
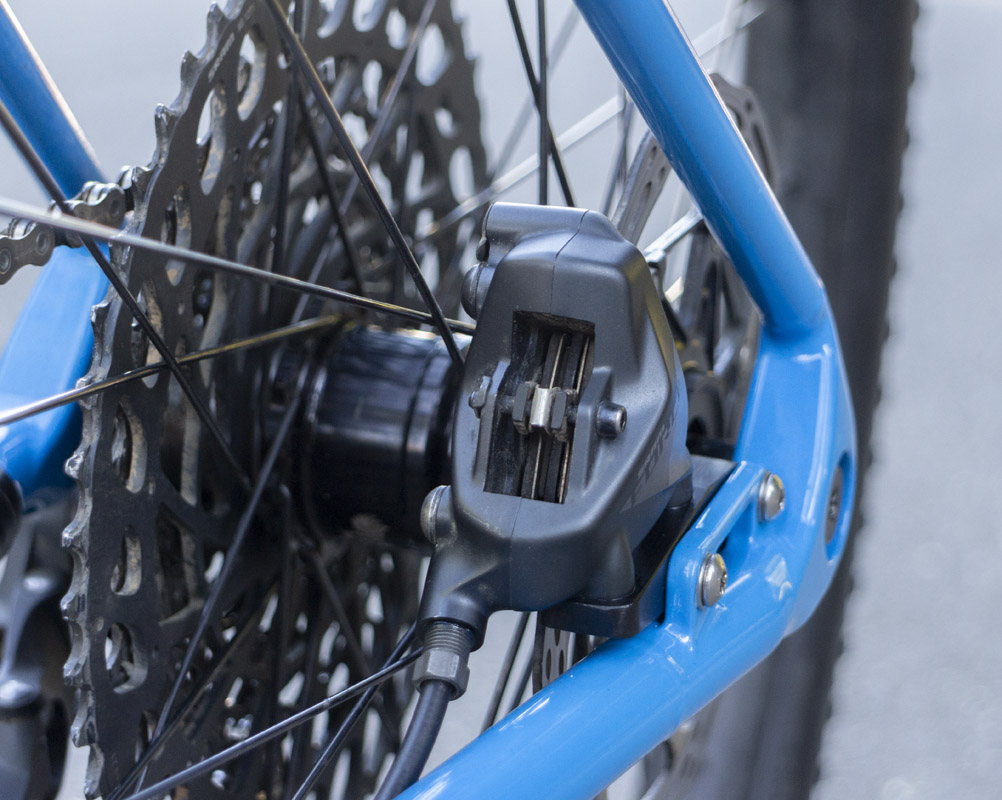
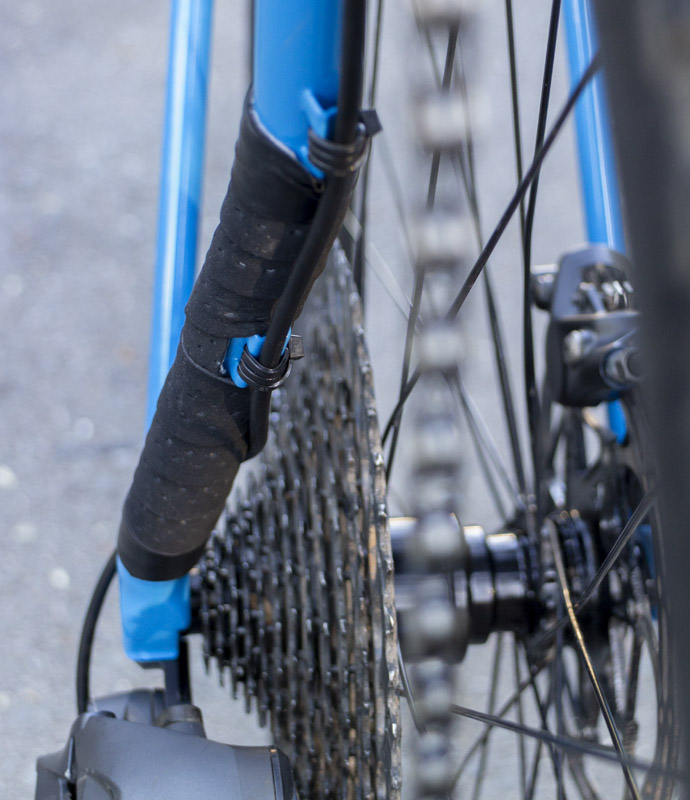
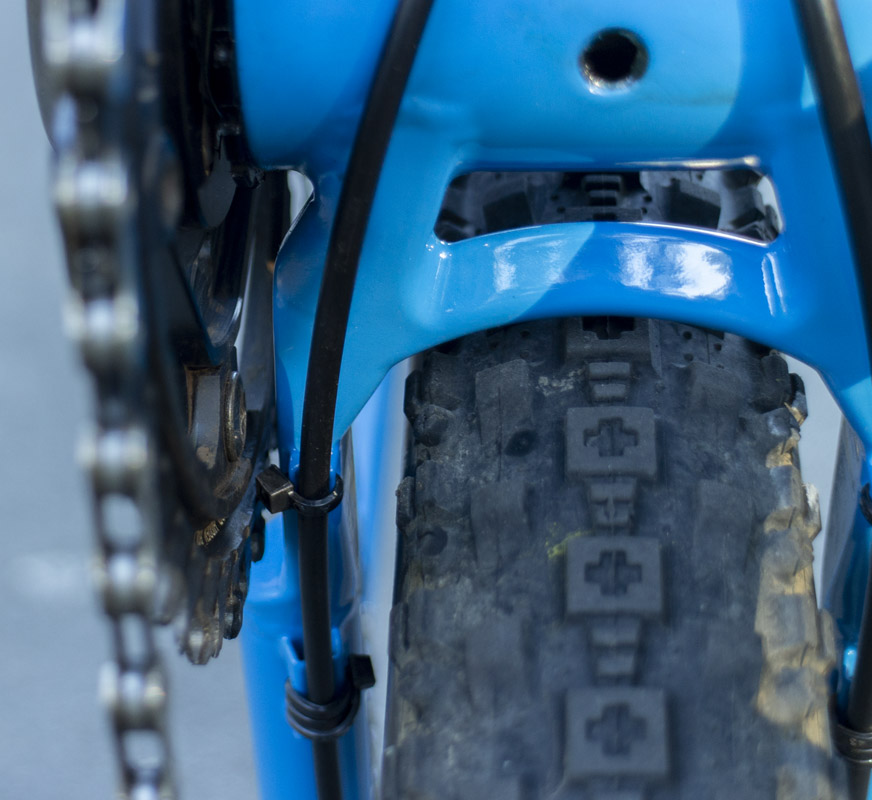
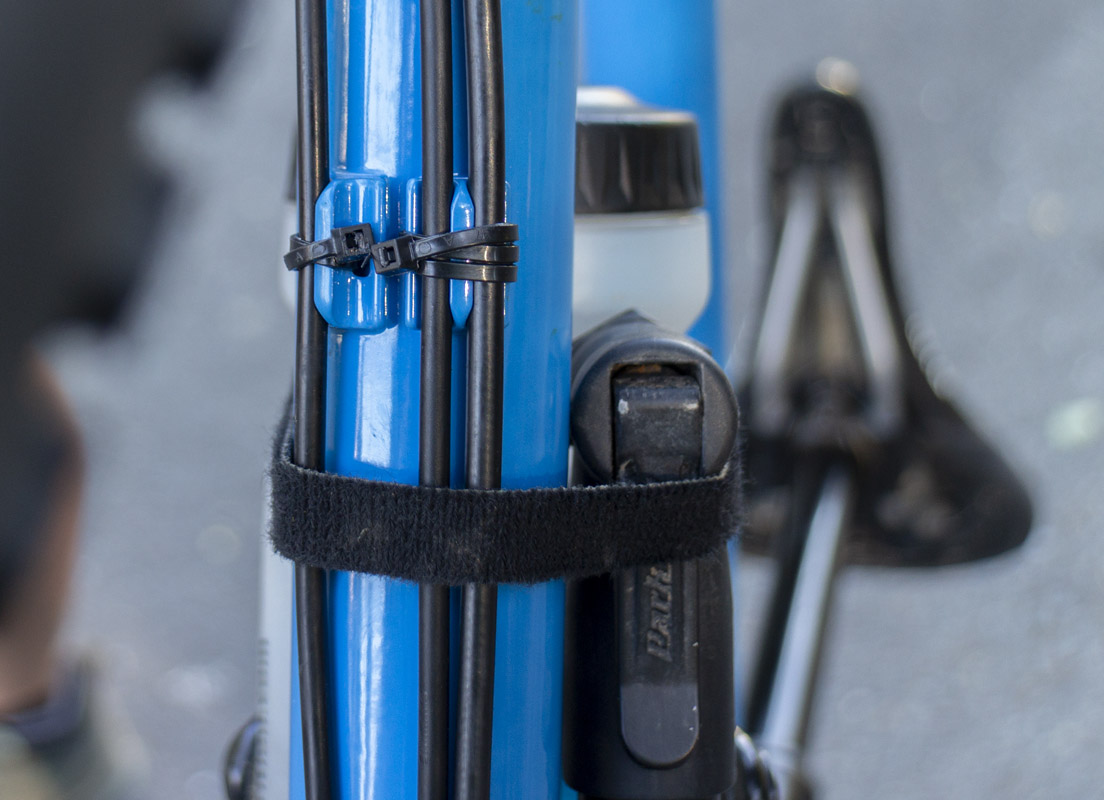
Folks that know my work of the last decade or more, know that I prefer a seatstay/top tube routing for my cables and housing. In the past, that was the superior choice. A change in how brake calipers are designed has forced a change. Namely, that apparently it’s been decided that flat mount calipers will have routing on the stay that they are mounted to. No more banjo bolts. This creates a problem if I mount to a chainstay and want a routing on the seatstay. I was forced to make a change. I had done one bike in the past with chainstay routing, it was so terrible that I swore to never do it again. Now, I was forced back to that.
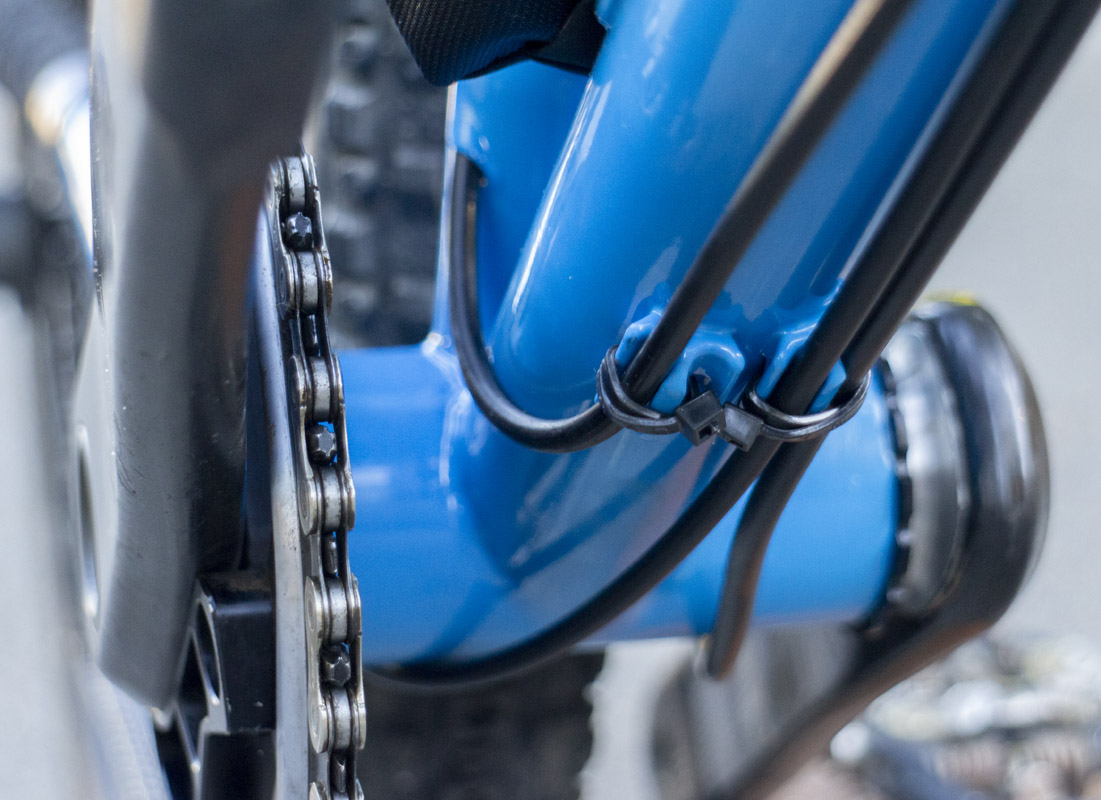
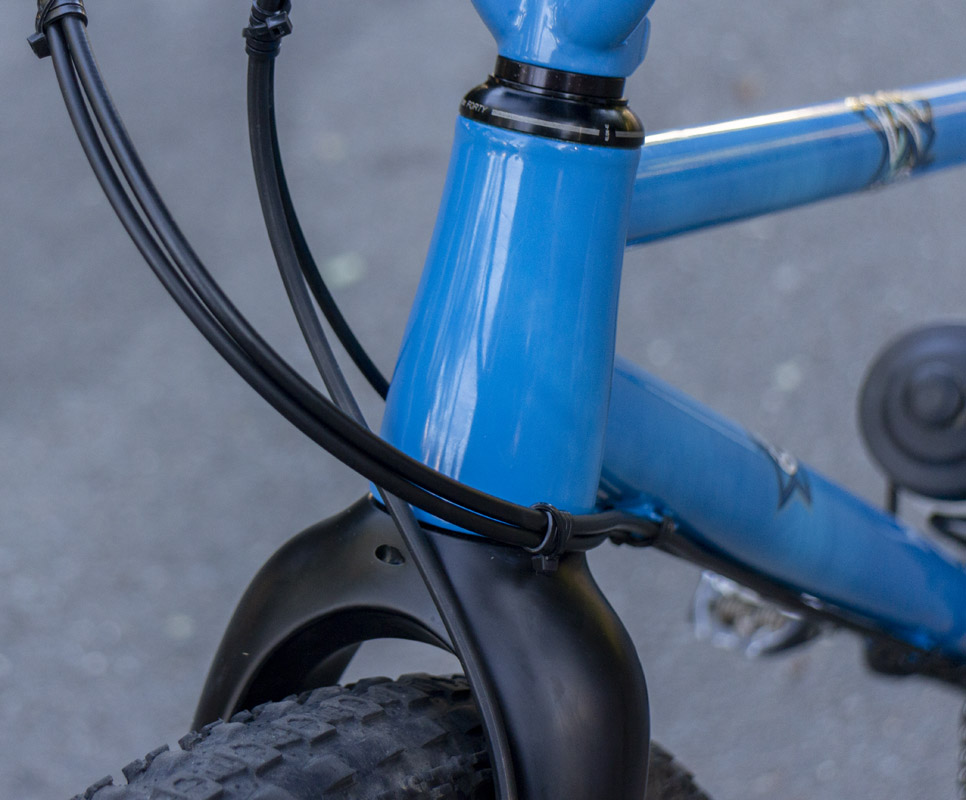
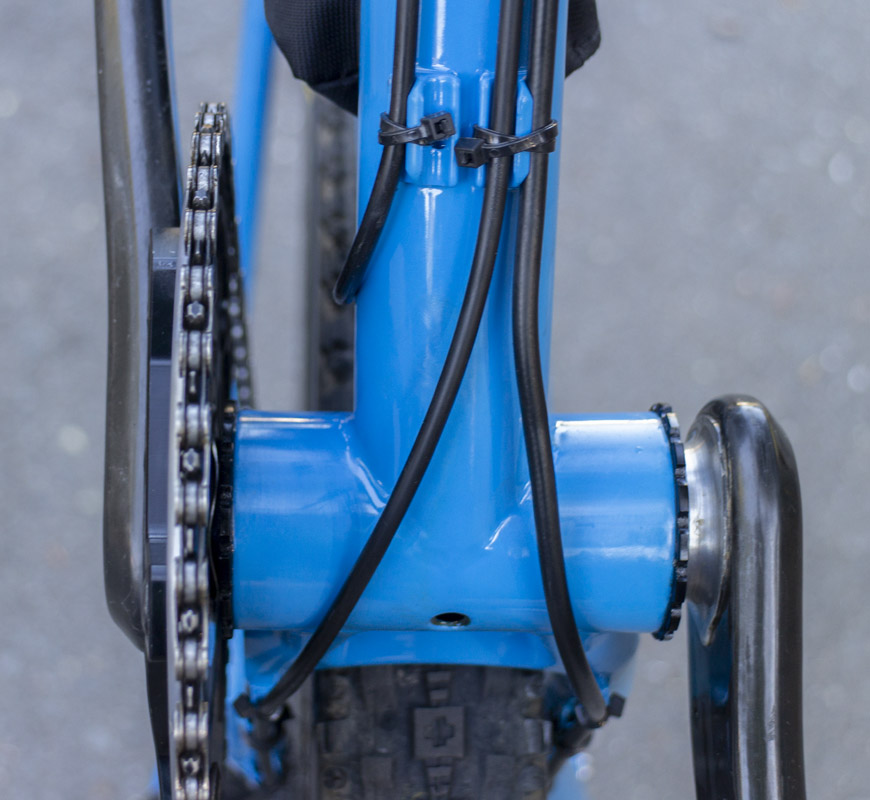
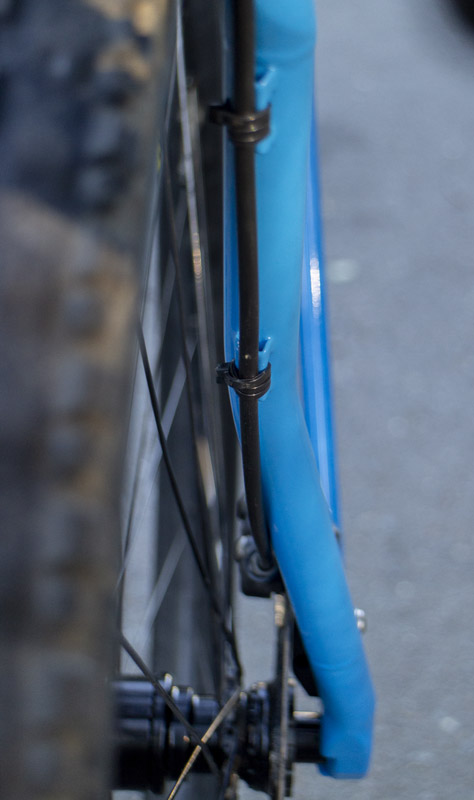
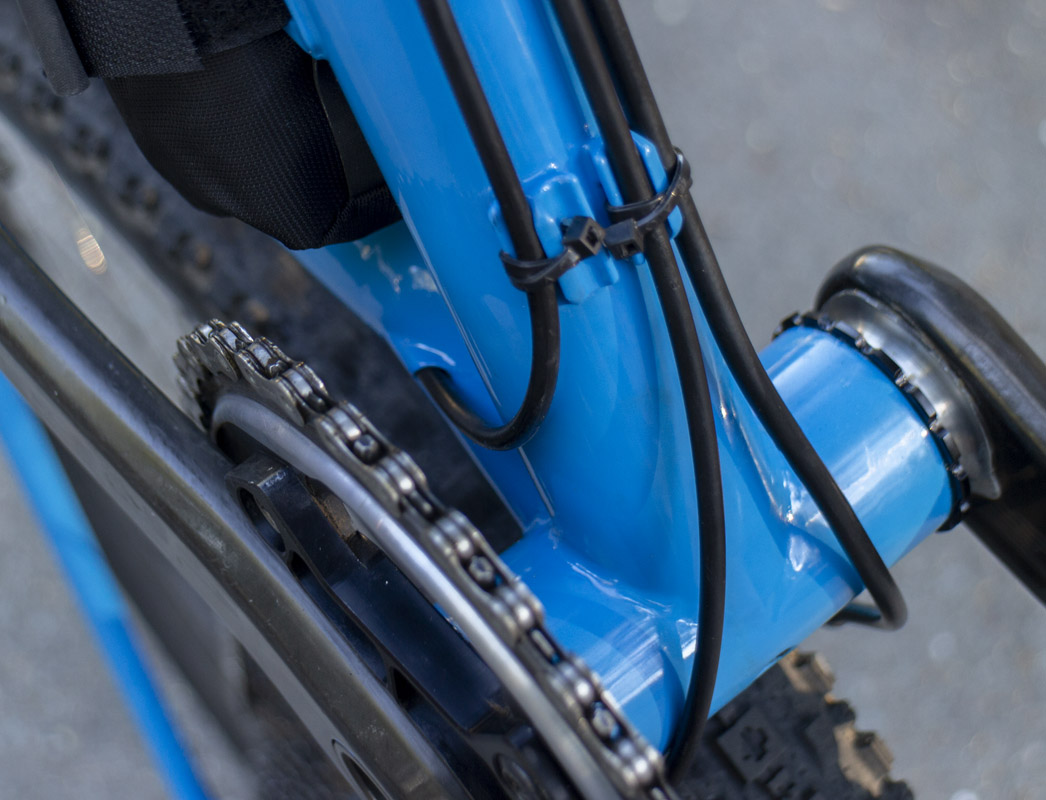
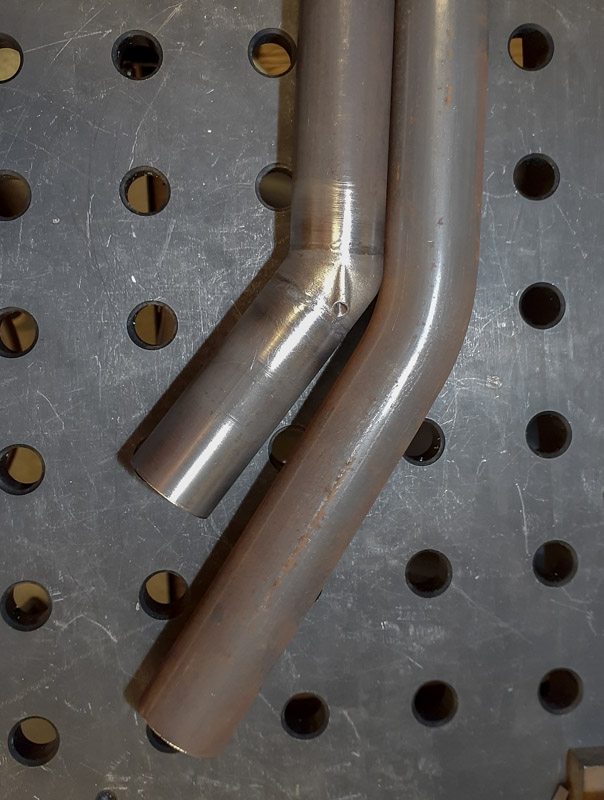
I put a few days of modeling into figuring out the routing method for running lines under the bike that would work out best. During that process, I figured out the best routing for the dropper line into the seat tube, the placement of the guides on the chainstay, and how to run 3 lines down the down tube. Routing is super important on any bike and worth every minute of consideration and note taking.
There was still more to the problem, I’ve found in testing that there may be times when a post mount caliper will need to be mounted on the all-road platform. Brakes matter and when the bike is getting pushed very hard, the flat mount calipers tend to run out. Post mount calipers have more heavy duty options. There needed to be space for these calipers. This meant that I would need an seatstay with significant offset at the dropout. This meant, after so many dropouts designed for other, I would get my own custom dropout.
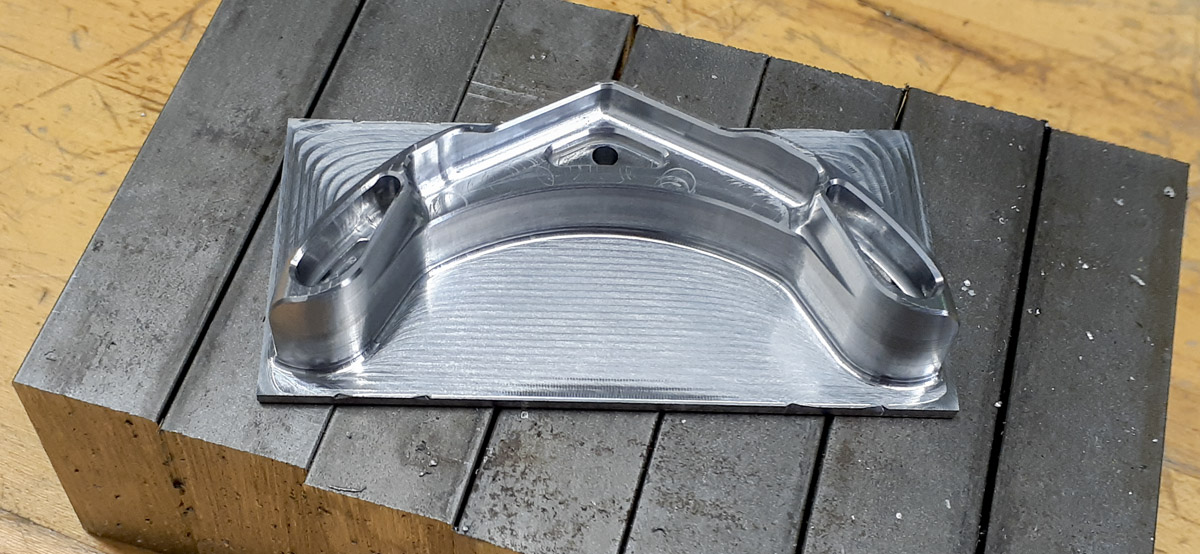
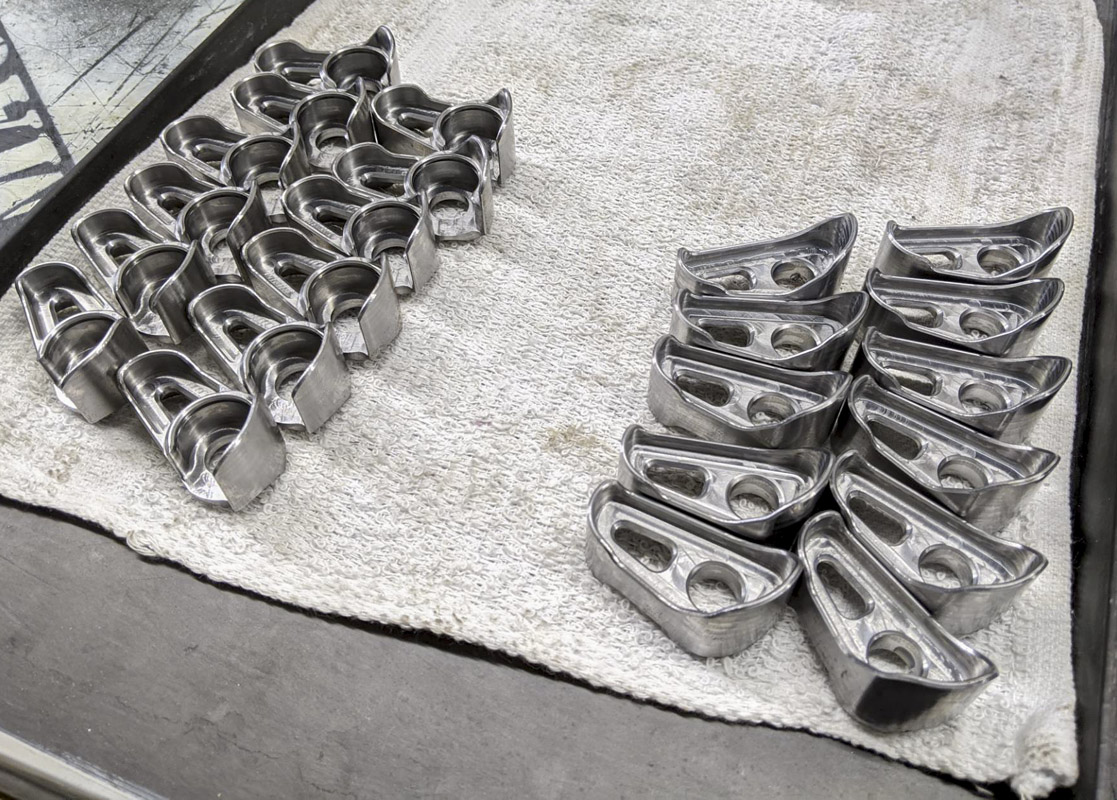
I spent weeks designing dropouts and yokes to be machined for the new bike. There were so many meticulous details for machining. I really went all in. Production documents were prepared with care. We even got the seat stay yokes and dropouts completed on the CNC machine…
And then the world changed….
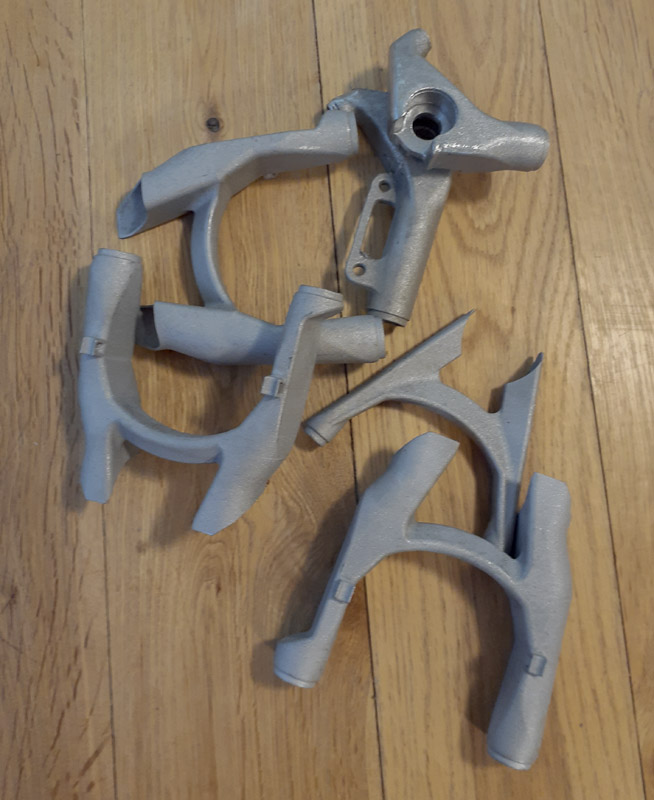
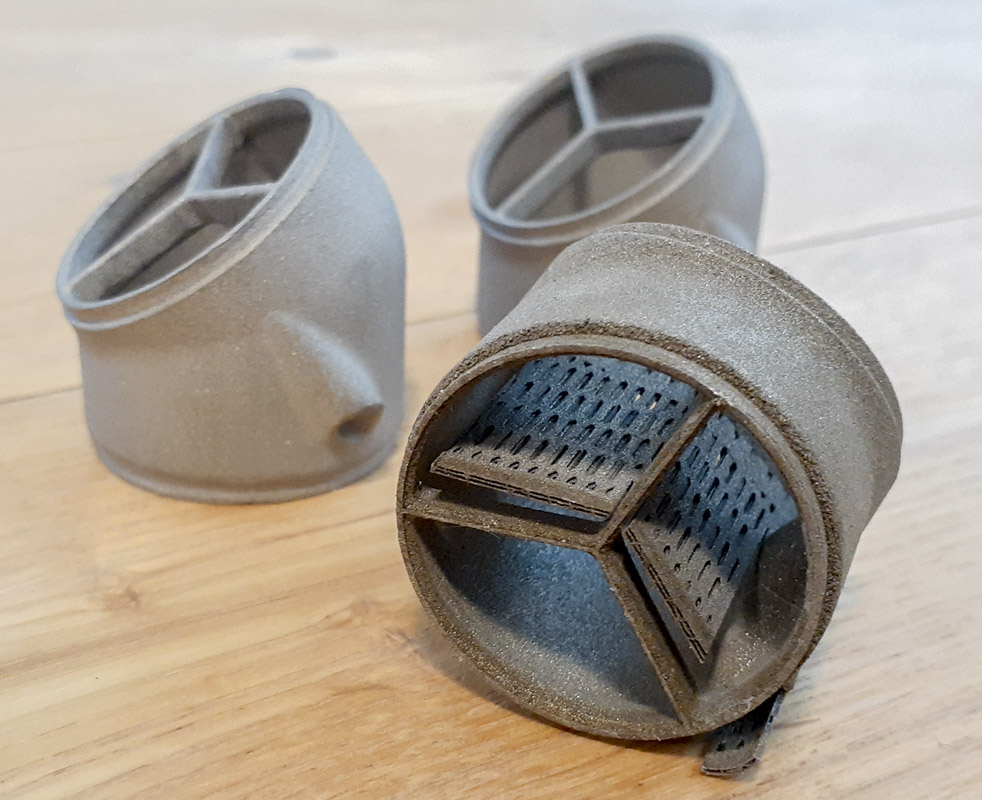
Suddenly, 3D printing became a truly viable and competitive option at the scale I work. In recent year, others had been using this on bikes but largely as uninformed and overly spent-on frame parts. Now, I could justify doing it. I validated that I had a legitimate source, so I sat down and re-drew all of the parts I had just done for subtractive and made them into additive parts. I had to know. This was no small undertaking. Everything is different in these two manufacturing techniques. It’s a whole new way of thinking. Luckily, I had the backbone in my models for all of the geometries so that I could spend time focused on my way of thinking.
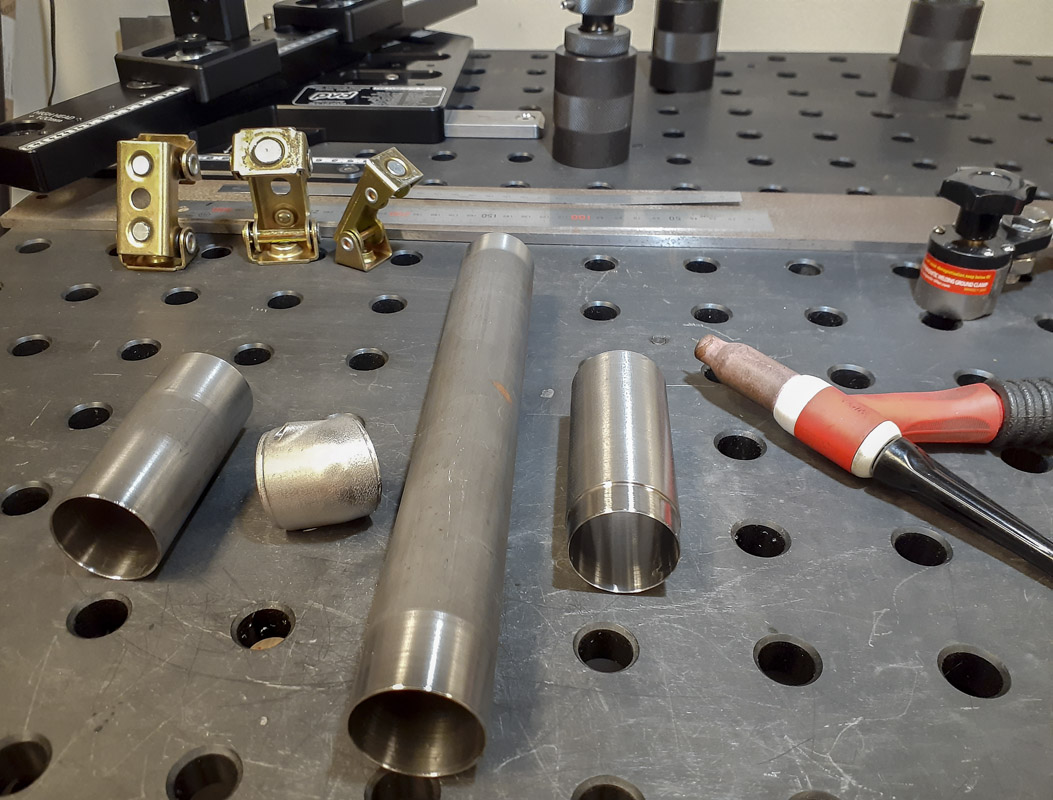
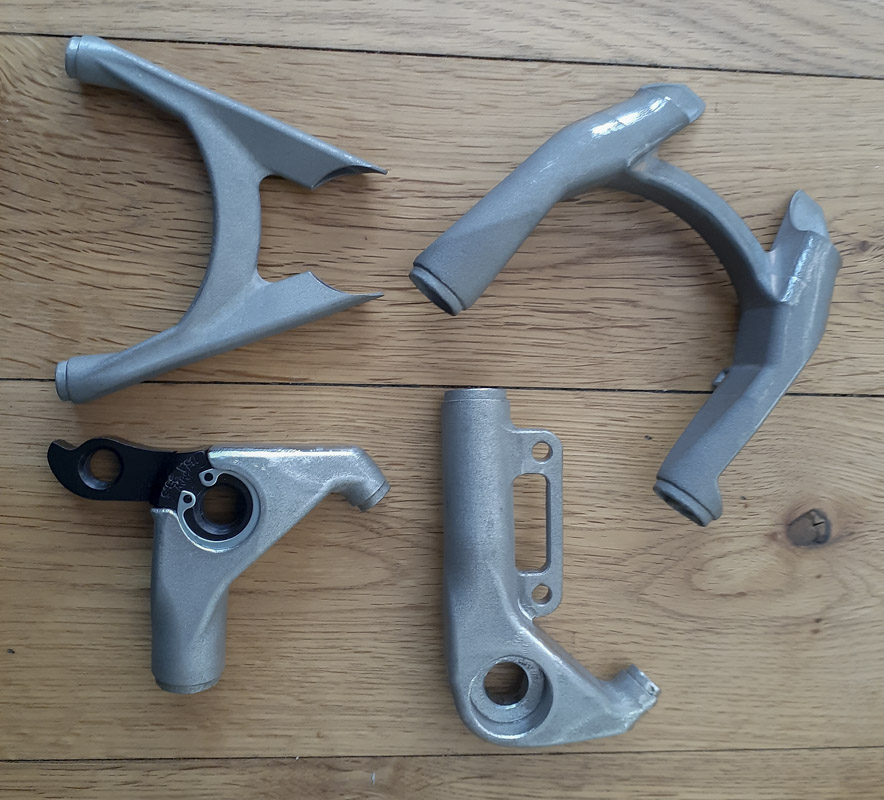
I decided that I had to make the move to a fully additive rear end as soon as possible to gain real experience in this method of production. I had put this off due to cost but that is now really starting to change. These are my first metal printed parts. They can and will improve as I gain more experience. I keep finding design and engineering details that I didn’t think of or what I can now do that I couldn’t before. In the real world, parts that look great in the computer model just don’t work or need a change when you are constructing or assembling the bike. This only comes in time. Will the parts crack? Will the welds fail? Can they be made lighter, or look better, or serve me more.
This has been a huge and rapid learning project. Basically, I went from a CNC complement of parts to my first 3D printed rear end in three weeks. Granted, I’m an expert solid modeler and have a really well constructed foundation for parts development on my bikes…so I was just able to pull this off. I have a lot to learn and much more work to do.
I’m going to give a warning about 3D printing. Additive manufacturing is a great technology and allows previously impossible things to be made for relatively low cost. The problem, it’s accessible to people that may not have the real engineering skills or fabrication experience to be able to safely use it. I’ve been an engineer, machinist, fabricator, and mechanic for go fast stuff for the last 30+ years. I’ve bet my own and others lives on the decisions that I’ve made. I have a good idea what should work and what should be avoided. Even still, things will go terribly wrong. If you are not experienced with the seriousness of this type of work, take care. Start this learning with parts that do not hold someone’s life in the balance. Consult with experts to ensure that you are using this tool correctly. For the parts I used here, I arranged a meeting to discuss my designs with an engineer that specializes in additive manufacturing and works in aerospace. I took a lot from that. I take my own advice.
I’ve found that modeling for additive is difficult, primarily due to how used to subtractive work I am. Many people my age have put a huge amount of work into understanding how machines work, how metal is removed, and all the changes that have taken place in that area in the last 15 years. Staying up on that requires a lot of attention and communication. Now, we have a technology that is rapidly coming into wide use that renders much of that knowledge irrelevant and even as a hinderance when modeling. Thinking like a machinist makes additive modeling worse. It gets in the way….until it becomes very valuable. There is a point where additive needs to merge with subtractive. Then all that subtractive knowledge is a boon. Workholding, multi-axis platforms, thread milling, precision grinding, etcetera burst into the scheme as we look to do more. So we need the knowledge of both additive and subtractive. For the old guys, we need to learn the new tricks…and few are interested in learning new things. For the young guys, they need to learn the old arts…but those are very difficult to acquire in the modern world and few young people are interested in using their hands.
This is the current state of the art. Two poles fighting against each other rather than working as complements. It will correct. The tools will be used well but it will take time. Sadly, the schools are really the enemy of progress in this era.
We learn to use tools. Those that learn to use the tools correctly, with imagination, and intelligently…win.
![]()
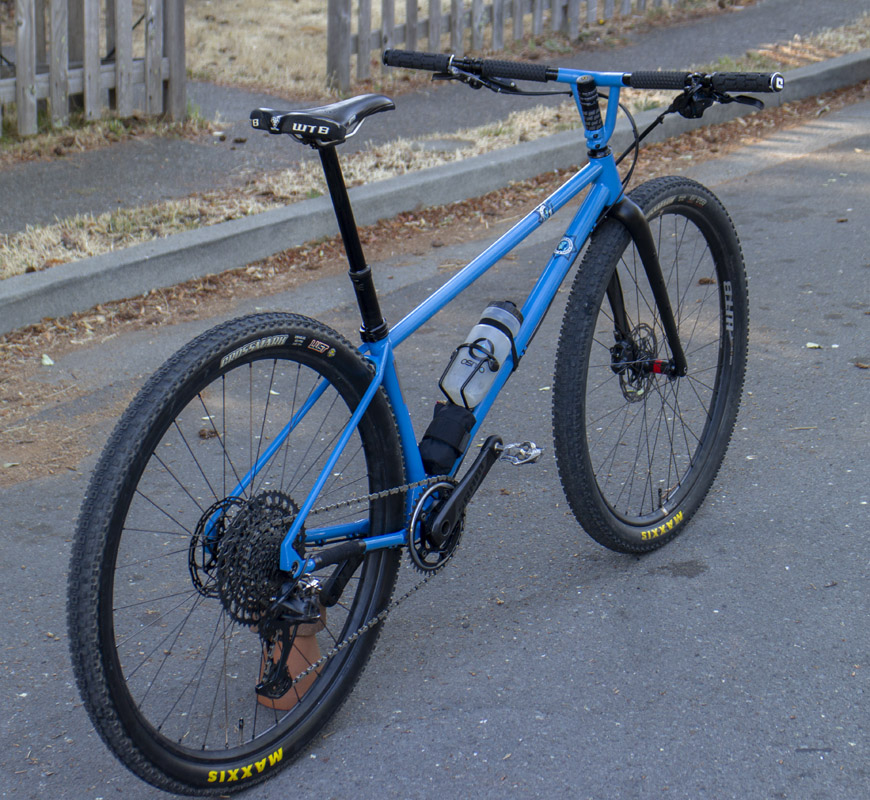
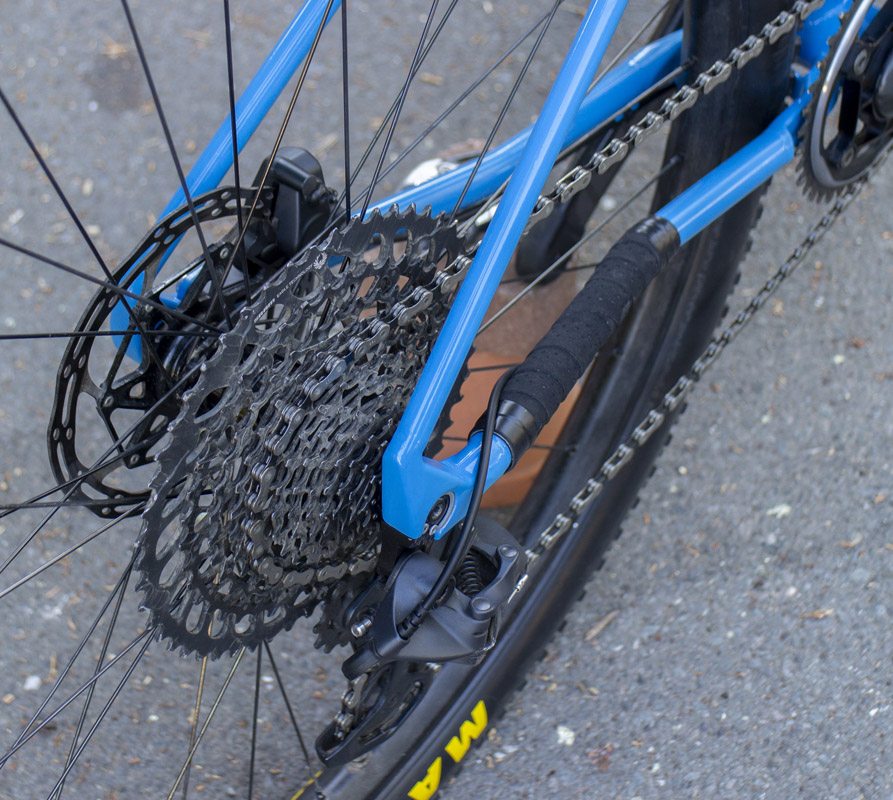
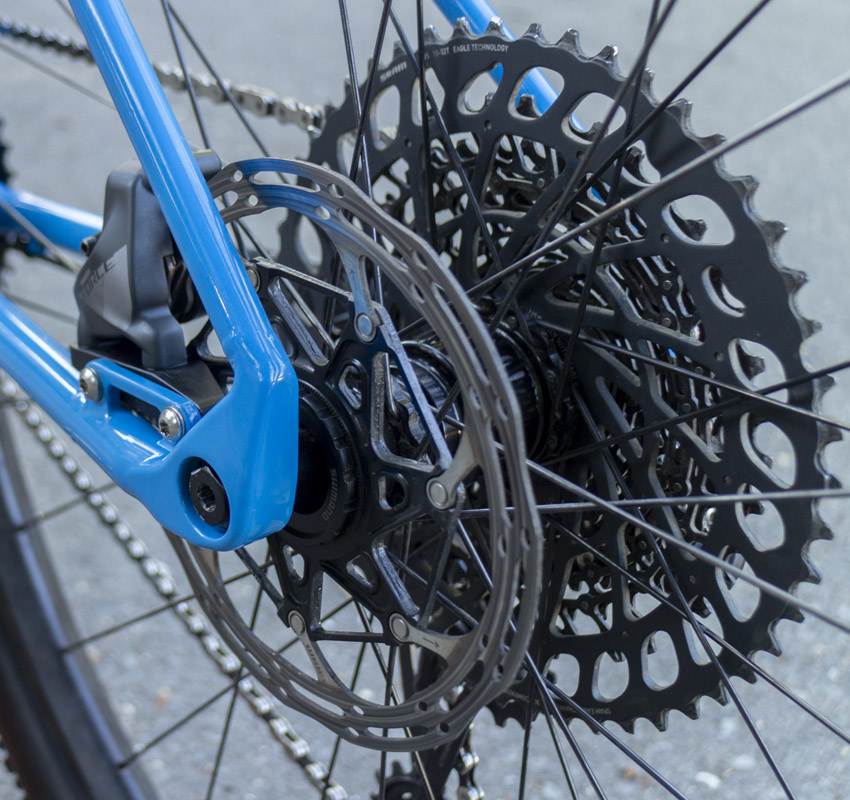
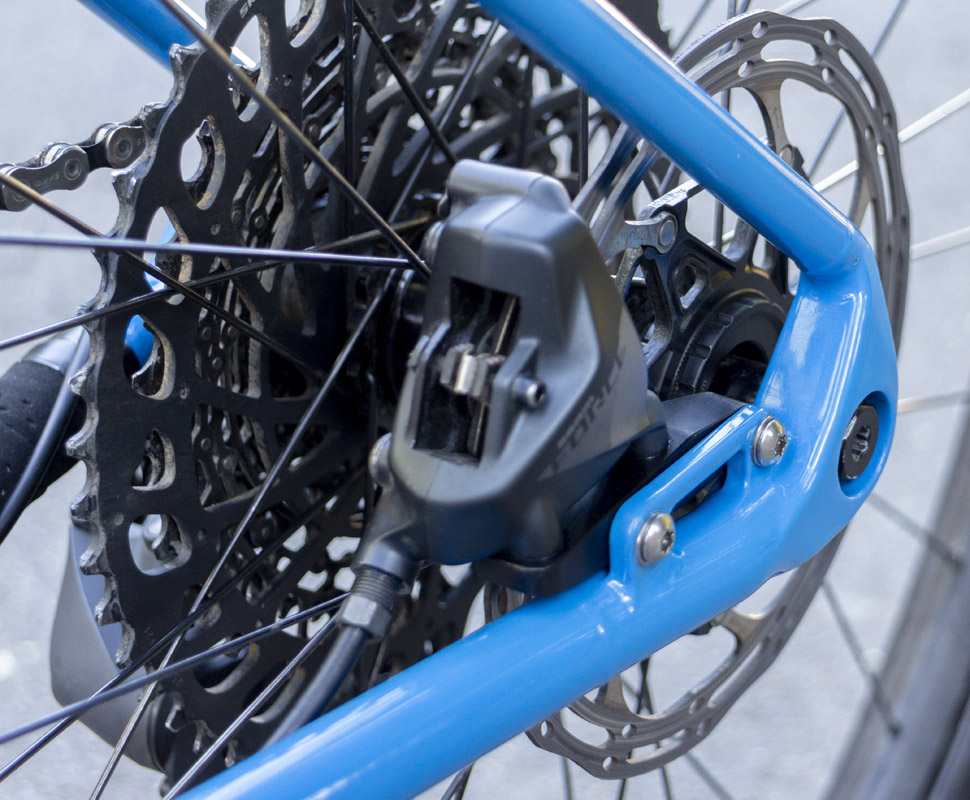
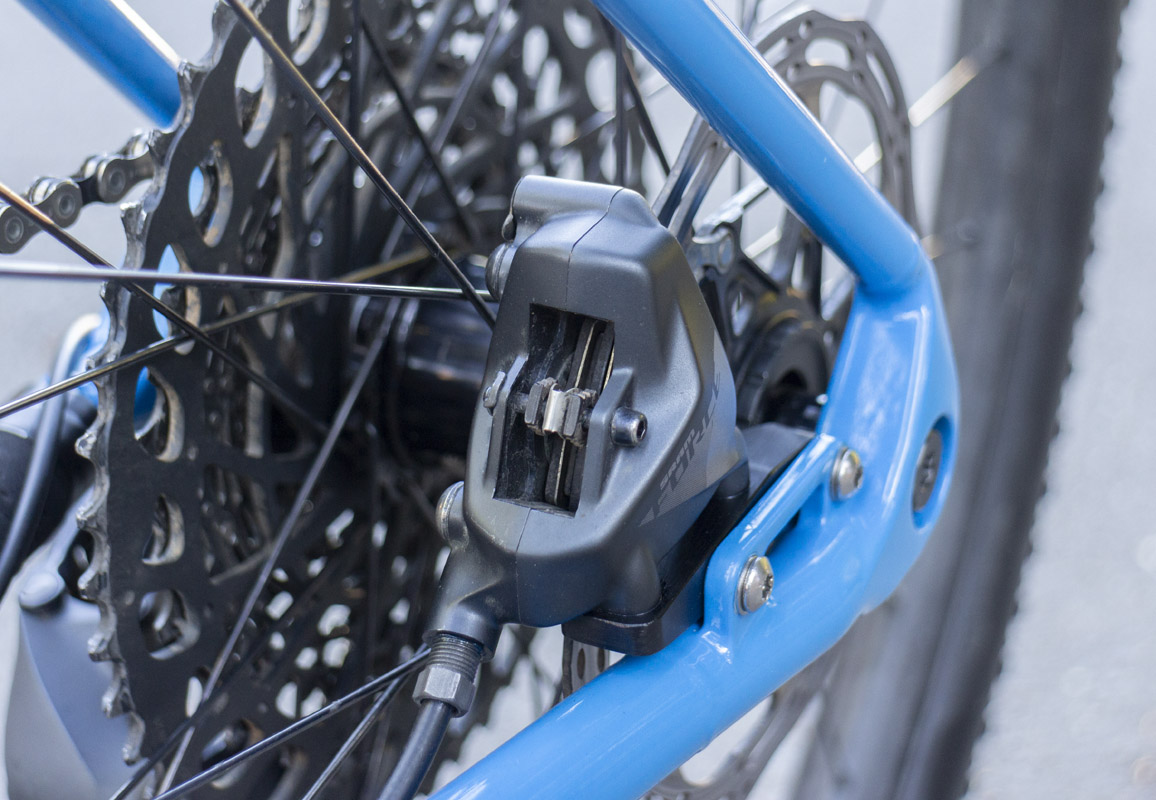
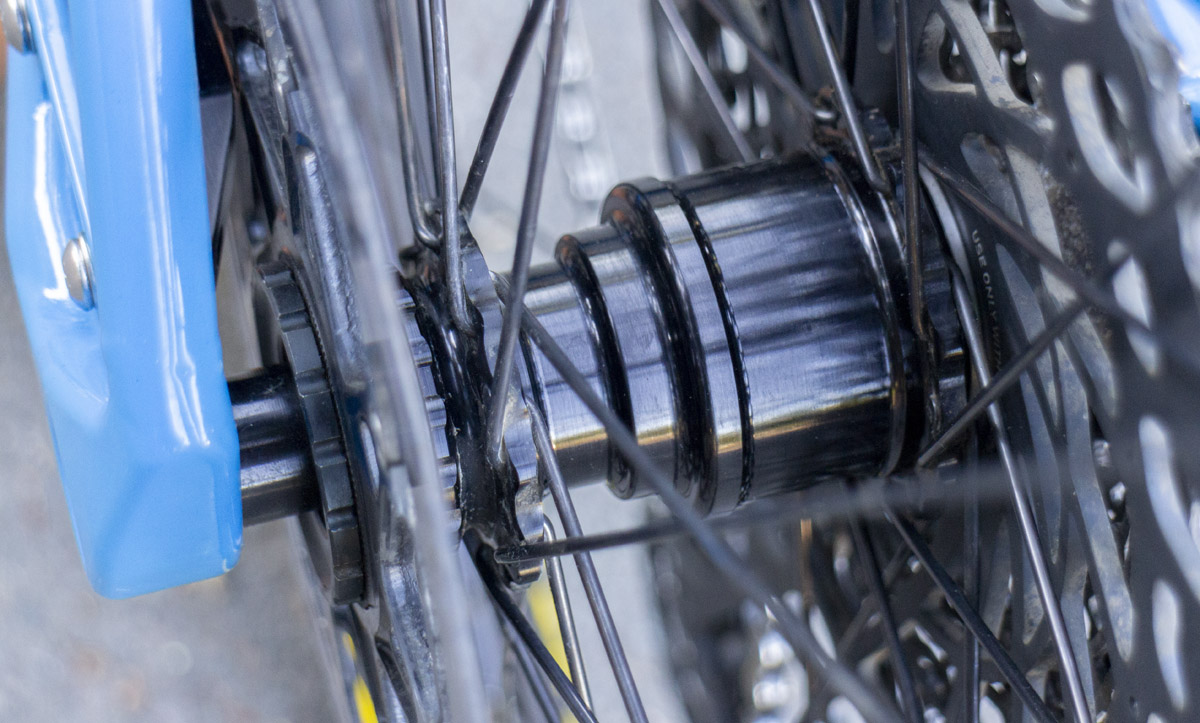
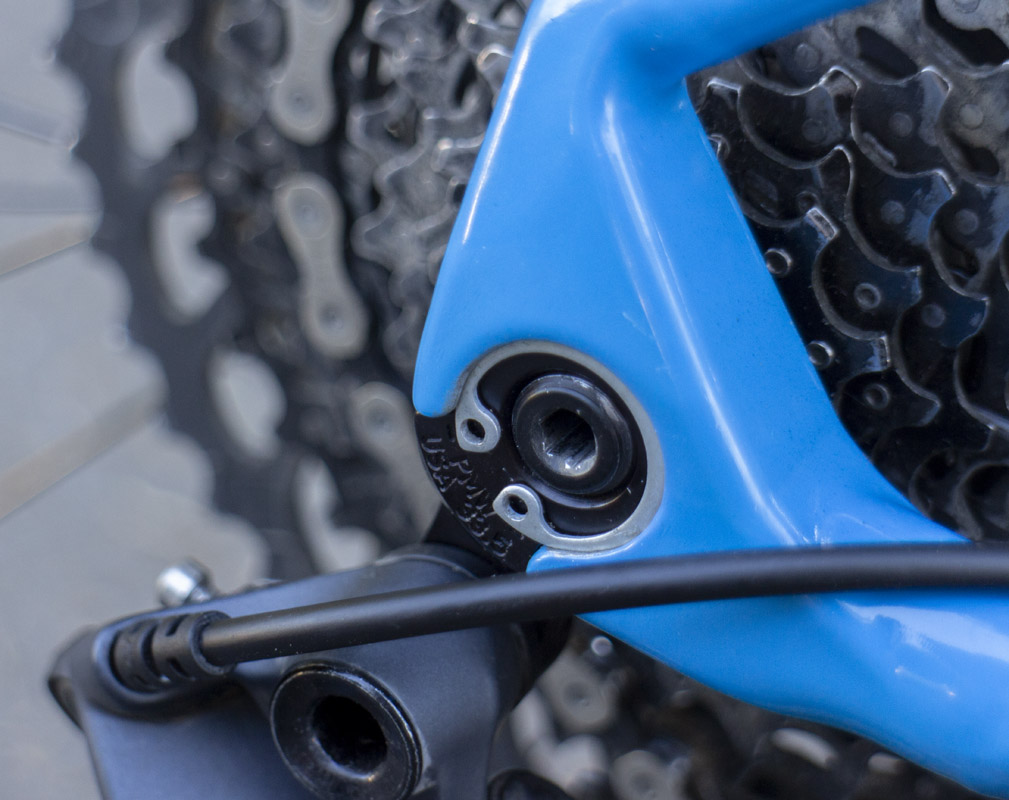
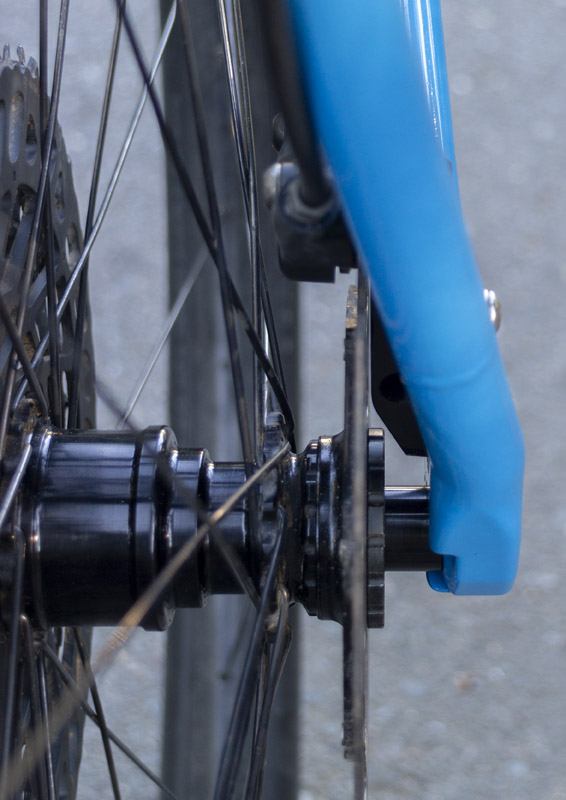
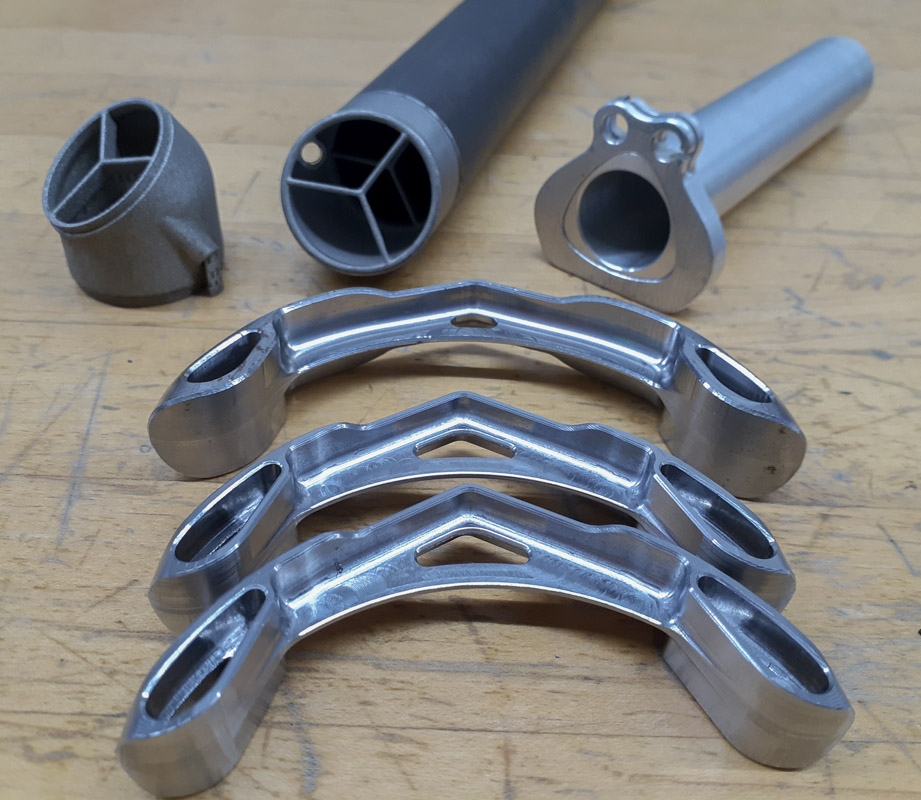
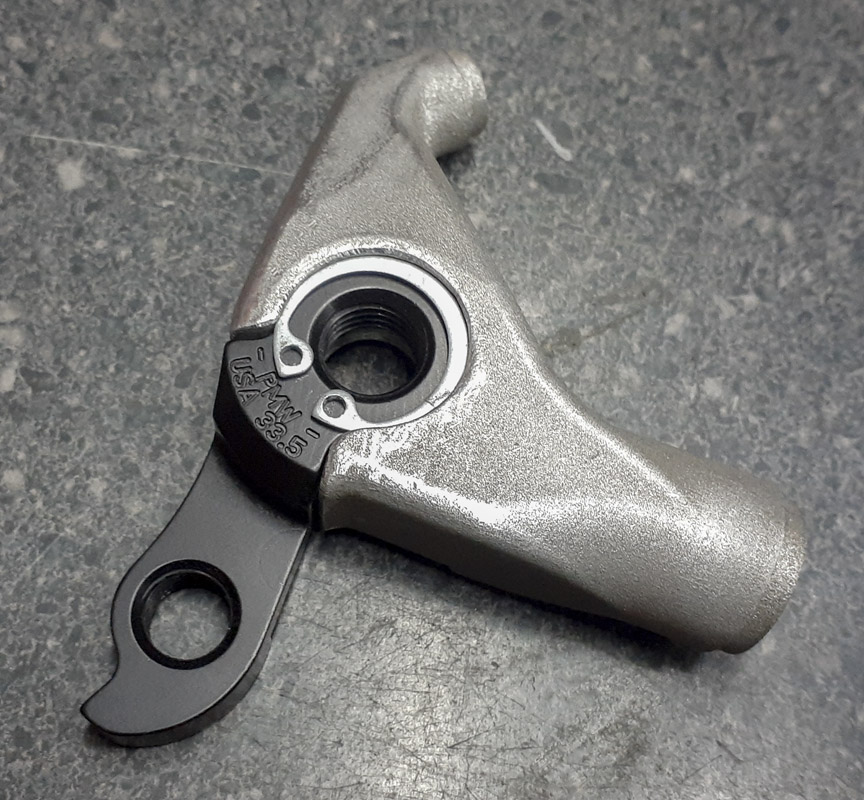
The dropout was designed to use the PMW snap ring hanger. It’s a nice solid design and takes up very little space. It’s good to have a source that will update the parts as standards change taking this off my shoulders. I’m not sure if it’s the best way to go for this method but it was good for this bike. I need to do a UDH dropout but that was just such a terrible problem for subtractive construction I put that off for a bit. It also seems that COAX has been pushed back a bit, buying me time.
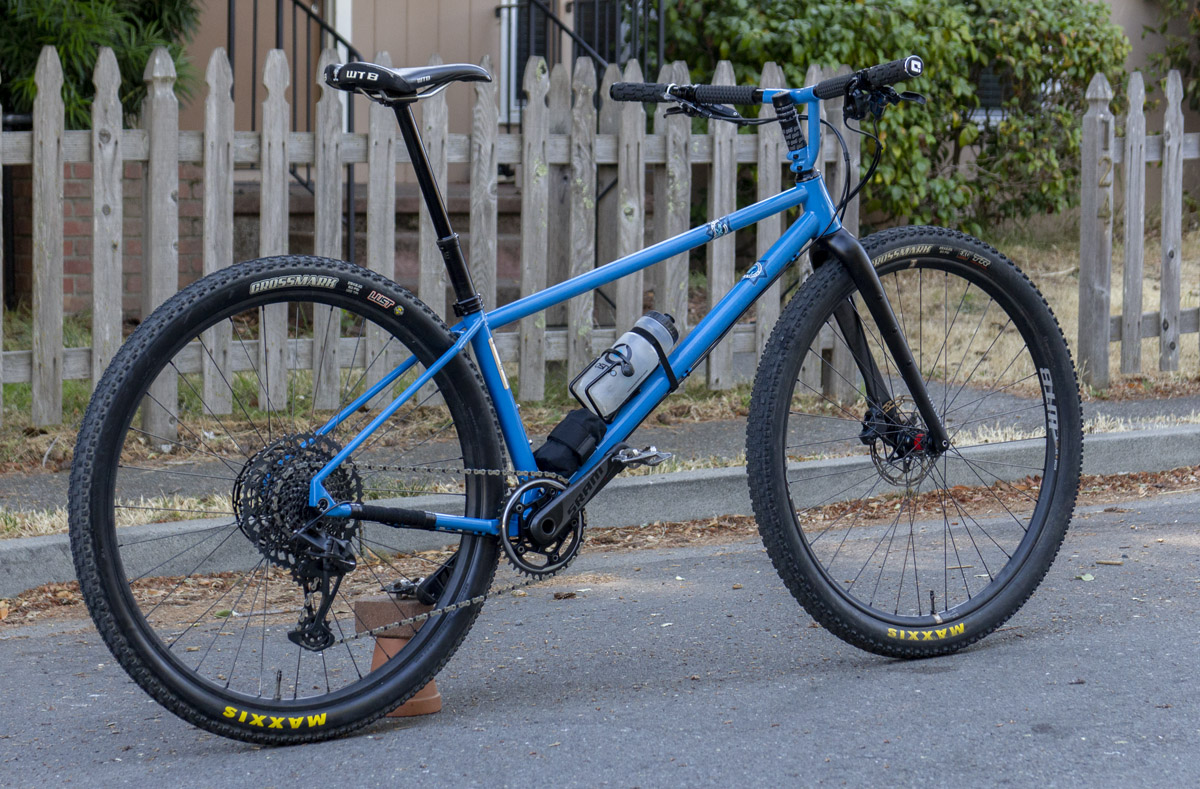
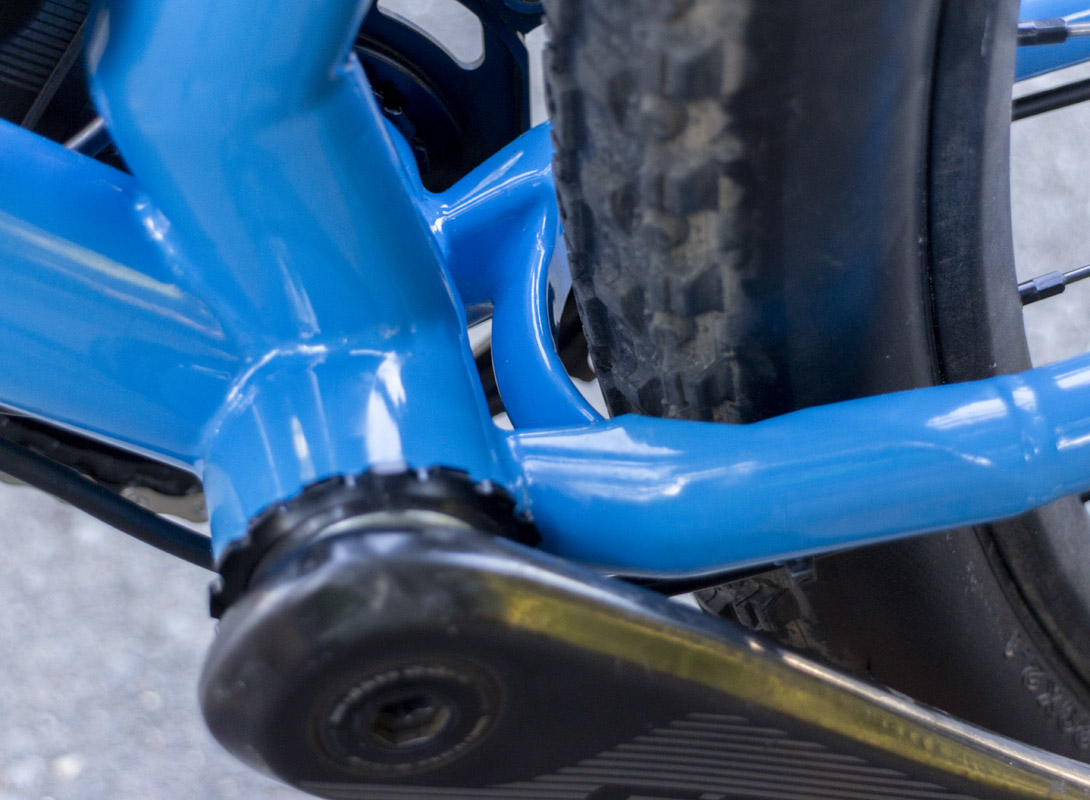
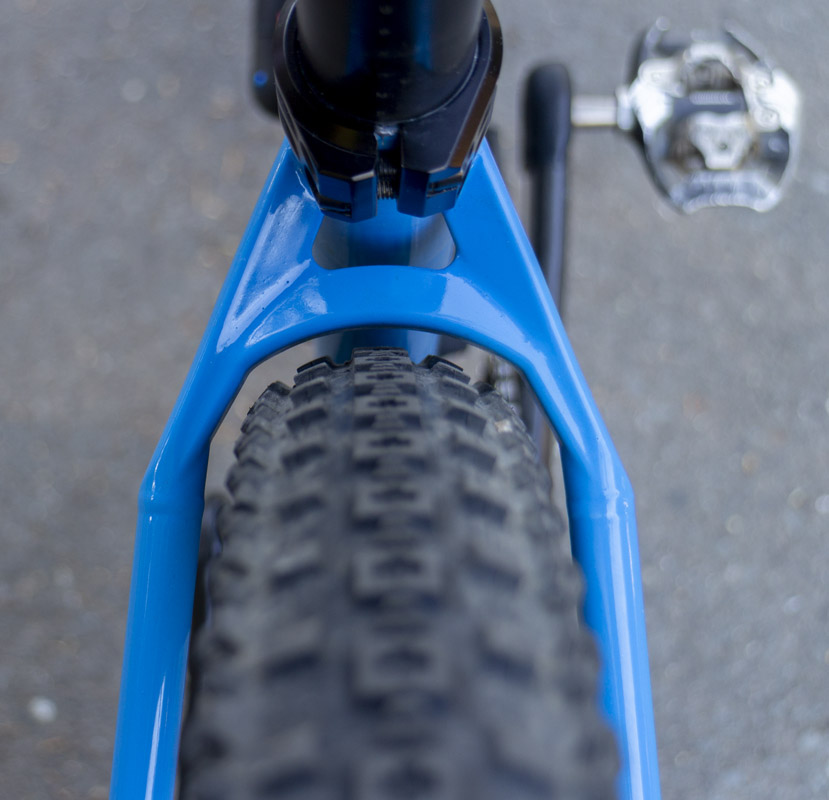
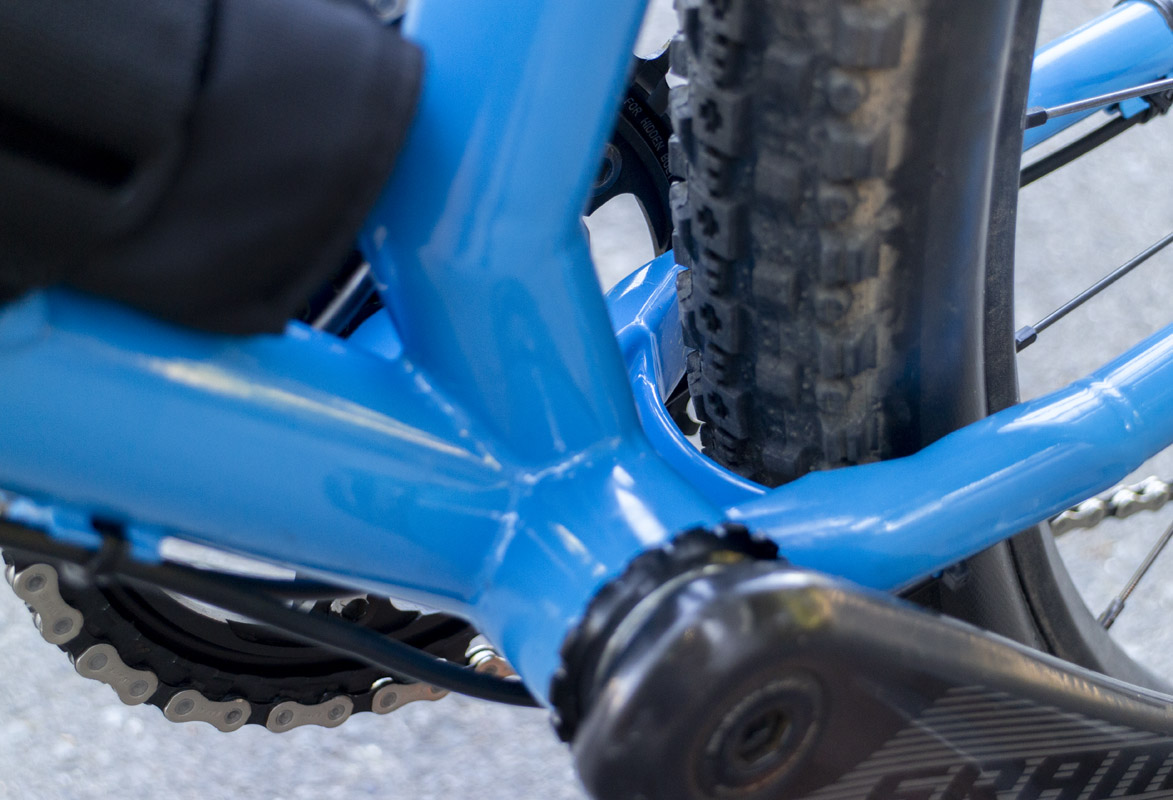
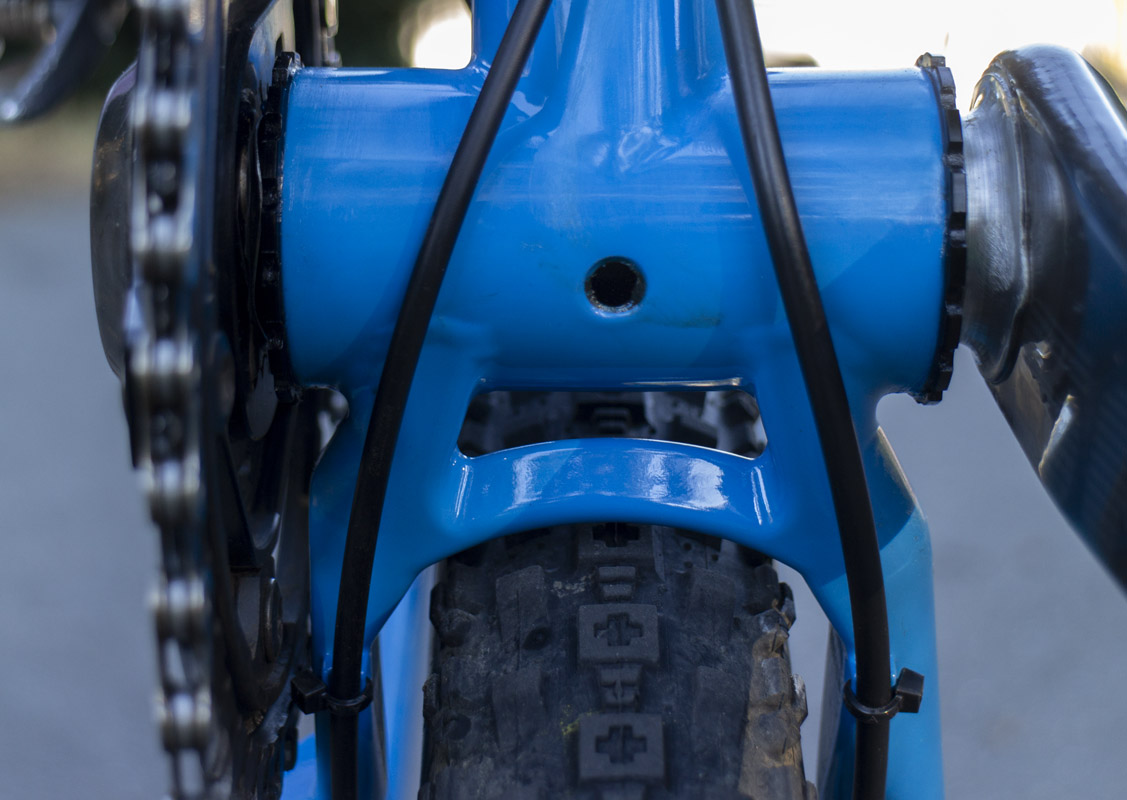
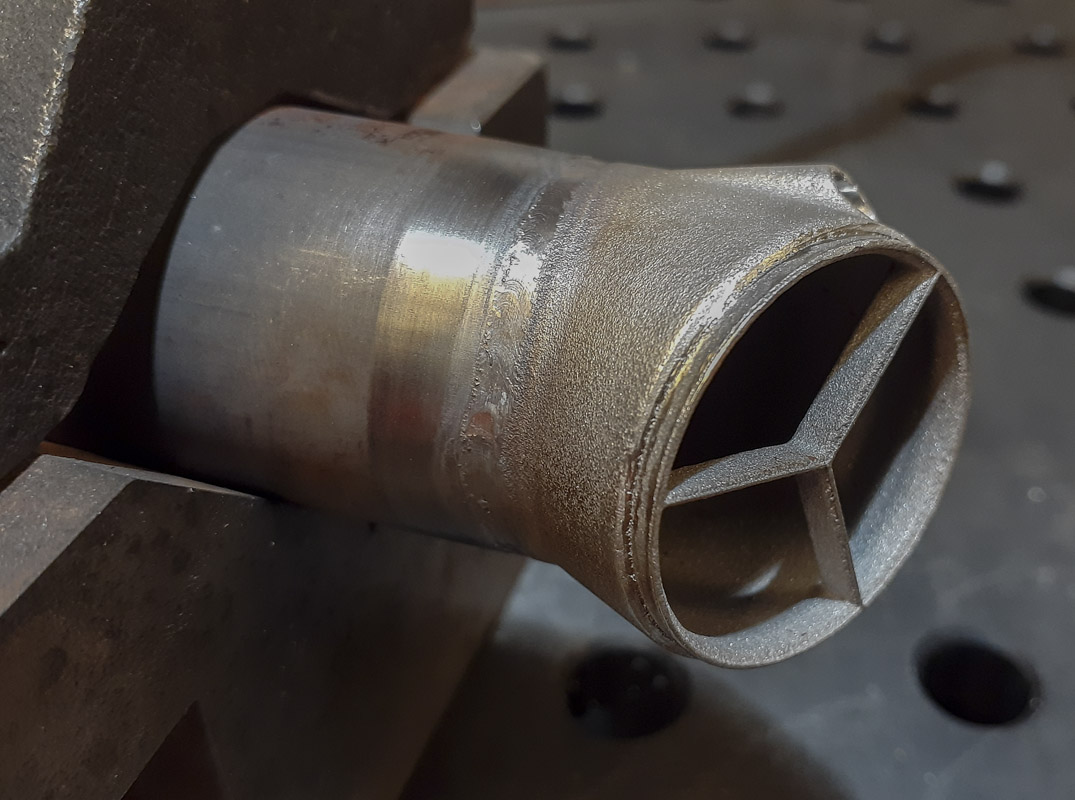
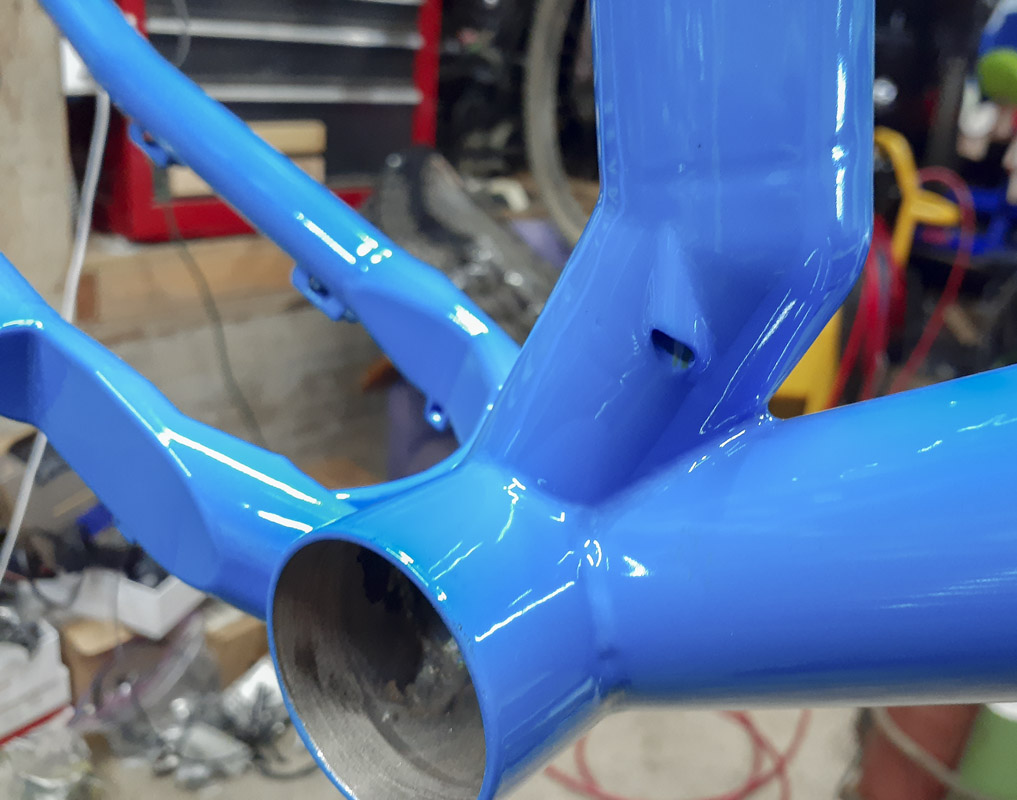
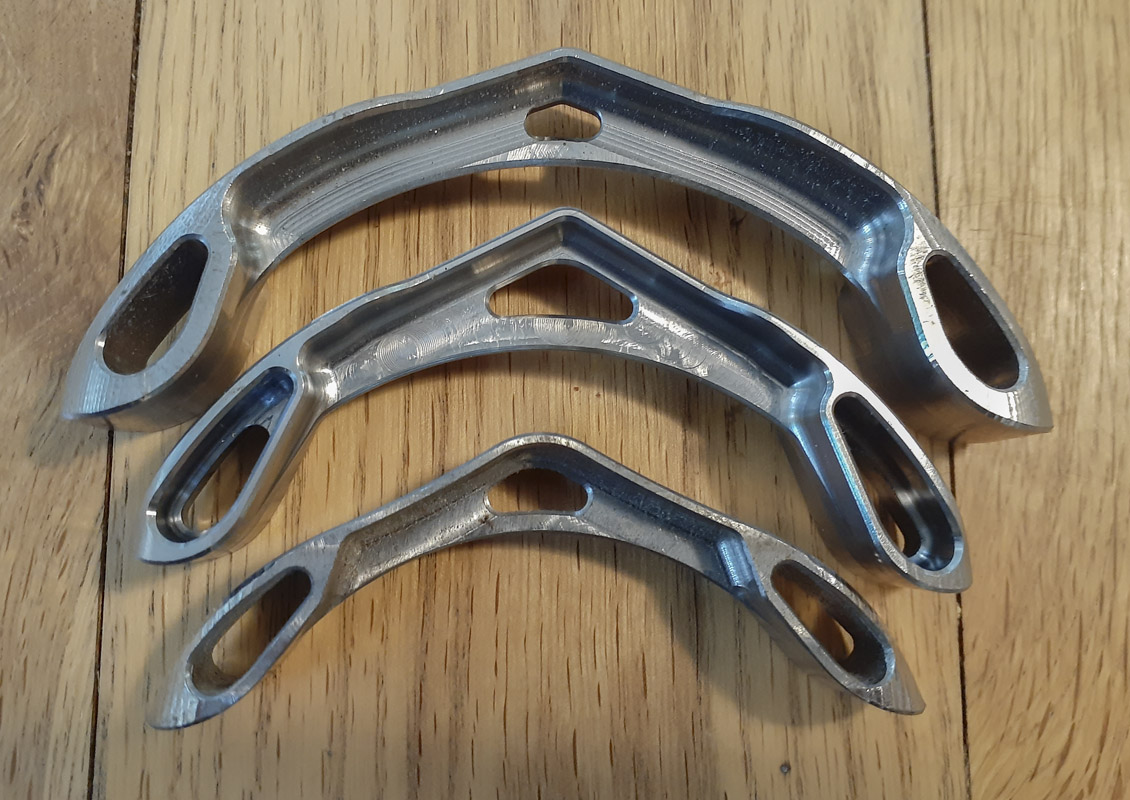
The printed seatstay yoke is really remarkable. It’s so delicate looking and thin but incredibly strong. It gives so much room for the legs of riders with “less than skinny legs” while offering a huge amount of support to the rear end. I even flattened and softened the side that would interact with the leg. The 1/2″ thick part has a 1/2″ radius where the leg would hit it. It makes the bike feel so skinny and comfortable.
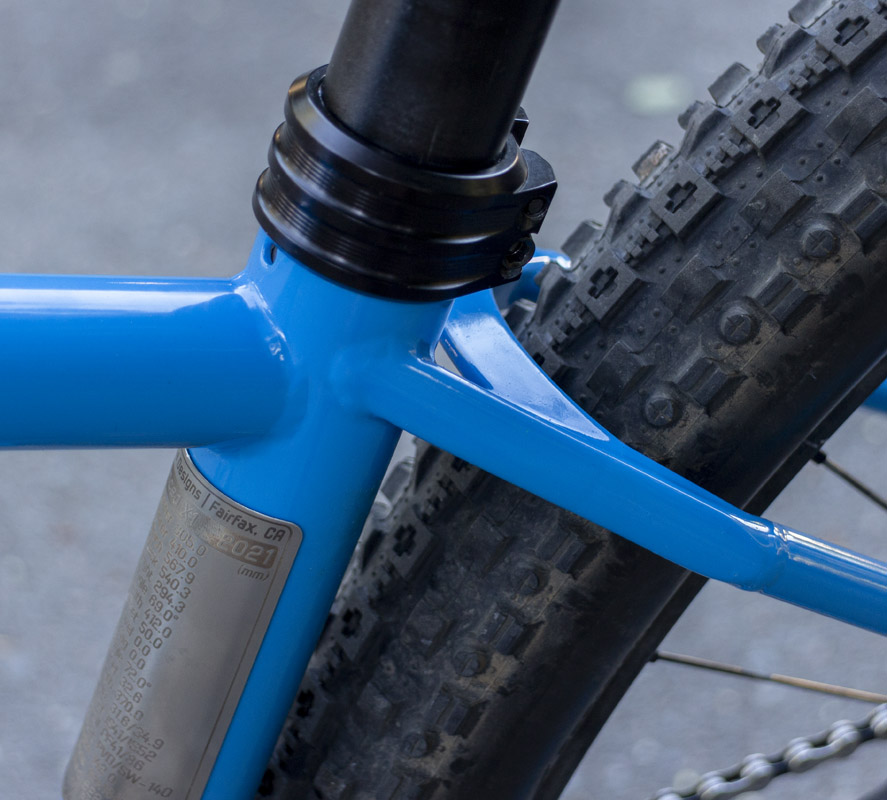
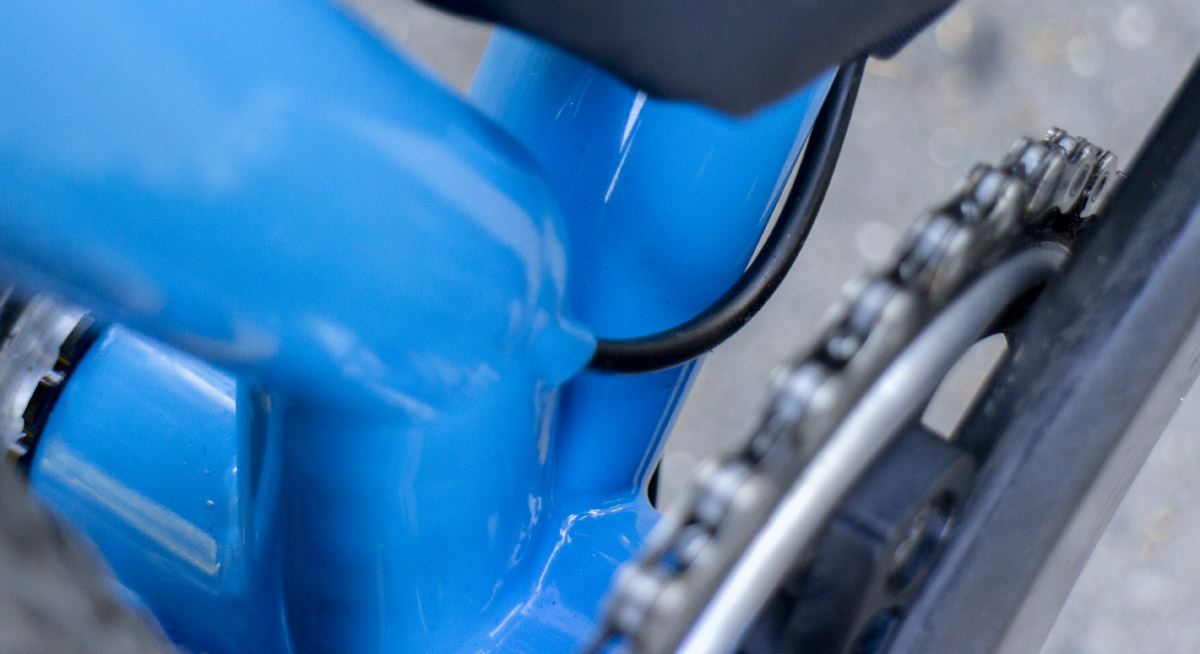
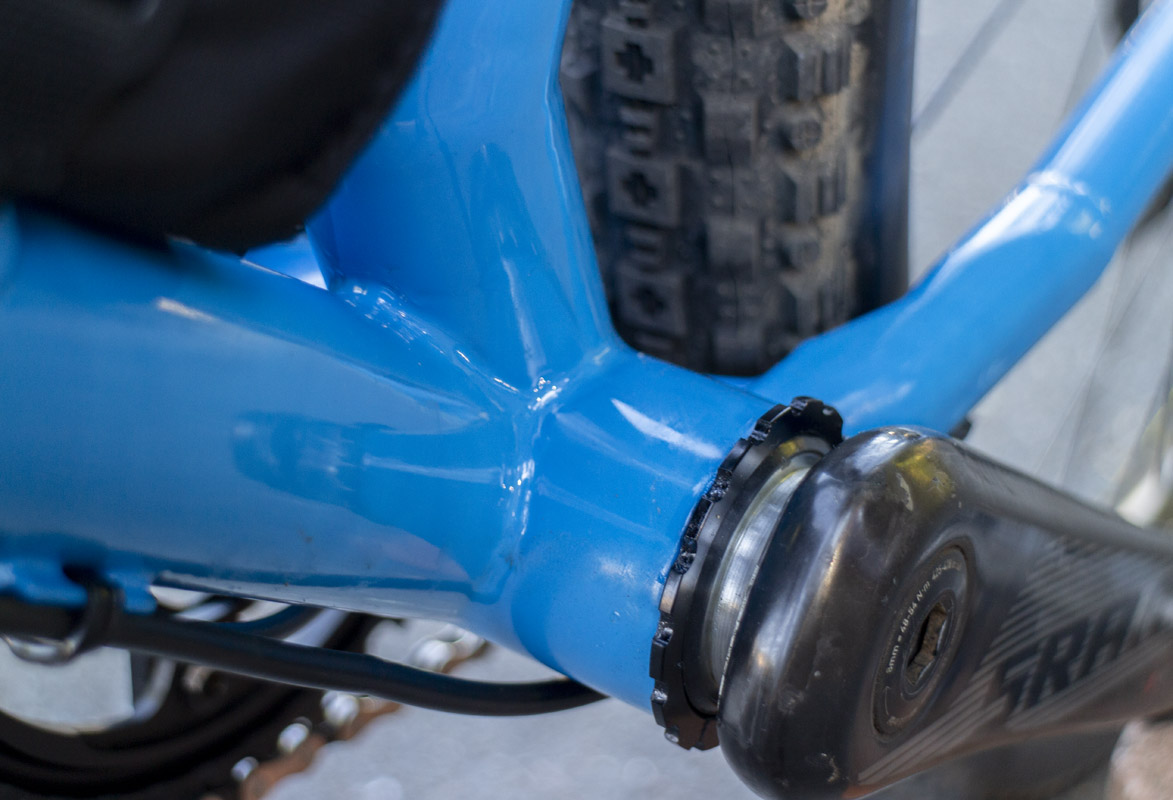
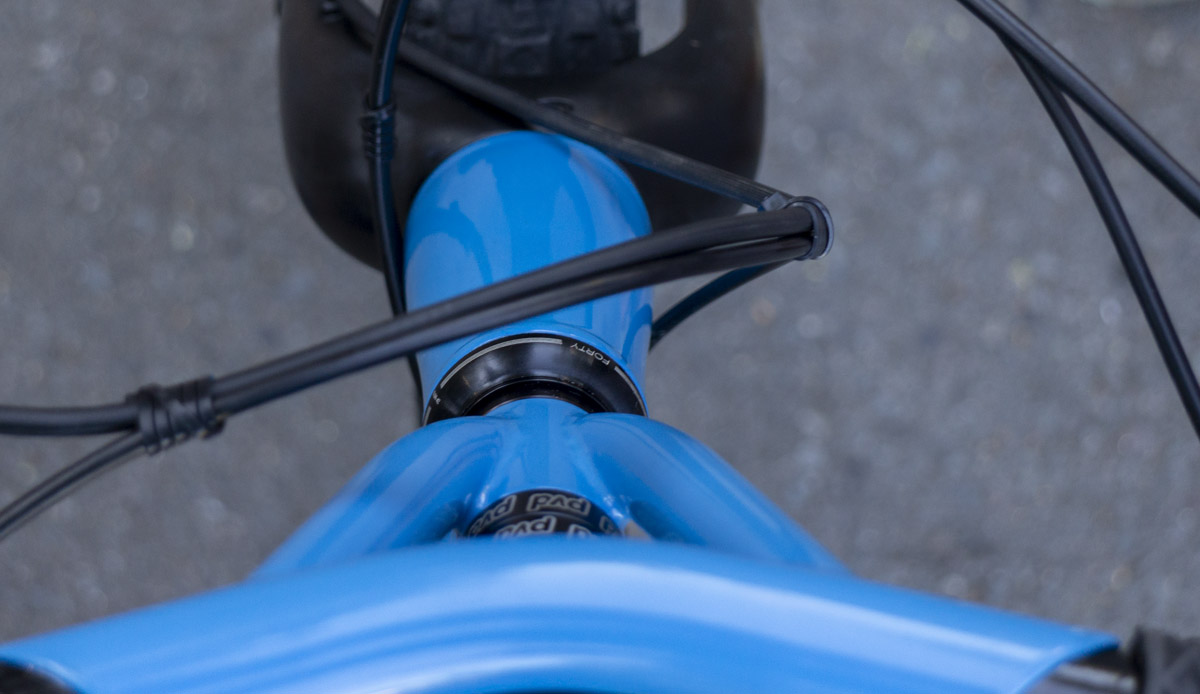
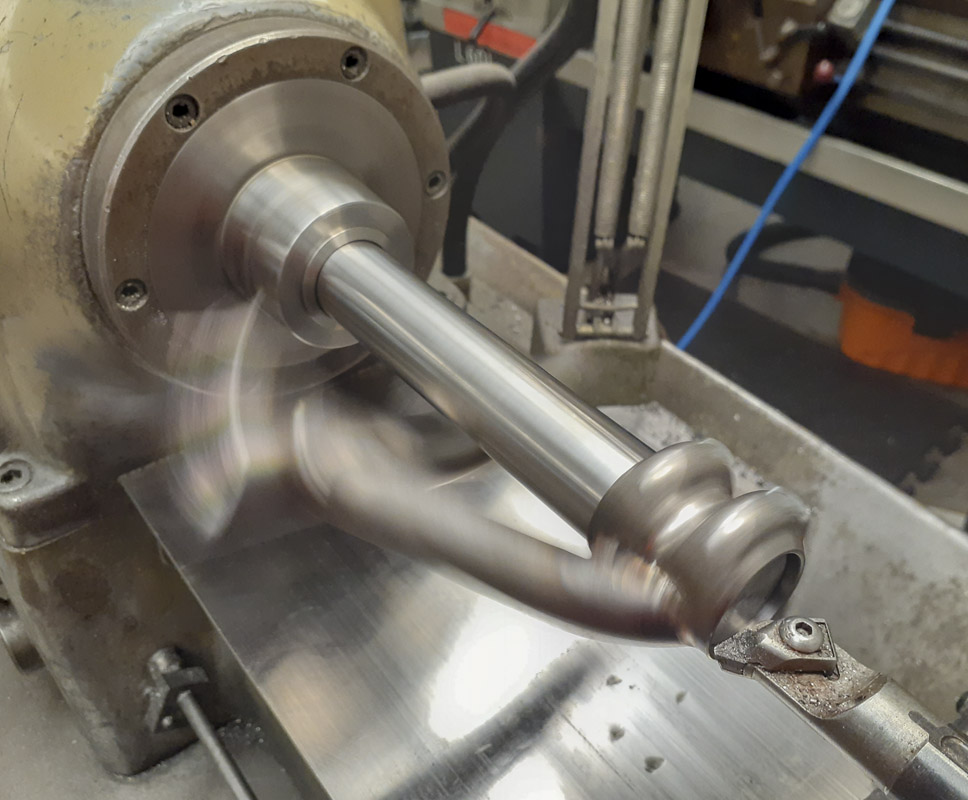
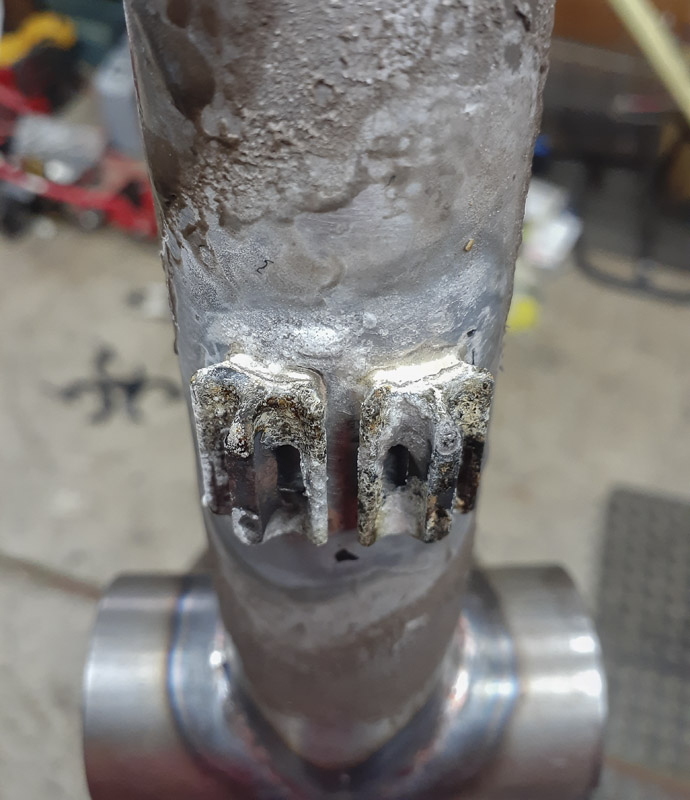
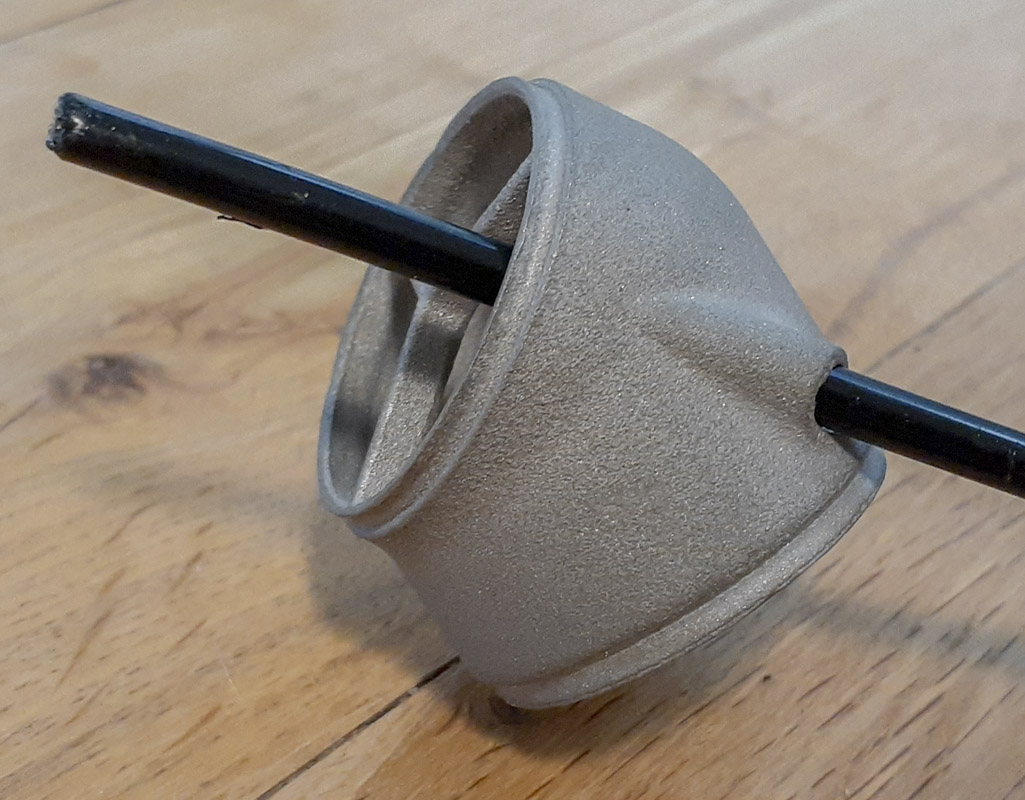
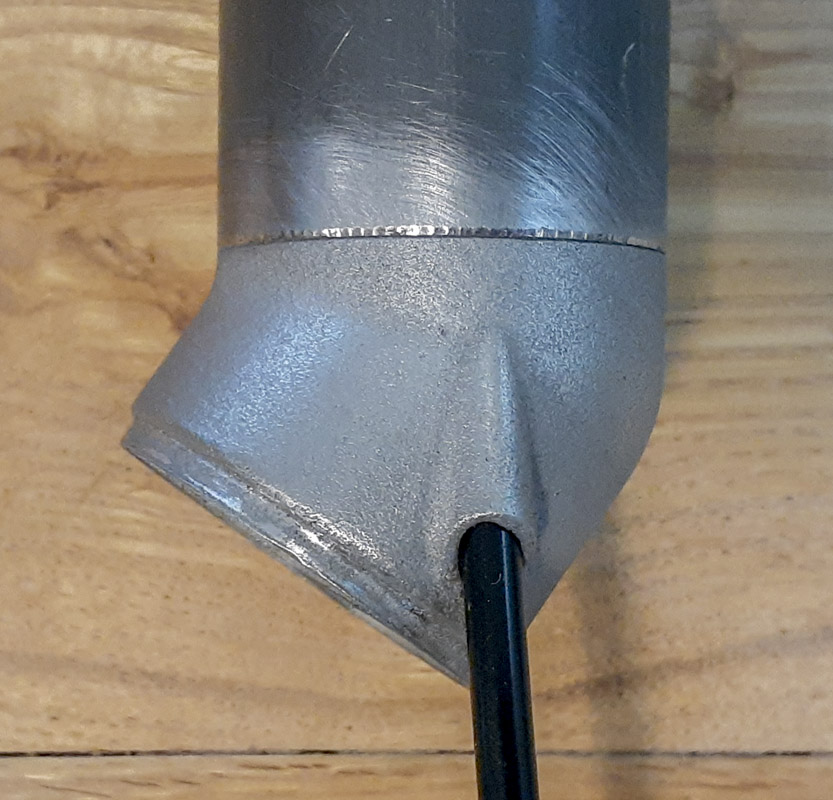
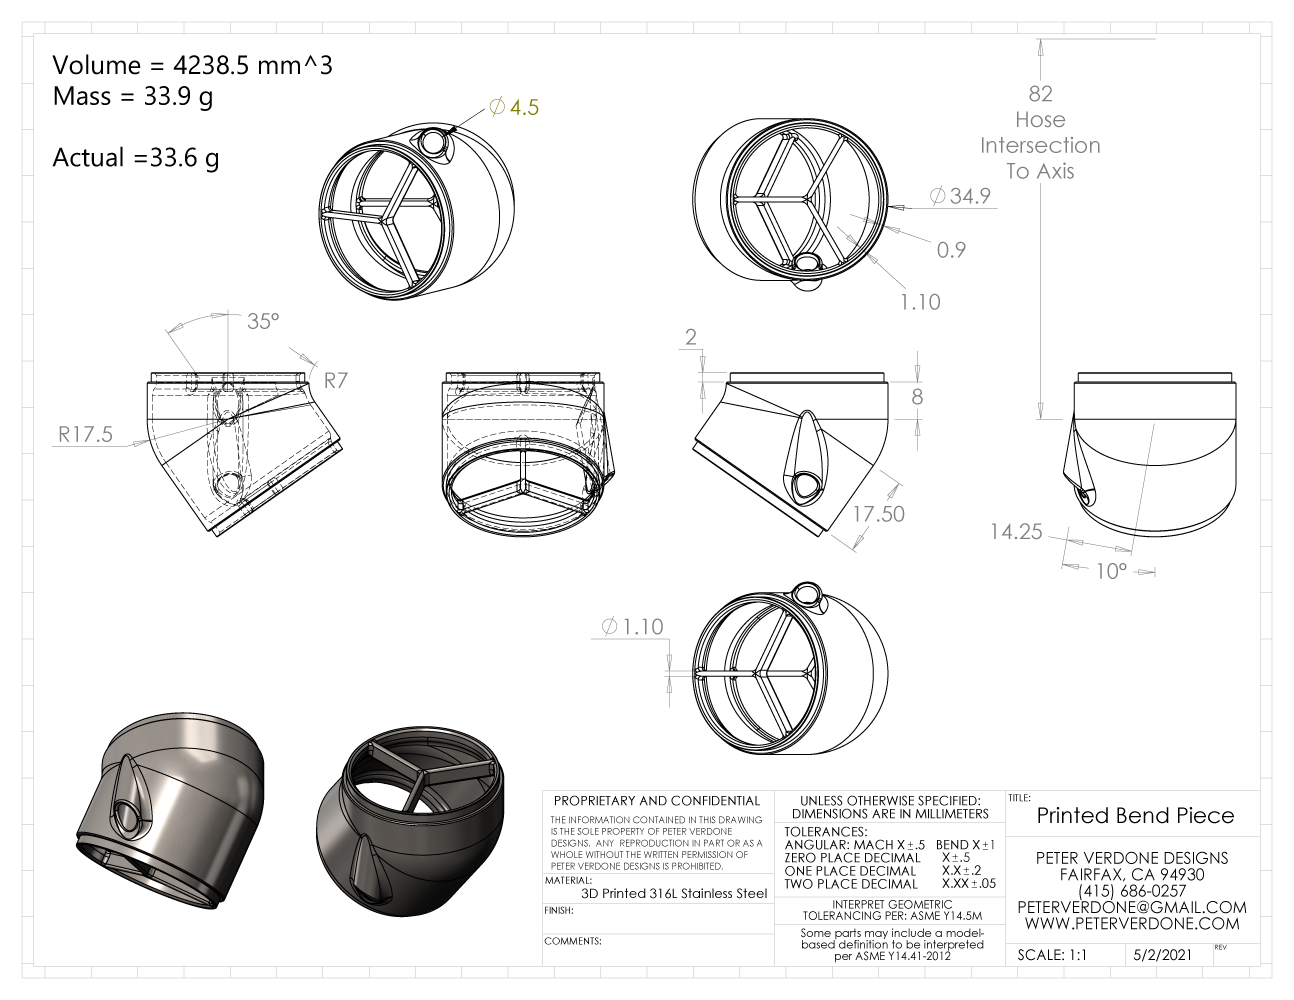
The printed seat tube bend piece produces a 35 degree bend angle with a 0.00″ CLR for the 1.375″ tube. This opens up so much room for dropper post hose routing. Additionally, the hose guide modeled right into the part actually makes it stronger.
Welding the bike was a bit scary. Uncharted waters and betting all on black. I called a few real pros that could fill me in on what they would do. I mixed that all up and made it up to work. The seat tube was welded first, and I wasn’t happy with the method that I used. The rest of the rear end 3D parts were done differently and in a way that I preferred. Welding this stuff is a bit strange but not insane. Nothing broke on the first ride. We’ll see what the long term holds for me.
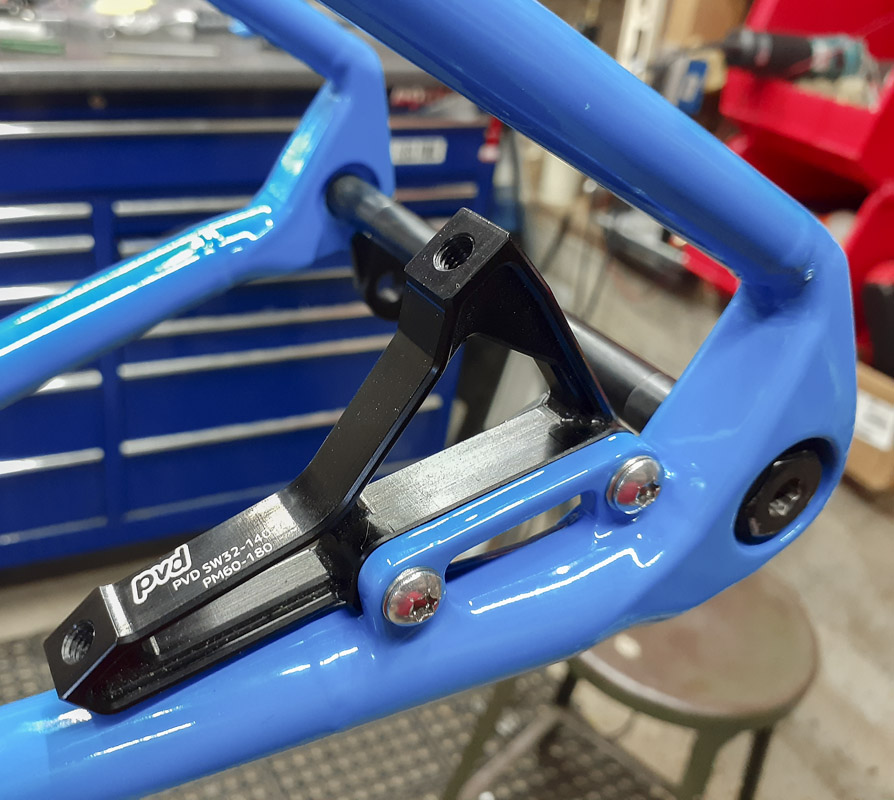
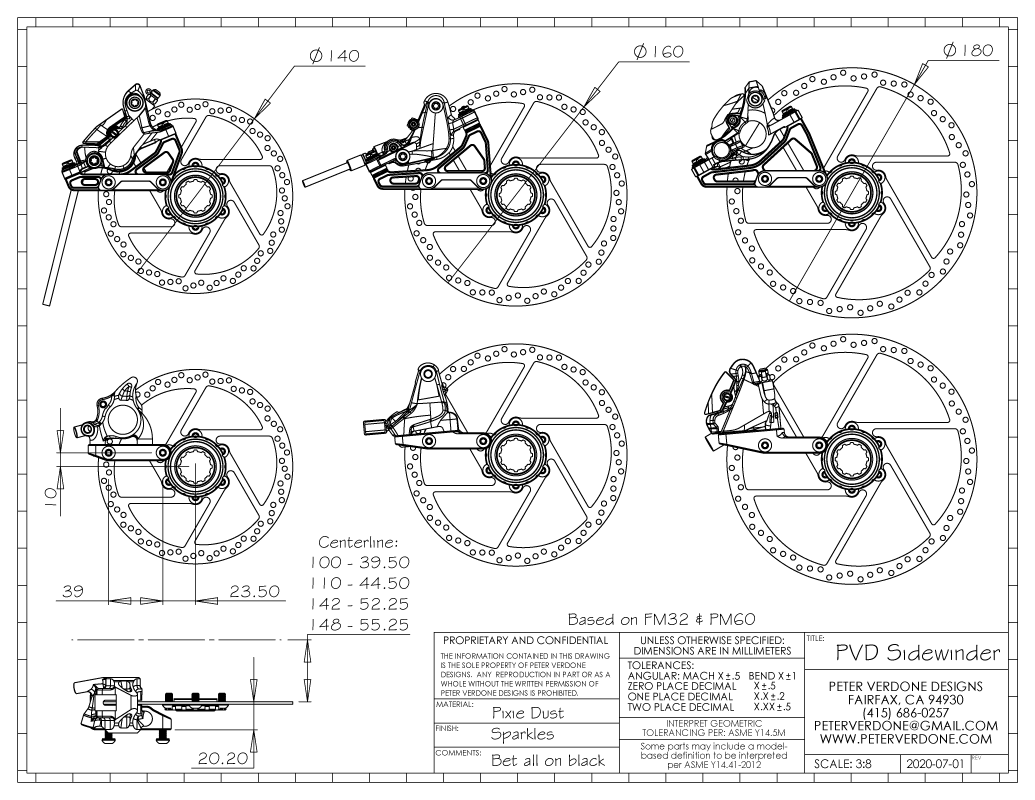
The caliper mounting is PVD Sidewinder. I played some tricks with the dropout design to ensure that I had room for rotors from 140-180mm, FM calipers from 140-180, and PM calipers from 160-180. This opens everything up and exactly what my system was developed for. I did get a little lazy in how I modeled the bracket on my parts that were printed. It was near the end of all the work and I was just running out of steam. I needed to move forward so the mount is less than stellar. Next round will be a lot nicer.
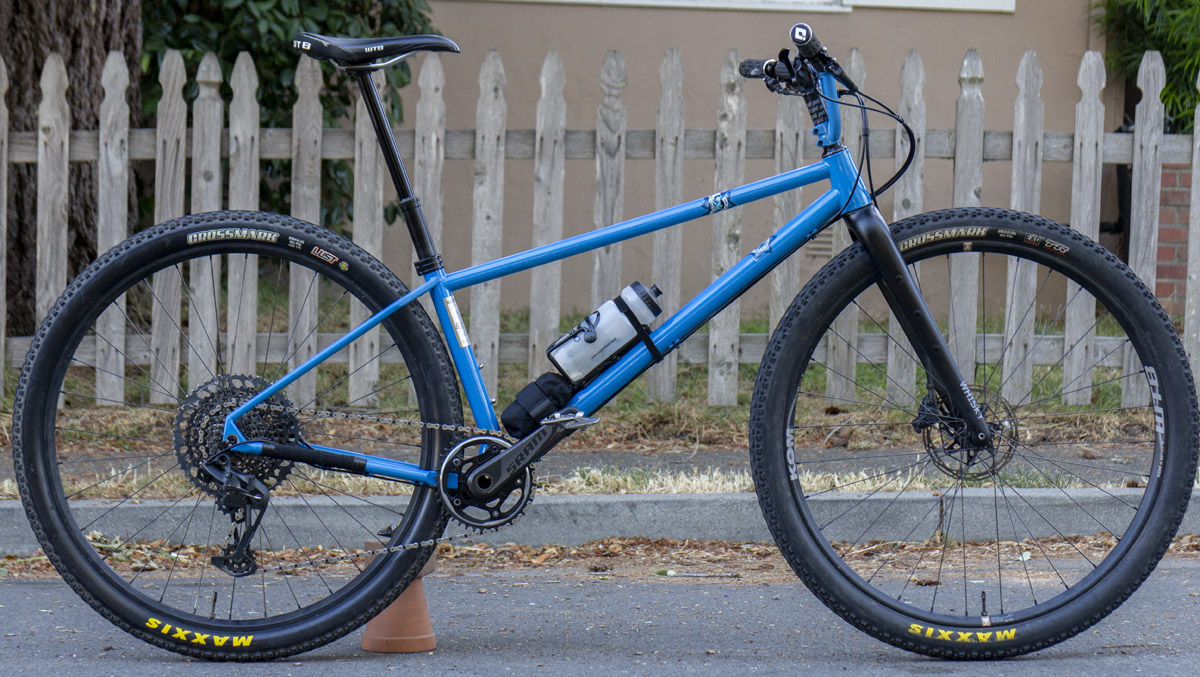
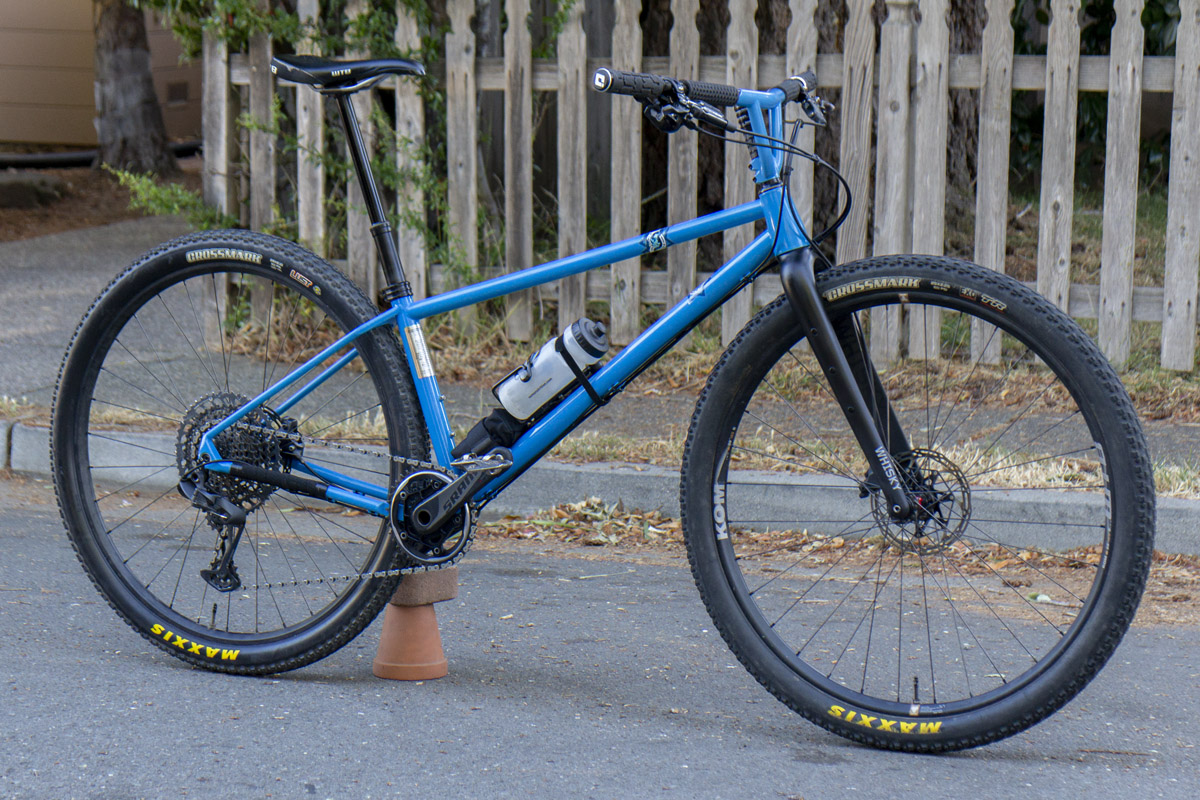
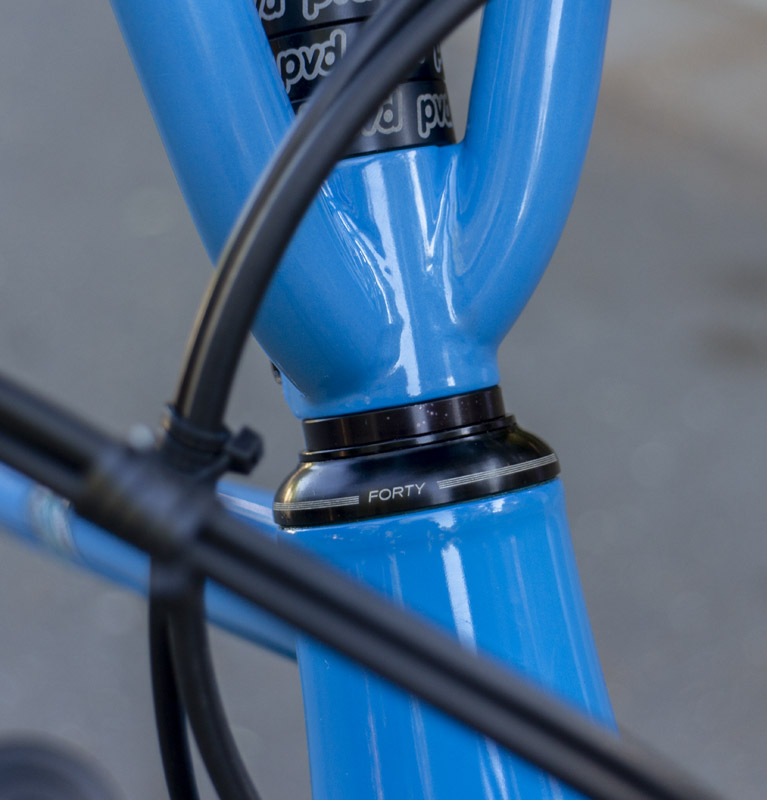
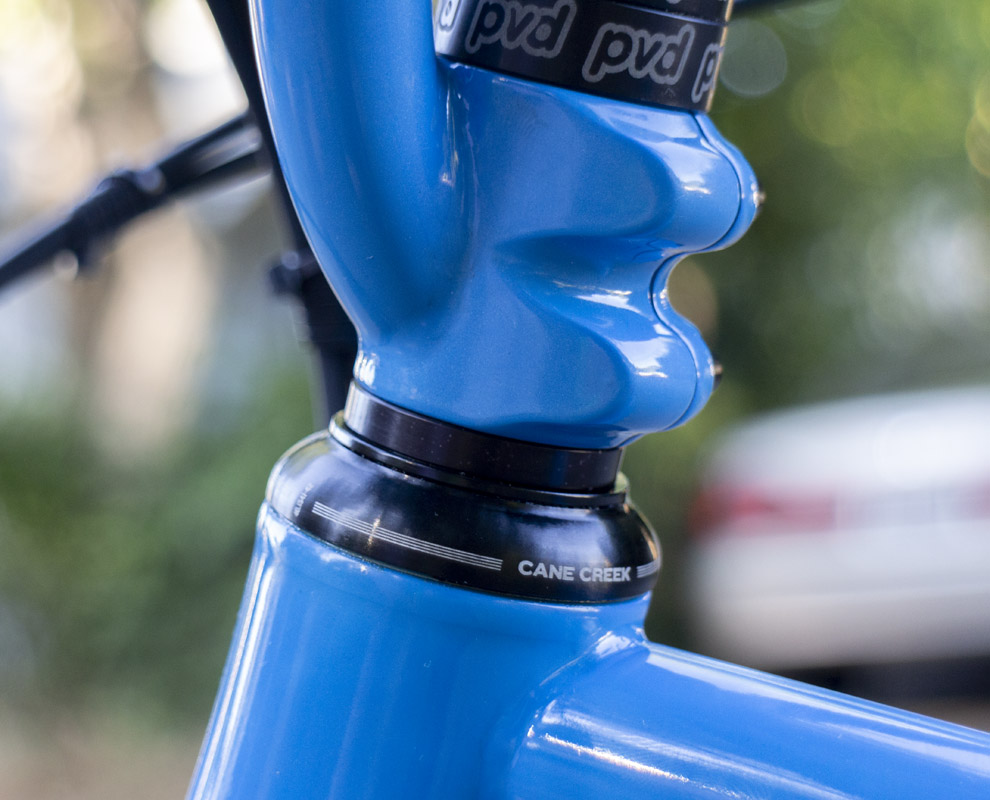
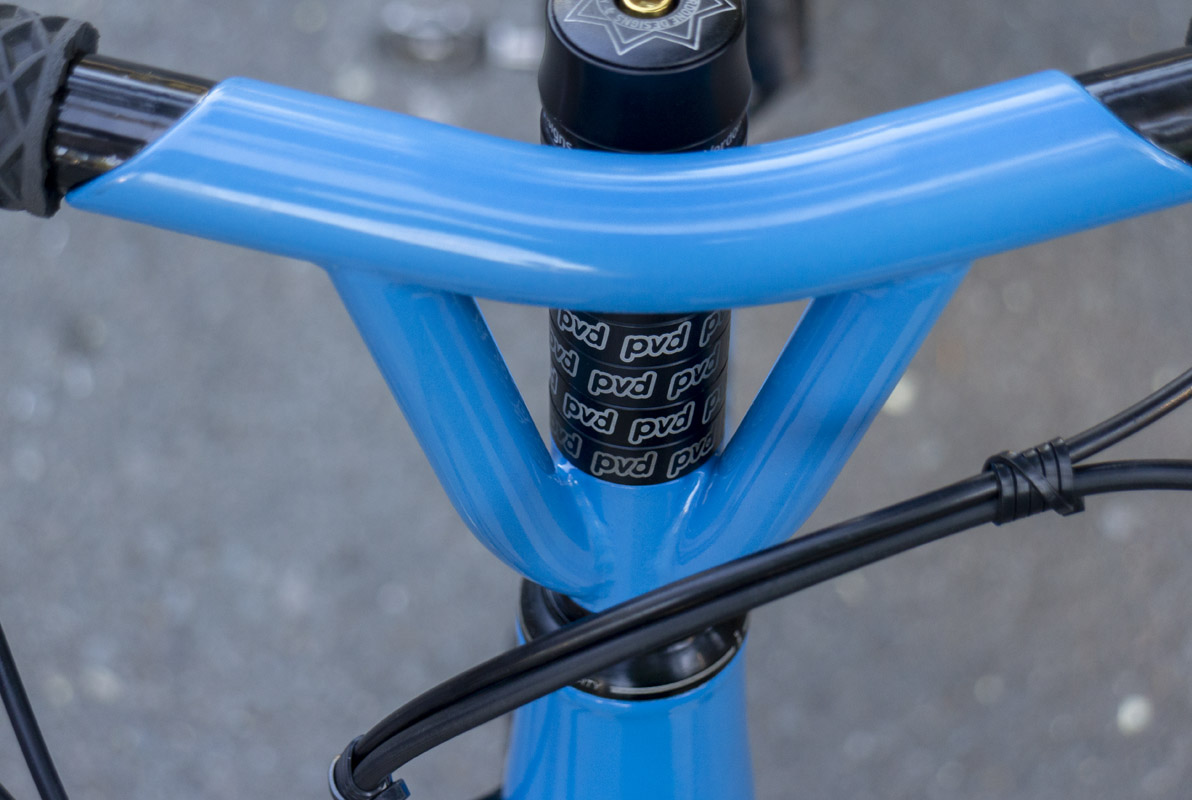
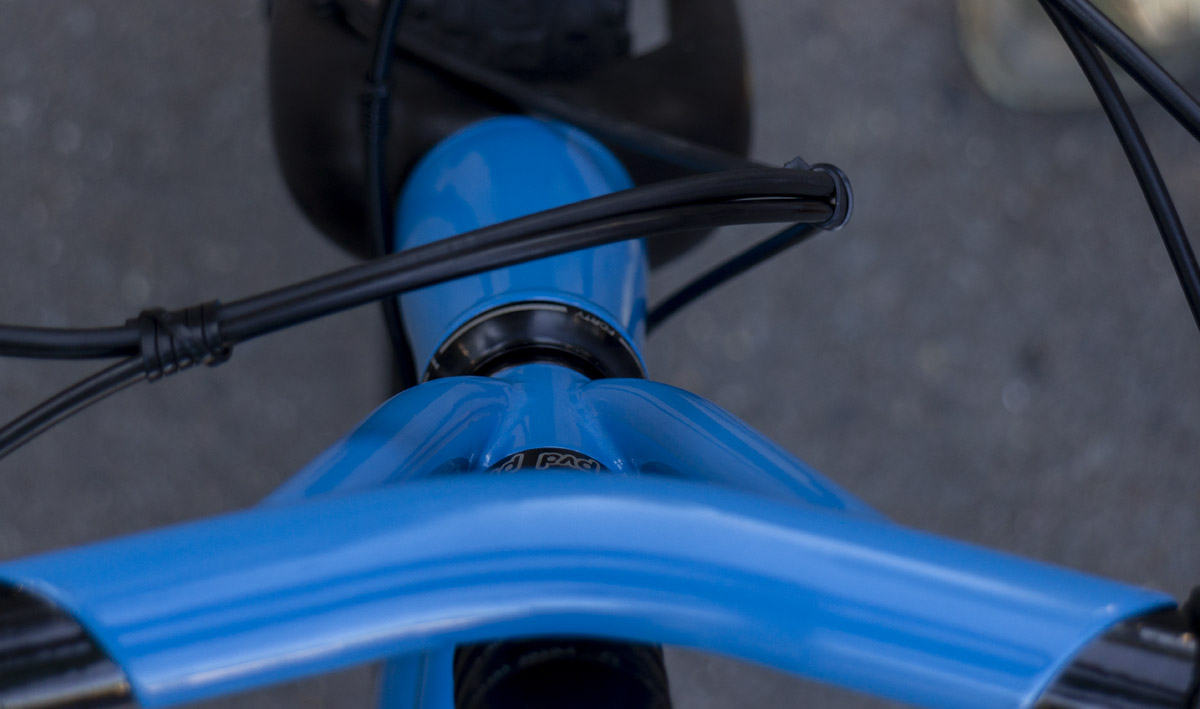
The Airspeeder was the first with the riser style PVD bar system. That was a good start but there were improvements that work on the PVD Supermarine Spitfire showed. I could get a lot more from the front end of the platform. The improved design gave more room for rise and shorter profiles, meaning I could shrink my head tube and increase front center. Both welcome changes. More, I moved to a 14 degree back sweep on the hand grips. As the all-road platform isn’t meant to be pushed as hard on the bars as a real boomer, I could fine tune for more all day comfort. The feel is really nice. The inner hand grip option hides me from the wind when pedaling into that.
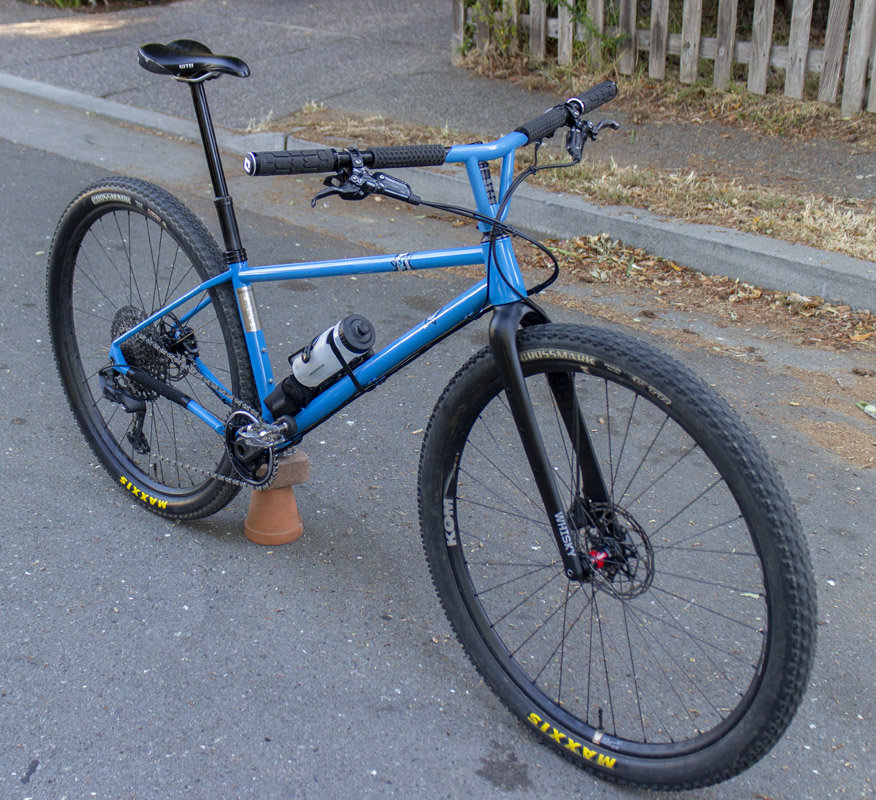
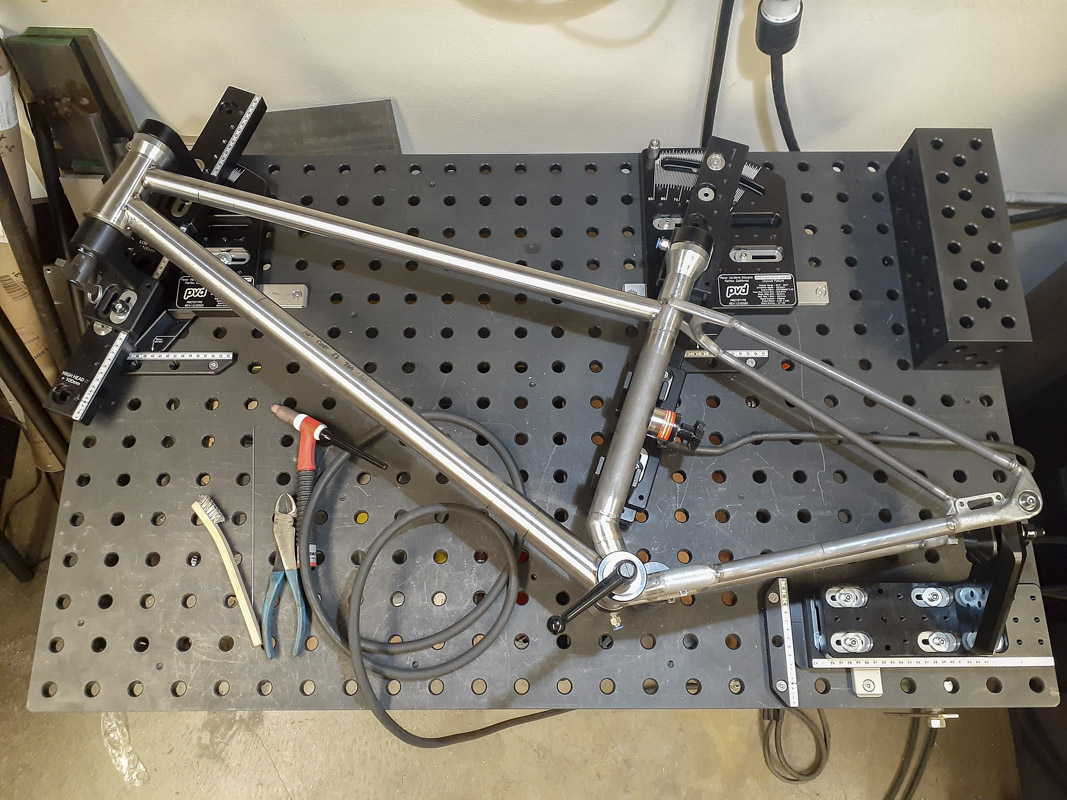
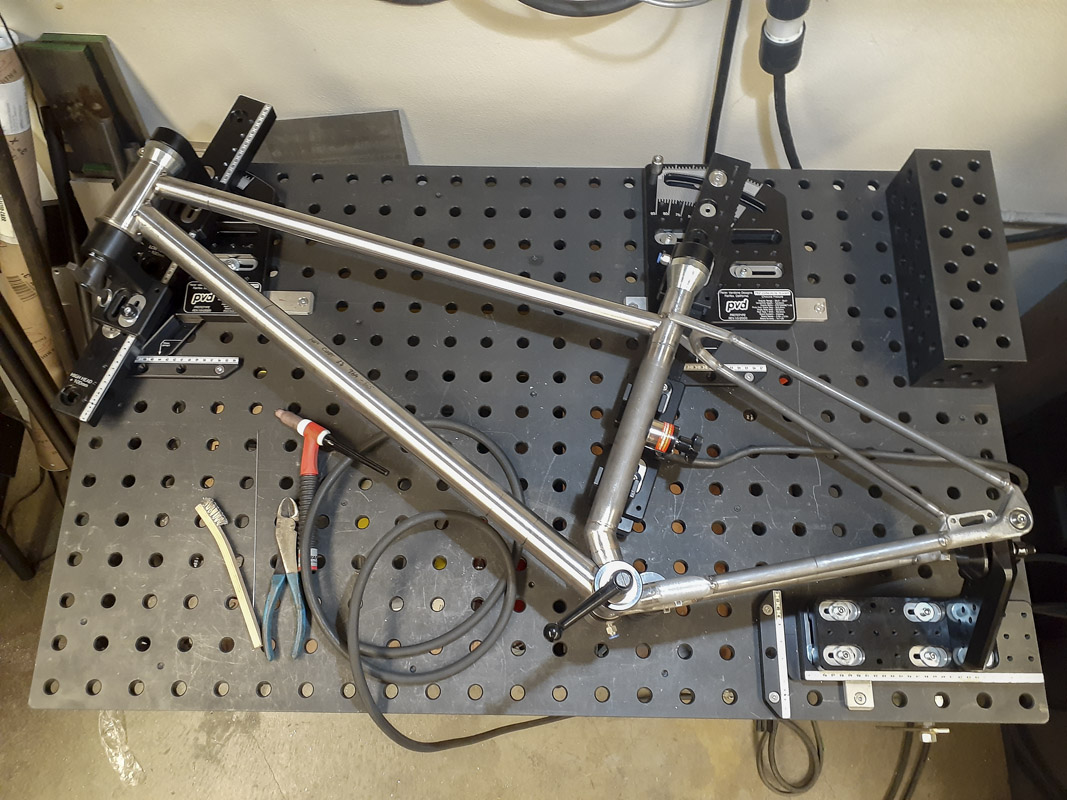
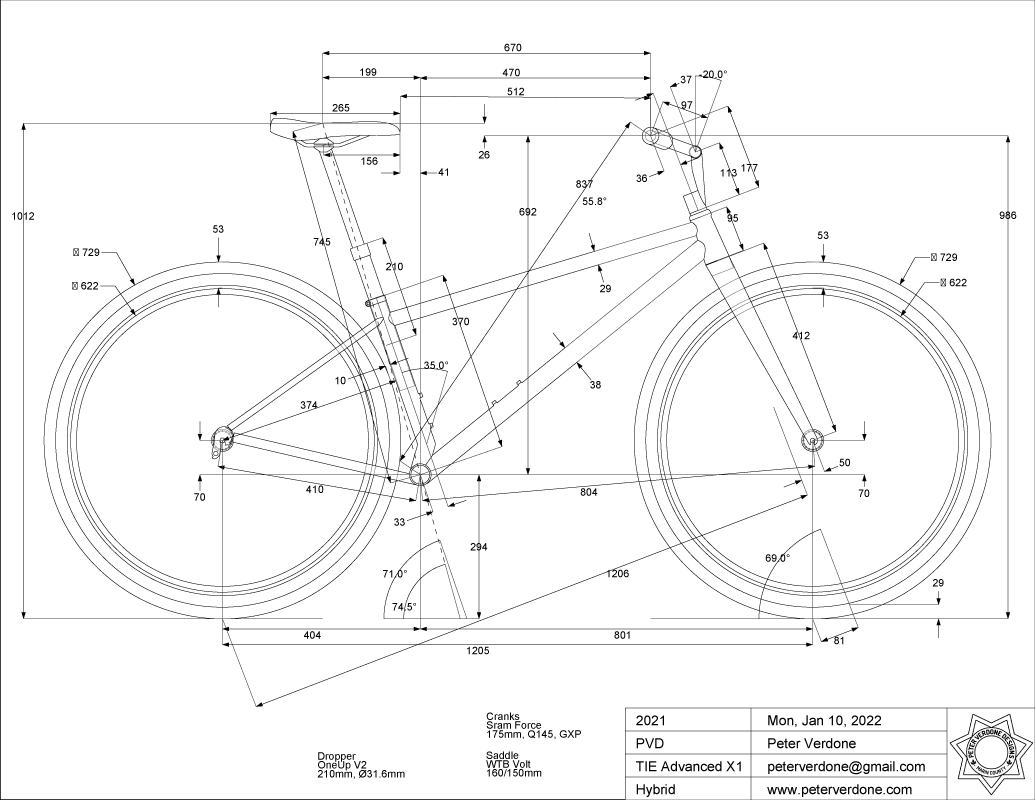
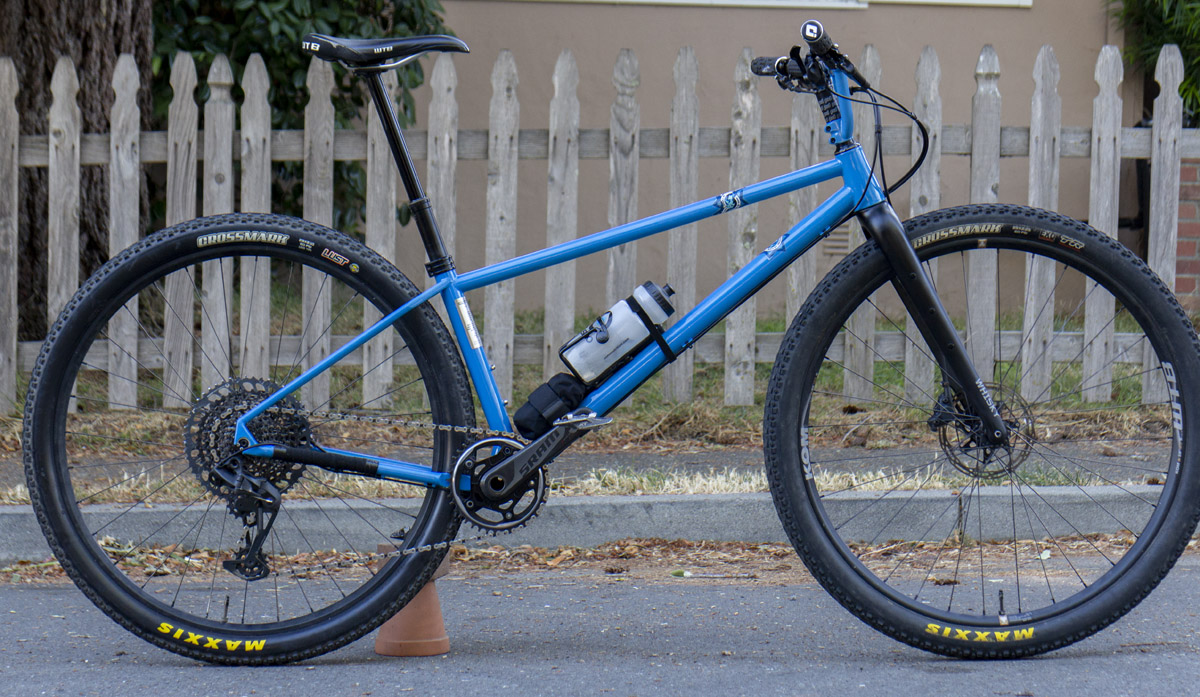
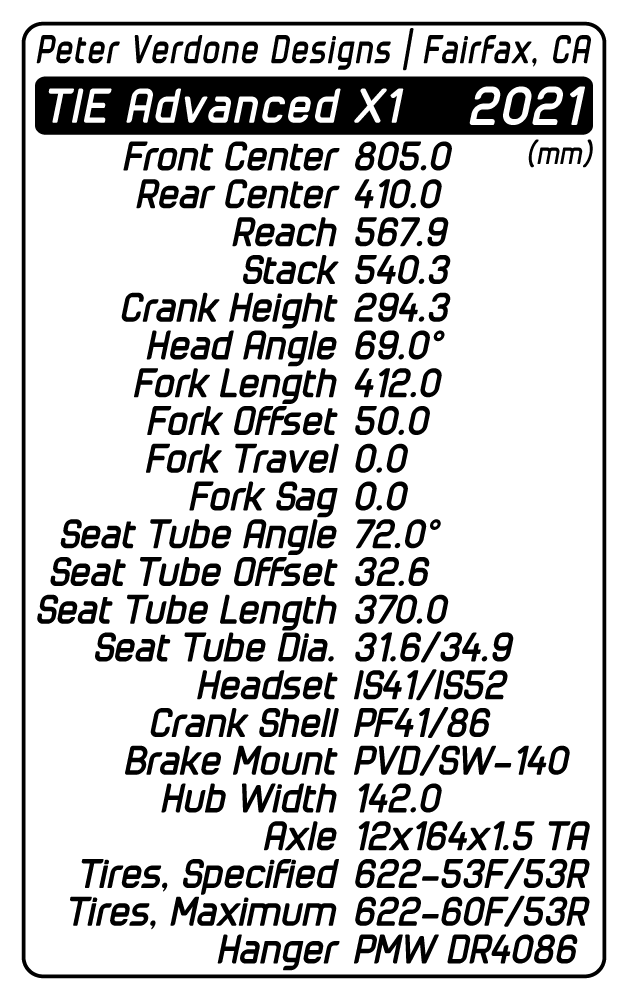
This bike has a novel front end geometry. To lighten the feel of the bike on the road and smooth dirt, I steepened the head angle to 69 degrees from 67 that the Airspeeder had. With the 50mm fork offset, this would give me 80.6mm of mechanical trail and 28.9mm of flop with the 622-53 tire. To improve performance on dirt, the front center was brought up to 805mm. I don’t think your going to find anyone doing anything close to this type of front end on an all-road bike but me. The head angle change is a bit of a risk but if it doesn’t work out, there’s a plan. The bike does feel very very nice in the dirt and good enough on pavement.
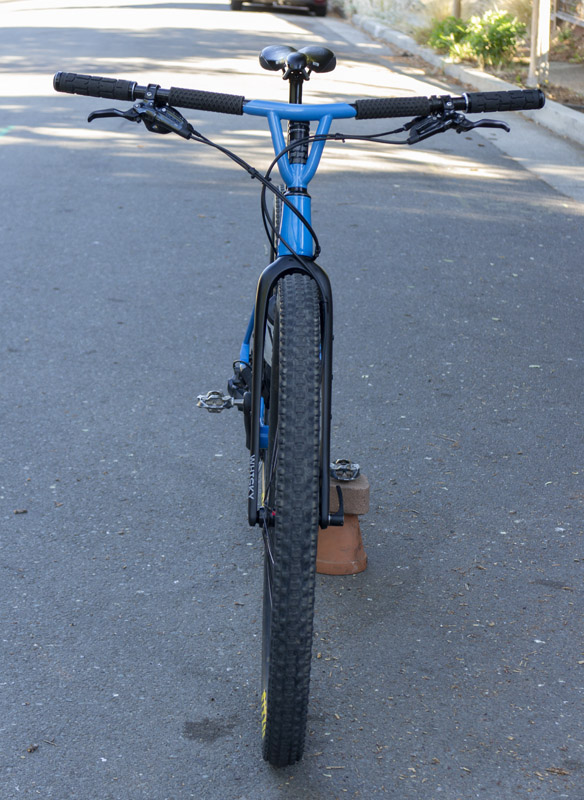
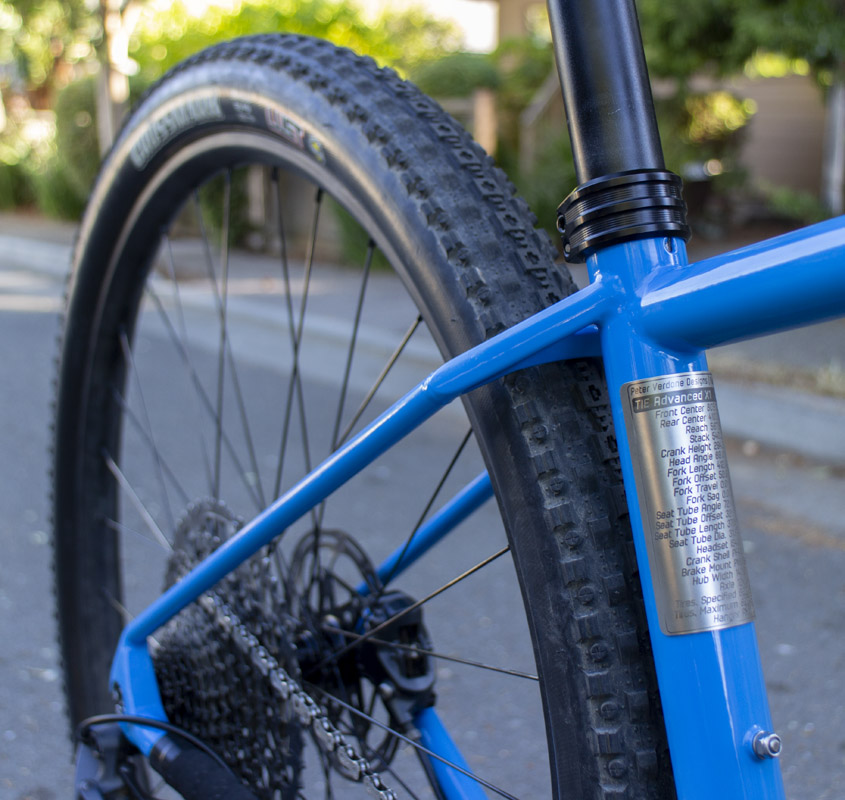
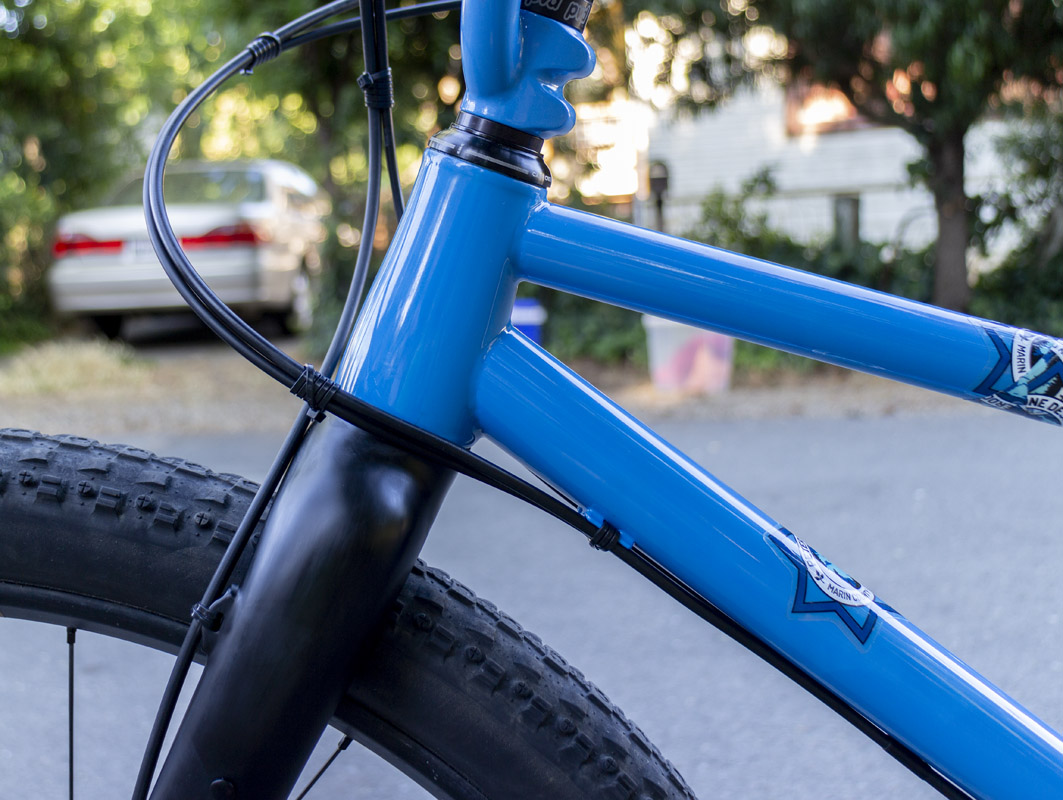
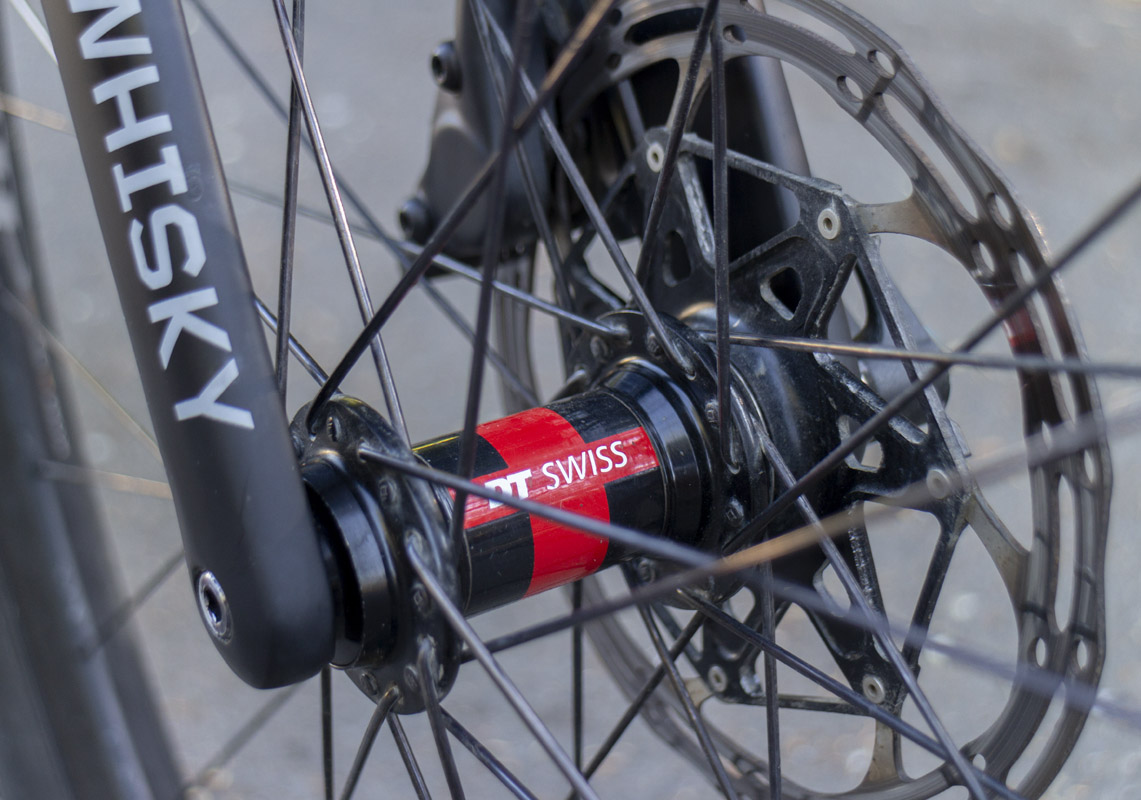
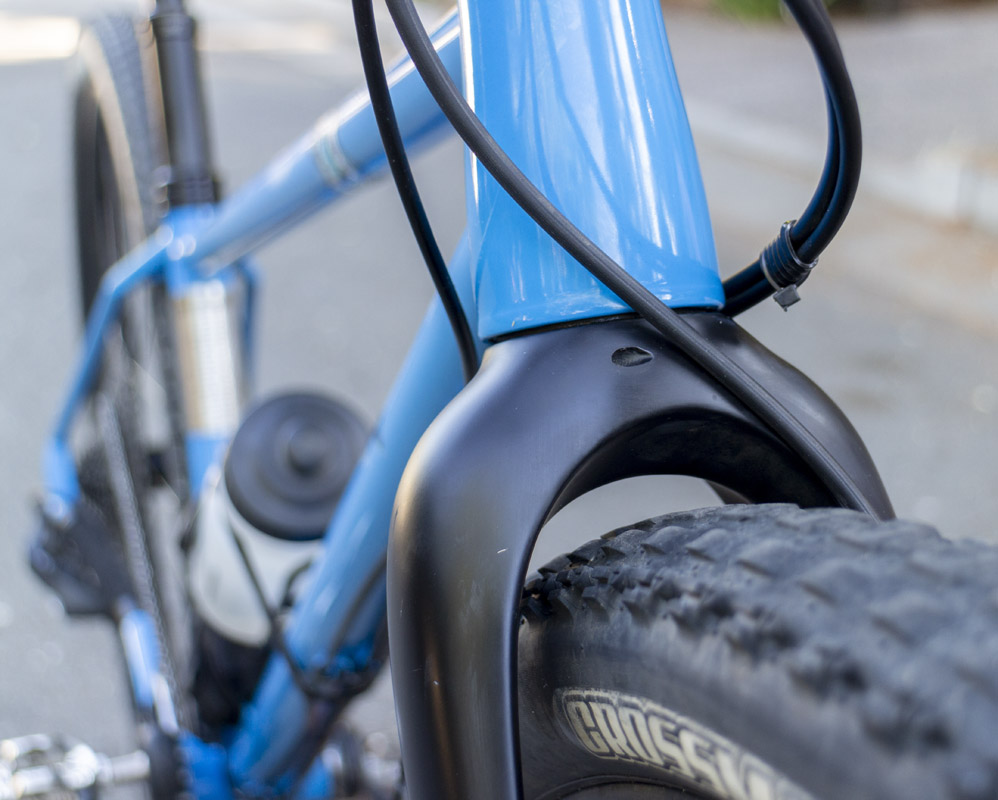
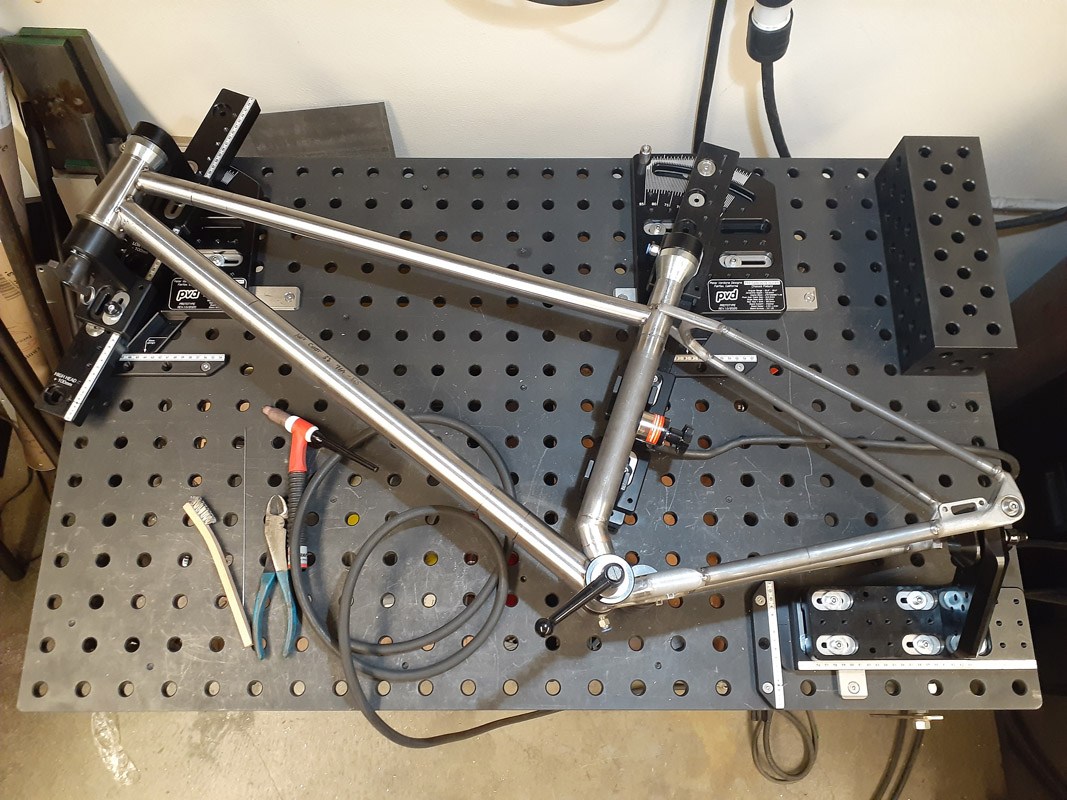
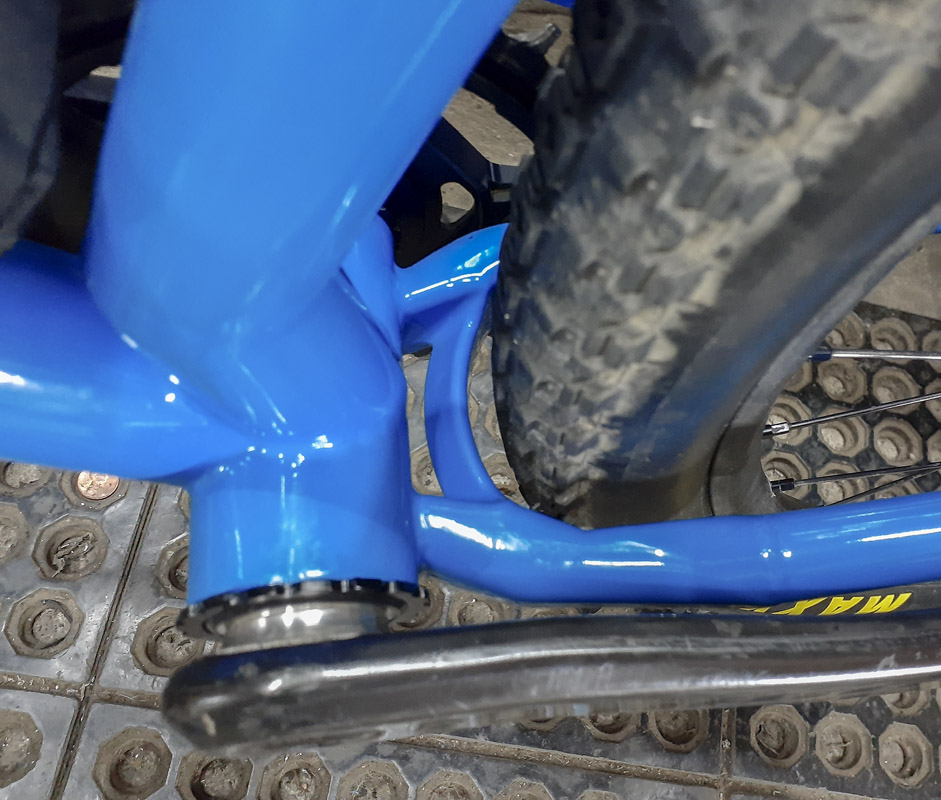
The fork that’s on the bike is the Whiskey No. 9 MCX. It’s a decent fork with a lot of clearance for the 412×50 size. The 622-57 tire that I show here fits fine, even with some room for mud. That’s pretty good. It’s on the stiff side but still my top choice on production forks for narrow gauge dirt bikes. I wish it didn’t have all the stupid mounting points on the side. They should make a Minnesota version with the mounts and another without for all the places people actually ride bikes.
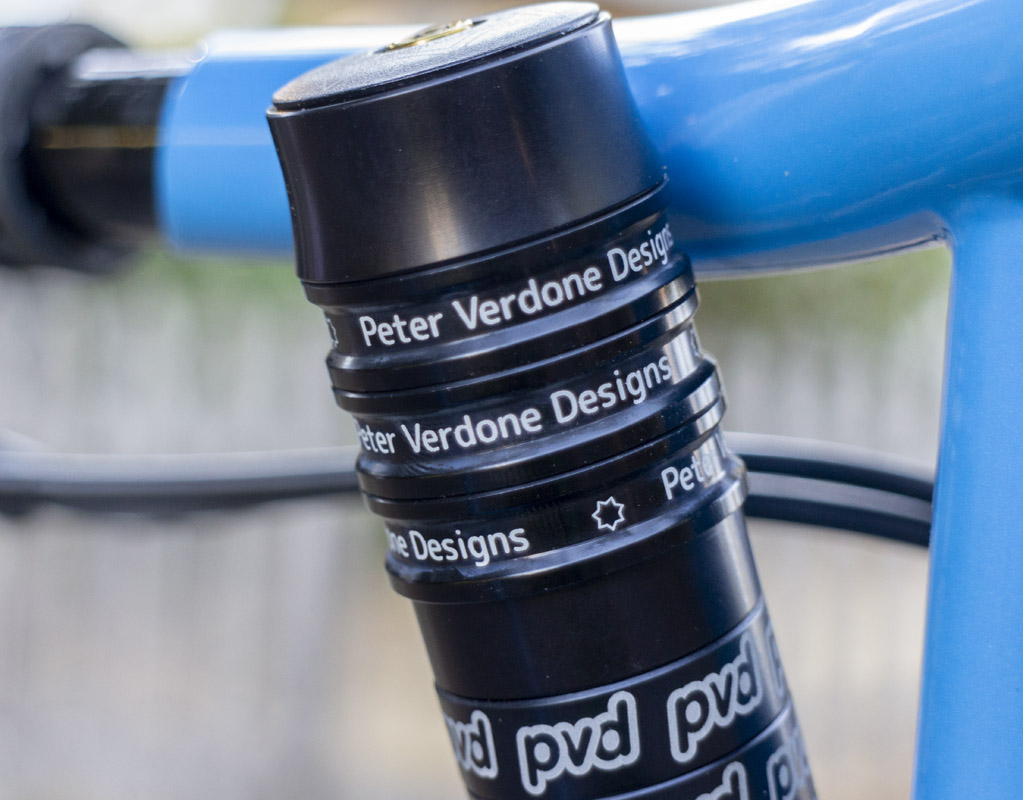
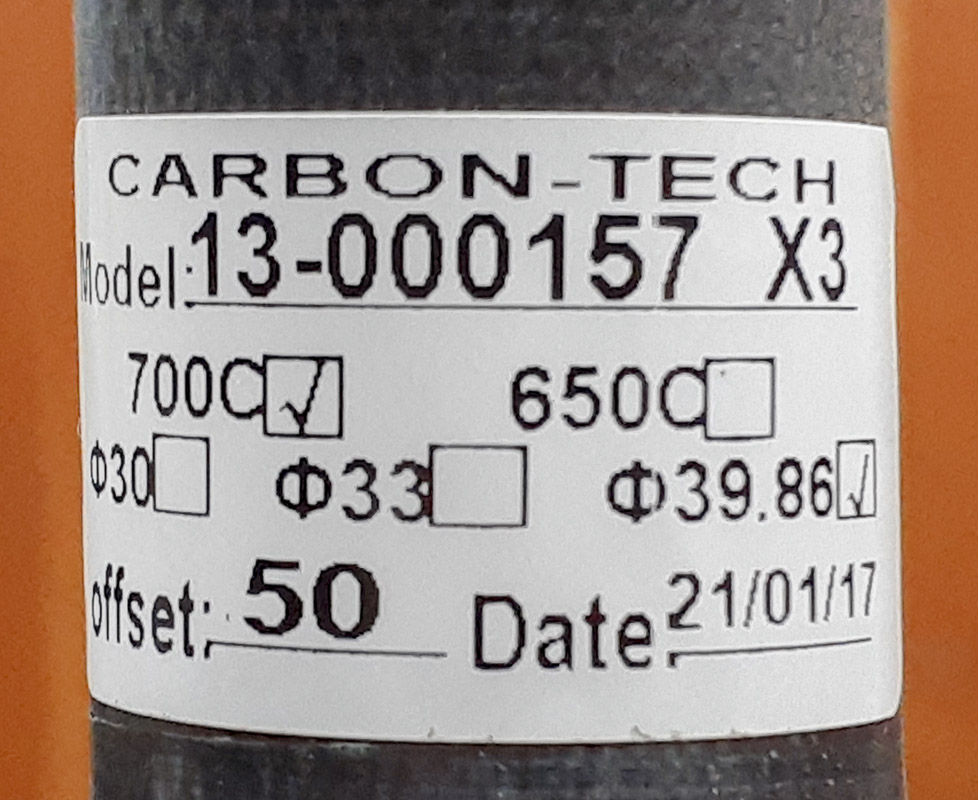
This fork will be going back onto the Airspeeder as I will be producing a carbon fiber fork of my own for this bike in a few weeks. Thus, the steerer is long in the photos. It will use a 3D printed crown and dropouts. I will modify the fork geometry to improve the mechanical trail and flop values. Decided to reduce offset by 5mm to 45mm. I think that I can get a little more in the rough from this without much loss on pavement. Brings mechanical trail to 85.6mm with 30.7mm flop on a 622-53 tire. Fork length, 410.1mm, Front Center, 799.6mm. The fork will allow room for a 622-60 tire and fender to add more capacity with the same geometry. This will add a lot to what this bike can do.
What is hard to see in the photos is the new top tube design. Developments in testing the Spitfire led to finding that there was more that should be done to support the tube connection at the head tube. I had some cool tubes made, the PVD SuperUltra tube. It should give the flex that I want with the strength for anything that’s thrown at it.
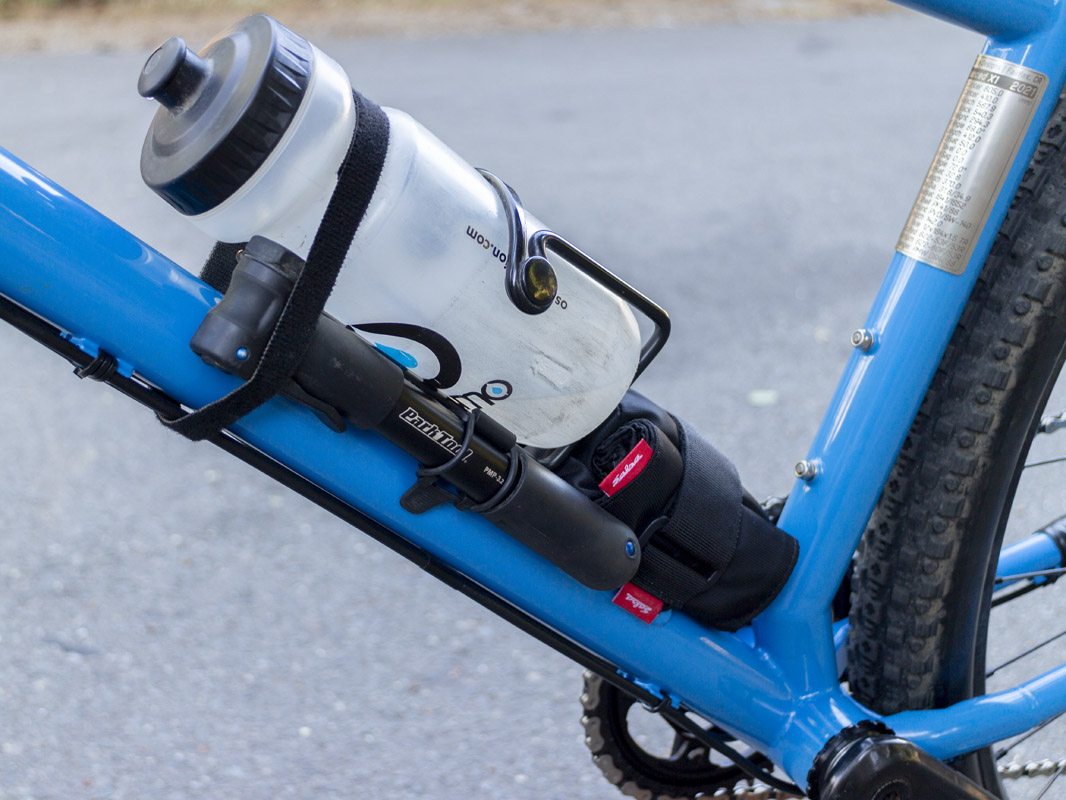
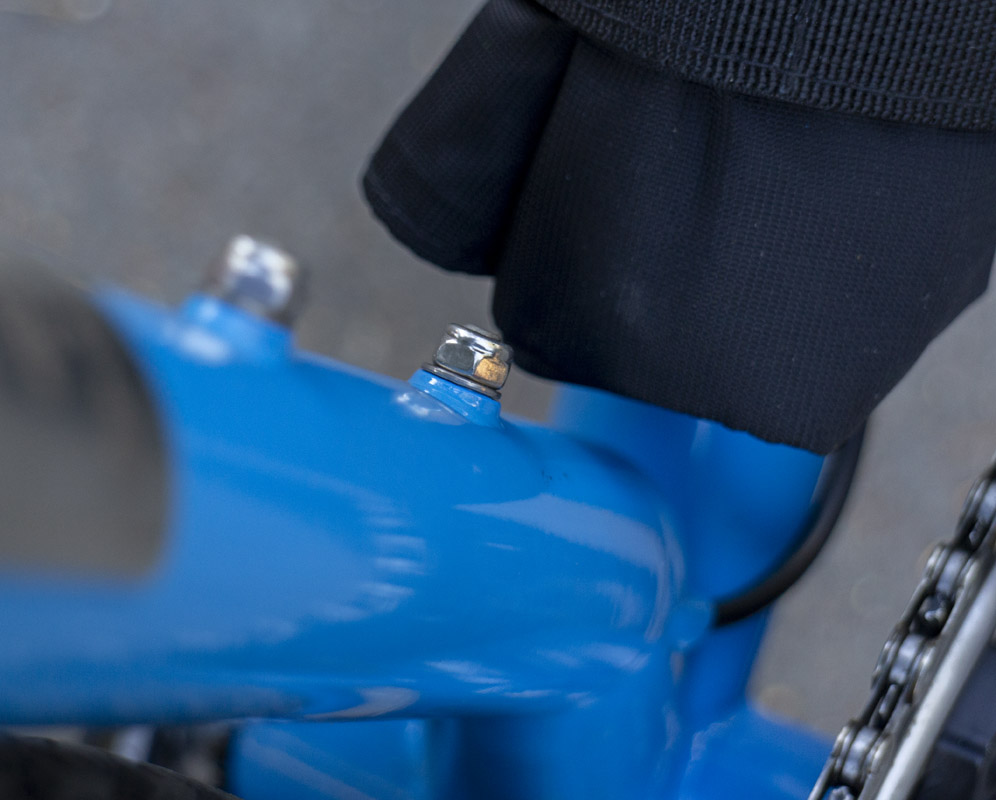
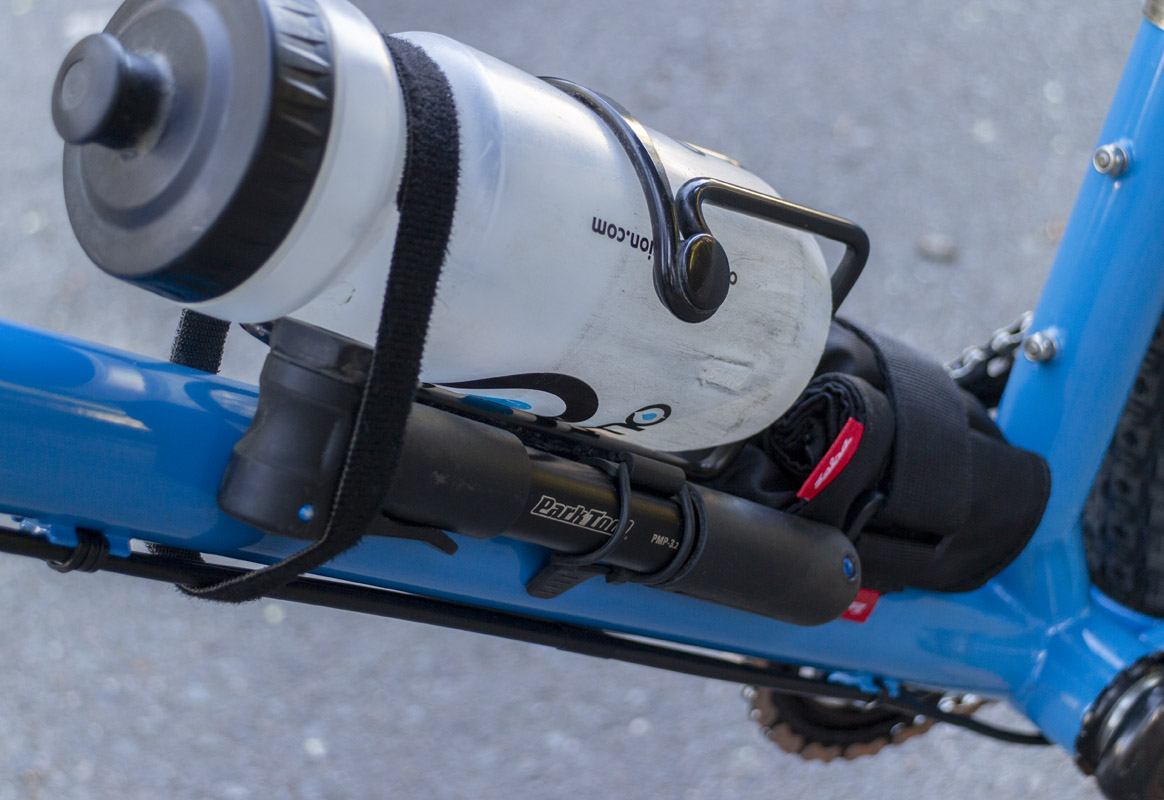
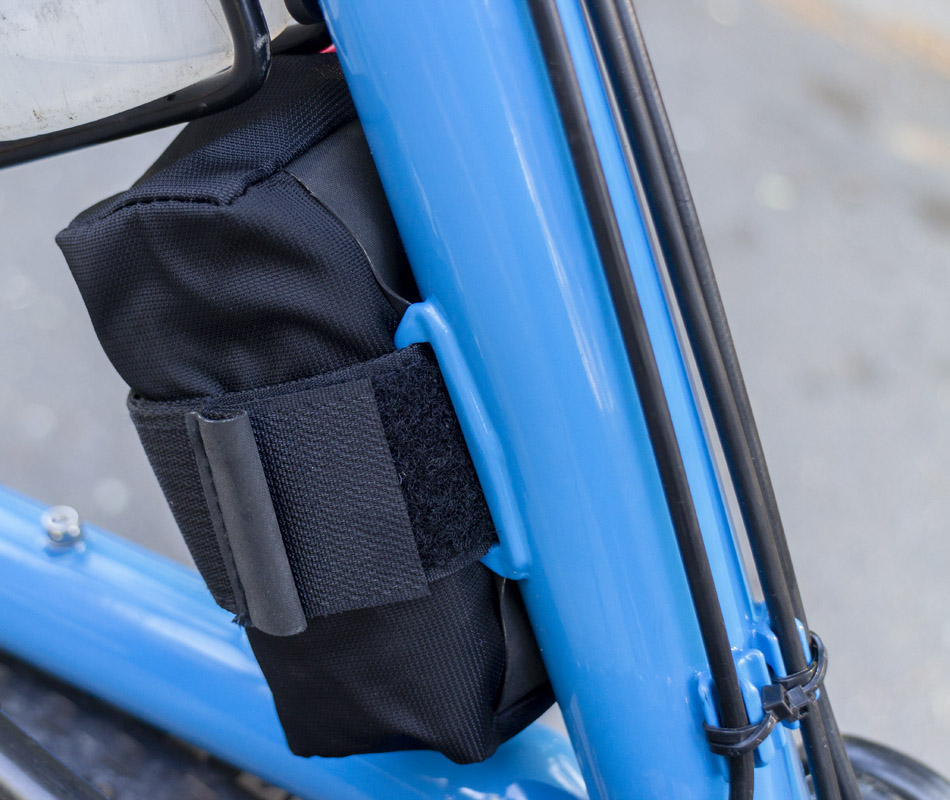
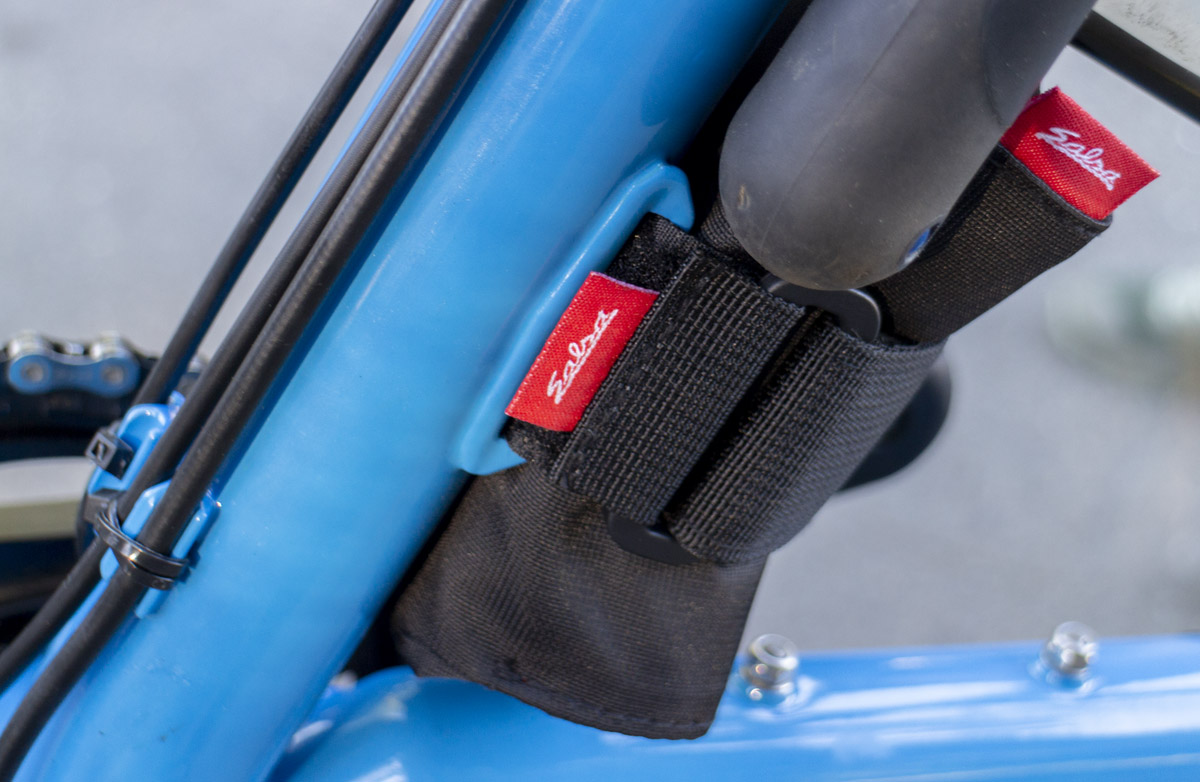
The shape and thickness of the bag strap was refined from what was done on the Spitfire. More of a rectangular slot than a rounded end slot. It’s also thinner, but could be a little more thin with some more shaping done. I need to do more work on this.
2021-07-03, Test ride #1
I tried to choose a ride that would push the bike to the extremes. The route: Deer Park Fire Road, Lake Lagunitas, Lakeview, Eldridge, Northside, 999Esses, Lake Lagunitas, Lake Bon Tempe, Bullfrog, Bofax Road, Pine Mountain Fire Road, Split Rock, Cascade Canyon. This mixed paved road, easy fire road, rough fire road, real singletrack, and double black diamond. It’s also is a ride that brings me to the top of Mount Tam and Pine Mountain. Not a quick spin. I’m out of shape and this ride kicked my ass. 40t chainrings ain’t no joke.
I was focusing on how the front and rear end of the bike were working. In the double black was where the front could have been an issue. I tried to let my grip loose when I could to see if the wheel was kicking around more than it should. It wasn’t. I was thinking about the difference between how the Spitfire would do versus TIE. This was far rougher and slipperier..but the klunker has a big gnarly 3.0″ tire on the front and a more flexible fork. That explains things a bit. Basically, the tire is the issue, not the geometry. On very steep climbs, the front did get a little lighter. Still, the mix of the 74.5 degree effective seat tube angle, the 745mm saddle height, and the 410mm rear center was just enough keep things right. Most bias corrections could easily be made while seated or standing.
The more substantial rear tire over that of the Airspeeder was awesome! “Gravel” tires really really suck in general and having the option for a proper 622-53 MTB tire lets me really open up on the bike. I can work the dirt so much harder. Now, of course, the twin pot flat mount calipers are getting pushed a bit too hard. I may have to move over to post mount if I want to use the bike this way. I’m worried about going to 180mm at my size as without enough tire grip, I could have a low side problem. Also, in keeping the bike light and peppy, maybe a little under braked in the hard stuff is the right choice. That is the devil of the hybrid bike. It’s not a mountain bike. It’s not a road bike. Fall too hard to one side and you’ve ruined it.
The bike is definitely better than the Airspeeder, everywhere. It was obviously at the far limit of dirt use. Regardless, this is how we see a design break down. The bike was superb in the dirt everywhere but the hardest of terrain. The TIE pedaled and covered the ground more efficiently than any bike I have ever used. It would do even better with lighter wheels and fancy light tires, especially without the CX-F/XC-R Cushcore I use in the tires. I have a lot of miles on the Airspeeder with 30mm road tires and riding through SF and pavement. This bike is a little longer but the steering is lighter, which should be even better there. Not much else is really different that would show up on pavement so I’m feeling pretty confident that I got a lot more in the dirt with some slight improvement on pavement.
I would love to do a test of this bike with a Maxxis Velocita AR 50F/40R. Those tires have proven to be the absolute best 50/50 tire and are just a joy to ride. The problem is that they haven’t made a 50mm version yet. A 40mm front tire is a real problem in the dirt as more volume is truly needed to carry speed and have grip.
2021-07-04, Test ride #2
Tamarancho and Hobo. This was a basic clockwise loop of the ranch with the drop down hobo at the end. Truly, there is only one section of the loop that overwhelms the bike, the rock garden above Cascade Canyon. I would say that net, the bike is the fastest I have for this loop. There are a couple of sections that slow it down some from another bike with better tires and suspension but anytime there is traversing or climbing, this bike is crushing. Period. It also makes the trail a bit more of a challenge and fun than a 6 inch travel full suspension bike will.
On Hobo, this is the wrong bike. Hobo requires tires with some real meat on them and this bike doesn’t have that. Is this bike better here than Airspeeder? Yes. Will you post up a KOM or PR? No. But that’s not the only way to play this game. I like going down Hobo on whatever bike I have. I always try to do that as fast, smooth, and with as much class as I can. What I can say about going down this trail on the TIE is that it’s going to do it faster than any other full rigid bike that I know exists….except for the PVD Supermarine Spitfire. How’s that?
2021-07-05, Test ride #3
China Camp. Bay View, Echo, Bay Hills Drive, Nike, Hitler, Hummingbird, Canary, JT Howell, Gold Hill, Q’s III & IV , Maytag, Power Lines, Bay View.
This bike is just so sick. It just makes you want to pedal harder and harder. I had re-geared prior to this ride. 38t. It made a real difference. Definitely moving it farther from a pavement bike but so good off road. Discovering that the cool thing about this bike is that it really rewards you for putting more effort in. You speed up. Also, as it is fully rigid and has little tires, the faster you do go, the less the bike get’s hung up in rough. So you are double rewarded. It pays to push harder and carry speed. It’s a pretty cool bike.
Please, try to ignore the excessive steerer that has not been cut in these photos. This fork will be going back on the Airspeeder in a few weeks and I need to keep it intact! Also, the rear tire shown is a ‘large’ 622-53 tire and taller than it theoretically should be, thus, it’s tuk’d.